Gluten-Free Carrot Cake

Gluten-Free Carrot Cake

I know, I know. Carrot Cake for Easter, how inspired. But let me explain. See, this Carrot Cake is different. This Carrot Cake has the lovely texture and flavor of the Carrot Cake you’ve come to know and love, except that this one is completely gluten-free. Is it especially healthy? Not on your life. I don’t believe in taking all the sugar out of desserts. Is it perfect for gluten-intolerant friends and gluten eaters alike? It most certainly is. And to be perfectly honest, I’m almost as excited about the garnish as I am about the cake itself.

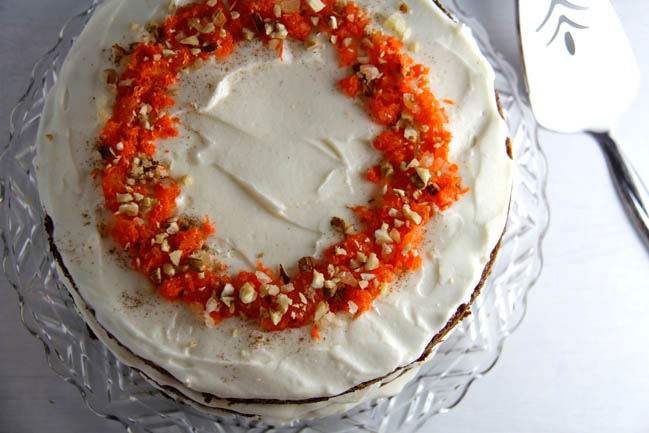
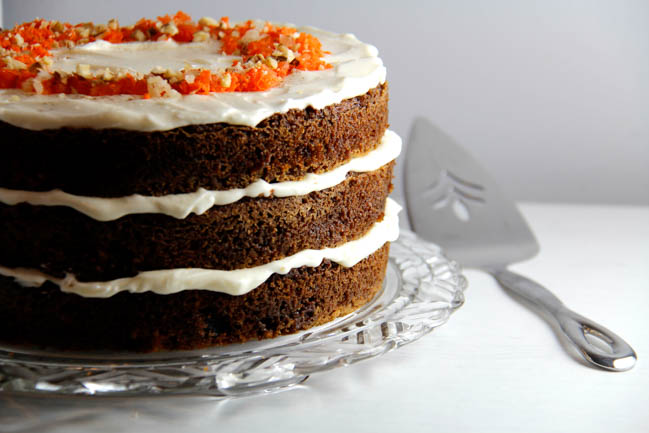
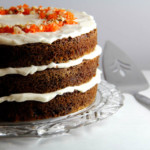
The last thing I wanted to do was pipe buttercream carrots all over the top of my cake. If I’m making something as popular as Carrot Cake, I at least want the topping to be unique. My garnish is made of carrot that I shredded with a microplane, with chopped walnuts, and dried, candied pineapple bits. Sprinkled on the top of the cake in layers, I think this garnish looks bright and fresh. I love the concept of taking fun ingredients from the cake itself and turning them into the garnish. It gives the top of the cake a little more interest, and displays what people can expect to find inside – this is particularly helpful with something as customize-able as Carrot Cake.

This recipe is adapted from What The Fork’s Gluten Free Carrot Cake, and hers was adapted from The Silver Palate Cookbook. Gluten-free baking benefits tremendously from this kind of borrowing and adaptation, and I love it. When recipes go through enough work and transformation, with everyone adding their own improvements, you can end up with some seriously magical desserts.

In the spirit of benefiting the baking community in general, I tested this recipe with King Arthur, Bob’s Red Mill, and Maple Grove Farm’s gluten-free all-purpose baking blends. I very seldom use boxed gluten-free baking mixes, but in this recipe, which includes several heavy ingredients, the lightness that a mix can contribute helps achieve a cake with a great texture. The thing about gluten-free baking mixes is that they vary widely from brand to brand.  King Arthur was the clear stand-out, giving me a delicious cake with a great texture. If you decide to make this recipe, do yourself a favor and use the King Arthur “Measure for Measure” mix.

Bob’s Red Mill uses bean flours in their all-purpose baking mix, which is great in a lot of recipes. But it also gives Carrot Cake a bean-reminiscent flavor. The texture of that test cake was fantastic, but it didn’t have the exact cake flavor I was going for. The Maple Grove Farm’s baking mix is closer to King Arthur’s, and the flavor of that cake was perfect. The texture, however, was very soft, and the cake layers didn’t bake evenly, cratering a little in the center, probably because the Maple Grove Farm mix includes a higher proportion of starch than the King Arthur mix. This kind of variation in mixes is equal parts frustrating and exciting, because while it means you can’t use them interchangeably, it also means that underwhelming results in a recipe made with one mix might be improved by switching to a different one.

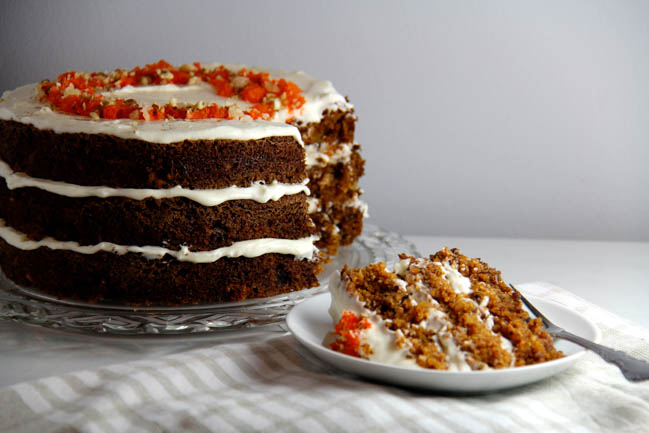
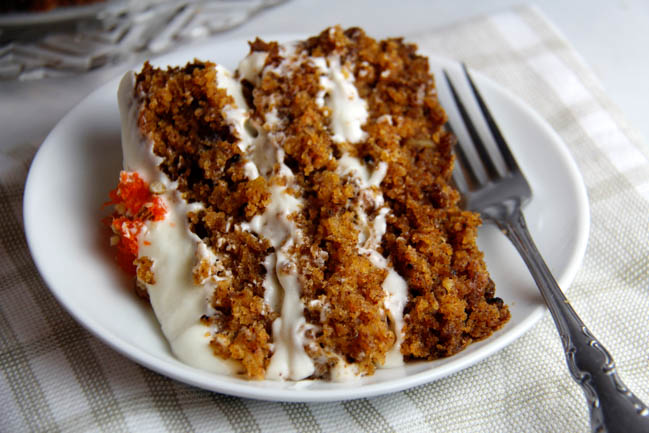
Everyone knows the most important part of any carrot cake is the cream cheese frosting, and this one is certainly not lacking in that department. Thick, creamy layers of frosting make this simple gluten-free cake taste like absolute heaven.  This cake is, however, delicious on its own, if you’re inclined to skip frosting to keep the calories low. As always, you can go further and really make this recipe your own. You can swap out the walnuts for pecans if you’d like, boost the flavor by adding shredded coconut (I left it out of this version because coconut and I do not get along very well), or omit the raisins and substitute currants instead. However you make it, this cake is a perfect addition to your springtime festivities. I would know – I’ve been celebrating spring with my test versions of this cake all month!

Gluten Free Carrot Cake

Adapted from What the Fork's Gluten Free Carrot Cake Recipe.

Ingredients

Gluten-Free Carrot Cake

  • 2 1/2 cups King Arthur's "Measure for Measure" Baking Mix 350g
  • 1/2 cup almond flour 45g
  • 3 cups sugar 600g
  • 1 tsp salt
  • 2 tsps baking soda
  • 1 Tbsp cinnamon
  • 1/4 tsp nutmeg
  • 1/4 tsp cloves
  • 1 1/2 cups walnuts, chopped 130g
  • 1 1/2 cups butter, melted
  • 1/4 cup golden raisins 40g
  • 1 8oz can crushed pineapple, mostly drained - not too dry 100g drained weight
  • 4 large eggs
  • 1 1/3 cups pureed, cooked carrots (about 5 medium carrots) 320g, pureed

Cream Cheese Frosting

  • 8 oz cream cheese
  • 14 Tbsps butter
  • 1 3/4 cups powdered sugar 356g
  • 2 tsps vanilla

Garnish

  • 4 Tbsps carrot, shredded with a zester or microplane
  • 2 Tbsps chopped walnuts
  • 2 Tbsps candied pineapple, chopped small
  • 1 tsp cinnamon

Instructions

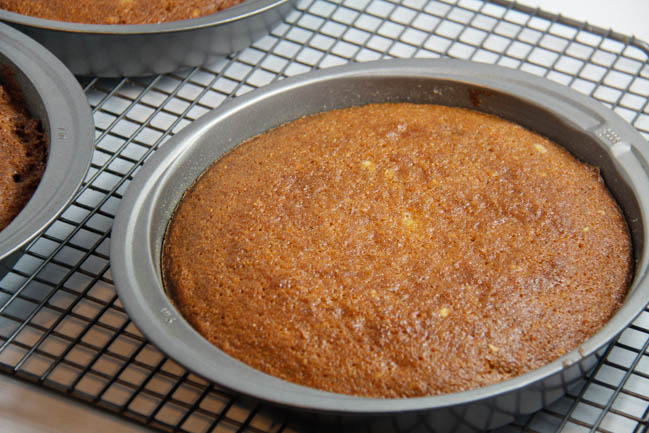
  1. 1. Preheat oven to 350 degrees. Generously butter 3 9-inch cake pans and dust with baking blend.

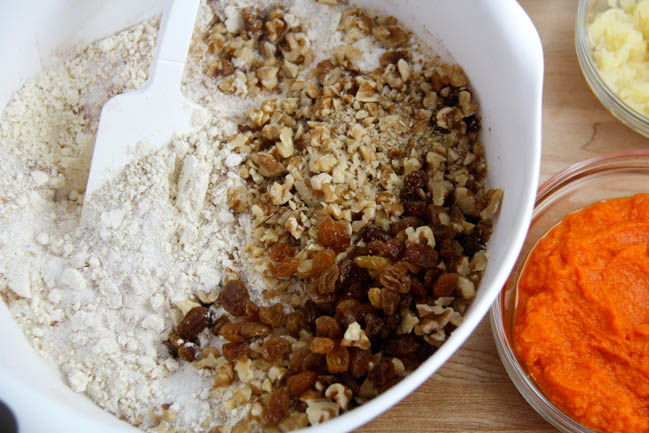
    2. In a large bowl, whisk together the gluten-free flour blend, almond flour, sugar, salt, baking soda, cinnamon, nutmeg, and cloves. Mix in the walnuts to coat them with the flour, then mix in the melted butter. Fold in the  raisins and the crushed pineapple, and set the bowl aside.

    3. In a medium bowl, lightly beat the eggs. Whisk in the pureed carrots and mix until well combined. Pour the wet ingredients into the dry ingredients, and gently mix until there isn't any dry flour. Pour the batter evenly between the 3 cake pans. I had roughly 720g of batter in each of my pans.

    4. Bake on the center rack for 35- 40 minutes, or until a cake tester comes out clean. Let the cakes cool for 15 minutes in the pans before inverting onto wire racks to cool. 

    5. While cakes are baking, prepare your frosting. Cream the cream cheese in an electric mixer until very smooth. Add butter and vanilla and mix well. Gradually add the powdered sugar, and whip on the highest speed until light and fluffy.

    6. For the garnish, stir together carrots and pineapple. Sprinkle on top of the cake in a circle, or whatever pattern you choose. Sprinkle walnuts over top of the carrot/pineapple mixture. Sprinkle cinnamon lightly over the garnish. 


Tex-Mex Rice

Tex-Mex Rice

I intend to post on this blog about delicious Mexican food for as long as humanly possible. With that in mind, I think it makes sense to share my favorite side dish to go with things like Salsa Verde Chicken Enchiladas. This Tex-Mex rice is a family recipe, and it’s a far cry from the stuff you sometimes get in restaurants with chunks of peas and carrots that were clearly recently defrosted.

This Tex-Mex rice is cooked in olive oil and chicken broth, and flavored with onion, garlic, and chili powder; oregano; cumin; and a little bit of enchilada sauce. It’s a perfect choice to complement black beans and just about any version of tacos, enchiladas, or burrito you want to make. The rice definitely isn’t spicy, but it has a depth of flavor that makes it delicious even just eaten by itself.

Tex-Mex rice doesn’t take much longer to make than traditional rice, because the only extra steps are browning it briefly in olive oil, and adding the seasonings. It can be made while the rest of dinner is cooking, and it keeps well in an air-tight container, in the refrigerator, for about a week. This rice has a slightly higher nutrition content than plain or cilantro-lime rice, since it’s cooked in chicken broth. You can also make it with vegetable broth to keep it animal-product free.

My favorite way to eat Tex-Mex rice is in a big burrito bowl, because it’s a perfectly mild, yet flavorful, base to build on with just about any Mexican flavors. However you decide to serve it, in a burrito, a bowl, or just on the side, this recipe will change the way you look at rice.

Tex-Mex Rice

Servings 3 cups

Ingredients

  • 1 cup raw white rice
  • 3/4 Tbsp olive oil
  • 14oz chicken broth (or a mix of broth and water, or vegetable broth)
  • 1 Tbsp enchilada sauce or smooth salsa
  • 1/2 tsp salt
  • 1/2 tsp onion powder
  • 1/2 tsp garlic powder
  • 1/2 tsp chili powder
  • 1/2 tsp cumin
  • 1/8 tsp dried leaf oregano

Instructions

  1. Stir together seasonings and salt, set aside. If the broth is cold, warm it to at least room temperature. Combine broth with the enchilada sauce. Set aside.

    2. Heat the olive oil in a medium pot with a tightly-fitting lid (lid off). Add the rice, and stir over medium-high heat until lightly browned, just to an ivory or light tan color.

    3. Stir the seasonings into the rice, and then add the broth. Stir once, to distribute evenly. When the broth comes to a full boil, put the lid on the pot, and turn the heat to the lowest setting. Let cook for 20 minutes. Do not remove the lid during cooking time. Check for doneness after 20 minutes; if the liquid has not been completely absorbed, cover the pot again and let it cook another 5 minutes or so.

    For best texture, cook a day or two ahead of serving, cool, and then refrigerate. Reheat in the microwave just before serving.


Salsa Verde Chicken Enchiladas

Salsa Verde Chicken Enchiladas

Most of the time when I’m dreaming up blog posts, I try to be inventive and give recipes delicious new twists. Other times, I’m just hungry for something really specific, and I get inspired to test recipes until I make my dream version of a classic. Salsa Verde Chicken Enchiladas is one such classic that I didn’t want to change too much. Why mess with perfection? These enchiladas are bursting with flavor, the chicken is moist and perfectly seasoned, and they aren’t hard to make at all. As a person who eats at a lot of Mexican restaurants, I can say that these are absolutely restaurant quality. All they need are some rice and beans on the side, and maybe a margarita or two.

Before testing this recipe, the only experience I had with salsa verde was eating a lot of it. I have found a wonderful version that is so much simpler to make than I ever would have imagined. Don’t you just love it when your favorite foods are actually so easy to throw together? I combined recipes for salsa verde from Tyler Florence and The Flavor Blender and I think I may have made the sauce of my dreams. I have been putting it on everything I eat and I’m not sure I’ll ever stop. I love the tangy, spicy flavor, and it can be made as hot or mild as you like, in case spicy food isn’t your favorite. Spicy food is definitely my favorite. But I actually prefer it toned down in a salsa like this, because there are so many interesting flavors at play, and I really want to be able to taste all of them.

Making enchiladas can seem like kind of an arduous process, because you have to prepare all of the ingredients and then fill and roll them. It definitely takes some time, but a lot of that is really just letting things cook in the oven. You start by roasting the tomatillos, peppers, and onions for the salsa verde. Then you roast a couple of chicken breasts with some olive oil and seasonings. You blend your salsa together, whip up a quick fresh tomato salsa while the chicken is cooking, shred the chicken after it’s done, and then you’re ready to assemble the enchiladas. I do recommend doing all of this before you start on the margaritas, but everyone has her own method!

Can we talk for a second about how Mexican food is the best food? My husband and I went to Mexico for our honeymoon and I’m dying to go back purely for the food. (That’s a lie, I also want to go back to lay out at a beautiful resort in Playa Del Carmen while someone brings me a cocktail, and relax all day). Anyway, even when we went off of the resort to eat, it seemed like the food wasn’t all that different from what you can get in a really good Mexican restaurant in D.C. I don’t know if this makes me really excited about D.C. or confused about Mexico, but I do know that it means Mexican food is consistently wonderful, if you know what to look for. And if all else fails, you now have a seriously amazing Salsa Verde Chicken Enchilada recipe up your sleeve!

These Enchiladas are probably one of my favorite things I’ve ever made. They’re stuffed with chicken, plenty of cheese, and fresh tomato salsa to brighten up the filling a little. Add a squeeze of lime, an extra dollop of salsa verde, and some cilantro on top, and you won’t even know what hit you. These are perfect to serve to a bigger group, because you can make a couple large trays at a time, and even pre-bake them, and then just heat them up in the oven when you want to serve. If you somehow end up with extra salsa verde, or want to prepare it ahead of time, it can be stored in an airtight container in the fridge for a week. I’m so excited to try variations on the filling with these, but every time I start considering that, I think about how much I really just want the perfect chicken version. It’s like I said before, some things just don’t need to be changed, because they’re exactly right the way they are.


Salsa Verde Chicken Enchiladas

Salsa Verde recipe adapted from Tyler Florence and The Flavor Blender.

Servings 16 enchiladas

Ingredients

Salsa Verde

  • 1 lb tomatillos, de-husked and washed
  • 1 poblano pepper
  • 2 jalapeno peppers
  • 4 cloves garlic, wrapped in foil
  • 1 medium white onion
  • 3/4 cup chicken broth
  • 1/2 cup cilantro
  • 2 tsps cumin
  • 3 Tbsp lime juice
  • 1 tsp salt

Chicken Filling

  • 2 lbs chicken breasts
  • 4 Tbsp olive oil, divided use
  • 1 Tbsp paprika
  • 1 Tbsp cumin
  • 1 Tbsp garlic powder
  • 1 tsp salt
  • 16 soft corn tortillas
  • 2 cups shredded Monterey Jack cheese

Fresh Tomato Salsa

  • 2 tomatoes
  • 1/2 medium white onion
  • 1/2 jalapeno
  • 1 Tbsp lime juice
  • 1/2 tsp salt
  • 3 Tbsps cilantro, chopped

Instructions

  1. Make the salsa verde. Place de-husked tomatillos, poblano, jalapeno, and garlic cloves (wrap the garlic cloves in foil to prevent burning) on a baking tray lined with foil. Broil in the oven for 7 minutes. Cut a white onion into quarters. Remove the tray from the oven, add the onions to it, and bake for an additional 7 minutes. 

    2. Place two chicken breasts on a baking sheet and pour two Tbsps of olive oil over top. Stir together spices and sprinkle evenly over top. After the salsa verde ingredients are out of the oven, reduce oven temperature to 350 degrees, and bake chicken for 35-40 minutes. 

    3. Allow tray of broiled tomatillos and peppers to cool, and then de-stem the tomatillos, poblano, and jalapenos, and cut into quarters. For the jalapenos, de-seed them if you want a milder salsa. Leave in the seeds of one jalapeno if you want the salsa to have a kick without being extremely hot. Add all of the ingredients from the tray to a food processor (my NutriBullet was perfect for this), and run until everything is broken down and mixed. Add the remaining ingredients to the food processor and pulse until well-blended.

    4. Make the fresh tomato salsa. Dice tomatoes and onion, and de-seed and finely chop jalapeno. Stir together all ingredients, adding more salt to taste. 

    5. When the chicken is done, allow to cool slightly, and place on a plate. Shred each chicken breast with two forks. 

    6. Spread salsa verde in the bottoms of 2 9x13 baking pans, about 1/4 cup for each. Assemble your enchiladas: Heat the tortillas in the microwave, and then brush them on each side with olive oil. This keeps them from breaking when you roll them. Fill each with a sprinkle of shredded cheese, chicken, and about a Tbsp of each kind of salsa. Roll, and place in the baking pan. When the pans are full, spread more salsa verde over the tops of the enchiladas, and sprinkle generously with cheese. Bake pans at 350 degrees for about 25-30 minutes, until the cheese just starts to lightly brown on top. Top each enchilada off with a little more salsa verde before serving. 


Balsamic Strawberry Nachos

Balsamic Strawberry Nachos

Strawberry Nachos aren’t a particularly new concept in the world of imaginative desserts, but they are a particularly delicious concept. Generally, they consist of some kind of cinnamon-sugar chip base, sweetened strawberries, a whipped cream component, and shaved chocolate. Mine follow all of these rules, but I’ve added the twist of balsamic vinegar with the strawberries to elevate the complexity of the flavors a little. It really takes the recipe from just “tasty” to “no, this plate is mine, go get your own!”

Strawberry Nachos are a perfect spring dessert. They’re quick to make, and don’t require a lot of baking time. The crisp cinnamon sugar chips take a total of 15 minutes in the oven for the whole batch, and all the toppings can be prepared during baking time. The best thing about these nachos is the combination of textures. The crunch of the chips with the soft strawberries and the smooth cream make each mouthful delightful. If you need a beautiful spring dessert, and don’t have time for something involved like Pavlova, these are the perfect solution.  Strawberries aren’t quite in season yet technically, but it doesn’t matter when you’re giving them a flavor boost with some sugar and balsamic vinegar. A lot of recipes that involve balsamic strawberries call for a balsamic reduction. As long as you use very high quality balsamic vinegar, this isn’t necessary for this dish. I use Florida Olive Oil’s 18 Year Balsamic Vinegar.

The cream that goes on top is part Cool Whip and part sour cream, with a little added sugar and cinnamon. It’s light and a little sweet, but also has some tang from the sour cream. It works beautifully with the strawberries and the chips, and has a distinctly different flavor than typical strawberry and cream desserts. Not that there’s anything wrong with those – writing about this recipe suddenly has me thinking of all the wonderful desserts I could make with strawberries when they do fully come into season!

After the chips are piled onto a plate, dolloped with cream and sprinkled with chopped strawberries, the whole dish is topped with shaved dark chocolate and sliced almonds. I can think of very few desserts that wouldn’t be improved by a sprinkle of chocolate and almonds. In Strawberry Nachos, the chocolate adds just a hint of flavor that goes especially well with the balsamic vinegar on the strawberries. Just remember that the actual assembly of this dish should take place right before serving, because the strawberries have a fair amount of liquid, and you don’t want that sitting on the chips for too long, making them soggy. Once you serve them, they’ll disappear quickly enough that the juice won’t be a problem.

I was thinking the other day about how fall baking is my favorite kind, what with all the gourds and stews and heavier components (read: piles of cheese and bread). Now that I’ve really gotten my spring baking rolling, I’m re-considering that stance. I could eat fresh, bright Strawberry Nachos every day, but they’re only truly satisfying in the spring and summer. Who wants a light, fruity dessert on a blustery November day? This April I’m focusing on appreciating the breezy, warm(ish) weather we’ve got here in the DC area, and all the delicious food options that go with that. It’s Strawberry Nacho season, and I plan to enjoy every second of it.


Balsamic Strawberry Nachos

Prep Time 10 minutes
Cook Time 15 minutes
Total Time 25 minutes
Servings 4

Ingredients

Cinnamon Sugar Chips

  • 3 7 inch flour tortillas
  • 1 tsp cinnamon
  • 2 tsps sugar
  • butter or canola oil cooking spray

Balsamic Strawberries

  • 1 1/2 cups strawberries, diced
  • 3 Tbsp sugar
  • 3 tsps high quality balsamic vinegar

Cream

  • 1/4 cup sour cream
  • 1/4 cup Cool Whip or whipped cream
  • 1 Tbsp sugar
  • 1/8 tsp cinnamon

Toppings

  • 2 Tbsp shaved dark chocolate
  • 2 Tbsp slivered almonds, roughly chopped

Instructions

  1. Make the cinnamon sugar chips. Preheat your oven to 350 degrees. Stack the flour tortillas and slice them into eight triangles, like a pizza. I actually use a pizza cutter for this job. Spread the triangles in single layers on two baking sheets lined with foil.

    2. Spray the tortillas with a light coating of cooking spray. Stir together cinnamon and sugar, and sprinkle lightly over the tortillas. Bake each tray for 8 minutes.

    3. While the chips are baking, prepare the toppings. Stir together diced strawberries, sugar, and balsamic vinegar. Set aside. In another bowl, mix sour cream, Cool Whip, sugar, and cinnamon. Cover and refrigerate until it's time to use the cream mixture.

    4. When the chips are done, allow them to cool completely before assembling your nachos. You can make all of the components a day ahead, and store in airtight containers until serving time. Strawberries and cream should be refrigerated.

    5. Assemble the nachos. Place the chips on a serving tray, being careful not to have too many overlapping. Use a spoon to drop small dollops of the cream mixture all over the chips. You want the cream to stay in blobs, rather than spreading it around. Start piling strawberries onto the chips in an even layer, being careful not to pick up too much of the liquid in the bowl. Too much liquid with the strawberries will give you soggy chips in no time!

    6. Top with shaved chocolate and slivered almonds, and enjoy!  

Quick Cauliflower Pizza Crust (That Doesn’t Taste Like Cauliflower)

Quick Cauliflower Pizza Crust (That Doesn’t Taste Like Cauliflower)

Whoever claims that cauliflower pizza crust made from scratch is quick and easy is lying to you. You have to rice the cauliflower and cook it and squeeze it. Squeezing it is an arduous task at best, because you really do have to wring as much moisture out as possible to achieve a good crust. If you’re making more than one pizza, which I usually am, because cauliflower crusts are not very large or filling, then it takes double the time and effort. It quickly becomes an expensive, time consuming endeavor to feed more than one person with cauliflower crust pizza.

Fortunately, I’ve discovered the secret weapon. Trader Joe’s Frozen, Riced Cauliflower. It’s only $1.99 for a 12 oz bag, which happens to be exactly the right amount for a beautiful crust, and it’s cheaper than buying fresh cauliflower that you’d have to rice and squeeze yourself. I do think you can buy frozen, riced cauliflower in regular grocery stores – I use Trader Joe’s because I love their store, and it’s the first time I discovered such a magical product.

* not sponsored, just love the product *

When you freeze food, it tends to lose some of its distinct flavor over time. I think this is at play with the frozen cauliflower, and why it makes such a wonderful crust: it doesn’t taste like vegetables. It also doesn’t have a huge amount of moisture, even after you defrost it. I pour it into a bowl, microwave for a minute or two, and then pat the top dry with a paper towel. No squeezing involved at all. Do you know what that means? You’re smart and you probably do, but I tell you anyway. That means that this crust takes approximately five minutes to make. Defrost the cauliflower, pat dry, toss in some cheese, an egg, and some seasonings, stir and pour out onto your tray to shape the mix into a nice crust-like circle. Although to be honest, when I’m making it to eat instead of photograph, mine tends to look like a very wobbly rectangle.

Now, about that cheese that I so casually mentioned. I think of the cheese as my second secret weapon: goat cheese. For Cauliflower Pizza Crust, most people use Parmesan to help bind the crust together. I’ve swapped that for garlic and herb goat cheese, and it’s made a world of difference. The only other ingredients I add to my crust are an egg, some Italian herbs and salt. The crust still crisps up just right, and doesn’t taste like cauliflower even a little bit. The single caveat of the whole endeavor is that the crust needs about 40 minutes to bake properly, so it could be considered time-consuming in that regard. We all know at this point how impatient I am when it comes to wanting to eat what I make, though, so believe me when I say it’s worth the time.

I topped my pizza with mozzarella, cherry tomatoes, basil and pesto. Pesto is my new favorite thing to put on pizza – it just adds a whole new dimension to the flavor. I tested this crust topped like a traditional margarita pizza with fresh mozzarella, but the fresh cheese has a lot more moisture to it, and makes the pizza difficult to eat without a fork and knife. If you don’t mind that, then definitely give fresh mozzarella a try, it tasted outstanding. I am very happy to say that my days of squeezing moisture out of cauliflower until my hands fall off are completely behind me, and I promise that once you try this method, yours will be too.


5 from 2 votes
Print

Quick Cauliflower Pizza Crust (That Doesn't Taste Like Cauliflower)

Prep Time 7 minutes
Cook Time 40 minutes
Total Time 47 minutes
Servings 1 pizza

Ingredients

Cauliflower Crust

  • 1 12oz bag frozen, riced cauliflower
  • 1 egg
  • 4 oz garlic and herb goat cheese
  • 1/2 tsp salt
  • 1 tsp Italian seasoning

Toppings

  • 2 cups pizza sauce
  • 2 cups shredded mozzarella cheese
  • 1/2 cup pesto
  • sliced cherry tomatoes
  • basil

Instructions

  1. Preheat oven to 400 degrees. Line a baking sheet (round or rectangle) with parchment paper. 

    2. Place frozen cauliflower in a microwave-safe bowl. Microwave for about 2 minutes until the cauliflower has started to defrost. Pat the top of the cauliflower with a paper towel to remove excess moisture. 

    3. Add goat cheese to the cauliflower and microwave for an additional 30 seconds. Add egg, seasoning, and salt. Stir until well combined. The mixture will seem a little soft and wet. If you don't have garlic and herd goat cheese, you can use plain goat cheese and add an extra tsp of the Italian seasoning. 

    4. Pour the mixture out onto the parchment paper and flatten into a circle (or whatever shape you like, really) about 10-11 inches in diameter, and 1/2 inch thick. 

    5. Bake for 40 minutes, rotating the tray halfway through baking time to ensure even color. Baked crust will be a dark, golden brown and the edges will be crispy. Top with sauce, cheese, and whatever else you fancy and bake for  5-10 minutes until the cheese melts and browns very slightly on top. 


Upside-Down Lemon Raspberry Pavlova

Upside-Down Lemon Raspberry Pavlova

Pavlova is something I’ve dreamed of making ever since I found out about its existence. A light, fluffy meringue crust, covered in whipped cream and fruit? Um yes please. Give me some now. Except Pavlova takes a really long time to make from scratch – the meringue has to be in the oven for literal hours to come out right. It’s not at all difficult to make the meringue, I’m just very impatient when delicious treats take forever to bake. I finally gathered my patience (read: made lots of snacks to eat while the meringue baked) and decided that it was time to give Pavlova a shot.

I used a recipe from Eating Well, waited the prescribed couple of hours for my meringue to bake, and made some lemon curd and whipped cream to top it off. It was completely delicious, but a little too sweet, and very hard to serve. If you’ve ever made meringue, you’ll know that they don’t exactly slice cleanly, or keep well for more than an hour or two, once topped with gooey, wonderful things like lemon curd and whipped cream.

I added a raspberry sauce to subsequent test Pavlovas, to add more dimension to the flavor, and reduced the sugar in the meringue by just a small amount. This resulted in a much more interesting Pavlova that I was certain I wanted to eat approximately all of. The crunch of the meringue with the tart lemon and raspberry and silky cream is the most wonderful combination of textures and flavors. You don’t have to make any of your own fillings, if that seems like too much work – you can get lemon curd and whipped cream pretty readily in stores, and I’ll admit that whisking the lemon curd can feel a little tedious if lemon curd isn’t something you absolutely love. If you do make the fillings yourself, there’s plenty of time to get them all done while the meringue is baking.

The question of how to serve this dessert neatly was answered when I was browsing online and saw some of those frosting roses on top of cupcakes. Here’s a tutorial if you’ve never made them – they’re easy to do, but you do need a special piping tip: an extra large 2D or 1M will work nicely. I’ve known about them for a long time, but I’d never thought to make meringue versions (meringues take too long and all that). After that, it became a question of how to incorporate pretty, white meringue roses without slathering them with lemon curd and cream, as you would with a normal Pavlova. Turning them upside-down was the obvious solution, and I think it worked marvelously.

The Upside-Down Lemon Raspberry Pavlovas are perfect to bring to a party – I’ll be bringing mine to my family Easter celebration. I served mine in these sweet little glasses, but you could use any shot glass that you can fit a spoon into. You don’t have to worry about cutting and serving, since they’re all single-serve, and nearly all the prep can be done ahead of time. All you have to do is pop a meringue rose on top of each one at dessert time, and watch people ooh and ahh over how pretty they are. And then listen to them sigh about how delicious they were!


Upside-Down Lemon Raspberry Pavlovas

Meringue recipe adapted from Eating Well: Lemon Pavlova

Lemon Curd recipe from from Eating Well: Lemon Pavlova

Servings 12 Pavlovas

Ingredients

Meringue Roses

  • 2 egg whites
  • 1/3 cup superfine sugar
  • 1/8 tsp cream of tartar
  • pinch of salt

Lemon Curd

  • 1 egg
  • 2 egg whites
  • 3/4 cup granulated sugar
  • 2/3 cup lemon juice
  • 1 Tbsp freshly grated lemon zest
  • 1 Tbsp butter

Raspberry Sauce

  • 1 cup frozen raspberries
  • 2 Tbsps powdered sugar

Whipped Cream

  • 1 cup heavy whipping cream
  • 2 Tbsps powdered sugar

Instructions

  1. Start by making the meringue. Add egg whites, cream of tartar, and salt to a mixer, and beat on medium-high speed until soft peaks form. Make sure that your bowl is very, very clean before starting, because any grease will damage your results. If you don't have superfine sugar, you can blend it in a food processor  - I used my NutriBullet - for a few seconds. Make sure not to let it go too long, or it will just turn into powdered sugar. Increase the mixer speed to high, and gradually add the sugar. Whip until stiff peaks form and the mixture is glossy white. 

    2. Line a baking sheet with parchment paper. Turn one of your serving glasses upside down and trace the rim on the parchment paper, to create a guide for how large to pipe your meringue. Make 12-15 circles, and turn the paper over so the pencil marks are on the reverse.

    3. Spoon the meringue mixture into a piping bag, fitted with an extra large 2D or 1M tip. Pipe roses onto the parchment paper, starting in the center of each circle and moving in a swirl outward. Bake at 200 degrees for 1 hour, on the lowest rack in the oven. When baking time is up, turn off the oven, and prop open the door slightly. Allow meringue roses to dry completely in the oven for about 1 hour. When they're finished, meringues will be dry and light. 

    4. While the meringues are baking, make the lemon curd, raspberry sauce, and whipped cream. For the lemon curd, whisk together all ingredients except butter in a small sauce pan. Place pan over low heat, add butter, and whisk consistently for 5-12 minutes, depending on the temperature you're using. Mine took almost exactly 12 minutes. When you can coat a spoon with the curd and leave a mark when you run your finger across the curd on the spoon, it's done. Press curd through a fine-meshed sieve to remove solids (like the zest). Chill completely in the refrigerator before using. This can be make up to a week ahead of time. 

    5. For the raspberry sauce, combine frozen raspberries and powdered sugar in a sauce pan over low heat. Stir frequently until the raspberries soften and break down, and the sugar is completely dissolved. Press through a fine-meshed sieve to remove seeds. Store in the refrigerator. This can be made ahead, also. 

    6. For the whipped cream, place your mixer bowl and whisk attachment in the freezer for at least ten minutes. Remove from freezer and pour cream and sugar into the bowl. Whip at high speed until the cream thickens and stiff peaks form - this should only take a minute or two. 

    7. To assemble the Upside-Down Pavlovas, put whipped cream and lemon curd into piping bags, and pipe alternating layers of cream, curd and raspberry sauce into shot glasses until they're full. To create the layers of raspberry sauce, just drizzle a little with a spoon and tilt the glass to swirl it around and create an even layer. Make sure that the last layer is whipped cream. Just before serving, top each glass with a meringue rose (the meringue will go soft if put on more than a few minutes ahead of time). 


Falafel Hummus

Falafel Hummus

I was really hoping I’d invented Falafel Hummus as a concept, which is pretty silly since it seems like everything you can think of has already been done (I like to dream big). A couple Google searches show that this isn’t a completely new concept, but it’s also not all over the place. Well, it should be. I’ve been obsessed with falafel lately. The flavors are so interesting, with the mild, nutty chick peas and the sharp spicy parsley. I have to admit that turning falafel into a dip resulted from my failure to make actual falafel, but I’m not mad at about it even a little. Falafel Hummus is easier to make than falafel, and it has become my new favorite snack.

I started with a recipe from Gourmandelle for Healthy Vegan Falafel, formed the mixture into little patties and tried to fry them (the recipe calls for pan-frying instead of deep-frying), only to end up with squishy, soft, non-fried “falafel.” This is probably a case of my oil not being hot enough, but I can’t say for sure. What I can tell you for sure is that the whole time I was standing at the stove frying, I was eating the falafel “batter” that was still in the bowl. And it was delicious. I’m talking the kind of delicious where the flavors are curious and pleasing in a way where you have to keep tasting it to make sure you’re remembering it properly. And every bite is  better than the last.

I ditched the frying and decided to try the recipe again, but this time with a few additions to turn it into a dip.  During this experiment I left out the almond flour, which turned out to be a huge mistake. The almond flour balances the onion and the parsley in this dip to keep them from tasting bitter. I think almond butter would work as well, if not better, but almond flour worked just fine for me. I added some of the liquid from the can of chick peas and some olive oil to thin it to dip consistency. I also tossed in a couple of dates, which give the whole thing a slight undertone of sweetness, adding another dimension and tying all the flavors together.

I ate way too much of it in a single sitting, dipping warm pita and carrots in it and marveling at how something so similar to a million other versions of hummus could taste so different. It has the added bonus of involving zero frying, so this Falafel Hummus is technically healthier and quicker to make as well. Serve it to your vegan and non-vegan friends alike, or just have it for lunch spread inside a pita with some veggies. It’s perfect to share or to devour on your own when you’re experiencing serious falafel cravings or desperate wanderlust, or in my case, both.


5 from 1 vote
Print

Falafel Hummus

Recipe adapted from Gourmandelle's Healthy Vegan Falafel 

Ingredients

  • 1 can chick peas (drain but keep the water)
  • 2 Tbsp aquafaba (water from the can of chick peas)
  • 1 Tbsp ground flax seeds
  • 1/4 cup fresh parsley, chopped
  • 1/2 carrot, shredded
  • 1/2 yellow onion, diced
  • 3 garlic cloves, mashed
  • 2 Tbsps almond flour
  • 1/2 tsp paprika
  • 1/2 tsp ground cumin
  • 1 Tbsp tahini
  • 2 dates
  • 2 Tbsp olive oil
  • 3/4 tsp salt

Instructions

  1. Place all ingredients in a food processor and pulse until blended but not completely smooth. The dip is better if it's a little chunky. Salt to taste.

    Serve with warm pita, chips, and veggies.

    Note: I mixed mine in my nutri-bullet because I'm obsessed with it, but it definitely was not the very best tool for the job. I recommend using an actual food processor.


Better Chicken Vino Bianco

Better Chicken Vino Bianco

This recipe is one of my favorite dinners, and only partly because the recipe involves wine. It’s pretty quick to make, and all the prep can be done ahead of time, so you don’t have to spend hours in the kitchen to make something wonderful. Since the chicken doesn’t actually cook in the sauce, you can buy a roasted chicken and use that if you’re especially short on time. Short cuts that don’t diminish the final product are essentially just examples of good time management, right?

Chicken Vino Bianco is typically served over pasta, but I chose to make this dish with rice. The rice absorbs the sauce better than pasta ever could, soaking up the flavor and making sure it ends up in your mouth instead of on the bottom of the dish. The sauce itself is rich and creamy, without feeling heavy, and the flavor of the wine comes through without being overpowering. You can use chicken broth and maybe a little lemon juice in place of the wine and still have a silky, beautifully flavored sauce.

Better Chicken Vino Bianco is loaded with vegetables, but you hardly even notice them because with a little wine and cream in the mix, all the vegetables cook down into the glorious, smooth sauce. This recipe involves fresh grape tomatoes, spinach, shredded carrot, onion, and mushrooms. The tomatoes add a freshness that balances the heavy cream, and the onions, carrot, and spinach add loads of flavor as well as bulk and color.

Every recipe for Chicken Vino Bianco I looked at called for mushrooms. I’ll just say it – I hate mushrooms. I’ve been on a quest to force myself to like foods that I hate, in order to broaden my palate (it’s too complicated to be a food-lover who hates popular flavors like mushrooms and bananas). This was a great place to start, because I chopped the mushrooms so small that they all but disappeared into the sauce, and I could forget they were there.

I’ve tried the recipe sans mushrooms and the flavor just wasn’t the same. If you happen to love them, you can just roughly chop them before adding them to the skillet. You can do that with all of the vegetables in this dish, depending on what you like. If you’re of the vegetarian persuasion, you could also opt to increase the mushrooms in place of the chicken. I don’t think I’ll ever like mushrooms enough to live that life, but I hear some people think they’re amazing. Teach me your ways, please.

Like most of my recipes, this one was developed over time, based on a lot of similar recipes. I love taking a concept and changing it to fit my personal needs – especially when the result is something this tasty!  With its irresistible sauce and depth of flavors, Better Chicken Vino Bianco is a beautiful, savory dish that still feels light and healthy. And thank goodness for that, since it practically comes with a built-in wine course. The recipe only calls for a cup, and it would be a shame to waste the rest!


Better Chicken Vino Bianco


Prep Time 20 minutes
Cook Time 30 minutes
Total Time 50 minutes

Ingredients

  • 3 chicken breasts
  • 2 Tbsp olive oil
  • 1 cup yellow onion, diced
  • 1 cup shredded carrot
  • 4 garlic cloves, minced
  • 1 1/2 cup mushrooms, chopped
  • 1 cup quartered grape tomatoes
  • 1/2 cup heavy cream
  • 1 cup dry white wine
  • 1 tsp salt

Instructions

  1. Slice chicken into bite sized pieces and cook in a Tbsp of olive oil. Cook gently, over medium heat, to prevent chicken drying out. Remove cooked chicken from the skillet.

    2. Place onion, shredded carrot, garlic, and a Tbsp of olive oil in the same skillet over medium heat. Let cook until everything starts to soften, stirring occasionally.

    3. While onions are cooking, cut tomatoes into quarters, and chop mushrooms - I diced mine very very small, but you could just chop them roughly if you love mushrooms. Add both to the skillet with 1 tsp of salt and let cook until soft. 

    4. Add wine to the skillet and bring to a simmer. Cook until the sauce starts to reduce. Turn off heat and add cream. Stir until well combined. Salt to taste. Add chicken to the skillet and mix until coated with sauce. 

    5. Serve over warm rice or pasta. 

Perfect French Toast

Perfect French Toast

It’s no secret that I’m kind of particular about what I eat. I physically don’t want to waste time and calories on something that doesn’t taste wonderful. French Toast is one of my favorite foods, but I find that it’s very hit or miss at restaurants. I know that sounds crazy, like how much can you really mess it up? Hear me out. A lot of restaurants make it with thick brioche or challah bread, which sounds great in theory. In practice it leaves you with French Toast that looks fine on the outside, but then you start eating and realize the inside is dry and flavorless, and you have to use twice as much syrup. Not that I’m knocking syrup – syrup is a gift to humanity.

There are two problems at work with sub-par French Toast: The bread, and the batter. The issue with the bread is that unless it’s stuffed with some delicious filling, you have to soak it long enough for the batter to penetrate beyond the outer layer, but you can’t soak it too long without it getting soggy. I find that the thicker the bread, the harder it is to control this, and bread that’s too thin just doesn’t stand up to the batter to begin with. The issue with the batter is that it needs to have more than egg and milk and a little cinnamon to yield really star quality results. It’s like the bread – you don’t want it to be too thin or too thick. Fortunately for all of us, I have the solution: the perfect French Toast bread, and the perfect batter to go along with it.

Not sponsored – I just love the bread for this recipe.

The bread I’m referring to is Pepperidge Farm’s Farmhouse Hearty White Bread. It lives up to its name, being much more substantial than a regular white bread, but it’s not the extra-thick bread many people seem to prefer for French Toast. It stands up to batter beautifully, absorbing it quickly without getting too soft. Since loads of French Toast is never a bad thing, I tripled the batter recipe to make enough to cook the whole loaf. It makes a ton, so it’s perfect for a big family brunch – or a small family brunch, if you know lots of perpetually hungry people like I do!  To keep everything fresh and hot before serving time, transfer the cooked pieces to a tray/platter in a pre-warmed oven held at its lowest temperature while you finish working your way through the loaf.

The batter I use is from The New Best Recipe, and I haven’t changed the recipe except to add cinnamon. What I have changed is the method for preparing the batter. I’ll admit that it takes a bit of nerve to look at a recipe developed by America’s Test Kitchen and declare, “I can do better.” The first time I tried it, I followed it to the letter. And I spent 10 frustrating minutes trying to conquer lumps and clumps of flour that refused to whisk in. The flour is what sets this recipe apart, giving it a beautiful, crispy outside that keeps the inside tender.

To get a silky-smooth batter consistency, it’s important to begin by stirring the melted butter into the combined dry ingredients. A thick mess will form, and you’ll think I’m nuts. But stir in all the butter, and then add the milk and egg mixture very gradually until everything is combined and smooths to a paste-like consistency. Then, when you add the rest of the milk, it’ll combine with the paste, sans lumps. It’s amazing to me how such a simple alteration in the steps can yield highly improved results. The rest of the technique is straight-forward.  The bread is soaked in the batter and then fried in butter to a deep golden brown. It’s not any harder than making a grilled cheese sandwich. The only trick is keeping an eye on multiple pieces as they brown.

This French Toast recipe gives you those lovely golden-brown edges, and it tastes as good as it looks. There’s a little sugar and cinnamon in the batter, along with a healthy dose of vanilla, so you get loads of flavor. Add a little drizzle of syrup, and make sure you get a second helping before it’s all gone, because this French Toast does not stick around long.


Perfect French Toast

Recipe adapted from "The New Best Recipe" by America's Test Kitchen

Ingredients

  • 3 large eggs
  • 6 Tbsps unsalted butter, melted
  • 2 1/4 cups whole milk, divided use
  • 2 Tbsp vanilla
  • 6 Tbsp sugar
  • 1 cup flour
  • 3/4 tsp salt
  • 1 tsp cinnamon
  • 1 loaf Pepperidge Farm "Farm House White" Bread
  • unsalted butter for frying

Instructions

  1. Combine eggs, ¼ cup milk, and vanilla in a small bowl; set aside. Combine dry ingredients in a medium bowl. Melt the butter and stir into the dry ingredients thoroughly. Stir the egg mixture into the butter/flour mixture very gradually, and whisk until smooth. Add the remaining 2 cups of milk.

    2. Preheat the oven to warm (about 200 degrees), and have a large platter ready.

    3. Cut the bread slices in half (do the whole loaf at once – just open the wrapper down the top). Heat a 10 or 12” cast-iron skillet over medium heat. Add about 1 Tbsp butter for each of first few frying rounds, then add as needed. When the butter has melted, soak each bread slice in turn without saturating, about 20 seconds per side. Lift out and allow excess to drip off, and then immediately place in the hot pan.  

    4. Cook until golden brown, about 2 minutes per side. Flip or rotate half-slices as needed, to ensure even browning. Remove to a large platter in the warm oven until all slices are cooked and you are ready to serve.

Mom’s Chocolate Chip Cookies

Mom’s Chocolate Chip Cookies

Chocolate chip cookie recipes are a dime a dozen, but this is the one that always breaks my diet when I’m trying to eat clean. This is the one that I return to over and over, because it’s just that good. These Chocolate Chip Cookies have achieved something like cult-status in my family. My mom has been making this recipe, which is a Betty Crocker original, since she was eight years old. It’s gone through minor adaptations over the years, and is essentially the cookie that every single person in my family loves, without fail.

The texture of these Chocolate Chip Cookies is nothing short of perfection. They have those crispy edges and soft middles that I can’t get enough of. If you like over-done, crunchy cookies, leave these cookies in the oven a minute or two longer – they’ll develop more flavor while they’re in there too. They’re made with butter and shortening, so they taste rich without feeling too dense, something I’ve found that break-and-bake type cookies seriously lack.

The texture is wonderful, but I think the flavor is what really keeps me coming back to these. They have a slight hint of salt, so there’s no overwhelming sweetness, and it amplifies the chocolate hit in each cookie. The butter and sugars are balanced exactly right, and there’s just enough vanilla to complement the chocolate, so these taste like the Chocolate Chip Cookies of your dreams. If we’re being honest here, I could eat the whole bowlful of cookie dough before any of it makes it to the oven. Apparently that’s bad for you or whatever, but I’ve never gotten sick. I think someone is just trying to keep me from living my best life.

The thing about this cookie recipe is that it took me 26 years to master it. I’ve tried making it several times over the course of my adolescence and early 20’s, and for some reason, I could never get it exactly right. This recipe is a perfect example of why precision matters in baking. Even a little extra flour can throw off the dough and leave you with sub-par cookies. Fortunately, I found a way to solve my problem a while ago: with a food scale.

I’ve given the measurements for the ingredients in grams (I try to do it with most of my baking recipes,) and it’s pretty important that you actually weigh them on a food scale to get the cookies exactly right. I promise it’s worth it. Baking with a food scale instead of measuring cups means way less clean-up, and no more trying to measure things like shortening or peanut butter by squishing them into a cup. If you haven’t already invested in a food scale, this is me begging you to do so. Your entire life will be better for it.

I sort of view this recipe as my mom’s family legacy. That’s completely ridiculous, as she has six children (I know, it was like growing up in a zoo), but baking is something I’ve always done with my mom and learned from her, so her beloved cookie recipe stands out to me as particularly important. I love the idea of a family recipe that gets passed through generations, and I plan to keep this one going forever.

This dough unfortunately isn’t the type that will do best if you mix it up and pop it right in the oven. It generally needs at least three hours to chill to achieve good results, and you’ll get even better results if you let it chill overnight. My mom mentioned that she discovered this years ago while running her zoo, as she had to work during toddler nap times and do things in stages to get anything done! The wait time for this dough lets it develop the proper flavor and texture. You can chill the dough for up to two days if you want to make it ahead, but the quality will start to decline after that.

Both the cookies and the dough freeze well. If you bake more cookies than you can eat, they keep okay for a day in an airtight container – but nobody has ever found out if they keep well longer than that.


Chocolate Chip Cookies

Recipe adapted by Laura Landi from Betty Crocker Chocolate Chip Cookies.

Servings 72 cookies

Ingredients

  • 2/3 cup butter, softened 150g
  • 2/3 cup shortening (I use Crisco) 128g
  • 1 cup granulated sugar 200g
  • 1 cup brown sugar, firmly packed 215g
  • 2 eggs
  • 1 tsp vanilla
  • 3 cups plus one Tbsp flour 385g
  • 1 tsp salt
  • 1 tsp baking soda
  • 2 cup semi-sweet chocolate chips 340g

Instructions

  1. 1. Cream together butter, shortening, and both sugars. Stir in eggs and vanilla until well combined.

    2. In a separate bowl, stir together flour, baking soda, and salt. Mix thoroughly, and add to the sugar mixture. Stir gently just until everything is combined. Don't over-mix. Fold chocolate chips into the dough until evenly dispersed. 

    3. Place dough in an airtight container and refrigerate for at least three hours, up to two days. 

    4. Roll cookies into 1 inch balls and bake at 375 degrees for 7 minutes. Turn the tray in the oven and bake for an additional 1 to 1 1/2 minutes, depending on how they look. The bottom edges should look golden and baked through, the tops should look pale, but not doughy. Remove tray from oven and set on a cooling rack. Allow the cookies to remain on the tray for an additional 3 minutes before transferring to the cooling rack. If cookies look brown all over, skip this step and transfer to a cooling rack immediately. 

    Note: Freeze dough by rolling it into balls first. You can bake them directly from the freezer like this, increasing baking time by 30 seconds to 1 minute.

    This recipe makes quite a lot, as it's technically a double batch. It can be halved if you don't need 72 cookies, although I don't know anyone who has ever experienced that!