Falafel Hummus

Falafel Hummus

I was really hoping I’d invented Falafel Hummus as a concept, which is pretty silly since it seems like everything you can think of has already been done (I like to dream big). A couple Google searches show that this isn’t a completely new concept, but it’s also not all over the place. Well, it should be. I’ve been obsessed with falafel lately. The flavors are so interesting, with the mild, nutty chick peas and the sharp spicy parsley. I have to admit that turning falafel into a dip resulted from my failure to make actual falafel, but I’m not mad at about it even a little. Falafel Hummus is easier to make than falafel, and it has become my new favorite snack.

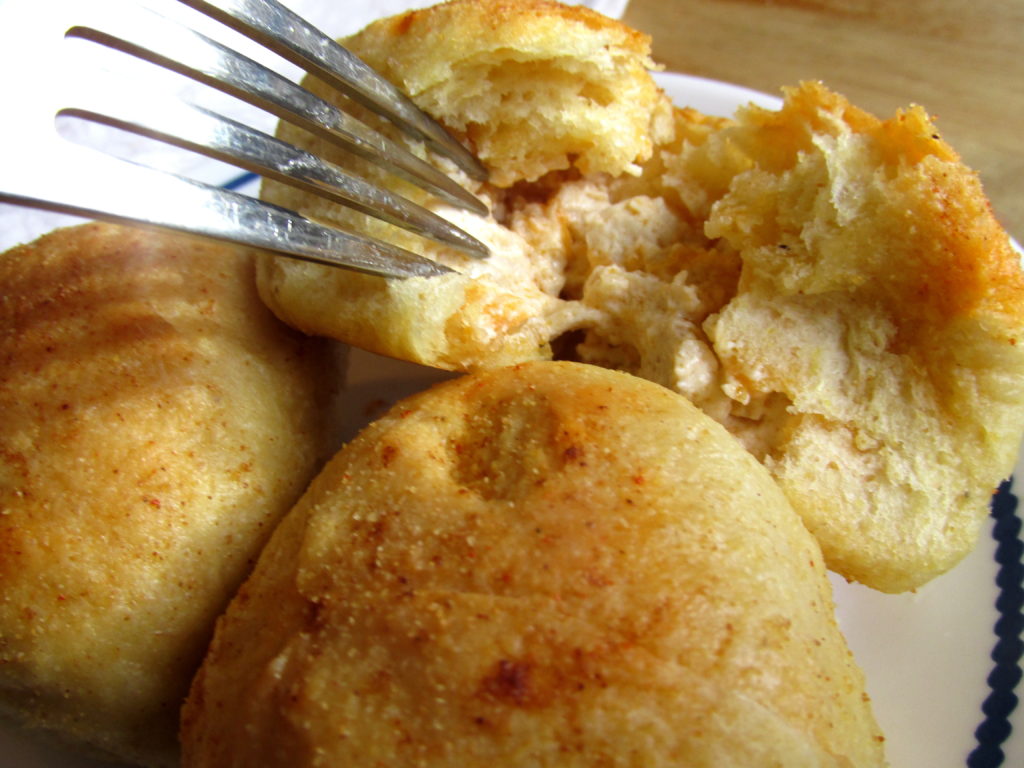
I started with a recipe from Gourmandelle for Healthy Vegan Falafel, formed the mixture into little patties and tried to fry them (the recipe calls for pan-frying instead of deep-frying), only to end up with squishy, soft, non-fried “falafel.” This is probably a case of my oil not being hot enough, but I can’t say for sure. What I can tell you for sure is that the whole time I was standing at the stove frying, I was eating the falafel “batter” that was still in the bowl. And it was delicious. I’m talking the kind of delicious where the flavors are curious and pleasing in a way where you have to keep tasting it to make sure you’re remembering it properly. And every bite is  better than the last.

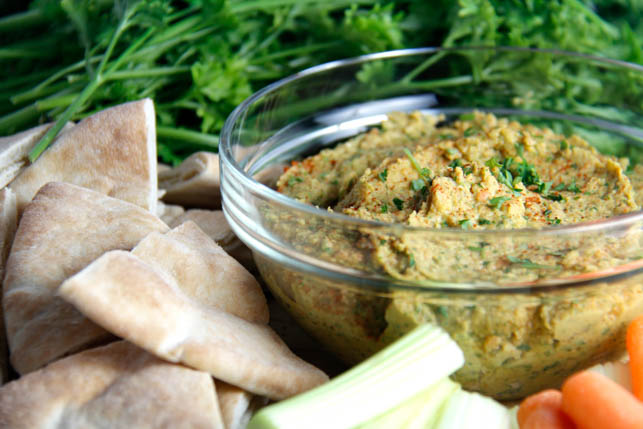
I ditched the frying and decided to try the recipe again, but this time with a few additions to turn it into a dip.  During this experiment I left out the almond flour, which turned out to be a huge mistake. The almond flour balances the onion and the parsley in this dip to keep them from tasting bitter. I think almond butter would work as well, if not better, but almond flour worked just fine for me. I added some of the liquid from the can of chick peas and some olive oil to thin it to dip consistency. I also tossed in a couple of dates, which give the whole thing a slight undertone of sweetness, adding another dimension and tying all the flavors together.

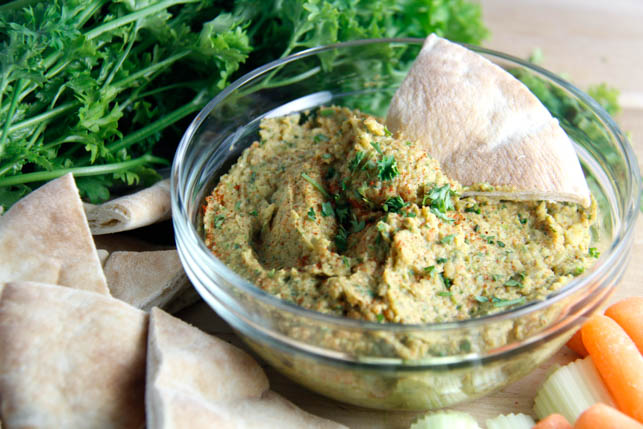
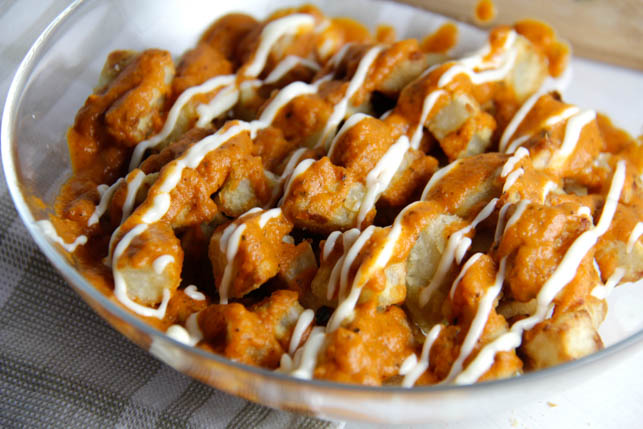
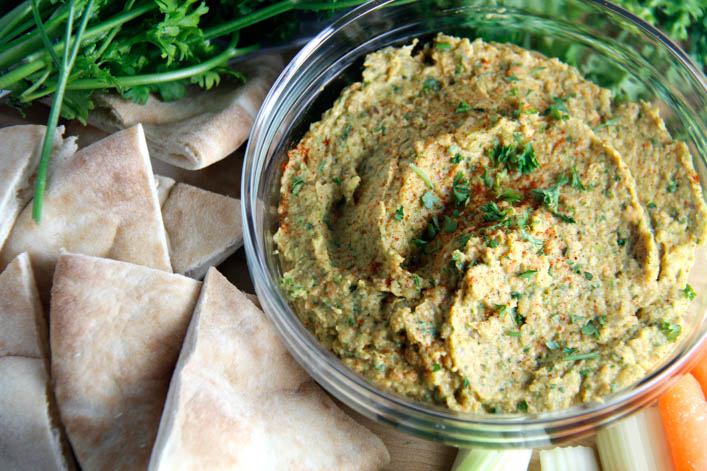
I ate way too much of it in a single sitting, dipping warm pita and carrots in it and marveling at how something so similar to a million other versions of hummus could taste so different. It has the added bonus of involving zero frying, so this Falafel Hummus is technically healthier and quicker to make as well. Serve it to your vegan and non-vegan friends alike, or just have it for lunch spread inside a pita with some veggies. It’s perfect to share or to devour on your own when you’re experiencing serious falafel cravings or desperate wanderlust, or in my case, both.


5 from 1 vote
Print

Falafel Hummus

Recipe adapted from Gourmandelle's Healthy Vegan Falafel 

Ingredients

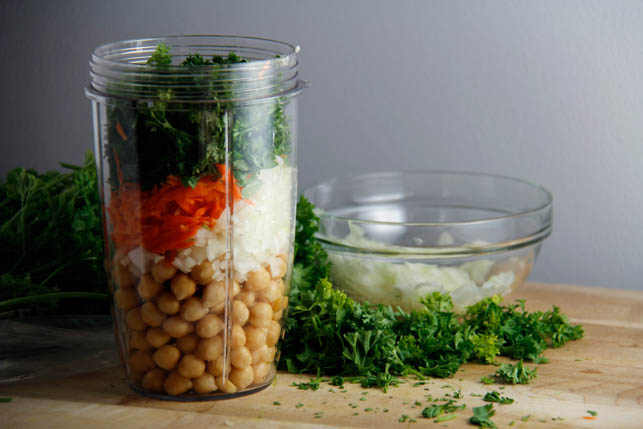
  • 1 can chick peas (drain but keep the water)
  • 2 Tbsp aquafaba (water from the can of chick peas)
  • 1 Tbsp ground flax seeds
  • 1/4 cup fresh parsley, chopped
  • 1/2 carrot, shredded
  • 1/2 yellow onion, diced
  • 3 garlic cloves, mashed
  • 2 Tbsps almond flour
  • 1/2 tsp paprika
  • 1/2 tsp ground cumin
  • 1 Tbsp tahini
  • 2 dates
  • 2 Tbsp olive oil
  • 3/4 tsp salt

Instructions

  1. Place all ingredients in a food processor and pulse until blended but not completely smooth. The dip is better if it's a little chunky. Salt to taste.

    Serve with warm pita, chips, and veggies.

    Note: I mixed mine in my nutri-bullet because I'm obsessed with it, but it definitely was not the very best tool for the job. I recommend using an actual food processor.


Spinach and Artichoke Tarte Soleil

Spinach and Artichoke Tarte Soleil

I try really hard to look at the end of daylight savings as the beginning of those long, glorious, sunny summer days. When you’re losing an hour of precious sleep, it’s hard to remember the bright side. I decided that this year I would stop worrying about the sleep aspect, and celebrate the end of daylight savings with the most appropriate dish I could think of: a Tarte Soleil. It’s made of puff pastry, cut and shaped to look like the most beautiful sunburst, with endless possibilities for fillings – just the thing to help cheer up tired people like us.

Puff pastry works well with all sorts of flavors. I filled mine with creamy, slightly tangy and salty spinach and artichoke dip. I was a little worried that the spinach and artichoke dip would run out of the pastry in the oven and make a huge mess, but it held up quite well. I adapted a recipe from Once Upon a Chef, which uses a Mornay sauce in place of cream cheese/mayo. A Mornay sauce is essentially just a white sauce with shredded cheese, and also a term that I was unaware of until I made my spinach and artichoke dip. You learn something new every day (even a day that’s missing an hour).

A Tarte Soleil is a wonderful thing to know how to make. I’ll be the first to admit that while puff pastry with spinach and artichoke dip is undeniably delicious, it’s not exactly boundary-pushing. But formed into an intricately twisty sun-shape, and baked to perfect golden crispiness, the combination is not only classic, it becomes irresistible.

I made my puff pastry from scratch. I think people assume puff pastry is difficult to make, because you do have to be a little careful about the temperature of the dough. I find that it’s actually a fairly quick and easy process, if you focus on what you’re doing. I would encourage everyone to try making their own at some point, but store-bought crust will work just as well for this recipe. I actually meant to buy mine this time (I’ve read Pepperidge Farm makes a great version), forgot to get it, and then was too lazy to run to the store when it was time to get cooking. So I just made it instead. I’m nothing if not a problem solver. The fact that I also create my own problems may have something to do with that.

The key to a good Tarte Soleil is cutting the sections of filled pastry uniformly, and then twisting them evenly. This is always a challenge for me, because I’m not as meticulous as I might choose to be. It’s important to twist each section of pastry about three times, and make sure the twists are evenly spaced along the section. My other advice would be to stop twisting and pop the whole thing in the freezer for a few minutes if you find your puff pastry is getting too soft and warm to work with. This solves a lot of frustration when trying to get those perfect twists.

My Spinach and Artichoke Tarte Soleil is exactly what I’d like to snack on at a party, but your taste could be drastically different from mine. Luckily, the filling possibilities for Tarte Soleil are endless. You could do a different savory option, like this feta tapenade from Smitten Kitchen, or even choose a sweet filling – I’ve seen loads of versions stuffed with Nutella. Whatever direction you go, it’s sure to be a crowd-pleaser. Even if the crowd is mostly you and your family sitting in your kitchen, eating it straight from the oven. But then, that’s the best sort of crowd, isn’t it?


Spinach and Artichoke Tarte Soleil

Spinach and Artichoke Dip recipe is adapted from Once Upon a Chef's Baked Spinach and Artichoke Dip. I changed it to make it gluten-free. 

Puff Pastry is a basic puff pastry from All Recipes - I used a different method for making it. 

Prep Time 30 minutes
Cook Time 35 minutes
Total Time 1 hour 5 minutes

Ingredients

Puff Pastry

  • 5 cups bread flour
  • 2 1/2 tsps salt
  • 2 cups very cold water
  • 2 cups cold unsalted butter (do not soften)

Spinach and Artichoke Dip Filling

  • 1/4 cup sour cream
  • 4 Tbsps butter, divided use
  • 1/2 tsp corn starch
  • 1 cup heavy cream
  • 1 medium yellow onion, diced
  • 5 oz frozen spinach
  • 9 oz frozen artichoke hearts, chopped
  • 1/3 cup shredded parmesan cheese
  • 1/3 cup shredded Monterey Jack cheese
  • 2 cloves garlic, minced
  • 1 tsp dried thyme

Tarte Soleil

  • flour for rolling
  • 1 egg

Instructions

  1. Make puff pastry, if you are doing it from scratch. Stir together flour and salt in a large bowl. Cut butter into small pieces and add to the bowl. Pour in water gradually, while stirring the mixture - add just enough water to get everything combined into a rough dough. You don't want the butter creamed into the flour, you want it to stay in chunks - this is what causes the dough to form those beautiful, flaky layers in the oven.

    2. Turn the mixture out onto a floured surface. Form it into a rectangle, and gently roll out until it's about a half inch thick. Fold the bottom third up into the middle, and fold the top third down on top of that. Turn it 90 degrees, add more flour to prevent sticking, and roll it out again. Repeat this process three more times, adding flour as needed. Wrap the dough in plastic wrap and refrigerate while you prepare the filling. You can also freeze it for about 10 minutes before using, if your filling is already made.

    Note: While making this dough, you need to work quickly, with very cold water and butter, to prevent the butter from melting into the dough. 

    3. Make the spinach and artichoke dip. Start with the Mornay sauce. Stir together 3 Tbsps butter and sour cream in a sauce pan over medium heat. Stir together cream and corn starch in a small bowl and add to the pan. Let the sauce come to a boil, stirring constantly. When it reaches a boil, turn off the heat and gradually stir in the shredded cheese, until sauce is smooth. It should be fairly thick. 

    4. In a skillet, cook onion over medium heat in the remaining 1 Tbsp of butter until it starts to become translucent. Add spinach, garlic, artichokes, thyme, and salt. Let cook for roughly five minutes, stirring occasionally, until the artichokes start to soften. Pour cheese sauce over the vegetables and stir until well combined.

    5. Prepare your Tarte Soleil. Take half of your puff pastry (leave the other half in the fridge)  and roll out into a 12 inch round on a floured surface. Take a round plate slightly smaller in diameter than your baking tray (I used a pizza tray) and place it upside down on the dough. Trace around it with a knife to form a perfect circle for the base of your Tarte. Place the circle on your baking tray (lined with parchment paper).

    6. Top with a generous layer of filling, leaving about a half inch bare around the outer edge of the circle. You may have some extra filling - don't feel like you need to use all of it, you just want a nice thick, even layer - no gobs. Cover with plastic wrap and refrigerate while you work with the rest of the puff pastry.

    6. Roll the second half of your pastry dough into a 12 inch round and cut a perfect circle as you did with the first layer. Place this layer on top of the first layer with the filling, so that the filling is sandwiched between the two layers. Place a small bowl or glass in the center of the the dough. This will mark the center of your Tarte, the section that doesn't get cut and twisted. 

    7. Cut away from the glass with a knife, slicing the dough into quarter sections. Cut each quarter section in half, and each of those sections in half again, until you have 16 total sections. You can choose to go a step further, cutting each section in half one more time, to end with 32 total sections coming from the center circle. It mostly depends on how many servings you want to make/how much work you want to do. Be careful not to cut through the parchment paper. 

    8. Twist each section 3-4 times, twisting all of the sections in the same direction. Don't just hold the end of a section and twist, because the dough won't automatically twist the way you want it to. The best way to do this is to try to twist each section once near the center circle, once in the middle of the section, and once closer to the end, so they're evenly spaced. 

    9. When all of the sections are twisted, you should have a beautiful sunburst. Beat egg in a small bowl and brush over the pastry. Bake at 350 degrees for 30-35 minutes, until golden brown. Let cool before moving to a serving tray, to prevent Tarte from tearing. 


Salsa Bruschetta

Salsa Bruschetta

This recipe is one of my favorite creations thus far. It happened sort of by accident, ending up in a much different place than it started. The original inspiration was the concept of Pan a la Catalana, and then I started researching recipes, and went a completely different way. I was in the kitchen with my tomatoes and garlic and my baguette, and suddenly I was just adding things to a bowl and tasting and adding some more. I seem to do that a lot lately, which makes me both very excited about what I could create, and very concerned that I’m missing a lot of interesting things that might result from me ever following a recipe properly. But, what would be the fun in that?

The Salsa Bruschetta that has resulted from my impatience and possible over-confidence in the kitchen is fresh, bursting with flavor, and a perfect addition to your favorite tapas recipes – I served it alongside my Baked Patatas Bravas. I used tomato and onion as a base, and added garlic and a bit of balsamic vinaigrette, along with basil, lemon, brown sugar, and olive oil. It’s got a lot of the flavor that you would find in Pan a la Catalana, and in traditional bruschetta, with some sweetness and citrus that really lift the onion and the garlic to make them a little brighter. The lemon and onion are what really take this bruschetta recipe into salsa territory, because there isn’t a lot of  salsa-esque heat. I added a pinch of cayenne, but I didn’t want that to overshadow the freshness of the tomatoes and the lemon. If you’re in the mood for something a bit spicier, I’d recommend adding chopped jalapeno to this recipe.

There’s one more element to this particular version of Bruschetta: After I sliced my baguette, I topped the slices with a light drizzle of olive oil, and a sprinkle of Monterey Jack cheese. Next time I may experiment with mozzarella for a caprese-inspired version, but the Monterey Jack worked extraordinarily well with the Salsa Brushetta. It’s the right amount of salty and creamy to pair with the tangy, slightly sweet flavor of the bruschetta. Cheese isn’t typically a part of bruschetta, possibly because that can take it to pizza-bread territory very quickly. I assure you that very little about this Salsa Bruschetta reminds me of pizza. The flavors are much lighter, yet richer and more complex than something you’d find on a pizza. (Unless it’s a very good, very unusual pizza, of course)!

These are definitely best served fresh, when the cheese is still gooey and melted. They do keep in the fridge fairly well overnight, and I have it on good authority that husbands named Bobby find that leftover Salsa Bruschetta makes an excellent afternoon snack. Whether you’re snacking or having your Salsa Bruschetta as part of a meal – perhaps as an interesting starter – this recipe is one you’ll make again and again. It’s very quick to make, and as uncomplicated as something that looks this elegant can get. No one will believe that you knocked the whole thing together in 20 minutes. But they won’t have much time to worry about that, as they’ll be worried about getting another bite before it all disappears.


Salsa Bruschetta

Prep Time 15 minutes
Cook Time 5 minutes
Total Time 20 minutes

Ingredients

  • 2 medium tomatoes
  • 1/4 small/medium white onion
  • 1 french baguette
  • 1 clove garlic
  • 1/2 Tbsp olive oil + more for drizzling
  • 1/2 tsp balsamic vinegar
  • 3/4 tsp brown sugar
  • 3/4 tsp dried basil
  • 1 dash cracked black pepper
  • 1 1/2 tsps lemon juice
  • 1/2 tsp salt
  • 1 dash cayenne
  • 1/4 cup shredded Monterey Jack

Instructions

  1. Dice tomatoes and mince garlic, stir together. Chop onions in a smaller dice than the tomatoes and add to the bowl. 

    2. Slice baguette into thin slices, about 1/4 of an inch thick. Place in a single layer on a baking sheet lined with foil. Drizzle olive oil lightly over each. Bake in the oven at 350 degrees for 4 minutes. You want the bread crisp on the edges, but still a little soft.

    3. Add remaining ingredients to the salsa mixture, except the cheese. Stir until well combined. Salt to taste - add more cayenne for a spicier salsa. 

    4. When baguette slices are done, remove from oven, top each with a little less than 1/2 Tbsp of Monterey Jack, and return to the oven for 2 minutes, or until cheese is melted. 

    5. Top each baguette with the salsa mixture. Try not to eat the whole batch by yourself. 


Baked Patatas Bravas

Baked Patatas Bravas

I think it’s only appropriate to begin this post by saying that I’ve never been to Spain. If you’d like to take me there, I can be packed and ready in an hour, but until then, my experience with authentic Spanish tapas will remain limited. That said, I have plenty of experience with tapas restaurants in the states – they’re possibly my favorite kind of restaurant. Sitting down with friends to experience not just a dish or two, but instead a wide variety, is how all meals would be served in my ideal world.

One of the best and simplest tapas out there is Patatas Bravas. How could anyone not get excited about golden brown potatoes that are crispy on the outside and soft on the inside, drizzled with a spicy tomato sauce and a creamy garlic aioli? There are a million recipes out there for Patatas Bravas – my intention was to replicate the ones I like best. All the tapas restaurants in my area seem to serve an almost identical version, so hopefully I’ve done it justice!

The spicy tomato sauce is actually very similar to my Tomato Basil Bisque recipe, with a few key flavor alterations. The aioli is a fairly standard lemon garlic aioli. Patatas Bravas are typically fried potatoes, but I chose to bake mine to make them slightly healthier, and for general ease. Deep frying at home is quite a process, compared to throwing a tray in the oven.

Baked fries/chunks of potato are a little difficult to get perfectly crispy in the oven, but the technique I used cooked them just the way I wanted. You start by putting your chopped potatoes in a pot of cold water and bringing it to a boil. Once the pot reaches a boil, you remove your potatoes from the heat, toss them in a couple tablespoons of olive oil and flour, and bake them on a tray at very high heat in the oven. I haven’t tried this method for fries but you better believe I intend to. This technique could also be something that experienced chefs have known about for years, and here I am just discovering it. The more I learn about cooking, the more I find that I will never know enough about cooking.

I served my Patatas Bravas with a cheese board, some salsa bruschetta (a recipe that I will be posting here soon!), and of course some sangria. Can’t forget the sangria. Bobby (my husband) and I basically gobbled it down, sitting on the floor of our apartment (we do have furniture – we’re just weird). I prefer to imagine that we sat on a balcony in Spain, in the warm glow of the last of the day’s sunlight, glasses of cold, fizzy, white sangria in hand, reaching for another helping of everything. Food can transport me the same way a good book does – or maybe I’m just delusional? You be the judge. I’ll be busy eating Patatas Bravas on my “balcony.”


Baked Patatas Bravas

Prep Time 15 minutes
Cook Time 45 minutes
Total Time 1 hour

Ingredients

Potatas

  • 3 russet potatoes
  • 2 Tbsps olive oil
  • 2 Tbsps white flour

Spicy Tomato Sauce

  • 1/4 medium yellow onion
  • 1 Tbsp butter
  • 1 clove garlic
  • 2 Tbsp tomato paste
  • 1/4 cup diced canned tomatoes
  • 1/4 cup chicken broth
  • 1 1/2 tsp brown sugar
  • 1/2 tsp dried basil
  • 1/8 tsp cumin
  • 1/8 tsp chili powder
  • 1/8 tsp cayenne
  • 1/8 tsp dried oregano
  • 1/8 tsp dried thyme

Lemon Garlic Aioli

  • 1/4 cup mayonnaise
  • 1/2 tsp lemon juice
  • 1 tsp olive oil
  • 1/4 tsp garlic powder
  • 1/16 tsp salt

Instructions

  1. Peel and dice potatoes into bite-sized chunks. Place in a pot with enough cold water to submerge them completely. Cook over high heat, just until the water reaches a boil. Drain, keeping the potatoes in the same pot. Add olive oil and flour to the potatoes and shake the pot until they're well coated - this is much easier than stirring to get them evenly coated. 

    2. Line a baking sheet with foil and spray with non-stick cooking spray. Spread potatoes on the tray in a single layer, and cook in the oven at 400 degrees for 30 minutes. Remove from the oven after 15 minutes, and flip the potatoes to ensure they brown on all sides. When they're golden brown and the outsides are all crispy, they're done. 

    3. While the potatoes cook, make your sauces. For the aioli, add all five ingredients to a small bowl and stir until well combined. For the tomato sauce, chop onion and add to a small pot with 1 Tbsp of butter. Let cook until the onion is soft and starting to become transparent. 

    4. Mince 1 clove of garlic and add it to the pot, with the tomato paste, diced tomatoes, and chicken broth. Let it come to a boil, reduce heat, and simmer for 15 minutes. After lowering the heat, add the remaining ingredients, and stir frequently.

    5. Remove sauce from heat and pour into a blender (I used my NutriBullet, as always). Blend until smooth. 

    6. Remove potatoes from the oven, pour into your serving dish and drizzle with both sauces. Enjoy!


Dark Chocolate Caramel Raspberry Popcorn

Dark Chocolate Caramel Raspberry Popcorn

I’m one of those people who loves awards season. I love all the beautiful people in their gorgeous clothes on the red carpet, and I love when someone funny does a great job hosting. The atmosphere at awards shows seems somehow both laid back and also buzzing with excitement, and I like feeling like I’m a part of it, even though I’m just sitting on my couch. As the Academy Awards are coming up this weekend, I thought it would be fun to create a very fancy snack to eat while watching, since I can’t go be a very fancy person at a huge, televised event.

I looked up the menu for this year’s official Oscars after-party, always catered by Wolfgang Puck. Among other things, he’s planned gold-dusted truffle popcorn. A decadent popcorn seems like just the thing to snack on while watching the Oscars, but I do not have access to gold dust. I mean, I probably could if I tried hard enough, but who really wants to eat gold dust on popcorn, when you can just coat it with beautiful, golden caramel instead? So I started thinking about what would go nicely with caramel, and chocolate came to mind, as it is the most obvious answer in the world. I wanted to add a little something extra, a little more glamour. I’d seen freeze-dried berries in a recipe from my name is yeh recently, and thought they might be the perfect addition. (You have to click on that link, by the way – her photos are gorgeous).

I went with freeze-dried raspberries, and I was so right about adding them to my popcorn. The combination of the slightly salty caramel, the sweet, almost bitter chocolate, and the tart raspberries is completely amazing – and addicting. The tartness of the berries really diffuses the bitterness in the chocolate, so every bite is perfect. This is the kind of recipe you can’t make too often because it’s very rich, but the compelling flavors make it easy to eat the whole batch. The recipe makes a good amount, so there’s plenty to share – if you have the self-control for that.

It starts with whipping up a basic caramel popcorn (only takes 20 minutes, and I highly recommend you eat some of it right away), and then you add a dark chocolate drizzle, followed by chocolate chunks, and crushed, freeze-dried raspberries. You can play with quantities, depending on what you like, but I promise the raspberries give this popcorn some serious star quality. This might be the Meryl Streep of popcorn.

It’ll keep for a couple days in an airtight container, if you have it around that long. Dark Chocolate Caramel Raspberry Popcorn is like a fantastic Oscars dress: custom made for the occasion, but talked about for years to come!


Dark Chocolate Caramel Raspberry Popcorn

Prep Time 5 minutes
Cook Time 20 minutes
Total Time 25 minutes
Servings 8 cups of popcorn

Ingredients

  • 8 cups air-popped popcorn
  • 1 cup brown sugar
  • 1 cup unsalted butter 2 sticks of butter
  • 1/8 tsp salt
  • 1 cup chopped dark chocolate; I just used dark chocolate chips divided use
  • 1 cup whole freeze-dried raspberries

Instructions

  1. Start by popping your popcorn with an air popper - you can also do this in a brown paper bag in the microwave. Place popcorn in a large bowl.

    2. Melt brown sugar, butter, and salt together over high heat. Bring just to a boil - (right when you start to see tiny bubbles), and then reduce heat and let simmer, stirring constantly, for 5 minutes. 

    3. Pour caramel over top of popcorn and stir until the popcorn is all coated. Line a baking sheet with foil and spray with non-stick cooking spray. Pour popcorn out onto the baking sheet, and spread into an even layer. Bake at 350 degrees for 8 minutes. 

    4. While the popcorn is in the oven, melt half of the chopped dark chocolate in a piping bag - you can also use a sandwich baggie. Be sure to melt it in 10 second bursts in the microwave to keep the chocolate from seizing. Crush the freeze-dried raspberries into small pieces.

    5. When the popcorn comes out of the oven, let cool until you can handle it without burning yourself. Eat some, and then drizzle half of the melted dark chocolate over the whole tray. Sprinkle on a 1/4 cup of the chopped dark chocolate bits and half of the raspberries. 

    6. Place the tray in the freezer for 5-10 minutes. Remove from freezer and check that the melted chocolate has mostly firmed up. Stir popcorn around on the tray. Drizzle on the rest of the melted chocolate, and top with the rest of the chopped dark chocolate and raspberries. Freeze for 5-10 more minutes, and then pour into a bowl and enjoy. 


Stuffed Corn Bubbles

Stuffed Corn Bubbles

When you do a search for Super Bowl snacks, you’re inevitably greeted with photos of cheese plates arranged to look like football stadiums, and cute little cupcakes topped with green grass frosting and tiny field goal posts. There’s certainly nothing wrong with these if you have the time for them, but I can’t say I know anyone who does! When I’m planning Super Bowl snacks, I’m thinking easy, throw-in-the-oven food that doesn’t require days of prep work ahead of time. Stuffed Corn Bubbles have everything you could want in a party appetizer, or even an after-school snack for the kids. The active cooking time is only about thirty minutes, the recipe makes a ton, and they reheat well.  They have a slightly crisp outside, a fluffy yet doughy inside, and can be filled with anything you desire – in my case, buffalo chicken dip.

This is another recipe that I’ve had forever – the original came from Fleischmann’s Yeast, although I discovered it on Recipe Link. My version is quite different, as I’ve added a lot more flavor to the dough itself. Onion powder, garlic powder, cumin, chipotle powder, and chili powder flavor the dough, and combined with their outstanding texture, these go way beyond typical stuffed-dough recipes.

They’re named Corn Bubbles because the dough uses both flour and corn meal. This combination gives them the outstanding texture. They’re heartier than a regular dinner roll without being heavy, chewy without being tough. Filled with anything you can dream up, and brushed with melted butter, these are satisfying bites of pure comfort and happiness.

Stuffed Corn Bubbles seem like they take a long time to make, but that’s only because of the yeast in the dough. There’s about an hour total of resting time. If you’re not in a hurry, I think resting time for a dough is actually wonderful, because it means you’re multi-tasking without even trying.  Plus that whole developing flavor thing. Completely passive parts of cooking still count as getting something done, right? I did use rapid rise yeast for this recipe though, because no one wants to wait longer than a couple hours for these to be ready.

Filling these with buffalo chicken dip is an excellent choice, but I’d also recommend barbecue pulled pork, or some variation of a beefy queso dip, with plenty of beef to keep it from being too drippy. Just make sure to pinch the seams really well when you’re stuffing them, or the filling will ooze out the bottom, into your pan. The dough is wonderfully stretchy after kneading, so filling your corn bubbles is an easier process than it might sound. I use a kitchen scale to weigh the bubbles as I fill them, to make sure each corn bubble gets exactly 16g so they don’t get too full. This helps them all stay uniform, which means they’ll bake evenly.

If you give these a try, let me know what you filled them with! I’m always looking for new ideas for a recipe this versatile.

Need more ideas for Super Bowl snacks? Check out my Loaded Baked Potato Tots!


Stuffed Corn Bubbles

Course Appetizer
Prep Time 1 hour 30 minutes
Cook Time 20 minutes
Total Time 1 hour 50 minutes
Servings 32 bubbles

Ingredients

Corn Bubbles

  • 5 to 5 1/2 cups flour
  • 1 1/2 cups yellow cornmeal
  • 2 packages Fleischmann's Rapid Rise Yeast
  • 1/4 cup sugar
  • 4 tsps salt
  • 1/4 tsp chili powder
  • 1/4 tsp ground oregano
  • 1/4 tsp chipotle powder
  • 1 tsp onion powder
  • 1 tsp garlic powder
  • 1 tsp cumin
  • 1 3/4 cups milk
  • 1/2 cup water
  • 1/4 cup butter

Buffalo Chicken Dip

  • 12 oz cream cheese
  • 1/2 cup ranch dressing
  • 1/4 cup Frank's hot sauce
  • 3/4 cup shredded cheddar cheese
  • 1 lb cooked, shredded chicken

Instructions

  1. Set aside 1 cup flour. In large bowl, mix remaining flour, cornmeal, undissolved yeast, sugar, salt, and seasonings; set aside.

    2. Heat milk, water and butter until hot to touch (125 to 130 degrees F); stir into dry mixture. Stir in enough additional flour to make a soft dough.

    3. Knead the dough on a lightly floured surface until smooth and elastic, about 6 to 8 minutes. Cover (I just turn the bowl upside-down over the dough). Let rest 10 minutes.

    4. Divide dough into 32 equal pieces. With palms of hands, flatten to 3-inch circles. Place a tablespoon (about 16g) of your filling in the center of each circle. Pull up edges and pinch to enclose filling. Place balls in 2 greased 10x10-inch dishes. Cover; let rise in warm, draft-free place until doubled in size, about 40 minutes.

    5. Bake at 375 degrees F for 15 -20 minutes or until done. Remove from pans and cool on wire racks.