Jack O’Lantern Sandwich Cookies

Jack O’Lantern Sandwich Cookies

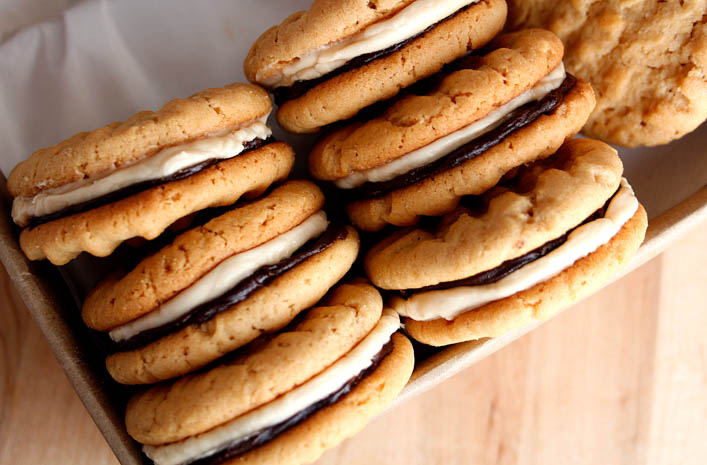
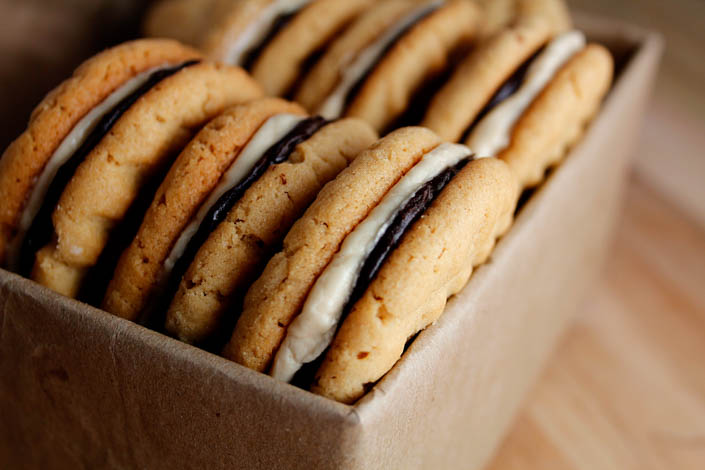
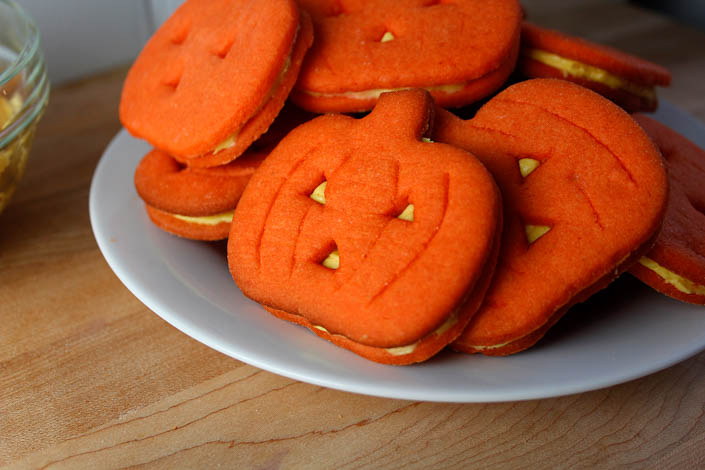
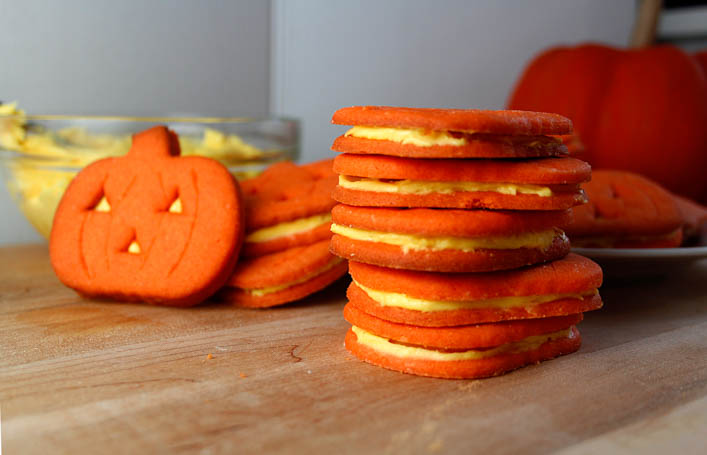
I didn’t intentionally theme this month based on sandwich cookies, but would that really upset anyone? Sandwich cookies rank with the best desserts – especially when they’re this cute! These Jack O’ Lantern Sandwich Cookies are among my absolute favorite childhood Halloween memories. I grew up helping my mom make them, and to this day I think they’re one of the most delicious treats I know how to make. The cookies are firm without being crunchy, and they have a wonderful sweet, buttery flavor that evokes a cross between a sugar cookie and a perfectly baked shortbread. Filled with a classic vanilla buttercream frosting, they become the kind of sandwich cookie that packaged cookies only dream of being.

The beauty of this recipe is that it doesn’t require any crazy cookie decorating skills. All you have to do is use a great pumpkin cookie cutter (perhaps while you watch The Great Pumpkin), and a paring knife to slice little triangles in the dough for the eyes and noses of your jack o’ lanterns. A yellow buttercream goes between the cookies, so it looks like the jack o’ lantern has a lit candle inside – no extra skill work required. I like these cookies sans mouths because I think they’re elegant in their simplicity, while still looking fun, and most importantly, delicious. Halloween baking always has the potential to go to a very goofy, over-the-top place, where treats look festive, but not necessarily appetizing. It’s one of my baking mantras to never sacrifice how mouth-wateringly edible something looks in the name of making it look cute.

There are a few things you should know before you make these cookies. The first is that the dough does require time to chill, so plan accordingly. The dough itself comes together in all of about five minutes, so you can make a batch now and be ready to cut and bake it tonight. The second is that these cookies are fairly fragile, so one or two will break no matter what you do. You’ll want to eat these broken ones immediately, which is fine, since broken cookies have no calories. It’s a well-known scientific fact. That said, as long as you handle them gently, and frost them with the cookie laying on a flat surface, too much breakage won’t be an issue. You can also roll your dough out slightly thicker than the 1/8 of an inch that I usually go for, to yield sturdier cookies.


Halloween theme aside, this cookie recipe is like the holy grail of roll-and-cut cookie recipes: easy to whip up, buttery without being too soft, crisp without being crunchy, and perfect for all forms of cookie decorating because it’s endlessly versatile. You can use food coloring to make the dough and frosting any color of the rainbow, and cut it into just about any shape you desire. I use this recipe to make Christmas cookies, and heart-shaped cookies for Valentine’s day. You can also substitute any flavor frosting or even a chocolate ganache for the filling, or just bake the cookies a little thicker and top them with frosting and sprinkles – no sandwiching required. Jack O’ Lanterns are easily my favorite way to use this recipe because Halloween is the best, but I won’t blame you if you find yourself loving this recipe for beautiful frosted Christmas cookies instead!

Jack O'Lantern Sandwich Cookies

Ingredients

Jack O' Lantern Sugar Cookies

  • 3/4 cup butter, softened
  • 1/4 cup sugar
  • 1/4 cup brown sugar
  • 1 egg yolk
  • 12 drops yellow food coloring
  • 4 drops red food coloring
  • 1 3/4 cups flour
  • 1/8 tsp salt
  • 3/4 tsp baking powder

Vanilla Frosting

  • 1/2 cup butter
  • 1 1/2 cups powdered sugar, divided use
  • 1 Tbsp milk
  • 2 dashes salt
  • 10 drops yellow food coloring
  • 1/4 tsp vanilla

Instructions

  1. Make the cookie dough: cream together butter and sugars. Beat in the yolk, and red and yellow food colorings.

    2. Stir remaining ingredients together, and add to butter mixture. Mix well. Chill for 4 hours or overnight.

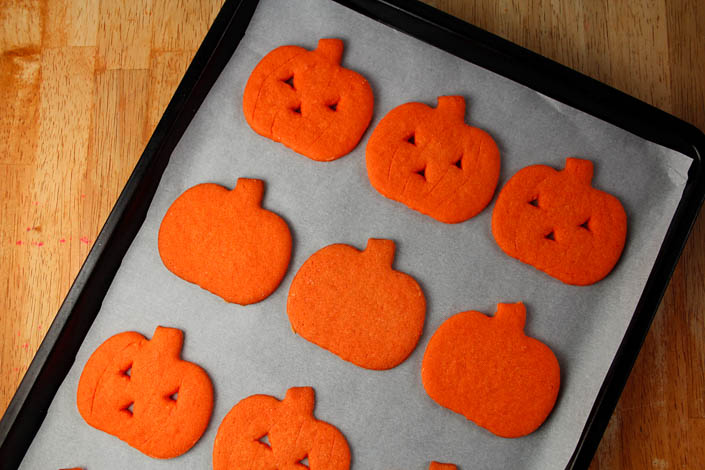
    3. Roll dough to 1/8" - 1/4” thickness, and cut into pumpkin shapes with a cookie cutter. Using a small, sharp knife, cut triangle eyes and noses on half of the pumpkins. You can also draw curved lines with the tip of a knife on the surface of the cookies, to mimic the ridges on a real pumpkin - just be careful not to cut all the way through the cookie.

    4. Bake at 350° F for 8 - 10 minutes, or until the edges are just barely, or just about to, brown. Cool completely on a wire rack.

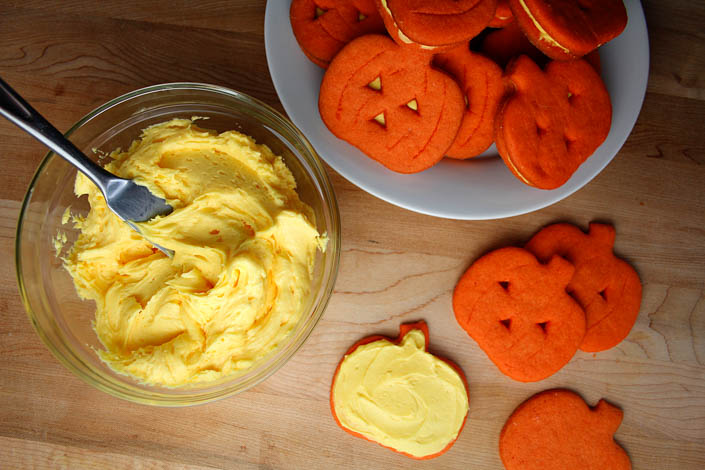
    5. To make the frosting, cream together butter and 1 cup of the powdered sugar. Stir in vanilla, salt, and milk. Stir in remaining powdered sugar. When sugar is completely incorporated, add food coloring and stir until frosting is uniform. Optional: Whip in a stand mixer on high speed, to yield more fluffy, voluminous frosting.

    5. When completely cool, spread the non-face pumpkins with the icing, and top with the pumpkins with faces. DO NOT try to press the top cookies down to make the icing squeeze up through the cut-outs - it will just break the cookies.


Chocolate Peanut Butter Sandwich (Wedding) Cookies

Chocolate Peanut Butter Sandwich (Wedding) Cookies

A year ago today, I married Bobby. It was truly the best day I could ever have imagined, but the planning was incredibly stressful. I did a lot of the detail work myself – I made the invitations and a lot of the centerpieces, which, looking back, I don’t really recommend. I would have enjoyed the planning process a lot more if I’d been a little more hands-off. One DIY thing that I highly recommend is making baked goods for wedding favors. But not just any baked goods: these peanut butter and chocolate sandwich cookies are absolutely perfect in every way. They’re delicious (we got SO many compliments on them), they freeze very well, they’re that wonderful combination of salty/sweet, chewy/crunchy – and they look super cute in little boxes, tied with ribbon.

I asked my mom to make the favors for my wedding, partially to save money, and partially to send guests home with a favor that they would actually enjoy having. The best wedding favors are edible, tasty, and of course, visually pleasing, with bonus points if you can personalize them with a simple tag or sticker added to the packaging. We decided on peanut butter and chocolate for the cookies, since I chose a white chocolate raspberry wedding cake – something Bobby had absolutely no interest in eating. If you read my last post, you know that peanut butter and chocolate is the only flavor combination in the world, according to Bobby.

We were inspired by Flourless Peanut Butter Chocolate Ganache Sandwich Cookies from Two Peas & Their Pod, and didn’t do a lot to change the look of the cookie itself, because they really are stunning. But the original version wasn’t exactly what I was looking for flavor-wise, or make-ahead-wise, so we had to do some serious recipe experimentation.

The first task was finding a peanut butter cookie recipe that was stiff enough to sandwich without falling apart, but soft enough to give when bitten into, so the frosting wouldn’t squish out the sides. It also had to freeze well, so it could be made ahead of time – I can’t imagine how we would’ve pulled this off if my mom hadn’t been working on them in the months leading up to the wedding. After rounds of testing with different brands of peanut butter, flourless vs flour-filled dough (the version we made is not gluten-free, but the original is, so give it a look if you want something gluten-free), and different levels of sweetness, we settled on our cookie, and got to work creating the fillings. We loved the way Two Peas & Their Pod did it, piling on a sweet, creamy, peanut butter filling and a rich, chocolate ganache, but needed to experiment with them to make sure the flavors went perfectly with our revised peanut butter cookie. The thing about chocolate and peanut butter is that you have to be very careful with the balance of sweetness/saltiness/bitterness, to keep the flavor from being cloying or bland. We used my brothers as taste testers, and had them try so many combinations that they actually started joking about wanting to eat anything but wedding cookies. They’ve gotten over it, I think, because the batch I made for this post got eaten in all of two hours, once I’d finished photographing it.

We put three cookies in each favor box, which meant we had to make about 300 of them – 600 peanut butter cookies to sandwich together. Starting about two months out from the wedding, we made the peanut butter cookies and the fillings in large batches, frosted and sandwiched them, wrapped them well, and then immediately froze them. We weighed the dough and the exact amount of frosting that went on each cookie, so they’d be perfectly uniform. They keep so well in the freezer, even with the frosting, that when they defrost they taste and feel like they were baked that morning. They’re little peanut butter and chocolate miracles. We put them in favor boxes the evening before the wedding, straight from the freezer. Since the frosting was rock-solid, they were easy to package neatly, and they defrosted perfectly overnight.

The process of making tons of these cookies wedding-perfect is time-consuming and repetitive, and demands attention to detail and lots of freezer space. It would be monumentally more difficult to execute for a very large wedding, especially if you’re not already an experienced baker. That said, these can be made literal months in advance – so you’ll have plenty of time to practice, and the effort yields superbly satisfying results. The recipe I’m posting here is scaled to make about 36 sandwich cookies, as opposed to 300, so the concept is perfect for smaller events as well. If you don’t require perfection and uniformity, you can skip weighing the dough and fillings, and the results will still be completely delicious. It’s my plan to make these every October 8th for the rest of my life…and freeze a bunch and save them to eat later in the year, because why not? They will always remind me of the most wonderful evening, being surrounded by my friends and family, wearing my princess dress, and marrying the love of my life. That’s a lot of pressure to put on a cookie, but there’s no cookie better suited than these.

Chocolate Peanut Butter Sandwich (Wedding) Cookies

This recipe is heavily adapted from Peanut Butter Chocolate Ganache Sandwich Cookies from Two Peas & Their Pod

Ingredients

Peanut Butter Cookies

  • 2 1/2 cups flour 300g
  • 1 tsp baking powder
  • 1 tsp baking soda
  • 1/4 tsp salt
  • 14 Tbsps butter 198g
  • 1 cup sugar 200g
  • 1 cup brown sugar 215g
  • 1 cup + 2 Tbsps peanut butter 284g
  • 2 eggs

Creamy Peanut Butter Frosting

  • 2 Tbsps peanut butter 32g
  • 1 Tbsp butter, softened 14g
  • 3 Tbsps powdered sugar 25g
  • 2 Tbsp + 1 tsp milk
  • 1 cup, scant powdered sugar 115g

Chocolate Ganache

  • 1/2 cup semi-sweet chocolate chips 85g
  • 1/4 cup heavy cream
  • 4 Tbsps salted butter 56g
  • 6 Tbsps cocoa 30g

Instructions

  1. Make the cookies: stir together flour, baking powder, baking soda, and salt. Set aside. Cream the butter with the two sugars, and then cream in the peanut butter. Stir in the eggs.

    2. Chill the dough at least 4 hours, or overnight. Roll into 18 g balls, and place on baking sheet. Press the balls with the back of a fork to create a criss-cross pattern on the tops. Chill dough balls while preheating oven to 350 degrees (or while previous tray is baking). Bake for 7 minutes, 40 seconds; turn tray, bake for 2 minutes. Cool on wire rack.

    3. Make the peanut butter frosting by adding all of the ingredients to a mixer in the order listed, and beating until well combined after each addition of sugar, and then until fluffy. 

    4. To make the chocolate ganache, heat the heavy cream in the microwave just until very warm (for us, that was 25 seconds). Pour over chocolate chips in a heavy bowl. Let sit 1 minute, then stir until smooth. Melt the butter in a separate bowl, and stir in the cocoa until smooth. Combine the two chocolates. Allow to cool to room temperature.

    5. To assemble the cookies, place 8g of ganache (roughly 1/2 Tbsp) on one cookie, and 16g of peanut butter frosting on another cookie. Press the two cookies gently together. 

    Cookies will be good in the freezer for up to a year, but will be at their best quality if used within 4 months of freezing. 


Mom’s Chocolate Chip Cookies

Mom’s Chocolate Chip Cookies

Chocolate chip cookie recipes are a dime a dozen, but this is the one that always breaks my diet when I’m trying to eat clean. This is the one that I return to over and over, because it’s just that good. These Chocolate Chip Cookies have achieved something like cult-status in my family. My mom has been making this recipe, which is a Betty Crocker original, since she was eight years old. It’s gone through minor adaptations over the years, and is essentially the cookie that every single person in my family loves, without fail.

The texture of these Chocolate Chip Cookies is nothing short of perfection. They have those crispy edges and soft middles that I can’t get enough of. If you like over-done, crunchy cookies, leave these cookies in the oven a minute or two longer – they’ll develop more flavor while they’re in there too. They’re made with butter and shortening, so they taste rich without feeling too dense, something I’ve found that break-and-bake type cookies seriously lack.

The texture is wonderful, but I think the flavor is what really keeps me coming back to these. They have a slight hint of salt, so there’s no overwhelming sweetness, and it amplifies the chocolate hit in each cookie. The butter and sugars are balanced exactly right, and there’s just enough vanilla to complement the chocolate, so these taste like the Chocolate Chip Cookies of your dreams. If we’re being honest here, I could eat the whole bowlful of cookie dough before any of it makes it to the oven. Apparently that’s bad for you or whatever, but I’ve never gotten sick. I think someone is just trying to keep me from living my best life.

The thing about this cookie recipe is that it took me 26 years to master it. I’ve tried making it several times over the course of my adolescence and early 20’s, and for some reason, I could never get it exactly right. This recipe is a perfect example of why precision matters in baking. Even a little extra flour can throw off the dough and leave you with sub-par cookies. Fortunately, I found a way to solve my problem a while ago: with a food scale.

I’ve given the measurements for the ingredients in grams (I try to do it with most of my baking recipes,) and it’s pretty important that you actually weigh them on a food scale to get the cookies exactly right. I promise it’s worth it. Baking with a food scale instead of measuring cups means way less clean-up, and no more trying to measure things like shortening or peanut butter by squishing them into a cup. If you haven’t already invested in a food scale, this is me begging you to do so. Your entire life will be better for it.

I sort of view this recipe as my mom’s family legacy. That’s completely ridiculous, as she has six children (I know, it was like growing up in a zoo), but baking is something I’ve always done with my mom and learned from her, so her beloved cookie recipe stands out to me as particularly important. I love the idea of a family recipe that gets passed through generations, and I plan to keep this one going forever.

This dough unfortunately isn’t the type that will do best if you mix it up and pop it right in the oven. It generally needs at least three hours to chill to achieve good results, and you’ll get even better results if you let it chill overnight. My mom mentioned that she discovered this years ago while running her zoo, as she had to work during toddler nap times and do things in stages to get anything done! The wait time for this dough lets it develop the proper flavor and texture. You can chill the dough for up to two days if you want to make it ahead, but the quality will start to decline after that.

Both the cookies and the dough freeze well. If you bake more cookies than you can eat, they keep okay for a day in an airtight container – but nobody has ever found out if they keep well longer than that.


Chocolate Chip Cookies

Recipe adapted by Laura Landi from Betty Crocker Chocolate Chip Cookies.

Servings 72 cookies

Ingredients

  • 2/3 cup butter, softened 150g
  • 2/3 cup shortening (I use Crisco) 128g
  • 1 cup granulated sugar 200g
  • 1 cup brown sugar, firmly packed 215g
  • 2 eggs
  • 1 tsp vanilla
  • 3 cups plus one Tbsp flour 385g
  • 1 tsp salt
  • 1 tsp baking soda
  • 2 cup semi-sweet chocolate chips 340g

Instructions

  1. 1. Cream together butter, shortening, and both sugars. Stir in eggs and vanilla until well combined.

    2. In a separate bowl, stir together flour, baking soda, and salt. Mix thoroughly, and add to the sugar mixture. Stir gently just until everything is combined. Don't over-mix. Fold chocolate chips into the dough until evenly dispersed. 

    3. Place dough in an airtight container and refrigerate for at least three hours, up to two days. 

    4. Roll cookies into 1 inch balls and bake at 375 degrees for 7 minutes. Turn the tray in the oven and bake for an additional 1 to 1 1/2 minutes, depending on how they look. The bottom edges should look golden and baked through, the tops should look pale, but not doughy. Remove tray from oven and set on a cooling rack. Allow the cookies to remain on the tray for an additional 3 minutes before transferring to the cooling rack. If cookies look brown all over, skip this step and transfer to a cooling rack immediately. 

    Note: Freeze dough by rolling it into balls first. You can bake them directly from the freezer like this, increasing baking time by 30 seconds to 1 minute.

    This recipe makes quite a lot, as it's technically a double batch. It can be halved if you don't need 72 cookies, although I don't know anyone who has ever experienced that!