The Hot Fudge Mug Brownie

The mug brownie concept is a God-send to any chocoholic who tries not to keep too much junk food in their house. You can mix one up if you really want it, but it’s not like a full batch of cookies, staring you in the face, shouting “Eat me, I’m wonderful.” The reality of mug brownies however, is that they never seem to capture that real brownie goodness. They’re nearly always on the cakey side, too sweet, and often they’re just too damn big. A brownie that fills up an entire mug sounds completely wonderful, but also sounds like mountain of sugar. For me, the point of a mug brownie is to have a quick, easy, single serve dessert that keeps me from baking an entire batch of brownies, that I can have every day without worrying that I’m eating more dessert than actual food.

I offer you the perfected concept: The Hot Fudge Mug Brownie. It’s small, rich, and honestly more like perfect, thick, dark chocolate sludge than an actual brownie, because I like mine reaaallly fudgey. Like basically undercooked. But there’s no egg in this one, so it’s totally fine. I’m aware that referring to food as “sludge” is perhaps not the most appealing – but it’s really the best word to describe the texture. Just remember, it’s rich, chocolate sludge.

There’s one more thing: Because this brownie isn’t overly-sweet, I top mine with a scoop of vanilla ice cream and frozen raspberries. Suddenly it’s a perfect little sundae in a cup that still only has about 160 calories, full flavor, and the added bonus of nutrition from the raspberries. You can literally have this for dessert every single day. It’s the most satisfying dessert you can make in 5 minutes, and a million times better than staring at a whole pan of brownies and trying to will yourself not to eat the entire thing. Unless you had a really terrible day – then I strongly advise you to eat as many brownies as you need to.

I tested this recipe at a couple of different lengths and microwave power settings, and found that a few seconds or a few hundred watts makes a fair difference in texture, so use the cooking guide that’s down with the recipe to get your mug brownie just right.


Hot Fudge Mug Brownie

Ingredients

  • 1/2 Tbsp salted butter
  • 1 Tbsp cocoa
  • 1 Tbsp water
  • 1 Tbsp granulated sugar
  • 1 Tbsp all purpose flour

Instructions

  1. Add butter to a mug or a glass and microwave for 10-15 seconds, until butter is completely melted. Stir in cocoa until completely blended. Stir in water until blended. This order is important to keep the brownie batter from clumping. Stir in sugar and then flour.

    *If you want to use unsalted butter, just add a pinch of salt when you add the flour.


    Microwave according to how gooey/fudgey you want your brownie.


    1200 Watt Microwave

    10 Seconds: rich, chocolate goop - excellent with ice cream

    15 Seconds: thicker, sludgey chocolate goop - my favorite

    20 Seconds: solid, cake-ier brownie


    700 Watt Microwave

    15 Seconds: rich, chocolate goop

    20 Seconds: thicker, sludgey chocolate goop

    25 Seconds: solid, cake-ier brownie


Jack O’Lantern Sandwich Cookies

Jack O’Lantern Sandwich Cookies

I didn’t intentionally theme this month based on sandwich cookies, but would that really upset anyone? Sandwich cookies rank with the best desserts – especially when they’re this cute! These Jack O’ Lantern Sandwich Cookies are among my absolute favorite childhood Halloween memories. I grew up helping my mom make them, and to this day I think they’re one of the most delicious treats I know how to make. The cookies are firm without being crunchy, and they have a wonderful sweet, buttery flavor that evokes a cross between a sugar cookie and a perfectly baked shortbread. Filled with a classic vanilla buttercream frosting, they become the kind of sandwich cookie that packaged cookies only dream of being.

The beauty of this recipe is that it doesn’t require any crazy cookie decorating skills. All you have to do is use a great pumpkin cookie cutter (perhaps while you watch The Great Pumpkin), and a paring knife to slice little triangles in the dough for the eyes and noses of your jack o’ lanterns. A yellow buttercream goes between the cookies, so it looks like the jack o’ lantern has a lit candle inside – no extra skill work required. I like these cookies sans mouths because I think they’re elegant in their simplicity, while still looking fun, and most importantly, delicious. Halloween baking always has the potential to go to a very goofy, over-the-top place, where treats look festive, but not necessarily appetizing. It’s one of my baking mantras to never sacrifice how mouth-wateringly edible something looks in the name of making it look cute.

There are a few things you should know before you make these cookies. The first is that the dough does require time to chill, so plan accordingly. The dough itself comes together in all of about five minutes, so you can make a batch now and be ready to cut and bake it tonight. The second is that these cookies are fairly fragile, so one or two will break no matter what you do. You’ll want to eat these broken ones immediately, which is fine, since broken cookies have no calories. It’s a well-known scientific fact. That said, as long as you handle them gently, and frost them with the cookie laying on a flat surface, too much breakage won’t be an issue. You can also roll your dough out slightly thicker than the 1/8 of an inch that I usually go for, to yield sturdier cookies.


Halloween theme aside, this cookie recipe is like the holy grail of roll-and-cut cookie recipes: easy to whip up, buttery without being too soft, crisp without being crunchy, and perfect for all forms of cookie decorating because it’s endlessly versatile. You can use food coloring to make the dough and frosting any color of the rainbow, and cut it into just about any shape you desire. I use this recipe to make Christmas cookies, and heart-shaped cookies for Valentine’s day. You can also substitute any flavor frosting or even a chocolate ganache for the filling, or just bake the cookies a little thicker and top them with frosting and sprinkles – no sandwiching required. Jack O’ Lanterns are easily my favorite way to use this recipe because Halloween is the best, but I won’t blame you if you find yourself loving this recipe for beautiful frosted Christmas cookies instead!

Jack O'Lantern Sandwich Cookies

Ingredients

Jack O' Lantern Sugar Cookies

  • 3/4 cup butter, softened
  • 1/4 cup sugar
  • 1/4 cup brown sugar
  • 1 egg yolk
  • 12 drops yellow food coloring
  • 4 drops red food coloring
  • 1 3/4 cups flour
  • 1/8 tsp salt
  • 3/4 tsp baking powder

Vanilla Frosting

  • 1/2 cup butter
  • 1 1/2 cups powdered sugar, divided use
  • 1 Tbsp milk
  • 2 dashes salt
  • 10 drops yellow food coloring
  • 1/4 tsp vanilla

Instructions

  1. Make the cookie dough: cream together butter and sugars. Beat in the yolk, and red and yellow food colorings.

    2. Stir remaining ingredients together, and add to butter mixture. Mix well. Chill for 4 hours or overnight.

    3. Roll dough to 1/8" - 1/4” thickness, and cut into pumpkin shapes with a cookie cutter. Using a small, sharp knife, cut triangle eyes and noses on half of the pumpkins. You can also draw curved lines with the tip of a knife on the surface of the cookies, to mimic the ridges on a real pumpkin - just be careful not to cut all the way through the cookie.

    4. Bake at 350° F for 8 - 10 minutes, or until the edges are just barely, or just about to, brown. Cool completely on a wire rack.

    5. To make the frosting, cream together butter and 1 cup of the powdered sugar. Stir in vanilla, salt, and milk. Stir in remaining powdered sugar. When sugar is completely incorporated, add food coloring and stir until frosting is uniform. Optional: Whip in a stand mixer on high speed, to yield more fluffy, voluminous frosting.

    5. When completely cool, spread the non-face pumpkins with the icing, and top with the pumpkins with faces. DO NOT try to press the top cookies down to make the icing squeeze up through the cut-outs - it will just break the cookies.


Chocolate Peanut Butter Sandwich (Wedding) Cookies

Chocolate Peanut Butter Sandwich (Wedding) Cookies

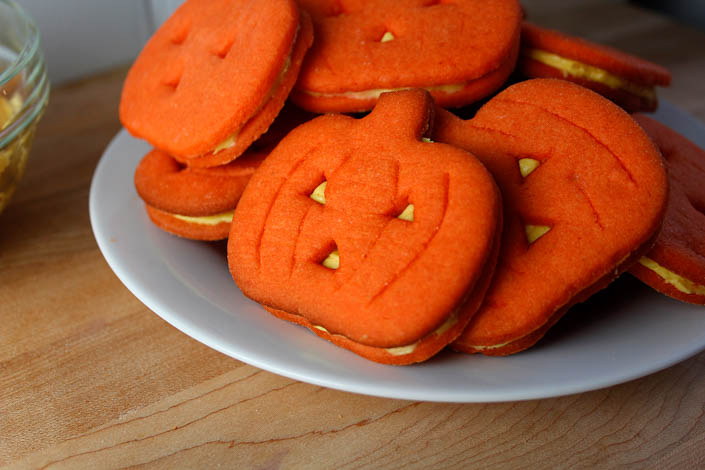
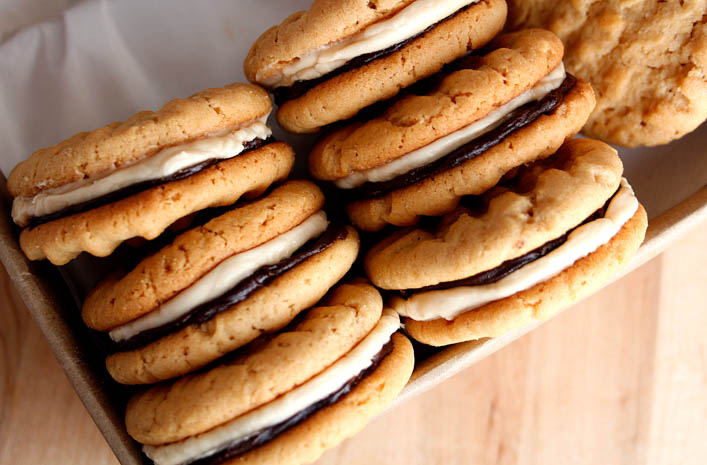
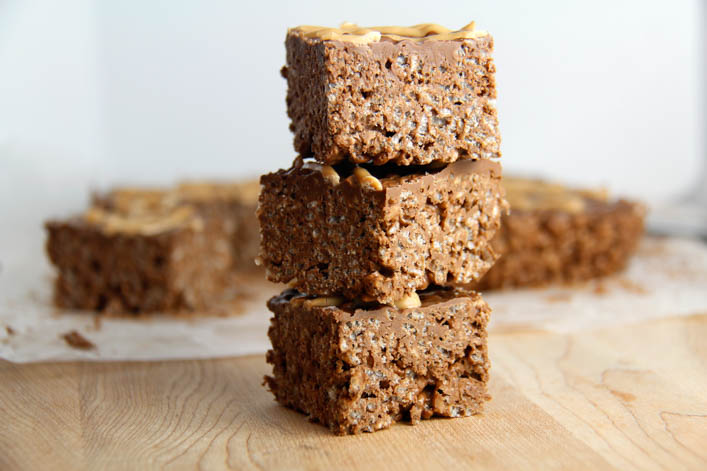
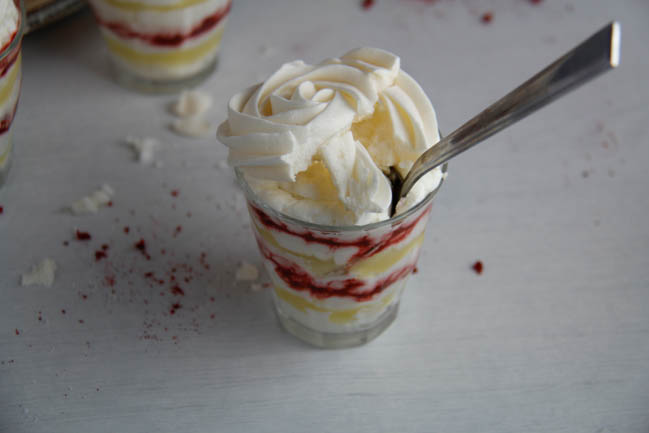
A year ago today, I married Bobby. It was truly the best day I could ever have imagined, but the planning was incredibly stressful. I did a lot of the detail work myself – I made the invitations and a lot of the centerpieces, which, looking back, I don’t really recommend. I would have enjoyed the planning process a lot more if I’d been a little more hands-off. One DIY thing that I highly recommend is making baked goods for wedding favors. But not just any baked goods: these peanut butter and chocolate sandwich cookies are absolutely perfect in every way. They’re delicious (we got SO many compliments on them), they freeze very well, they’re that wonderful combination of salty/sweet, chewy/crunchy – and they look super cute in little boxes, tied with ribbon.

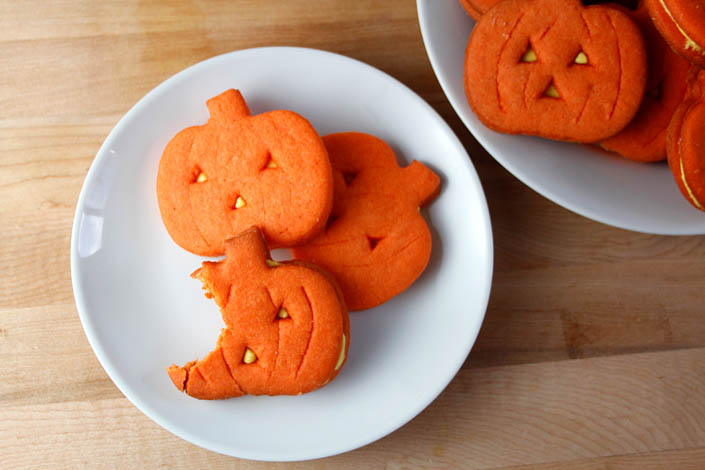
I asked my mom to make the favors for my wedding, partially to save money, and partially to send guests home with a favor that they would actually enjoy having. The best wedding favors are edible, tasty, and of course, visually pleasing, with bonus points if you can personalize them with a simple tag or sticker added to the packaging. We decided on peanut butter and chocolate for the cookies, since I chose a white chocolate raspberry wedding cake – something Bobby had absolutely no interest in eating. If you read my last post, you know that peanut butter and chocolate is the only flavor combination in the world, according to Bobby.

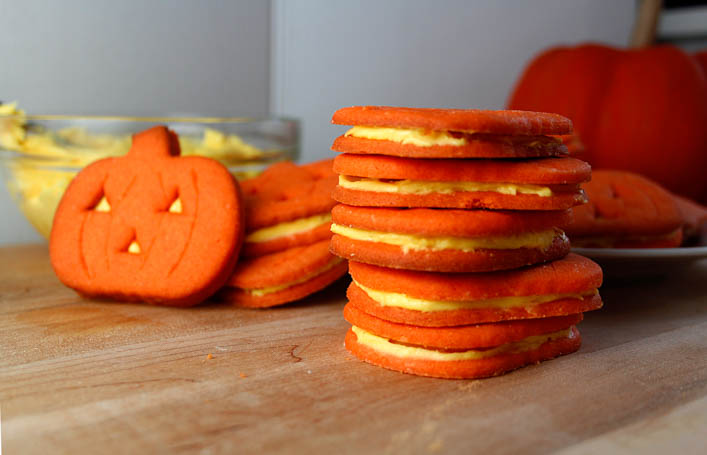
We were inspired by Flourless Peanut Butter Chocolate Ganache Sandwich Cookies from Two Peas & Their Pod, and didn’t do a lot to change the look of the cookie itself, because they really are stunning. But the original version wasn’t exactly what I was looking for flavor-wise, or make-ahead-wise, so we had to do some serious recipe experimentation.

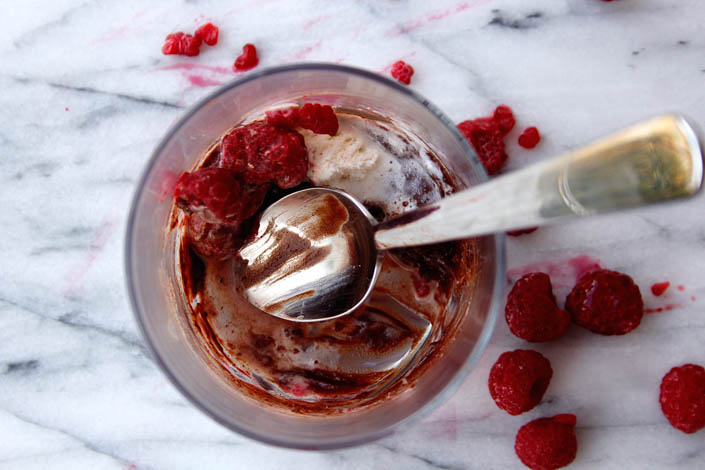
The first task was finding a peanut butter cookie recipe that was stiff enough to sandwich without falling apart, but soft enough to give when bitten into, so the frosting wouldn’t squish out the sides. It also had to freeze well, so it could be made ahead of time – I can’t imagine how we would’ve pulled this off if my mom hadn’t been working on them in the months leading up to the wedding. After rounds of testing with different brands of peanut butter, flourless vs flour-filled dough (the version we made is not gluten-free, but the original is, so give it a look if you want something gluten-free), and different levels of sweetness, we settled on our cookie, and got to work creating the fillings. We loved the way Two Peas & Their Pod did it, piling on a sweet, creamy, peanut butter filling and a rich, chocolate ganache, but needed to experiment with them to make sure the flavors went perfectly with our revised peanut butter cookie. The thing about chocolate and peanut butter is that you have to be very careful with the balance of sweetness/saltiness/bitterness, to keep the flavor from being cloying or bland. We used my brothers as taste testers, and had them try so many combinations that they actually started joking about wanting to eat anything but wedding cookies. They’ve gotten over it, I think, because the batch I made for this post got eaten in all of two hours, once I’d finished photographing it.

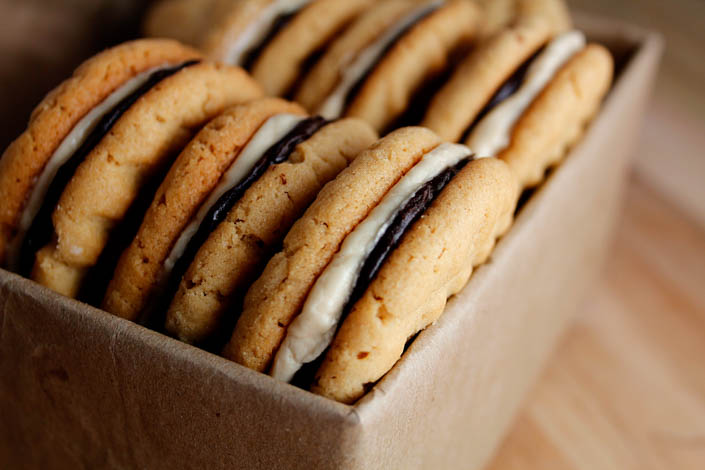
We put three cookies in each favor box, which meant we had to make about 300 of them – 600 peanut butter cookies to sandwich together. Starting about two months out from the wedding, we made the peanut butter cookies and the fillings in large batches, frosted and sandwiched them, wrapped them well, and then immediately froze them. We weighed the dough and the exact amount of frosting that went on each cookie, so they’d be perfectly uniform. They keep so well in the freezer, even with the frosting, that when they defrost they taste and feel like they were baked that morning. They’re little peanut butter and chocolate miracles. We put them in favor boxes the evening before the wedding, straight from the freezer. Since the frosting was rock-solid, they were easy to package neatly, and they defrosted perfectly overnight.

The process of making tons of these cookies wedding-perfect is time-consuming and repetitive, and demands attention to detail and lots of freezer space. It would be monumentally more difficult to execute for a very large wedding, especially if you’re not already an experienced baker. That said, these can be made literal months in advance – so you’ll have plenty of time to practice, and the effort yields superbly satisfying results. The recipe I’m posting here is scaled to make about 36 sandwich cookies, as opposed to 300, so the concept is perfect for smaller events as well. If you don’t require perfection and uniformity, you can skip weighing the dough and fillings, and the results will still be completely delicious. It’s my plan to make these every October 8th for the rest of my life…and freeze a bunch and save them to eat later in the year, because why not? They will always remind me of the most wonderful evening, being surrounded by my friends and family, wearing my princess dress, and marrying the love of my life. That’s a lot of pressure to put on a cookie, but there’s no cookie better suited than these.

Chocolate Peanut Butter Sandwich (Wedding) Cookies

This recipe is heavily adapted from Peanut Butter Chocolate Ganache Sandwich Cookies from Two Peas & Their Pod

Ingredients

Peanut Butter Cookies

  • 2 1/2 cups flour 300g
  • 1 tsp baking powder
  • 1 tsp baking soda
  • 1/4 tsp salt
  • 14 Tbsps butter 198g
  • 1 cup sugar 200g
  • 1 cup brown sugar 215g
  • 1 cup + 2 Tbsps peanut butter 284g
  • 2 eggs

Creamy Peanut Butter Frosting

  • 2 Tbsps peanut butter 32g
  • 1 Tbsp butter, softened 14g
  • 3 Tbsps powdered sugar 25g
  • 2 Tbsp + 1 tsp milk
  • 1 cup, scant powdered sugar 115g

Chocolate Ganache

  • 1/2 cup semi-sweet chocolate chips 85g
  • 1/4 cup heavy cream
  • 4 Tbsps salted butter 56g
  • 6 Tbsps cocoa 30g

Instructions

  1. Make the cookies: stir together flour, baking powder, baking soda, and salt. Set aside. Cream the butter with the two sugars, and then cream in the peanut butter. Stir in the eggs.

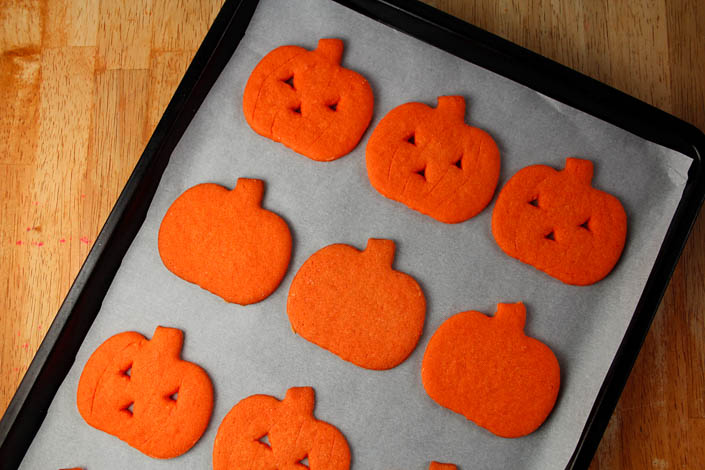
    2. Chill the dough at least 4 hours, or overnight. Roll into 18 g balls, and place on baking sheet. Press the balls with the back of a fork to create a criss-cross pattern on the tops. Chill dough balls while preheating oven to 350 degrees (or while previous tray is baking). Bake for 7 minutes, 40 seconds; turn tray, bake for 2 minutes. Cool on wire rack.

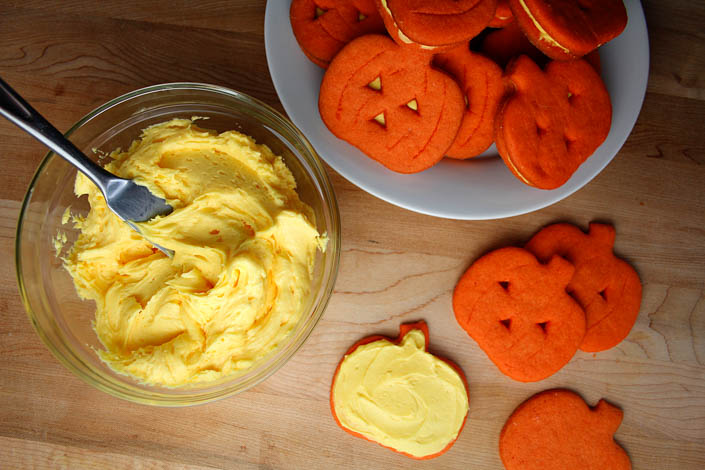
    3. Make the peanut butter frosting by adding all of the ingredients to a mixer in the order listed, and beating until well combined after each addition of sugar, and then until fluffy. 

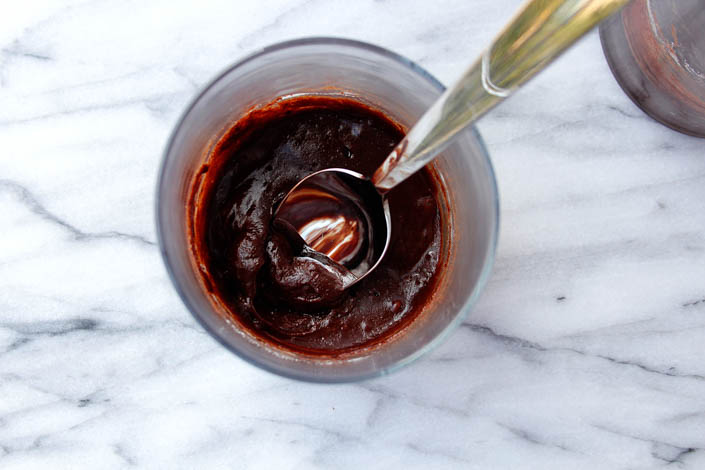
    4. To make the chocolate ganache, heat the heavy cream in the microwave just until very warm (for us, that was 25 seconds). Pour over chocolate chips in a heavy bowl. Let sit 1 minute, then stir until smooth. Melt the butter in a separate bowl, and stir in the cocoa until smooth. Combine the two chocolates. Allow to cool to room temperature.

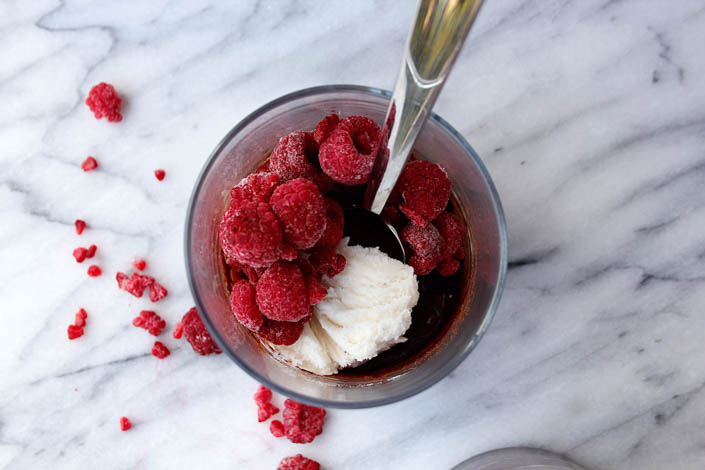
    5. To assemble the cookies, place 8g of ganache (roughly 1/2 Tbsp) on one cookie, and 16g of peanut butter frosting on another cookie. Press the two cookies gently together. 

    Cookies will be good in the freezer for up to a year, but will be at their best quality if used within 4 months of freezing. 


Bobby’s Surprise 30th Birthday Dinner (and Reese’s Cake)!

Throwing a surprise party is not for the faint of heart. All the planning and subterfuge is exhausting, particularly when you’re virtually incapable of asking for help. I had planned to go all out with a huge party for Bobby’s 30th, but then realized that I had neither the money nor the will to pull that off, so I changed tack – I threw him a surprise dinner with all of his closest friends. It was easy to switch since I realized this early enough, and a small gathering fit his personality better than a giant blow out would have anyway – thank goodness for my sanity.

I made a dinner reservation at The Smith in Penn Quarter, DC, which is an incredible spot. It’s got a very bright, lively atmosphere and the decor is all subway tiles and huge, open windows. It’s very New York cool. The food and drinks are great too – for cocktails I like the “Smoke ‘Em if You Got ‘Em” because I’m a mezcal fan – it’s fruity and smoky and perfect for a warm summer evening. I didn’t take a lot of photos at dinner because I’m just plain bad at remembering to do things like that. I get caught up in the moment and somehow always regret not having photographic evidence – there’s got to be a sweet spot between living in the now and capturing it for later, but I haven’t quite found it yet.

. ……  

I had our friends go to the restaurant and get seated, and then I brought Bobby a few minutes later. We walked in, and I made a bee-line towards them. Bobby followed, confused of course, because we hadn’t even asked for a table, and then realized what was going on. If you’ve ever thrown a surprise party, you’ll know what a pleasure it is to see all the planning finally come together. I turned around to watch Bobby’s face break into a huge grin as everyone shouted “Surprise!” Or, more accurately, I think they shouted “Bobby!!!” – I was a little distracted at that point, overwhelmed with sheer relief that we’d pulled it off. There was lots of hugging and Bobby shouting “Holy shit! You guys tricked me!” Some of our friends live a few hours away, so it was especially nice to be reunited with everyone for such a fun occasion.

After dinner, we went to the hotel suite I’d booked, so that we could have a few more drinks – and cake! – without spending all of our money. Spending all of your money on drinks at bars in DC is absurdly easy to do if you start too early – pre-gaming is the only way to avoid it. We toasted to Bobby, and to turning 30, and to all being able to celebrate together, and watched him blow out the candles on his birthday cake. The cake I made was always going to be a Reese’s cake, because as far as Bobby is concerned, there is no other flavor profile worth his time. When you’ve been with someone long enough, and made a good number of peanut butter and chocolate birthday cakes, you have to stretch a little to make the concept seem fresh and exciting. Thankfully, there are more than a few ways to cake a Reese’s, and the internet led me to this beautiful cake from Life Love and Sugar. 

I didn’t realize at the time that I was going to post this as anything other than a quick Instagram, or I would’ve taken a better picture!

The issue with making the cake was that, although I’ve made plenty of cakes in the past, I am in no way a professional at decorating them. I don’t think I understood crumb coats at all until about two years ago. Two days before the party, I was at Michael’s buying a cake turntable so that I could attempt to frost this all-important 30th birthday cake with those pretty, intentionally textured, Instagram-worthy sides. After a little trial and error, and a batch of  peanut butter frosting that separated for some frustratingly unknowable reason, it was done, and I’m definitely not mad at how it turned out. It’s gratifying to know that the hours I’ve spent watching cake frosting videos on Insta have contributed to my life in such a tangible way. I’m not including the recipe here because I didn’t change anything about it – follow the link above for directions!

We did a little bar hopping later in the night – checking out Cuba Libre to make fools of ourselves attempting to salsa dance, and then heading to a couple of much quieter places near Chinatown. Our friends are all in that stage of life where they’re getting married or buying a house or getting a new puppy, so we had a lot to catch up on. A little after one, we all piled into an Uber to pay a visit to Mr. Abe Lincoln. The DC monuments at night are breathtaking in a way that they never are during the day. There are little-to-no crowds, and everything is lit up with spotlights. It’s incredibly peaceful, and a perfect way to wind down the night, after you’ve spent a lot of time in noisy bars. You can walk down along the reflecting pool to the WWII memorial, and revel in the warm summer air – sans the sun making you all sweaty and 8,000 other tourists hurrying you along. If you’re like us, you’ll bring a “water bottle” with you to keep your buzz going – just a suggestion.

When we were all too hungry and tired to continue our impromptu tour, we returned to our hotel to stuff ourselves with pizza (shout out to Papa John’s for being open until 4am) and more cake, and eventually pass out. The surprise went exactly as planned, and the whole night was relaxing and fun, and about as unpretentious as you can get in a city full of hipsters and politicians. Bobby has said over and over that he truly had no idea that the surprise was going to happen. I never realized I was so sneaky. Even if you don’t have sneaky plans to throw a surprise dinner/party anytime soon, make sure you check out that Reese’s cake – and definitely see the monuments at night if you’re in town.


Balsamic Cherry Chocolate Ice Cream

Balsamic Cherry Chocolate Ice Cream

I’m very big on doing seasonal activities because I think those are the times that I stop and really appreciate the present moment. Making and eating ice cream both seem like perfect ways to relax and spend a little time really enjoying summer before the insanity of fall/holidays/back to school, etc. come rushing towards us. Not to mention it’s the perfect way to impress guests at summer parties. I can’t think of anything more wonderfully extra than scooping up some homemade ice cream at a barbecue or pool party.

Ice Cream Dishes from Crate and Barrel

Ice cream is one of those things that seems difficult to make, but I think that’s just because it requires several hours and special equipment to do it right. Most people (myself included, until just recently) are perfectly happy buying their ice cream in tubs from the store – making your own in this day and age can feel something akin to churning your own butter! But what are you to do when you think of an amazing ice cream concept that you can’t buy? Well, first you get an ice cream maker. I got this one and it works absolutely beautifully. It’s a little on the pricey side, but it’s easy to use, easy to clean, and does a great job. It’s an especially good investment if you want to make unique flavors or you’re looking to create healthier treats by controlling the sugar you’re putting in.

A while ago, I bought some cherry balsamic vinegar from Secolari, a specialty shop in Columbia, Md. And when I got home, I put some of it on chocolate ice cream because the man at the store told me to. I don’t always do what people at stores recommend, but this guy seemed to know his stuff. Suffice it to say, my life was changed forever. I go through phases where the only dessert I want to eat is ice cream, but the usual flavors can get pretty boring. Cherry balsamic vinegar on ice cream re-energizes it in a whole new way. It adds a warmth and slight savoriness to the flavor that is anything but dull. I decided it was time to take those flavors and create a brand new, swirled Balsamic Cherry Chocolate Ice Cream, and I am so glad I did.

For the base of my ice cream I started with Alton Brown’s Chocolate Ice Cream Recipe, from Good Eats. By itself it’s near perfect, although I did add the tiniest pinch of salt to help the chocolate-y flavor really stand out. Then, I cooked fresh cherries with a little sugar and a good helping of the cherry balsamic vinegar to create the sauce I wanted to swirl into the ice cream. I’m not going to lie to you – this ice cream is basically irresistible. It’s like a perfect chocolate covered cherry translated into something even more decadent. It’s not so heavy on the balsamic that kids won’t like it – although the second time you make it you could definitely add more to amplify the flavor contrast.

The balance of ice cream to cherry balsamic swirl is just right, so you’re not overwhelmed by the cherry parts, but you’re not digging through your container searching for them either. The small cherry pieces in the sauce get kind of chewy when frozen, giving every bite a really wonderful texture. Of course I couldn’t just leave well enough alone and enjoy this ice cream, so I added hot fudge on top. But not just any hot fudge – salted chocolate hot fudge. If you like salty-sweet things, then this is essentially compulsory – the sweet ice cream with the tangy cherries and salty-sweet sauce is nothing short of magic. I made my sauce from scratch, adapting this New York Times recipe. It’s very quick and easy to make, and tastes so much better than the stuff you get out of a jar. I actually hadn’t made my own hot fudge before this, but I don’t plan on going back.

Creating this recipe has cause me to fall down an ice cream rabbit hole. Realizing that I can, in just a few hours, make exist any flavor of ice cream that I can dream up, is weirdly surreal. I guess I always knew that was possible, but making a big batch of any ice cream you want at home seems too good to be true. What a wonderful thing to discover mid-July.  Thank goodness that DC summer is incredibly humid and very hot, so it’s important to eat ice cream almost every day in the name of keeping your sanity. That’s the real reason I’m sharing this recipe and encouraging you to go buy that ice cream maker. I want to help save your sanity. I’m just trying to make the world a better place.

I suddenly have new-found respect for ice cream parlors.


Balsamic Cherry Chocolate Ice Cream

Chocolate ice cream recipe very slightly adapted from Alton Brown's Chocolate Ice Cream Recipe.

Salted hot fudge recipe slightly adapted from Doris's Salty Hot Fudge Recipe, by Kim Severson in the New York Times.

Ingredients

Chocolate Ice Cream

  • 3 cups half-and-half
  • 1/2 cup cocoa
  • 1 cup heavy cream
  • 8 large egg yolks
  • 1 1/4 cup sugar 250g
  • 2 tsps vanilla exract
  • 1 tiny pinch salt

Balsamic Cherry Swirl

  • 8oz fresh cherries
  • 2 Tbsps sugar
  • 2 Tbsps water
  • 3 Tbsps cherry balsamic vinegar

Salted Chocolate Hot Fudge

  • 1/4 cup salted butter
  • 1/4 cup cocoa
  • 1 oz unsweetened chocolate
  • 1/2 cup heavy cream
  • 1/3 cup sugar
  • 1 tsp vanilla extract
  • 1/8 tsp salt

Instructions

Balsamic Cherry Chocolate Ice Cream

  1. Note: This recipe does require an ice cream maker - Makes 1 1/2 Quarts


    Whisk together cocoa and 1 cup of half-and-half in a sauce pan over medium heat, until combined. Stir in the rest of the hal- and-half and the heavy cream. Bring to a simmer. 

    2. Whisk egg yolks until they're slightly lighter in color, and then gradually stir in the sugar. When the cream mixture begins to simmer, remove from heat and temper the eggs and sugar by adding it to them a little at a time until 1/3 has been added. Pour everything in the bowl back into the sauce pan, and stir until well combined. Return the pan to the stove over low heat. Stir frequently until the mixture thickens and reaches 175 degrees F. It should be thick enough to coat the back of a spoon. 

    3. Pour the mixture into a large, shallow dish, and allow to sit out at room temperature for 30 minutes. Stir in the vanilla extract, and transfer the dish to the refrigerator or freezer, covered loosely with paper towel until it reaches 50 degrees F or below - this usually take around 2 hours. You can leave it overnight, but once it cools to 50 degrees, cover the dish tightly. 

    4. While the ice cream mix is chilling, make the balsamic cherry sauce. Pit and quarter the cherries, and add to a sauce pan with the sugar. Let cook for 8-10 minutes over low heat, stirring occasionally until the cherries soften and release a lot of juice. Add the water and balsamic vinegar and cook for an additional five minutes. The mixture will thicken some as it cooks, but should remain fairly thin. Pour into a bowl and chill in the fridge until you are ready to use it. This sauce can be stored in an airtight container for about a week, so you can prepare it ahead of time. 

    5. Churn the ice cream. Pour the 50-degree mixture into an ice cream maker, and process according to the directions for your machine. Add your tiny pinch of salt just before turning on the ice cream maker. While churning, place a 9-inch loaf pan in the freezer. 

    6. After about 25-30 minutes, the ice cream should look like soft serve. At this point, turn off the machine and remove the loaf plan from the freezer. Scoop about 1/5 of the ice cream into the pan, and spread it into an even layer. Top with 1/5 of the balsamic cherry sauce, and continue working in layers like this until you're out of ice cream and sauce. Cover the pan with foil and freeze for at least 2-3 hours to let it solidify. 


Salted Chocolate Hot Fudge

  1. Melt together the butter, and unsweetened chocolate in a sauce pan over medium heat. Add cocoa, sugar, and heavy cream, and stir until the sauce is completely smooth. Remove from heat, and stir in salt and vanilla. Pour over your favorite ice cream. 

    This sauce will keep for at least a week in an airtight container in the refrigerator. 


Vanilla Butterfly Cupcakes

Vanilla Butterfly Cupcakes

Cupcakes have been officially “over” for a while now, but that hasn’t stopped me from eating plenty of them. Trendy desserts are very different from trendy clothes, because even after they stop being the “it” sweet treat, they’re still wonderful. Cupcakes will always be endlessly customize-able, and also the easiest way to transport and share cake. No one turns down a good cupcake, so they’re still worth thinking about – even if they’re not the treat du jour like mermaid toast and cookie cakes.

The most overlooked thing about cupcakes is undoubtedly the cake part itself. Everyone gets carried away with cute toppings and frosting techniques, and a lot of the time the cake is a little dry and the flavor is off. I like to bake as much stuff as I can from scratch, but for basic yellow and chocolate cake, box mixes are a great choice. They require much less work than scratch cakes, they yield consistently nice results, and they’re pretty inexpensive.

When I was about 7, I had a Disney cookbook with a cupcake recipe that I made over and over. I loved that book and that recipe, but the cupcakes were terrible. They were dry, dense, and always had pockets of baking soda that never quite got mixed in properly (this cupcake obsession happened way before my mom got a KitchenAid). I had no idea that the cupcakes were so bad, because I just wanted to eat as much sugar as I could get my hands on. Any cupcake can be improved by putting a tub of frosting on it, like I used to. That 7-year-old metabolism was a beautiful thing, and I miss it.

Fast forward 20 years or so, and I’ve learned that baking a good scratch cake requires specific methods of adding and mixing ingredients. The recipe I like for scratch yellow cake is Fluffy Homemade Vanilla Cake from The Spruce, and the only thing I’ve changed is to increase the vanilla extract. The process involves creaming the butter and sugar until they’re fluffy, adding eggs one at a time, and alternating adding milk and dry ingredients until the batter is smooth. It’s more work than opening a box of mix, adding three other ingredients, and letting the mixer go for a few minutes, but it’s worth it. It’s a great recipe if you’re in the market for a scratch vanilla cake, or if box mixes just aren’t your jam.

Now that we’ve covered the cake part, I can tell you about the decorations that make these cupcakes special. I actually dreamed them up for my boss’ daughter’s birthday, and I couldn’t be happier with how they turned out. She wanted butterflies on the cupcakes, and I didn’t really have time to run out and buy butterfly decorations. Instead, I found a simple butterfly image online and printed it out to use as a template. I used melted white chocolate to pipe the butterflies onto wax paper laid over the template. The best part? You can be absolutely terrible at piping and still have these come out nicely. Since you place them on the cupcakes piping-side-down, they look smooth and no one knows how much you struggled to stay in the lines. After they hardened, I broke them in half, and positioned the wings in the frosting at an angle, to make them look like butterflies perched on top.

I piped a simple buttercream frosting in the same rose shaped swirl I used for my Upside Down Lemon Raspberry Pavlovas, because I love the idea that the butterflies are sitting on sweet pink roses. The method I used for the butterflies can be used to make just about any decoration you can think of – I think the inspiration was from a Pinterest post about spiderweb cupcake toppers, done a similar way. These cupcakes are perfect for little kid birthdays, but they’re not cartoon-y at all, so they’d also make great desserts for a baby shower or an adult birthday. They’re an especially good option if complicated, cutesy decor isn’t your forte, and people will just love how adorable they are – and how great they taste!


Vanilla Butterfly Cupcakes

Cake recipe adapted from The Spruce "Fluffy Homemade Vanilla Cake"

Ingredients

Cupcakes

  • 2 2/3 cups flour 345g
  • 1/2 tsp baking soda
  • 1/2 tsp baking powder
  • 1 tsp salt
  • 1 cup unsalted butter
  • 1 3/4 cups sugar
  • 3 tsps vanilla extract
  • 4 large eggs
  • 1 cup milk

Frosting

  • 1/2 cup unsalted butter
  • 1 1/2 cups powdered sugar - divided use
  • 1/2 Tbsp milk
  • 1/4 tsp vanilla
  • 4 drops red food coloring
  • 2 dashes salt

Butterflies

  • white chocolate, melted

Instructions

  1. Sift together flour, baking soda, baking powder and salt. Set aside. 

    2. Cream butter in a mixer on low speed. Add sugar and vanilla, and beat on medium speed until fluffy, this will take about 10 minutes. 

    3. Add eggs, one at a time, making sure that each is fully incorporated before adding the next one. Mix for five more minutes at medium speed, until batter is light and airy. 

    4. With the mixer still running, add 1/4 of the dry ingredients. When it is fully incorporated, add 1/3 of the milk. Continue alternating dry ingredients and milk until everything has been added to the batter. Stop and scrape down the sides of the bowl as needed. 

    5. Pour batter into cupcake tins, lined with cupcake papers. Bake at 350 degrees for 15-20 minutes, until the tops are golden. 

    6. While the cupcakes bake, prepare the frosting. Cream together butter and 1 cup of the powdered sugar. Stir in vanilla, salt, and milk.

    7: Stir in remaining powdered sugar. When sugar is completely incorporated, add food coloring and stir until frosting is uniform.

    Optional, but highly recommended: Whip frosting in a mixer on high until very fluffy, about five minutes. Frosting keeps well in the refrigerator for several weeks.

    8. To make the butterflies, lay a sheet of wax paper over a printed template of butterfly shapes - see the blog post for a link to a good one! Melt white chocolate chips in a bowl in the microwave, stirring every 20 seconds. Transfer to a piping bag, and pipe the white chocolate over the templates. If you don't have a piping bag handy, you can also melt the white chocolate chips in a Ziplock bag, and cut a small hole in the corner to pipe through. Let butterflies harden completely before peeling them off the wax paper, and setting on the cupcakes. 


Chocolate Peanut Butter Rice Krispie Treats: No Marshmallow, Extra Crispy!

Chocolate Peanut Butter Rice Krispie Treats: No Marshmallow, Extra Crispy!

This recipe was inspired by Mom on Timeout’s No Bake Snickers Crunch Bars, which essentially uses this version of a Rice Krispie treat as a base on which to put peanut buttery nougat and caramel. That sounds lovely and it tastes delicious – of course I tried it, how could I not? However, I found that the only part I was really interested in eating was the Rice Krispie part. I was that person who was just picking off the bottom and top layer and leaving the rest of the dessert on my plate. I know, I’m appalled with myself for wasting so much of a perfectly nice dessert. I set out to turn my favorite part into its own dessert, and with a few minor changes to the original recipe, I’ve achieved what I think is my favorite version of a Chocolate Peanut Butter Rice Krispie Treat.

These are unlike any Rice Krispie treats you’ve had. They’re the crispiest, crunchiest version out there, without being even a little hard or brittle. They’re also loaded with peanut butter and chocolate, so they taste exactly like one of those Little Debbie Nutty Bars. I’m pretty sure if you replaced the peanut butter with caramel, these would essentially be homemade Star Crunch (I may have had a Little Debbie problem growing up). The interesting thing about these treats is that they have absolutely no marshmallow, so they’re not chewy like you might expect. They’re held together with melted chocolate and peanut butter, and chilled briefly to make sure they hold their shape.

This recipe is wonderful because it calls for all of 5 ingredients, and takes 5 minutes to make. It’s made with semi-sweet chocolate, milk chocolate, peanut butter, peanut butter chips, and Rice Krispies. It really doesn’t get much simpler than that. Bobby, who has been known to give speeches about the virtues of Reese’s Cups, loved these, so they’re certain to satisfy any chocolate and peanut butter aficionado. You melt together the semi-sweet chocolate, peanut butter chips, and peanut butter, stir in the Rice Krispies and then press it into a pan. Top with a thin layer of melted milk chocolate, and drizzle with some melted peanut butter chips, and chill for 15 minutes. It’s the last-minute dessert you’ve always  dreamed of, and it’s a little more impressive than plain Rice Krispie treats.

The milk chocolate spread on top is essential to giving these the right amount of sweetness, and for holding them together properly. You can skip the peanut butter drizzle if it seems like more work that you don’t want to do, but I like it because otherwise people assume that this is an all-chocolate dessert, and then they take a bite and feel confused about their lives. I do that to myself enough, I don’t want it to happen to other people, too. The original recipe calls for butterscotch chips and Cocoa Krispies, so this concept is flexible to what you have on hand, and it’ll still end up delicious. These would be perfect to have kids help with, since this recipe is the opposite of complicated, and there’s a lot of stirring and spreading things into a pan involved. And since there’s no baking time, there won’t be any complaining about not being able to eat them immediately. Chilling them is a formality that helps them hold their shape, but we all know that I only put up with that since I needed to take pictures. If I’m just making these for family, we eat them in their just-pressed-into-the-pan state, gooey and falling apart slightly.

5 from 1 vote
Print

Chocolate Peanut Butter Rice Krispie Treats: No Marshmallows

Recipe adapted from Mom on Timeout's No Bake Crunchy Snickers Bars

Ingredients

  • 4 oz semi-sweet chocolate chips
  • 5 oz peanut butter chips - divided use
  • 1/2 cup peanut butter 128g
  • 4 cups Rice Krispies
  • 3 oz milk chocolate chips

Instructions

  1. Melt together semi-sweet chocolate chips, 4oz of peanut butter chips and peanut butter in the microwave, stirring after every 15 seconds. 

    2. Pour Rice Krispies into the melted chocolate peanut butter mixture and stir until well mixed.

    3. Pour mixture into an 8x8 pan lined with wax paper. Smooth with the back of a spoon into an even layer. 

    4. Melt the milk chocolate chips in the microwave, stirring after every 10 seconds. Spread in a thin, even layer over the top of the Rice Krispie treats. Drizzle with melted peanut butter chips. Refrigerate for 15-20 minutes. Remove from pan, and cut into squares. 


Gluten-Free Carrot Cake

Gluten-Free Carrot Cake

I know, I know. Carrot Cake for Easter, how inspired. But let me explain. See, this Carrot Cake is different. This Carrot Cake has the lovely texture and flavor of the Carrot Cake you’ve come to know and love, except that this one is completely gluten-free. Is it especially healthy? Not on your life. I don’t believe in taking all the sugar out of desserts. Is it perfect for gluten-intolerant friends and gluten eaters alike? It most certainly is. And to be perfectly honest, I’m almost as excited about the garnish as I am about the cake itself.

The last thing I wanted to do was pipe buttercream carrots all over the top of my cake. If I’m making something as popular as Carrot Cake, I at least want the topping to be unique. My garnish is made of carrot that I shredded with a microplane, with chopped walnuts, and dried, candied pineapple bits. Sprinkled on the top of the cake in layers, I think this garnish looks bright and fresh. I love the concept of taking fun ingredients from the cake itself and turning them into the garnish. It gives the top of the cake a little more interest, and displays what people can expect to find inside – this is particularly helpful with something as customize-able as Carrot Cake.

This recipe is adapted from What The Fork’s Gluten Free Carrot Cake, and hers was adapted from The Silver Palate Cookbook. Gluten-free baking benefits tremendously from this kind of borrowing and adaptation, and I love it. When recipes go through enough work and transformation, with everyone adding their own improvements, you can end up with some seriously magical desserts.

In the spirit of benefiting the baking community in general, I tested this recipe with King Arthur, Bob’s Red Mill, and Maple Grove Farm’s gluten-free all-purpose baking blends. I very seldom use boxed gluten-free baking mixes, but in this recipe, which includes several heavy ingredients, the lightness that a mix can contribute helps achieve a cake with a great texture. The thing about gluten-free baking mixes is that they vary widely from brand to brand.  King Arthur was the clear stand-out, giving me a delicious cake with a great texture. If you decide to make this recipe, do yourself a favor and use the King Arthur “Measure for Measure” mix.

Bob’s Red Mill uses bean flours in their all-purpose baking mix, which is great in a lot of recipes. But it also gives Carrot Cake a bean-reminiscent flavor. The texture of that test cake was fantastic, but it didn’t have the exact cake flavor I was going for. The Maple Grove Farm’s baking mix is closer to King Arthur’s, and the flavor of that cake was perfect. The texture, however, was very soft, and the cake layers didn’t bake evenly, cratering a little in the center, probably because the Maple Grove Farm mix includes a higher proportion of starch than the King Arthur mix. This kind of variation in mixes is equal parts frustrating and exciting, because while it means you can’t use them interchangeably, it also means that underwhelming results in a recipe made with one mix might be improved by switching to a different one.

Everyone knows the most important part of any carrot cake is the cream cheese frosting, and this one is certainly not lacking in that department. Thick, creamy layers of frosting make this simple gluten-free cake taste like absolute heaven.  This cake is, however, delicious on its own, if you’re inclined to skip frosting to keep the calories low. As always, you can go further and really make this recipe your own. You can swap out the walnuts for pecans if you’d like, boost the flavor by adding shredded coconut (I left it out of this version because coconut and I do not get along very well), or omit the raisins and substitute currants instead. However you make it, this cake is a perfect addition to your springtime festivities. I would know – I’ve been celebrating spring with my test versions of this cake all month!

Gluten Free Carrot Cake

Adapted from What the Fork's Gluten Free Carrot Cake Recipe.

Ingredients

Gluten-Free Carrot Cake

  • 2 1/2 cups King Arthur's "Measure for Measure" Baking Mix 350g
  • 1/2 cup almond flour 45g
  • 3 cups sugar 600g
  • 1 tsp salt
  • 2 tsps baking soda
  • 1 Tbsp cinnamon
  • 1/4 tsp nutmeg
  • 1/4 tsp cloves
  • 1 1/2 cups walnuts, chopped 130g
  • 1 1/2 cups butter, melted
  • 1/4 cup golden raisins 40g
  • 1 8oz can crushed pineapple, mostly drained - not too dry 100g drained weight
  • 4 large eggs
  • 1 1/3 cups pureed, cooked carrots (about 5 medium carrots) 320g, pureed

Cream Cheese Frosting

  • 8 oz cream cheese
  • 14 Tbsps butter
  • 1 3/4 cups powdered sugar 356g
  • 2 tsps vanilla

Garnish

  • 4 Tbsps carrot, shredded with a zester or microplane
  • 2 Tbsps chopped walnuts
  • 2 Tbsps candied pineapple, chopped small
  • 1 tsp cinnamon

Instructions

  1. 1. Preheat oven to 350 degrees. Generously butter 3 9-inch cake pans and dust with baking blend.

    2. In a large bowl, whisk together the gluten-free flour blend, almond flour, sugar, salt, baking soda, cinnamon, nutmeg, and cloves. Mix in the walnuts to coat them with the flour, then mix in the melted butter. Fold in the  raisins and the crushed pineapple, and set the bowl aside.

    3. In a medium bowl, lightly beat the eggs. Whisk in the pureed carrots and mix until well combined. Pour the wet ingredients into the dry ingredients, and gently mix until there isn't any dry flour. Pour the batter evenly between the 3 cake pans. I had roughly 720g of batter in each of my pans.

    4. Bake on the center rack for 35- 40 minutes, or until a cake tester comes out clean. Let the cakes cool for 15 minutes in the pans before inverting onto wire racks to cool. 

    5. While cakes are baking, prepare your frosting. Cream the cream cheese in an electric mixer until very smooth. Add butter and vanilla and mix well. Gradually add the powdered sugar, and whip on the highest speed until light and fluffy.

    6. For the garnish, stir together carrots and pineapple. Sprinkle on top of the cake in a circle, or whatever pattern you choose. Sprinkle walnuts over top of the carrot/pineapple mixture. Sprinkle cinnamon lightly over the garnish. 


Balsamic Strawberry Nachos

Balsamic Strawberry Nachos

Strawberry Nachos aren’t a particularly new concept in the world of imaginative desserts, but they are a particularly delicious concept. Generally, they consist of some kind of cinnamon-sugar chip base, sweetened strawberries, a whipped cream component, and shaved chocolate. Mine follow all of these rules, but I’ve added the twist of balsamic vinegar with the strawberries to elevate the complexity of the flavors a little. It really takes the recipe from just “tasty” to “no, this plate is mine, go get your own!”

Strawberry Nachos are a perfect spring dessert. They’re quick to make, and don’t require a lot of baking time. The crisp cinnamon sugar chips take a total of 15 minutes in the oven for the whole batch, and all the toppings can be prepared during baking time. The best thing about these nachos is the combination of textures. The crunch of the chips with the soft strawberries and the smooth cream make each mouthful delightful. If you need a beautiful spring dessert, and don’t have time for something involved like Pavlova, these are the perfect solution.  Strawberries aren’t quite in season yet technically, but it doesn’t matter when you’re giving them a flavor boost with some sugar and balsamic vinegar. A lot of recipes that involve balsamic strawberries call for a balsamic reduction. As long as you use very high quality balsamic vinegar, this isn’t necessary for this dish. I use Florida Olive Oil’s 18 Year Balsamic Vinegar.

The cream that goes on top is part Cool Whip and part sour cream, with a little added sugar and cinnamon. It’s light and a little sweet, but also has some tang from the sour cream. It works beautifully with the strawberries and the chips, and has a distinctly different flavor than typical strawberry and cream desserts. Not that there’s anything wrong with those – writing about this recipe suddenly has me thinking of all the wonderful desserts I could make with strawberries when they do fully come into season!

After the chips are piled onto a plate, dolloped with cream and sprinkled with chopped strawberries, the whole dish is topped with shaved dark chocolate and sliced almonds. I can think of very few desserts that wouldn’t be improved by a sprinkle of chocolate and almonds. In Strawberry Nachos, the chocolate adds just a hint of flavor that goes especially well with the balsamic vinegar on the strawberries. Just remember that the actual assembly of this dish should take place right before serving, because the strawberries have a fair amount of liquid, and you don’t want that sitting on the chips for too long, making them soggy. Once you serve them, they’ll disappear quickly enough that the juice won’t be a problem.

I was thinking the other day about how fall baking is my favorite kind, what with all the gourds and stews and heavier components (read: piles of cheese and bread). Now that I’ve really gotten my spring baking rolling, I’m re-considering that stance. I could eat fresh, bright Strawberry Nachos every day, but they’re only truly satisfying in the spring and summer. Who wants a light, fruity dessert on a blustery November day? This April I’m focusing on appreciating the breezy, warm(ish) weather we’ve got here in the DC area, and all the delicious food options that go with that. It’s Strawberry Nacho season, and I plan to enjoy every second of it.


Balsamic Strawberry Nachos

Prep Time 10 minutes
Cook Time 15 minutes
Total Time 25 minutes
Servings 4

Ingredients

Cinnamon Sugar Chips

  • 3 7 inch flour tortillas
  • 1 tsp cinnamon
  • 2 tsps sugar
  • butter or canola oil cooking spray

Balsamic Strawberries

  • 1 1/2 cups strawberries, diced
  • 3 Tbsp sugar
  • 3 tsps high quality balsamic vinegar

Cream

  • 1/4 cup sour cream
  • 1/4 cup Cool Whip or whipped cream
  • 1 Tbsp sugar
  • 1/8 tsp cinnamon

Toppings

  • 2 Tbsp shaved dark chocolate
  • 2 Tbsp slivered almonds, roughly chopped

Instructions

  1. Make the cinnamon sugar chips. Preheat your oven to 350 degrees. Stack the flour tortillas and slice them into eight triangles, like a pizza. I actually use a pizza cutter for this job. Spread the triangles in single layers on two baking sheets lined with foil.

    2. Spray the tortillas with a light coating of cooking spray. Stir together cinnamon and sugar, and sprinkle lightly over the tortillas. Bake each tray for 8 minutes.

    3. While the chips are baking, prepare the toppings. Stir together diced strawberries, sugar, and balsamic vinegar. Set aside. In another bowl, mix sour cream, Cool Whip, sugar, and cinnamon. Cover and refrigerate until it's time to use the cream mixture.

    4. When the chips are done, allow them to cool completely before assembling your nachos. You can make all of the components a day ahead, and store in airtight containers until serving time. Strawberries and cream should be refrigerated.

    5. Assemble the nachos. Place the chips on a serving tray, being careful not to have too many overlapping. Use a spoon to drop small dollops of the cream mixture all over the chips. You want the cream to stay in blobs, rather than spreading it around. Start piling strawberries onto the chips in an even layer, being careful not to pick up too much of the liquid in the bowl. Too much liquid with the strawberries will give you soggy chips in no time!

    6. Top with shaved chocolate and slivered almonds, and enjoy!  

Upside-Down Lemon Raspberry Pavlova

Upside-Down Lemon Raspberry Pavlova

Pavlova is something I’ve dreamed of making ever since I found out about its existence. A light, fluffy meringue crust, covered in whipped cream and fruit? Um yes please. Give me some now. Except Pavlova takes a really long time to make from scratch – the meringue has to be in the oven for literal hours to come out right. It’s not at all difficult to make the meringue, I’m just very impatient when delicious treats take forever to bake. I finally gathered my patience (read: made lots of snacks to eat while the meringue baked) and decided that it was time to give Pavlova a shot.

I used a recipe from Eating Well, waited the prescribed couple of hours for my meringue to bake, and made some lemon curd and whipped cream to top it off. It was completely delicious, but a little too sweet, and very hard to serve. If you’ve ever made meringue, you’ll know that they don’t exactly slice cleanly, or keep well for more than an hour or two, once topped with gooey, wonderful things like lemon curd and whipped cream.

I added a raspberry sauce to subsequent test Pavlovas, to add more dimension to the flavor, and reduced the sugar in the meringue by just a small amount. This resulted in a much more interesting Pavlova that I was certain I wanted to eat approximately all of. The crunch of the meringue with the tart lemon and raspberry and silky cream is the most wonderful combination of textures and flavors. You don’t have to make any of your own fillings, if that seems like too much work – you can get lemon curd and whipped cream pretty readily in stores, and I’ll admit that whisking the lemon curd can feel a little tedious if lemon curd isn’t something you absolutely love. If you do make the fillings yourself, there’s plenty of time to get them all done while the meringue is baking.

The question of how to serve this dessert neatly was answered when I was browsing online and saw some of those frosting roses on top of cupcakes. Here’s a tutorial if you’ve never made them – they’re easy to do, but you do need a special piping tip: an extra large 2D or 1M will work nicely. I’ve known about them for a long time, but I’d never thought to make meringue versions (meringues take too long and all that). After that, it became a question of how to incorporate pretty, white meringue roses without slathering them with lemon curd and cream, as you would with a normal Pavlova. Turning them upside-down was the obvious solution, and I think it worked marvelously.

The Upside-Down Lemon Raspberry Pavlovas are perfect to bring to a party – I’ll be bringing mine to my family Easter celebration. I served mine in these sweet little glasses, but you could use any shot glass that you can fit a spoon into. You don’t have to worry about cutting and serving, since they’re all single-serve, and nearly all the prep can be done ahead of time. All you have to do is pop a meringue rose on top of each one at dessert time, and watch people ooh and ahh over how pretty they are. And then listen to them sigh about how delicious they were!


Upside-Down Lemon Raspberry Pavlovas

Meringue recipe adapted from Eating Well: Lemon Pavlova

Lemon Curd recipe from from Eating Well: Lemon Pavlova

Servings 12 Pavlovas

Ingredients

Meringue Roses

  • 2 egg whites
  • 1/3 cup superfine sugar
  • 1/8 tsp cream of tartar
  • pinch of salt

Lemon Curd

  • 1 egg
  • 2 egg whites
  • 3/4 cup granulated sugar
  • 2/3 cup lemon juice
  • 1 Tbsp freshly grated lemon zest
  • 1 Tbsp butter

Raspberry Sauce

  • 1 cup frozen raspberries
  • 2 Tbsps powdered sugar

Whipped Cream

  • 1 cup heavy whipping cream
  • 2 Tbsps powdered sugar

Instructions

  1. Start by making the meringue. Add egg whites, cream of tartar, and salt to a mixer, and beat on medium-high speed until soft peaks form. Make sure that your bowl is very, very clean before starting, because any grease will damage your results. If you don't have superfine sugar, you can blend it in a food processor  - I used my NutriBullet - for a few seconds. Make sure not to let it go too long, or it will just turn into powdered sugar. Increase the mixer speed to high, and gradually add the sugar. Whip until stiff peaks form and the mixture is glossy white. 

    2. Line a baking sheet with parchment paper. Turn one of your serving glasses upside down and trace the rim on the parchment paper, to create a guide for how large to pipe your meringue. Make 12-15 circles, and turn the paper over so the pencil marks are on the reverse.

    3. Spoon the meringue mixture into a piping bag, fitted with an extra large 2D or 1M tip. Pipe roses onto the parchment paper, starting in the center of each circle and moving in a swirl outward. Bake at 200 degrees for 1 hour, on the lowest rack in the oven. When baking time is up, turn off the oven, and prop open the door slightly. Allow meringue roses to dry completely in the oven for about 1 hour. When they're finished, meringues will be dry and light. 

    4. While the meringues are baking, make the lemon curd, raspberry sauce, and whipped cream. For the lemon curd, whisk together all ingredients except butter in a small sauce pan. Place pan over low heat, add butter, and whisk consistently for 5-12 minutes, depending on the temperature you're using. Mine took almost exactly 12 minutes. When you can coat a spoon with the curd and leave a mark when you run your finger across the curd on the spoon, it's done. Press curd through a fine-meshed sieve to remove solids (like the zest). Chill completely in the refrigerator before using. This can be make up to a week ahead of time. 

    5. For the raspberry sauce, combine frozen raspberries and powdered sugar in a sauce pan over low heat. Stir frequently until the raspberries soften and break down, and the sugar is completely dissolved. Press through a fine-meshed sieve to remove seeds. Store in the refrigerator. This can be made ahead, also. 

    6. For the whipped cream, place your mixer bowl and whisk attachment in the freezer for at least ten minutes. Remove from freezer and pour cream and sugar into the bowl. Whip at high speed until the cream thickens and stiff peaks form - this should only take a minute or two. 

    7. To assemble the Upside-Down Pavlovas, put whipped cream and lemon curd into piping bags, and pipe alternating layers of cream, curd and raspberry sauce into shot glasses until they're full. To create the layers of raspberry sauce, just drizzle a little with a spoon and tilt the glass to swirl it around and create an even layer. Make sure that the last layer is whipped cream. Just before serving, top each glass with a meringue rose (the meringue will go soft if put on more than a few minutes ahead of time).