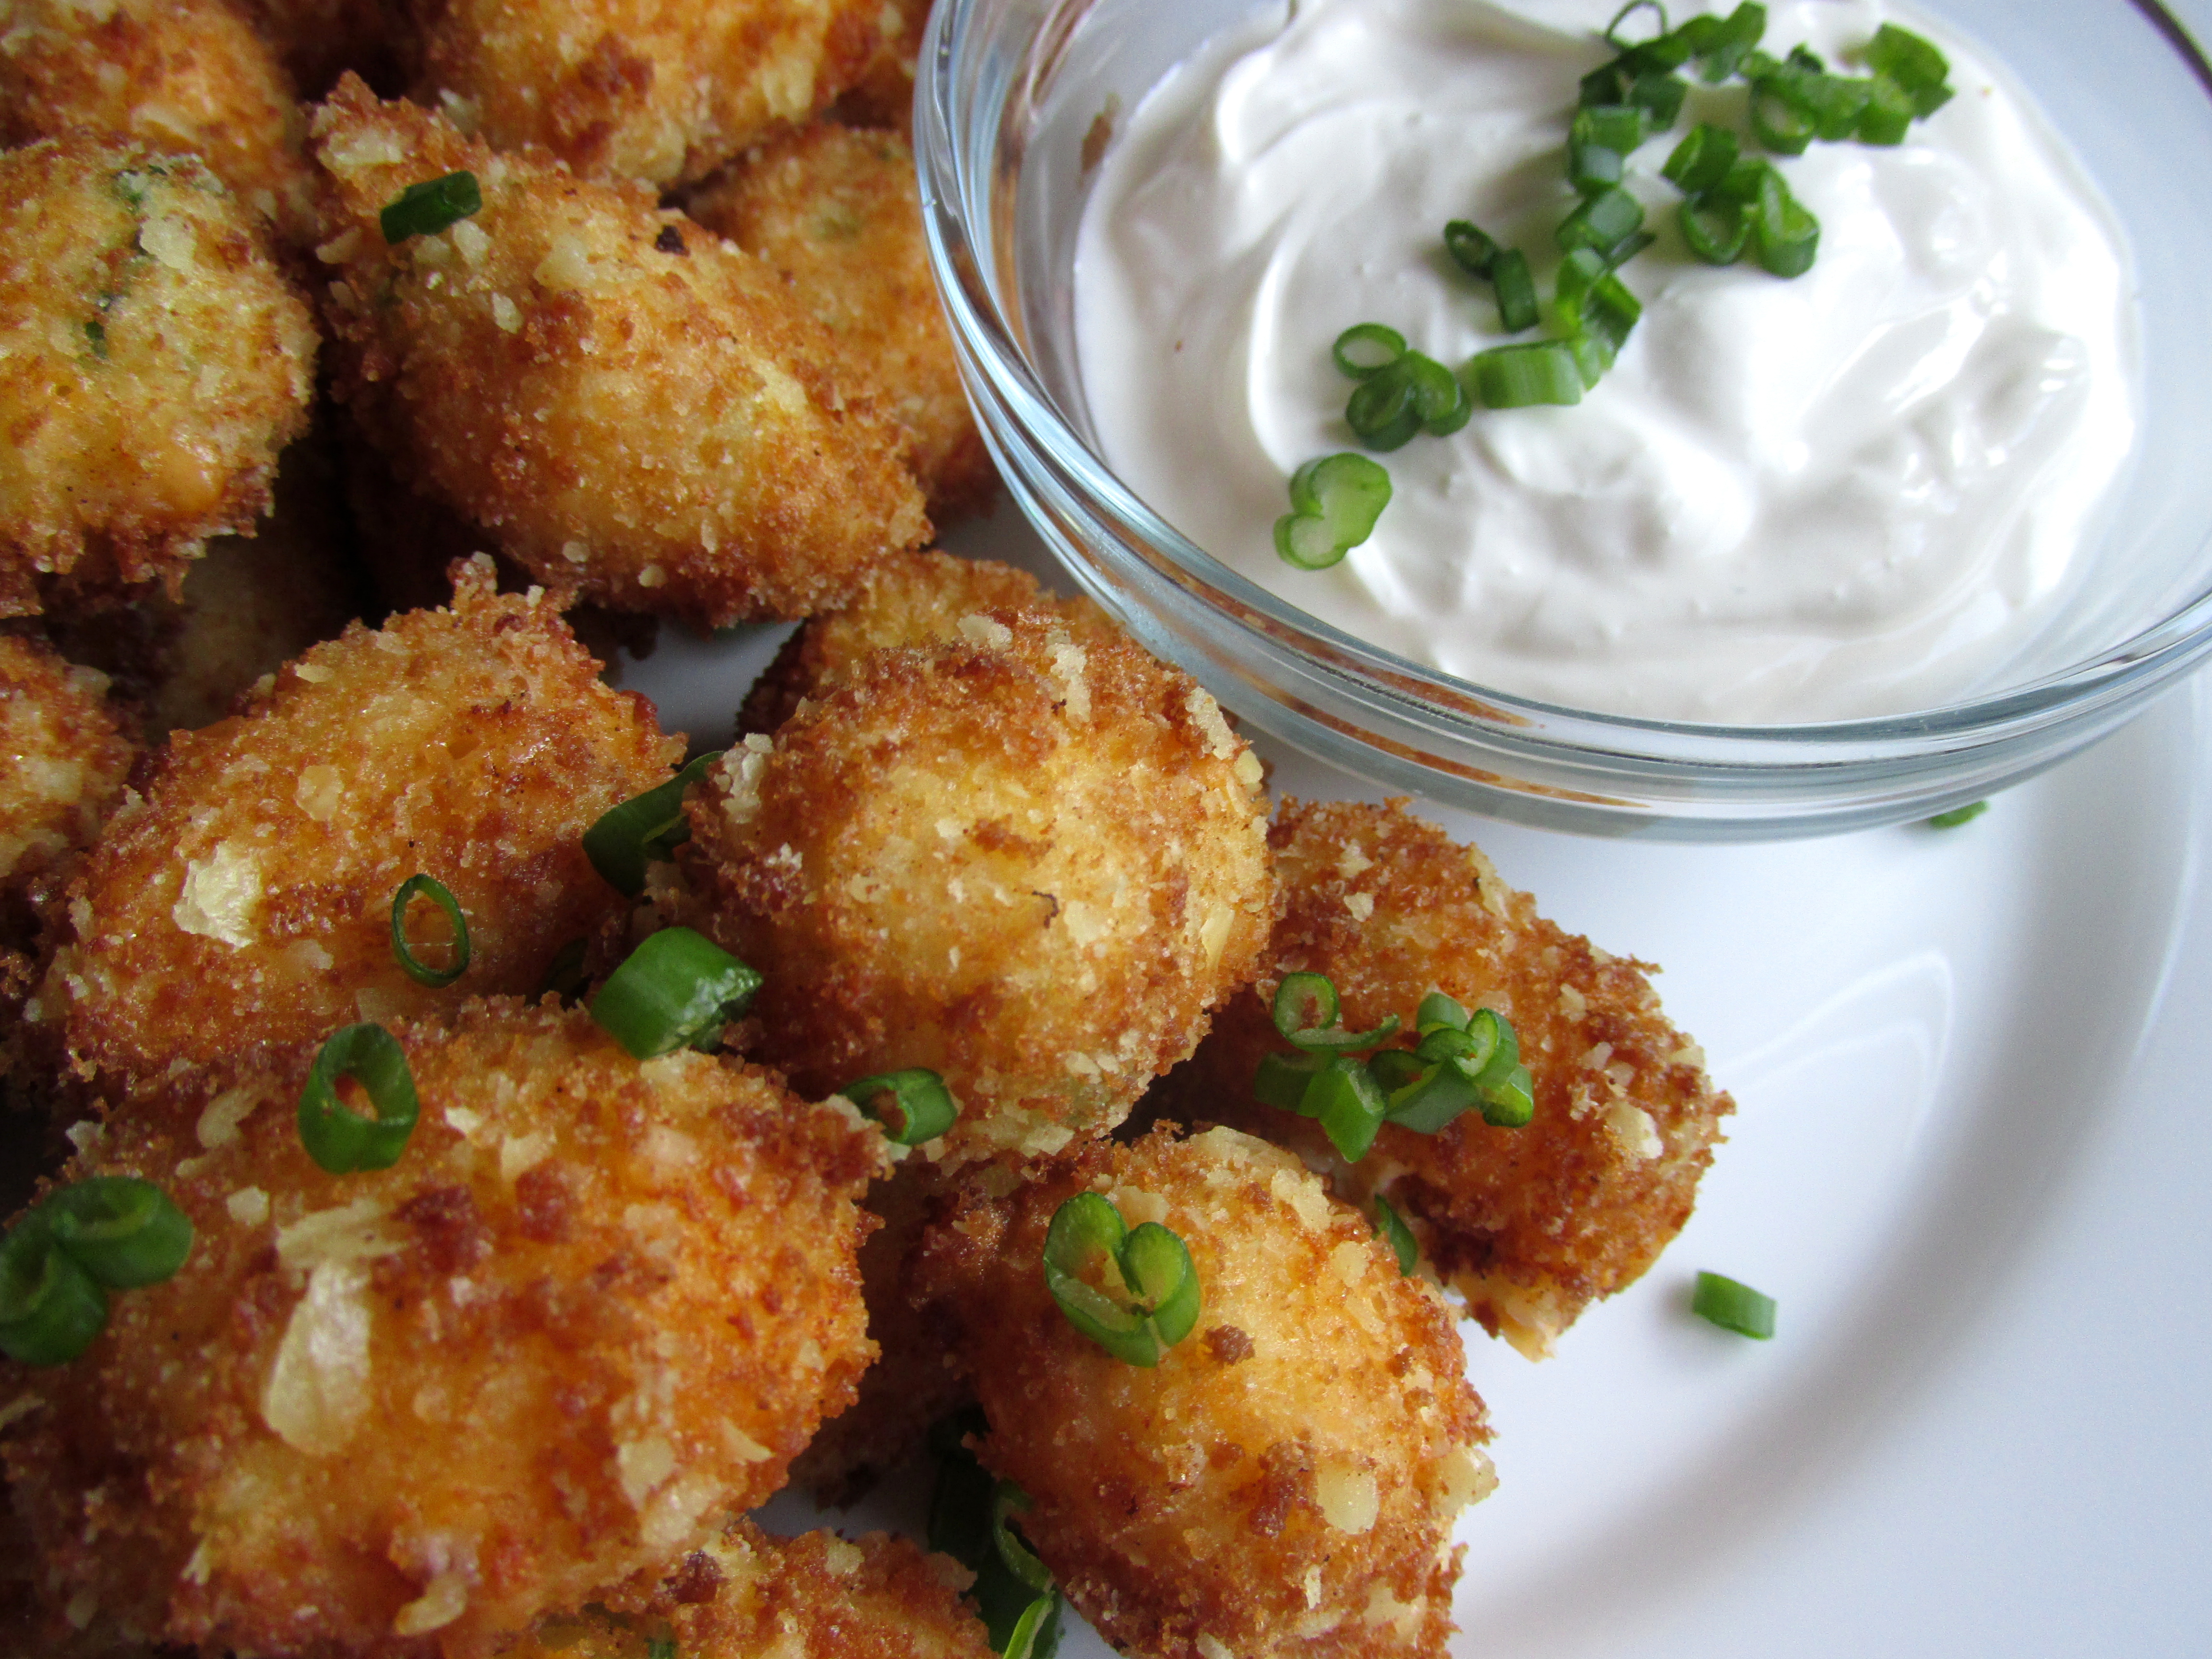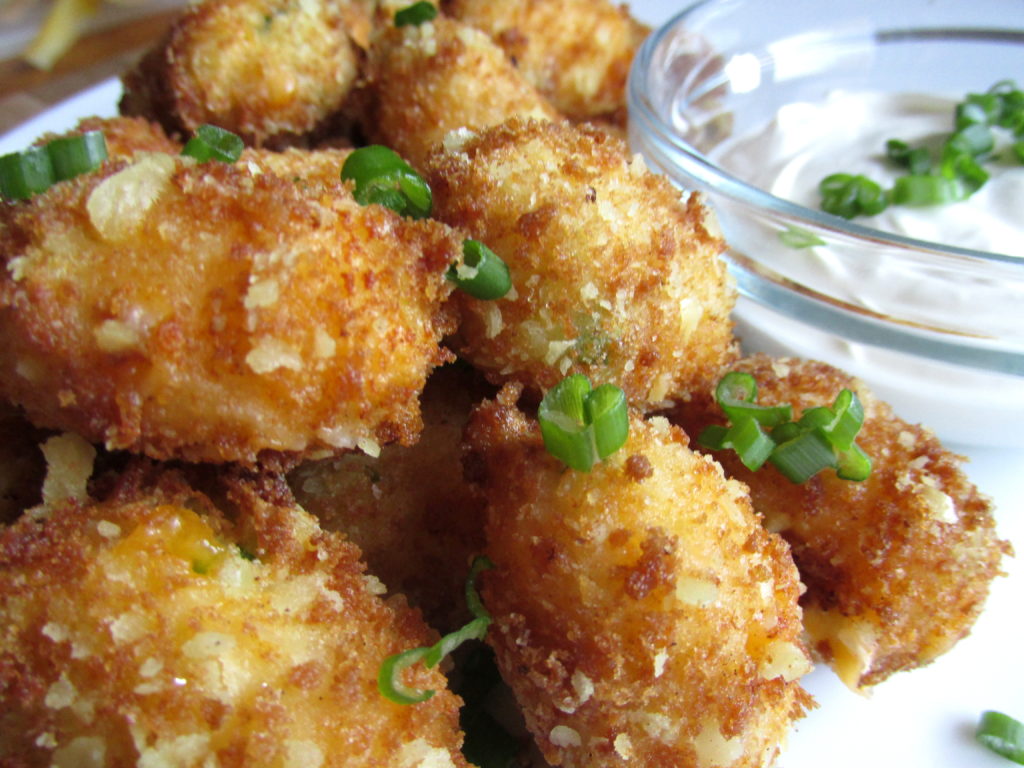
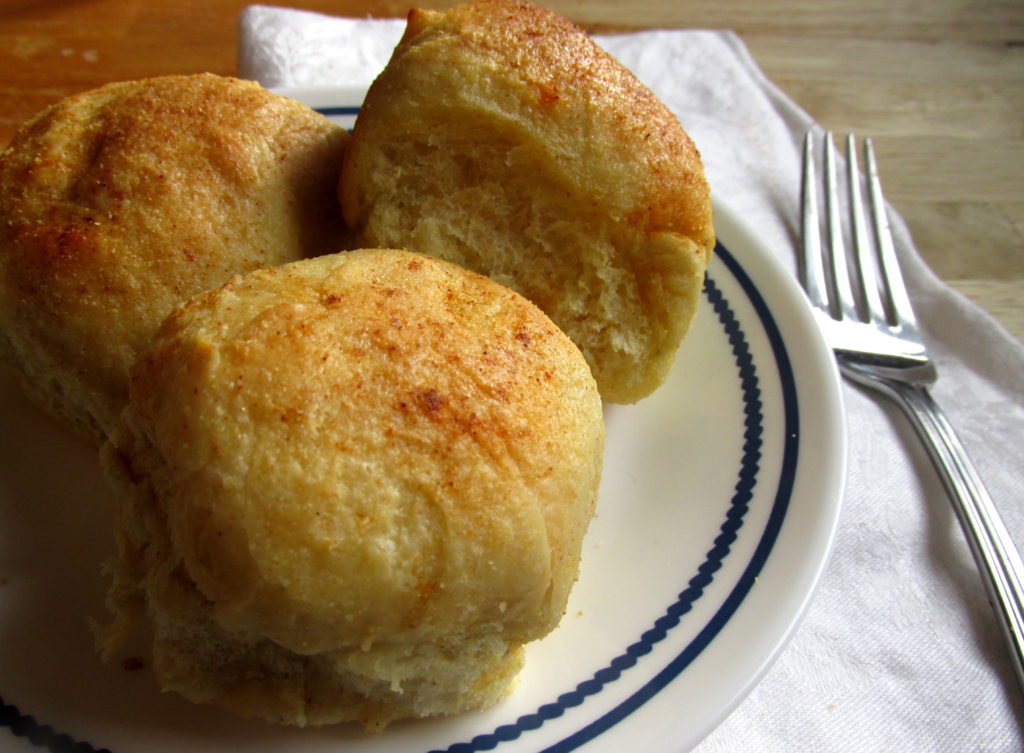
When you do a search for Super Bowl snacks, you’re inevitably greeted with photos of cheese plates arranged to look like football stadiums, and cute little cupcakes topped with green grass frosting and tiny field goal posts. There’s certainly nothing wrong with these if you have the time for them, but I can’t say I know anyone who does! When I’m planning Super Bowl snacks, I’m thinking easy, throw-in-the-oven food that doesn’t require days of prep work ahead of time. Stuffed Corn Bubbles have everything you could want in a party appetizer, or even an after-school snack for the kids. The active cooking time is only about thirty minutes, the recipe makes a ton, and they reheat well. They have a slightly crisp outside, a fluffy yet doughy inside, and can be filled with anything you desire – in my case, buffalo chicken dip.
This is another recipe that I’ve had forever – the original came from Fleischmann’s Yeast, although I discovered it on Recipe Link. My version is quite different, as I’ve added a lot more flavor to the dough itself. Onion powder, garlic powder, cumin, chipotle powder, and chili powder flavor the dough, and combined with their outstanding texture, these go way beyond typical stuffed-dough recipes.
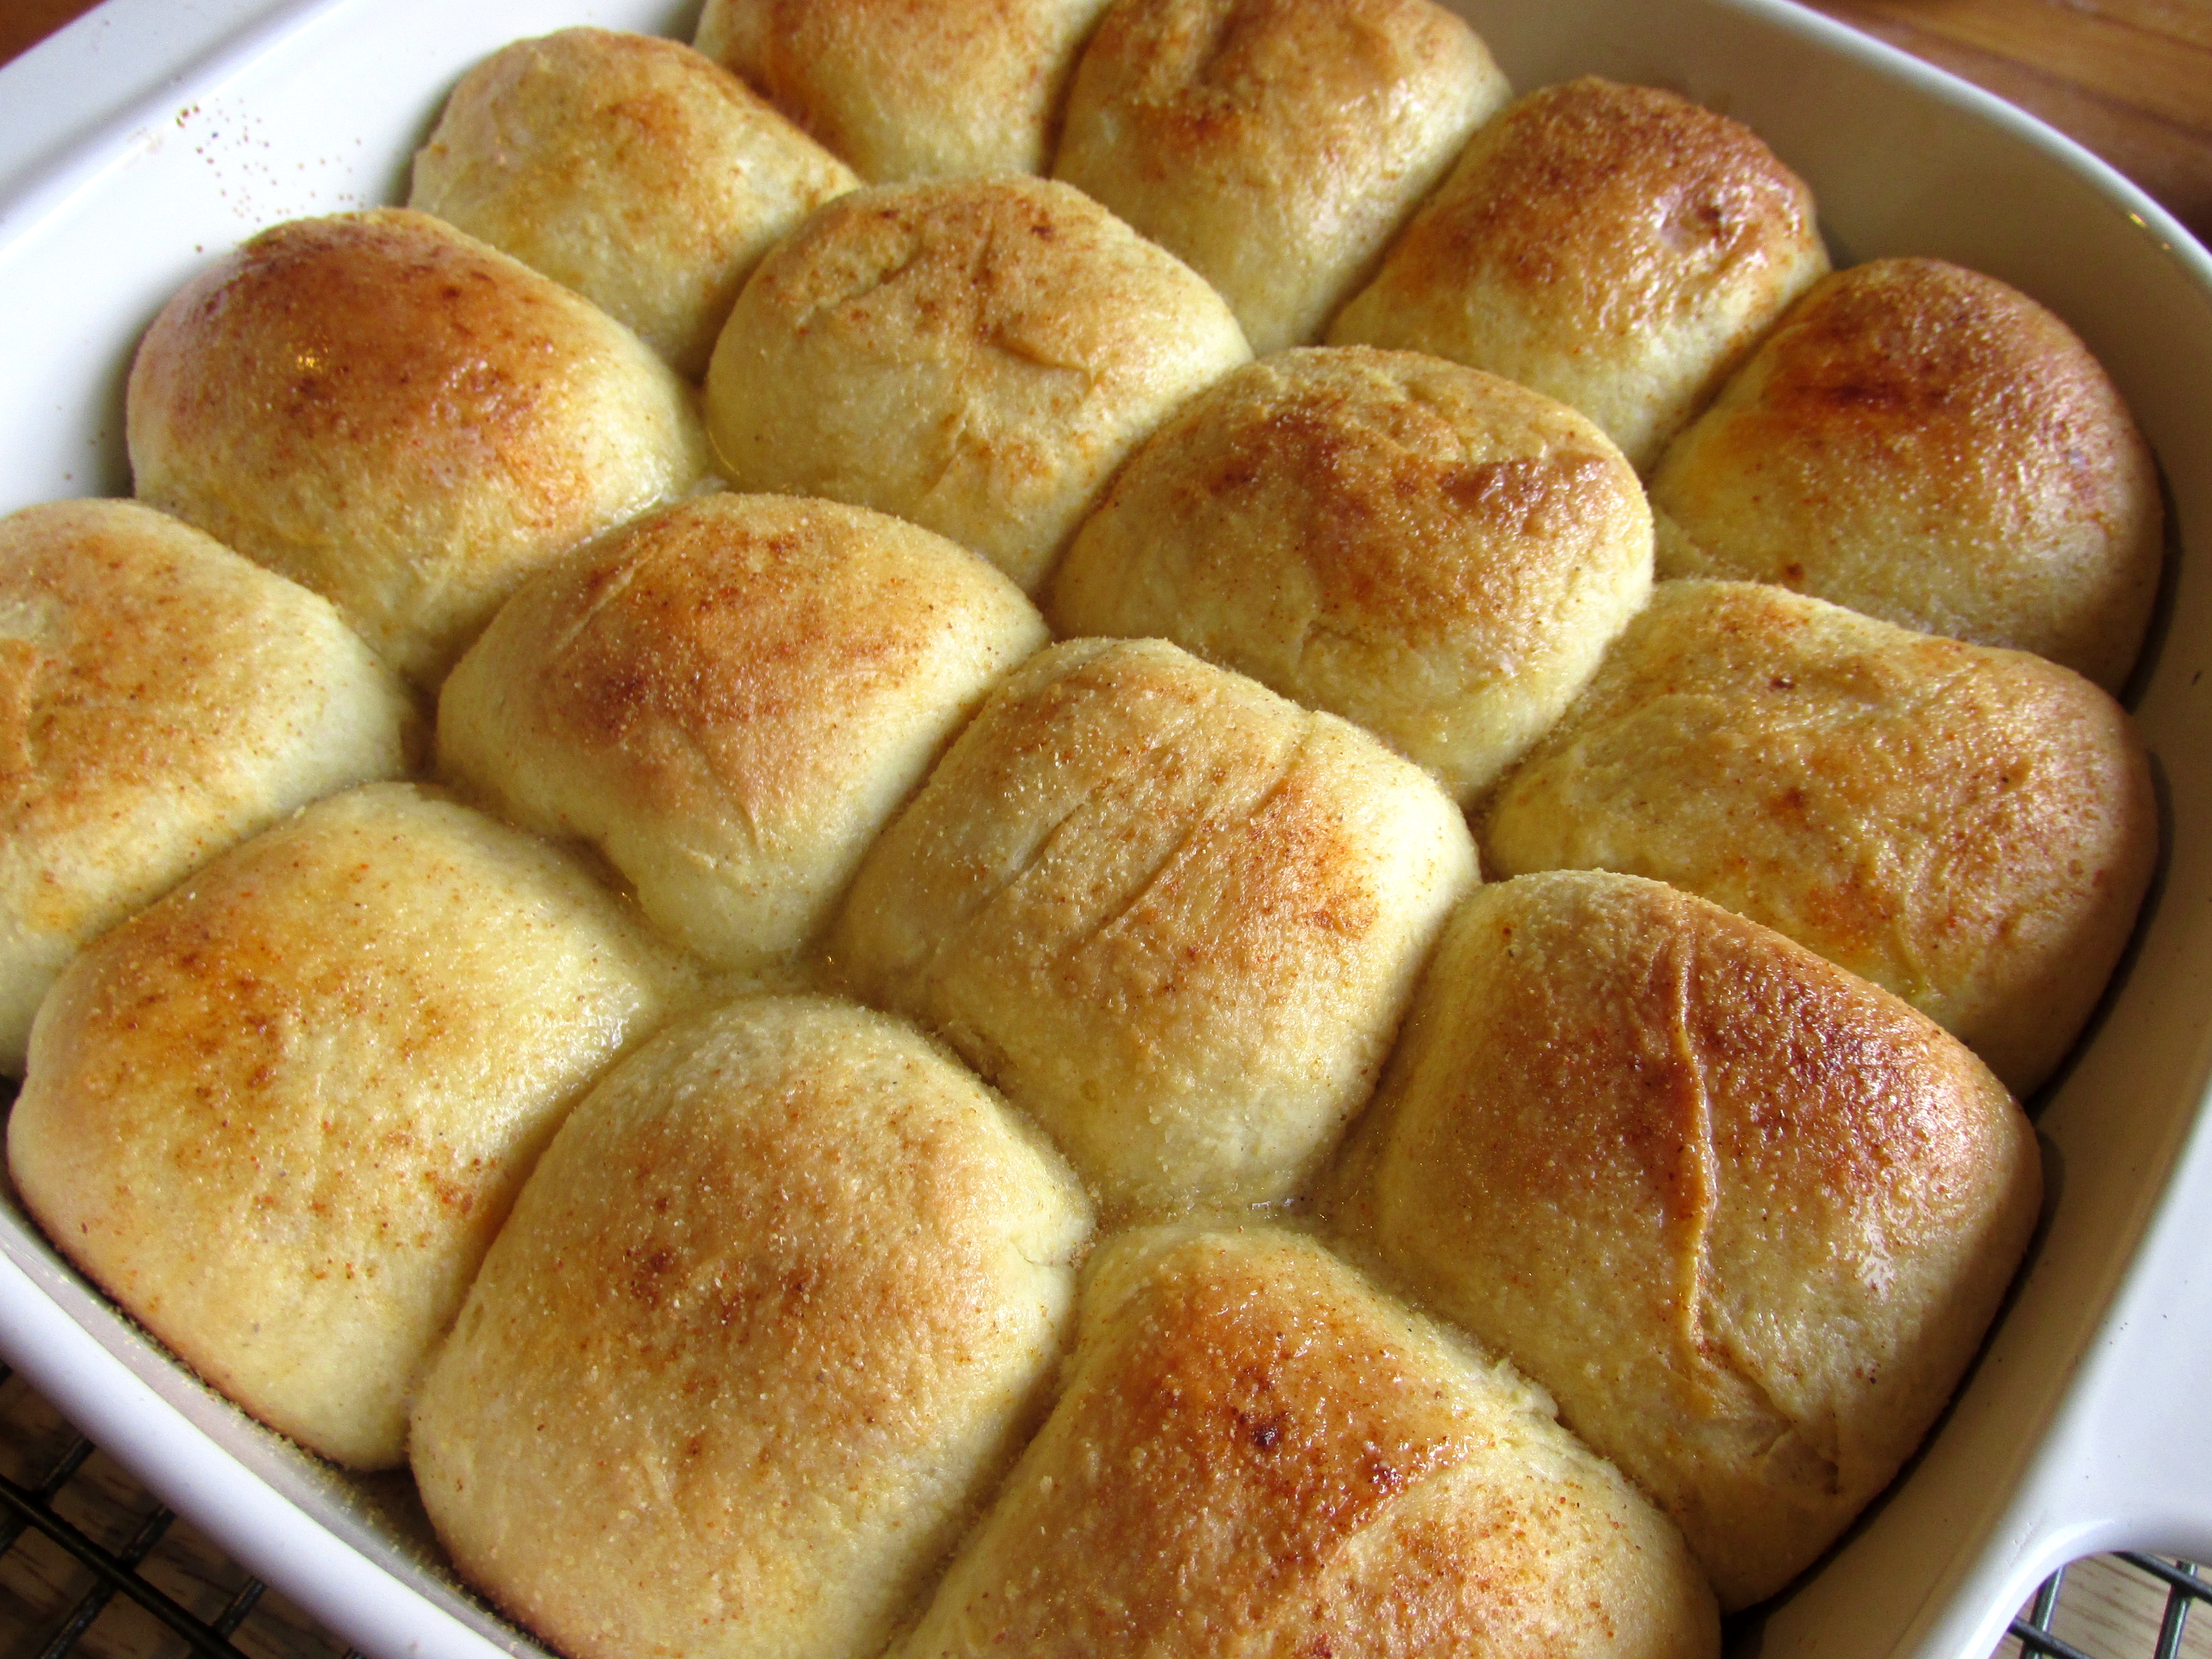
They’re named Corn Bubbles because the dough uses both flour and corn meal. This combination gives them the outstanding texture. They’re heartier than a regular dinner roll without being heavy, chewy without being tough. Filled with anything you can dream up, and brushed with melted butter, these are satisfying bites of pure comfort and happiness.
Stuffed Corn Bubbles seem like they take a long time to make, but that’s only because of the yeast in the dough. There’s about an hour total of resting time. If you’re not in a hurry, I think resting time for a dough is actually wonderful, because it means you’re multi-tasking without even trying. Plus that whole developing flavor thing. Completely passive parts of cooking still count as getting something done, right? I did use rapid rise yeast for this recipe though, because no one wants to wait longer than a couple hours for these to be ready.
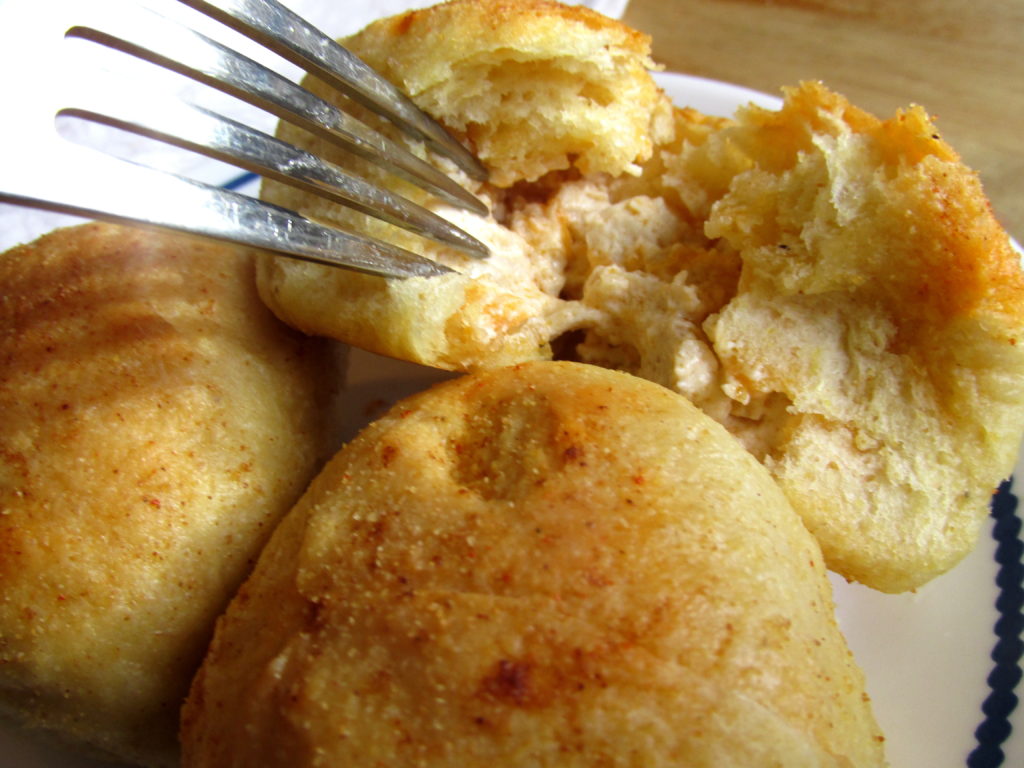
Filling these with buffalo chicken dip is an excellent choice, but I’d also recommend barbecue pulled pork, or some variation of a beefy queso dip, with plenty of beef to keep it from being too drippy. Just make sure to pinch the seams really well when you’re stuffing them, or the filling will ooze out the bottom, into your pan. The dough is wonderfully stretchy after kneading, so filling your corn bubbles is an easier process than it might sound. I use a kitchen scale to weigh the bubbles as I fill them, to make sure each corn bubble gets exactly 16g so they don’t get too full. This helps them all stay uniform, which means they’ll bake evenly.
If you give these a try, let me know what you filled them with! I’m always looking for new ideas for a recipe this versatile.
Need more ideas for Super Bowl snacks? Check out my Loaded Baked Potato Tots!

Stuffed Corn Bubbles
Ingredients
Corn Bubbles
- 5 to 5 1/2 cups flour
- 1 1/2 cups yellow cornmeal
- 2 packages Fleischmann's Rapid Rise Yeast
- 1/4 cup sugar
- 4 tsps salt
- 1/4 tsp chili powder
- 1/4 tsp ground oregano
- 1/4 tsp chipotle powder
- 1 tsp onion powder
- 1 tsp garlic powder
- 1 tsp cumin
- 1 3/4 cups milk
- 1/2 cup water
- 1/4 cup butter
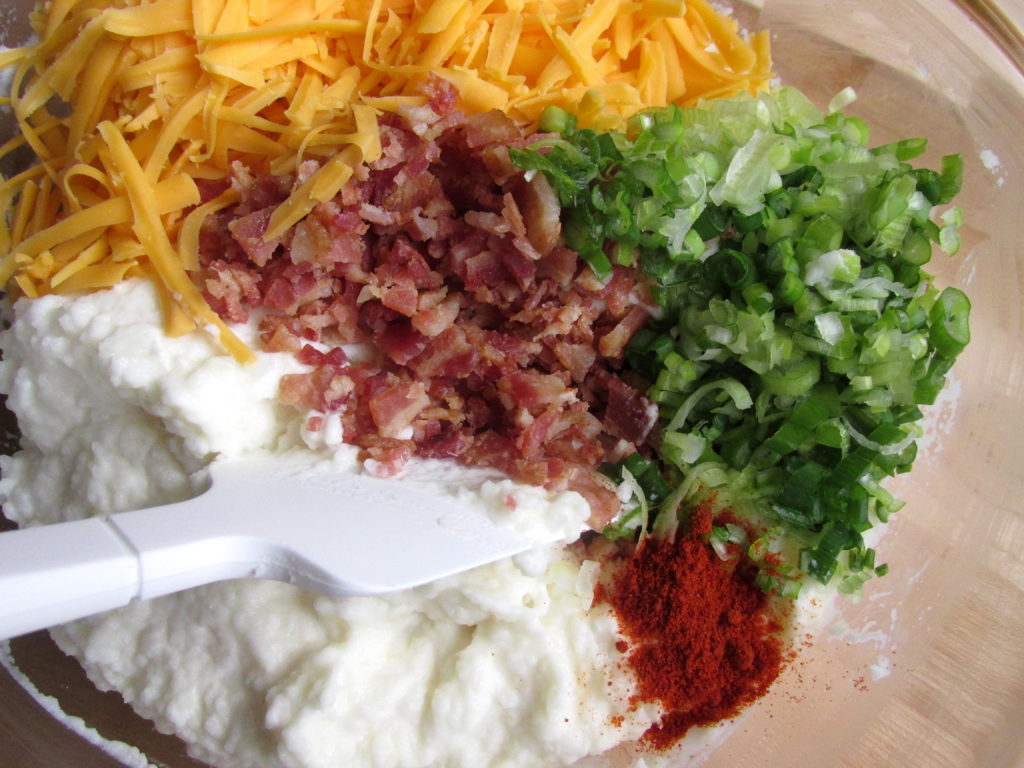
Buffalo Chicken Dip
- 12 oz cream cheese
- 1/2 cup ranch dressing
- 1/4 cup Frank's hot sauce
- 3/4 cup shredded cheddar cheese
- 1 lb cooked, shredded chicken
Instructions
-
Set aside 1 cup flour. In large bowl, mix remaining flour, cornmeal, undissolved yeast, sugar, salt, and seasonings; set aside.
2. Heat milk, water and butter until hot to touch (125 to 130 degrees F); stir into dry mixture. Stir in enough additional flour to make a soft dough.
3. Knead the dough on a lightly floured surface until smooth and elastic, about 6 to 8 minutes. Cover (I just turn the bowl upside-down over the dough). Let rest 10 minutes.
4. Divide dough into 32 equal pieces. With palms of hands, flatten to 3-inch circles. Place a tablespoon (about 16g) of your filling in the center of each circle. Pull up edges and pinch to enclose filling. Place balls in 2 greased 10x10-inch dishes. Cover; let rise in warm, draft-free place until doubled in size, about 40 minutes.
5. Bake at 375 degrees F for 15 -20 minutes or until done. Remove from pans and cool on wire racks.