Vanilla Butterfly Cupcakes

Vanilla Butterfly Cupcakes

Cupcakes have been officially “over” for a while now, but that hasn’t stopped me from eating plenty of them. Trendy desserts are very different from trendy clothes, because even after they stop being the “it” sweet treat, they’re still wonderful. Cupcakes will always be endlessly customize-able, and also the easiest way to transport and share cake. No one turns down a good cupcake, so they’re still worth thinking about – even if they’re not the treat du jour like mermaid toast and cookie cakes.

The most overlooked thing about cupcakes is undoubtedly the cake part itself. Everyone gets carried away with cute toppings and frosting techniques, and a lot of the time the cake is a little dry and the flavor is off. I like to bake as much stuff as I can from scratch, but for basic yellow and chocolate cake, box mixes are a great choice. They require much less work than scratch cakes, they yield consistently nice results, and they’re pretty inexpensive.
When I was about 7, I had a Disney cookbook with a cupcake recipe that I made over and over. I loved that book and that recipe, but the cupcakes were terrible. They were dry, dense, and always had pockets of baking soda that never quite got mixed in properly (this cupcake obsession happened way before my mom got a KitchenAid). I had no idea that the cupcakes were so bad, because I just wanted to eat as much sugar as I could get my hands on. Any cupcake can be improved by putting a tub of frosting on it, like I used to. That 7-year-old metabolism was a beautiful thing, and I miss it.

Fast forward 20 years or so, and I’ve learned that baking a good scratch cake requires specific methods of adding and mixing ingredients. The recipe I like for scratch yellow cake is Fluffy Homemade Vanilla Cake from The Spruce, and the only thing I’ve changed is to increase the vanilla extract. The process involves creaming the butter and sugar until they’re fluffy, adding eggs one at a time, and alternating adding milk and dry ingredients until the batter is smooth. It’s more work than opening a box of mix, adding three other ingredients, and letting the mixer go for a few minutes, but it’s worth it. It’s a great recipe if you’re in the market for a scratch vanilla cake, or if box mixes just aren’t your jam.

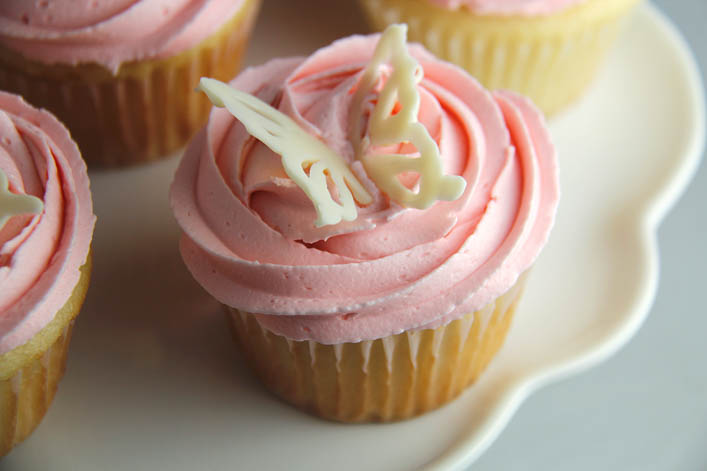
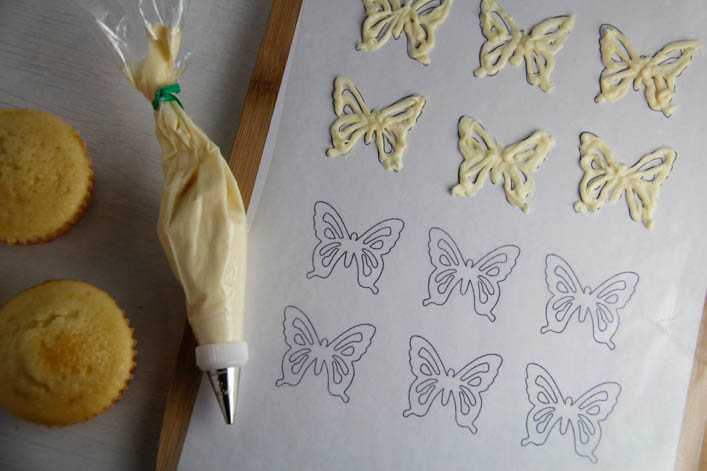
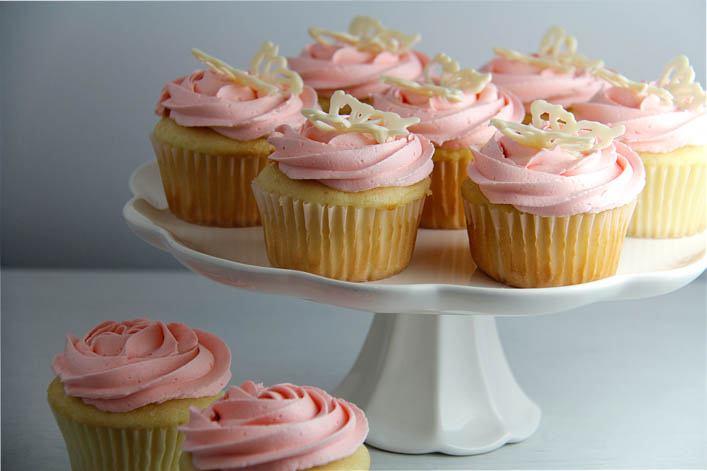
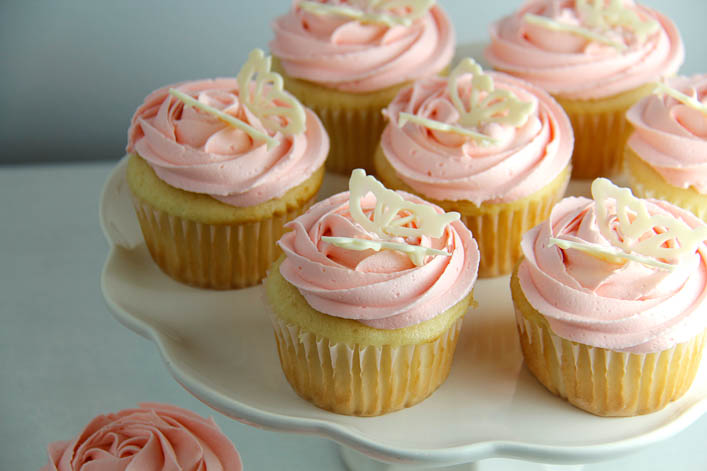
Now that we’ve covered the cake part, I can tell you about the decorations that make these cupcakes special. I actually dreamed them up for my boss’ daughter’s birthday, and I couldn’t be happier with how they turned out. She wanted butterflies on the cupcakes, and I didn’t really have time to run out and buy butterfly decorations. Instead, I found a simple butterfly image online and printed it out to use as a template. I used melted white chocolate to pipe the butterflies onto wax paper laid over the template. The best part? You can be absolutely terrible at piping and still have these come out nicely. Since you place them on the cupcakes piping-side-down, they look smooth and no one knows how much you struggled to stay in the lines. After they hardened, I broke them in half, and positioned the wings in the frosting at an angle, to make them look like butterflies perched on top.
I piped a simple buttercream frosting in the same rose shaped swirl I used for my Upside Down Lemon Raspberry Pavlovas, because I love the idea that the butterflies are sitting on sweet pink roses. The method I used for the butterflies can be used to make just about any decoration you can think of – I think the inspiration was from a Pinterest post about spiderweb cupcake toppers, done a similar way. These cupcakes are perfect for little kid birthdays, but they’re not cartoon-y at all, so they’d also make great desserts for a baby shower or an adult birthday. They’re an especially good option if complicated, cutesy decor isn’t your forte, and people will just love how adorable they are – and how great they taste!


Vanilla Butterfly Cupcakes

Cake recipe adapted from The Spruce "Fluffy Homemade Vanilla Cake"

Ingredients

Cupcakes

  • 2 2/3 cups flour 345g
  • 1/2 tsp baking soda
  • 1/2 tsp baking powder
  • 1 tsp salt
  • 1 cup unsalted butter
  • 1 3/4 cups sugar
  • 3 tsps vanilla extract
  • 4 large eggs
  • 1 cup milk

Frosting

  • 1/2 cup unsalted butter
  • 1 1/2 cups powdered sugar - divided use
  • 1/2 Tbsp milk
  • 1/4 tsp vanilla
  • 4 drops red food coloring
  • 2 dashes salt

Butterflies

  • white chocolate, melted

Instructions

  1. Sift together flour, baking soda, baking powder and salt. Set aside. 

    2. Cream butter in a mixer on low speed. Add sugar and vanilla, and beat on medium speed until fluffy, this will take about 10 minutes. 

    3. Add eggs, one at a time, making sure that each is fully incorporated before adding the next one. Mix for five more minutes at medium speed, until batter is light and airy. 

    4. With the mixer still running, add 1/4 of the dry ingredients. When it is fully incorporated, add 1/3 of the milk. Continue alternating dry ingredients and milk until everything has been added to the batter. Stop and scrape down the sides of the bowl as needed. 

    5. Pour batter into cupcake tins, lined with cupcake papers. Bake at 350 degrees for 15-20 minutes, until the tops are golden. 

    6. While the cupcakes bake, prepare the frosting. Cream together butter and 1 cup of the powdered sugar. Stir in vanilla, salt, and milk.

    7: Stir in remaining powdered sugar. When sugar is completely incorporated, add food coloring and stir until frosting is uniform.

    Optional, but highly recommended: Whip frosting in a mixer on high until very fluffy, about five minutes. Frosting keeps well in the refrigerator for several weeks.

    8. To make the butterflies, lay a sheet of wax paper over a printed template of butterfly shapes - see the blog post for a link to a good one! Melt white chocolate chips in a bowl in the microwave, stirring every 20 seconds. Transfer to a piping bag, and pipe the white chocolate over the templates. If you don't have a piping bag handy, you can also melt the white chocolate chips in a Ziplock bag, and cut a small hole in the corner to pipe through. Let butterflies harden completely before peeling them off the wax paper, and setting on the cupcakes. 

Triple Chocolate Hearts

Triple Chocolate Hearts

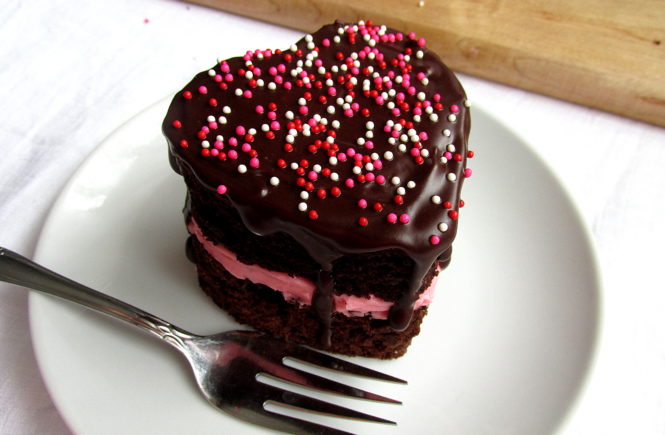
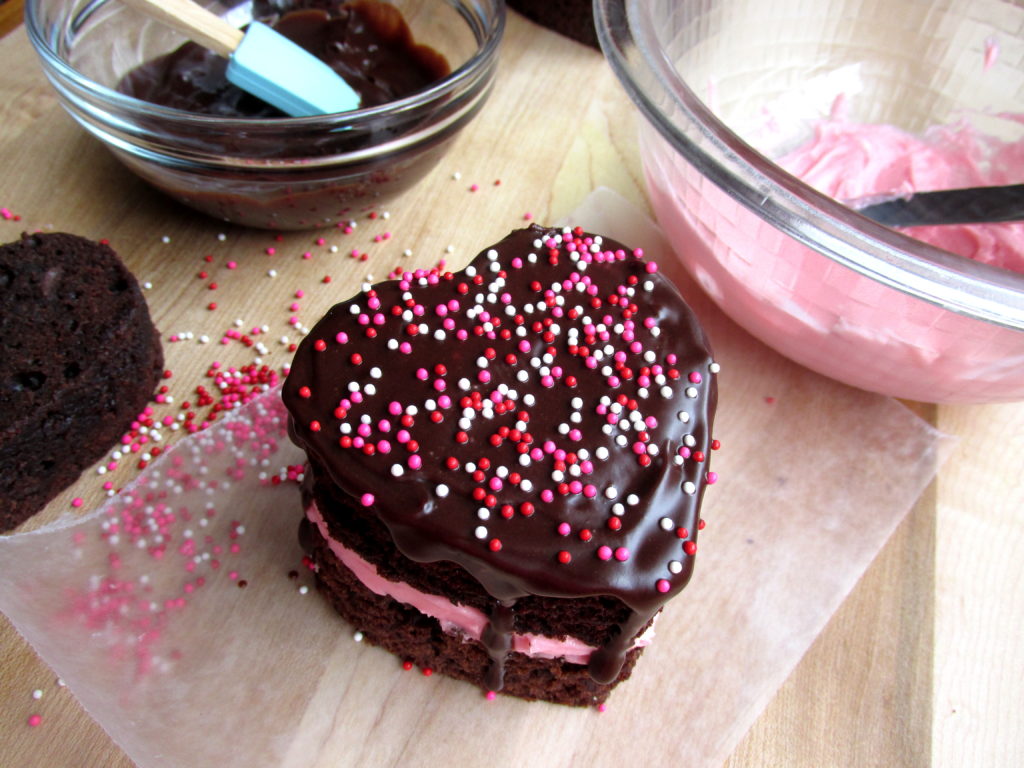
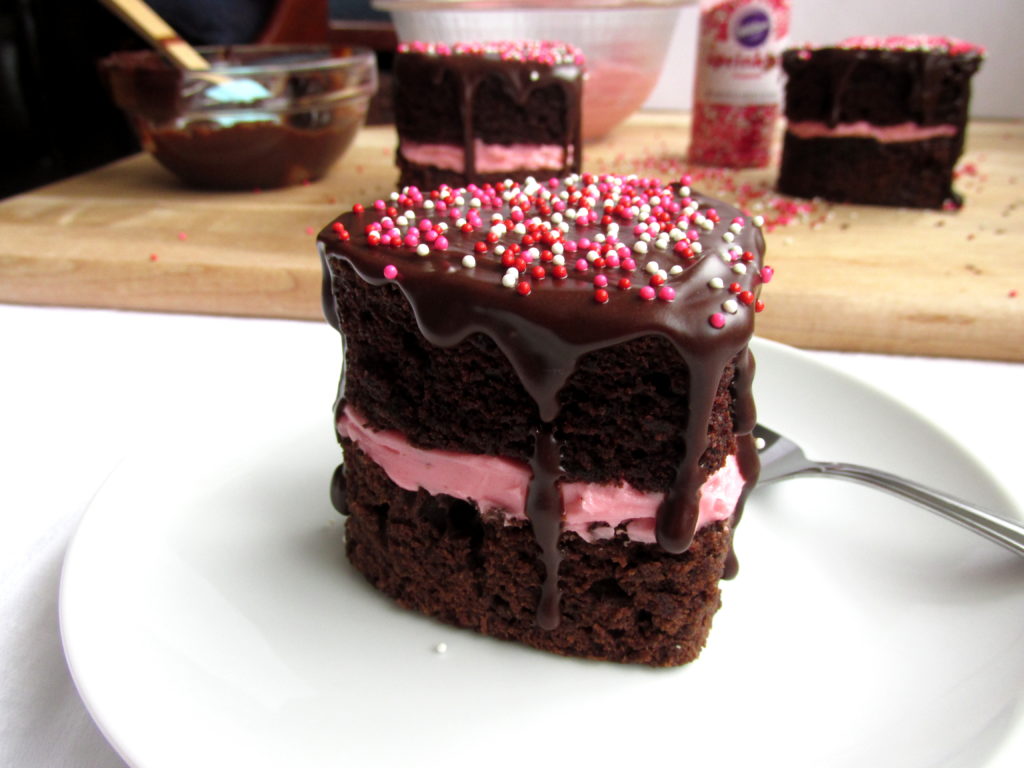
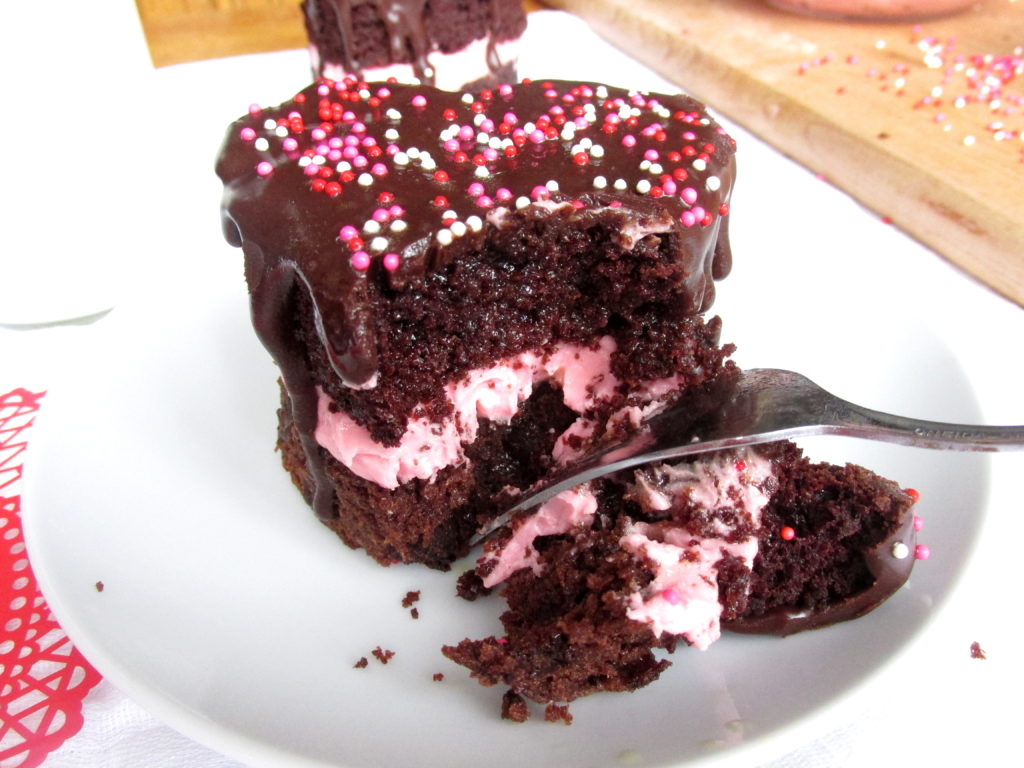
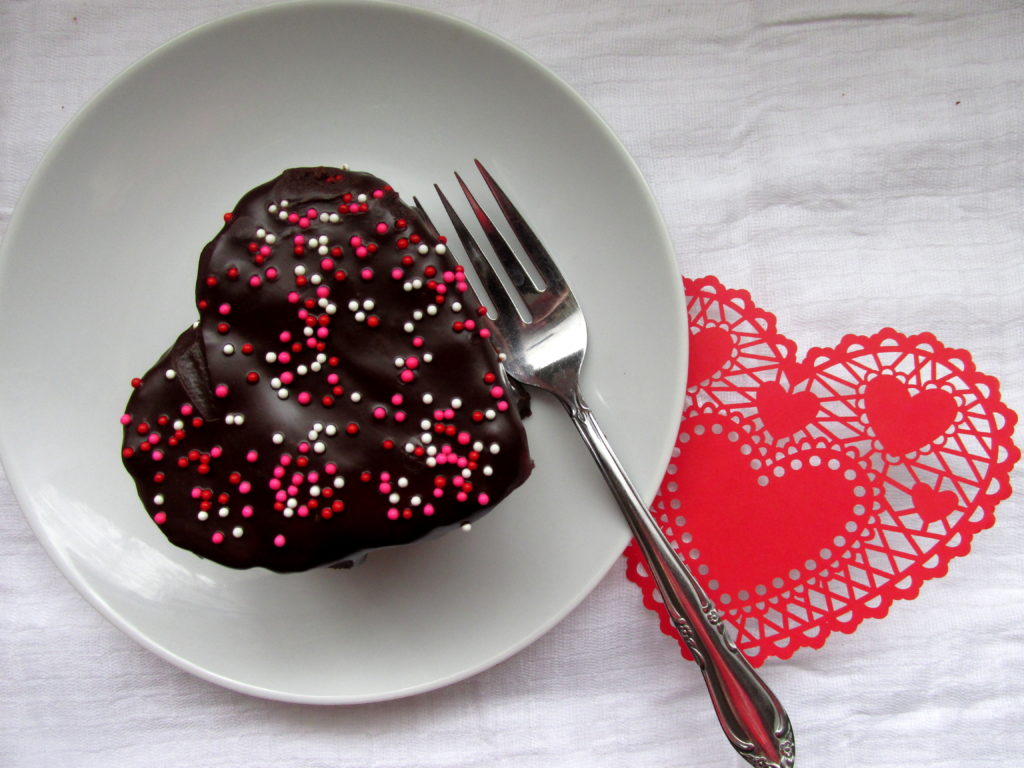
This recipe really counts as four recipes, because there are four homemade components that go into it. Triple Chocolate Hearts begin with a gooey brownie base. Next is a layer of smooth, pink, vanilla buttercream, followed by a layer of fluffy, moist, chocolate cake. The whole thing is topped with rich chocolate ganache, dripping down the sides of the cake. I wanted to create individual desserts of a similar size and cuteness as cupcakes, but in a more interesting form. I think these fit the bill perfectly.

Before you go running away because there are way too many parts to this recipe, let me make it easier. You can use a box brownie mix, a box cake mix, and a can of frosting if you so desire/don’t happen to have some extra time on your hands. Your treats will still be adorable and delicious, and you’ll only need to make a quick ganache from scratch. That said, baking is clearly my favorite hobby, so if I can find the time, I like to do it all from scratch. If you do have a little extra time, a quick way to improve canned frosting is to whip it with your mixer. This gives it a lot more volume, so you can put a nice thick – yet light and fluffy – layer between the brownie and the cake.

Triple Chocolate Hearts are extraordinarily rich, but I feel that Valentine’s Day calls for it. What is Valentine’s Day, if not an excuse to eat a lot of decadent chocolate-y desserts? Yeah, yeah it’s about love and all that, but the rest of the year can be about love if you make it, and wouldn’t that be a wonderful thing? Letting yourself indulge in desserts like this all year is definitely not going to work out as well. Love all year, eat extraordinary treats on Valentine’s Day.

These fit perfectly in little individual cupcake boxes, so you can package them with a pretty ribbon and hand them out to your favorite people. Be careful who you give them to, though – as soon as they take the first bite, I pretty much guarantee they’ll fall in love with you all over again.

You’ll be left with scraps of brownie and cake, and maybe extra frosting and ganache. I think it would be an absolute crime to waste all of this. Instead of just eating all the leftovers the very same day, I like to work them into other recipes. You can make mini triple chocolate parfaits, cake pops, or use the extra bits to top off yogurt or an acai bowl if that’s your thing. Of course, I’m not always the best at following my own re-purposing advice. I ate basically all of the scraps myself when I made these for co-workers last year. I was in the thick of planning my wedding; I promise I needed to eat the extras to keep from losing my mind. You can easily freeze the leftover cake and brownie pieces for self-medication purposes down the road, if you don’t want feel like turning them into something else.

You can change the concept here, and make adorable non-heart-shaped cakes with different sprinkles and white or chocolate frosting in the middle instead. These would make perfect birthday treats if you’re looking for something to make besides cupcakes. The only thing that won’t change is how delicious they are.

Every layer of Triple Chocolate Hearts has a different level of sweetness, so they aren’t overwhelmingly sugary. The varying textures of the layers make them much more interesting than a typical cake,  so you’ll keep coming back for another bite, and another. Just, do yourself a favor and have some milk on hand – anything this chocolatey requires milk.

Triple Chocolate Hearts

I use the standard Hershey's Collector's Chocolate Cake recipe for Triple Chocolate Hearts.  I didn't invent this one, but I wish I had!

The brownies and frosting are just typical recipes for brownies and buttercream - nothing super special or innovative (but extremely delicious).

The ganache is an original recipe. 

Ingredients

Hershey's Collector's Chocolate Cake

  • 3/4 cup butter
  • 1 3/4 cup sugar
  • 2 eggs
  • 1 tsp vanilla
  • 2 cups flour
  • 3/4 cups cocoa
  • 1 1/4 tsp baking soda
  • 1/2 tsp salt
  • 1 1/3 cup water

Brownies

  • 2 oz unsweetened chocolate (I used Baker's)
  • 1/2 cup butter
  • 1 cup sugar
  • 2 eggs
  • 1/2 tsp vanilla
  • 1/2 cup semi-sweet chocolate chips
  • 1/4 cup flour
  • 1/4 tsp salt

Fluffy Pink Buttercream

  • 1/2 cup unsalted butter
  • 1 1/2 cups powdered sugar - divided use
  • 1/4 tsp vanilla
  • 2 dashes salt
  • 1/2 Tbsp milk
  • 4 drops red food coloring

Chocolate Ganache

  • 4 Tbsp melted, unsalted butter 56.5g
  • 6 Tbsp cocoa 30g
  • 1/2 cup semi-sweet chocolate chips 85g
  • 1/4 cup heavy cream

Instructions

Hershey's Collector's Chocolate Cake

  1. Cream butter and sugar in large mixer bowl. Add eggs and vanilla; beat 1 minute at medium speed. 

    2. Combine flour, cocoa, baking soda, and salt; add alternately with water to creamed mixture (quickly, with the mixer running - takes about 3 minutes).

    3. Pour batter into two greased and floured 8-inch or 9-inch layer pans, or 13x9 pan. Bake at 350 degrees for 35 - 40 mins for 8-inch; 30 - 35 mins for 9-inch; 37 mins for 13x9. 

Brownies

  1. Melt together butter and unsweetened chocolate, stir until smooth. Add sugar, eggs, vanilla, and chocolate chips. 

    2. Stir in salt and flour. Pour batter into a greased and floured 8x8 pan. Bake at 325 degrees for 35-40 minutes. Do not over-bake. 

Fluffy Pink Buttercream

  1. Cream together butter and 1 cup of the powdered sugar. Stir in vanilla, salt, and milk.

    2: Stir in remaining powdered sugar. When sugar is completely incorporated, add food coloring and stir until frosting is uniform. 

    3: Optional, but highly recommended: Whip frosting in a mixer on high until very fluffy, about five minutes. 

    - Keeps well in the refrigerator for several weeks. 

Chocolate Ganache

  1. Combine melted butter and cocoa in a small bowl. 

    2. Pour chocolate chips into another bowl. Heat heavy cream for about 25 seconds in the microwave - you can also do this over the stove. You just want it hot enough to come barely to a boil. Pour cream over chocolate chips and let sit for one minute. Stir until chocolate has melted and the mixture is completely smooth. 

    3. Combine the two bowls of chocolatey essence into one bowl of nirvana.

Tripe Chocolate Hearts

  1. Make Cake (I did a 9x13) and Brownies. While these are baking, make frosting and ganache. When cake and brownies are cool, use a cookie cutter to cut heart shapes from each. Cut off the excess cake/brownie that sticks out over the top edge of the cookie cutter so that both sides of your heart shapes are even and flat. 

    2. Use the brownie hearts as the base. Frost with a generous layer of the pink buttercream. Top with a cake heart, bottom side-up, to give you a smoother surface for the ganache. 

    3. Spread a thick layer of ganache across the top of the cake, allowing some to drip down the sides. Decorate the hearts with sprinkles, and try not to eat all of them immediately!