Cherry Blossom Bites

Cherry Blossom Bites

I live just outside Washington, DC (seriously, it’s a 5 minute drive/Metro ride) – so I have a front row seat to our Cherry Blossom Festival, in March/April, long before cherries hit our grocery stores at reasonable prices. And all the Festival does is make me wish that cherries were in season, because I love them more than just about any other fruit (except raspberries, because they’re the best). Finally, finally, it’s time to celebrate cherries being in season. These Cherry Blossom Bites are an excellent way to use the cherries that are abundant this time of year, especially if you’re like me, and you’ve been buying more than you can reasonably consume on your own.

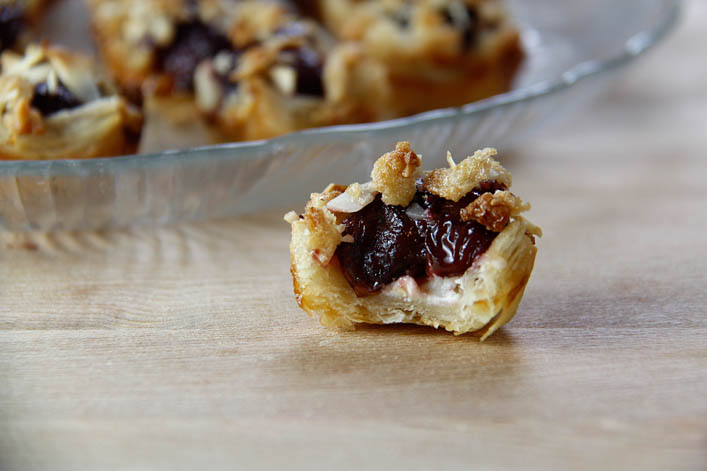
Cherry Blossom Bites were inspired by a similar hors d’oeurve that was served at the cocktail hour for my wedding last October. They were simple puff pastry, with goat cheese and a sweetened cherry compote on top, and they were lovely. For this recipe, I’ve kept the puff pastry, but I’ve used cream cheese instead of goat cheese.  Cream cheese is less expensive, and more useful to have extra of. You don’t really notice a difference between the two when they’re packed into these little bites. I don’t know exactly what went into the cherries for the version at my wedding, but I used fresh cherries, softened and reduced with a little orange juice, and cloves. If you don’t take anything else away from this post, know that a pot of cherries, orange juice, and cloves heating on the stove smells like absolute happiness.

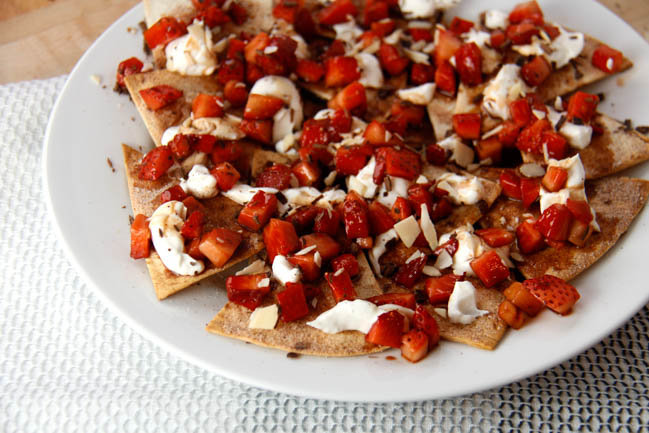
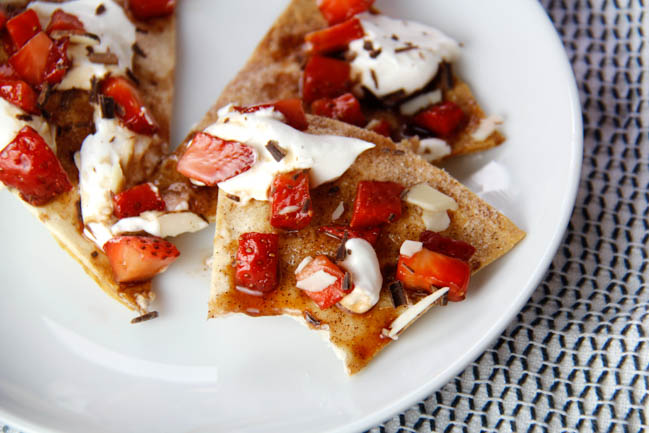
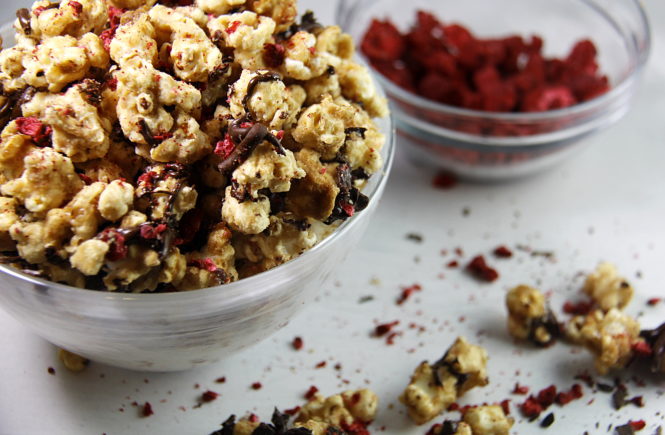
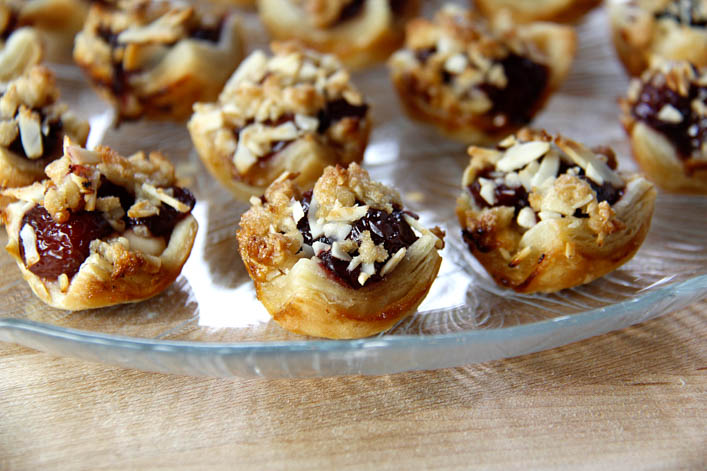
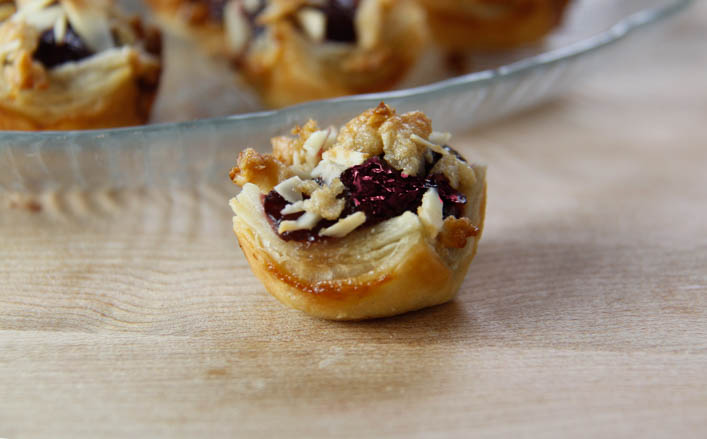
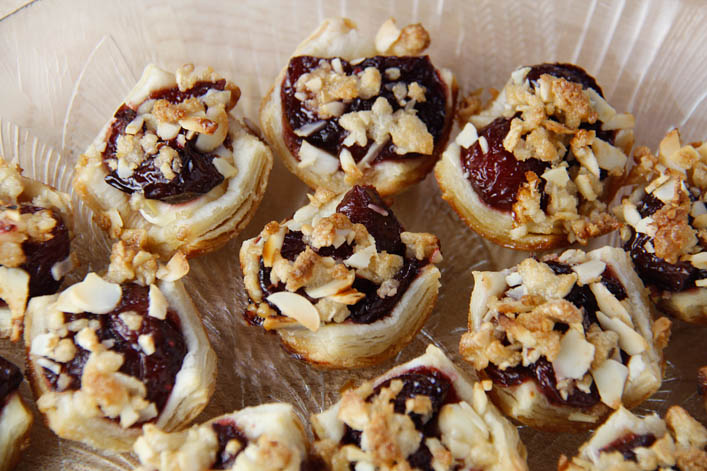
To add some sweetness and extra crunch, I created a streusel topping using chopped up bits of the leftover puff pastry, combined with sliced almonds and brown sugar. It really takes these bites to the point where they’re a perfect combination of sweet, salty, and tart. They’re a little chewy and plenty crispy, and the overall impact is what I imagine it would be like if you took a really good cheese board and captured all of its best parts in a single bite. I’d dare to say these are actually better than the ones from my wedding.

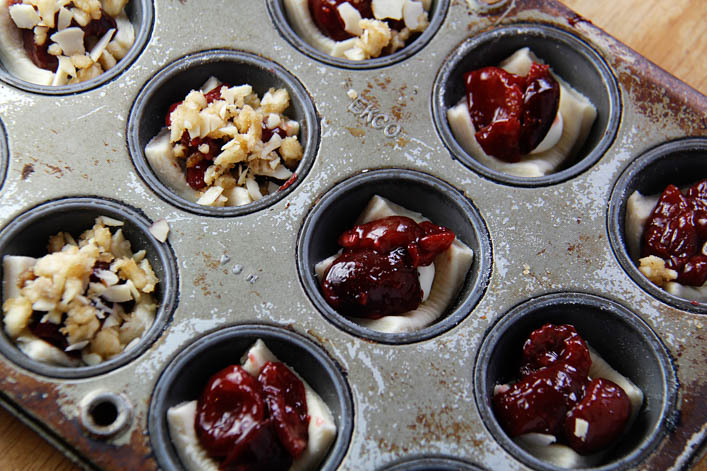
Figuring out how to bake these was something of an adventure, because I don’t usually put puff pastry into mini muffin pans. Puff pastry needs room to expand, so it doesn’t end up too chewy or over-cooked. After some trial and failure with a silicone mold, I found that the simplest method was also the best: I cut the puff pastry into 1 1/2 inch squares and just pressed them into the mini muffin pans. No cutting circles or trying to squish them in neatly, which is always a bonus in my book.

The rest of the process for making these is fairly quick – the cherries only need to cook for about 15 minutes, and the streusel can be prepared in the meantime. I made my own puff pastry, but you can speed up the process even more by buying it in pre-made sheets. These would be a perfect, unexpected treat to bring to summer parties and barbecues. They’d also make a great quick breakfast or snack that you can whip up ahead and then munch on throughout the week. They taste like dessert, but don’t have very much sugar added at all – it’s only in the topping – so they still fit into a healthy lifestyle. Or at least, that’s what I’m telling myself.


Cherry Blossom Bites

Ingredients

Puff Pastry

  • 1 1/4 cups flour
  • 3/4 tsp salt
  • 1/2 cup very cold water
  • 1/2 cup cold, unsalted butter (do not soften)

Cherry Blossom Bites

  • 28 fresh cherries, pitted and halved
  • 1/2 tsp ground cloves
  • 1/4 cup + 1 Tbsp water - divided use
  • 2 Tbsps orange juice
  • 1/2 Tbsp cornstarch
  • 2 1/2 Tbsps brown sugar
  • 2 Tbsps slivered almonds, roughly chopped
  • 1/4 cup chopped puff pastry bits

Instructions

  1. If you are making the puff pastry: Stir together flour and salt in a large bowl. Cut butter into small pieces and add to the bowl. Pour in water gradually, while stirring the mixture - add just enough water to get everything combined into a rough dough. You don't want the butter creamed into the flour, you want it to stay in chunks - this is what causes the dough to form those beautiful, flaky layers in the oven.

    2. Turn the mixture out onto a floured surface. Form it into a rectangle, and gently roll out until it's about a half inch thick. Fold the bottom third up into the middle, and fold the top third down on top of that. Turn it 90 degrees, add more flour to prevent sticking, and roll it out again. Repeat this process three more times, adding flour as needed. Wrap the dough in plastic wrap and refrigerate while you prepare the filling. You can also freeze it for about 10 minutes before using, if your filling is already made.

    Note: While making this dough, you need to work quickly, with very cold water and butter, to prevent the butter from melting into the dough. 

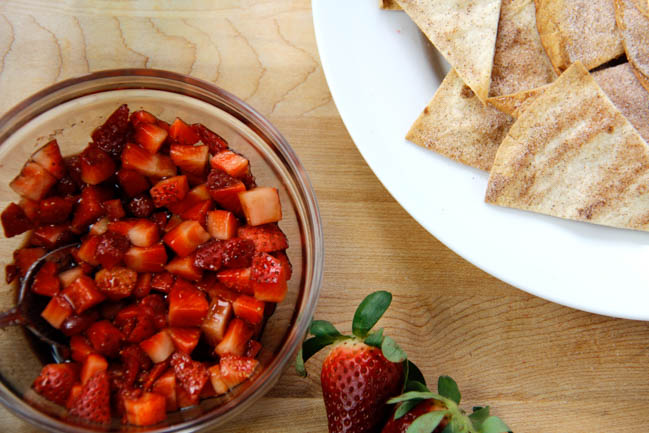
    3. Pit the cherries and cut them into halves or quarters - a mix of both is good. Place in a small sauce pan over medium heat with 1/4 cup water, orange juice and cloves. Stir occaisonally, until the cherries have gotten soft and released a lot of juice. Combine 1 Tbsp of water with the cornstarch, and add to the pot of cherries. Continue stirring until the cherry mixture has thickened, and then remove from heat.

    4. Soften cream cheese in the microwave in a small bowl, so that it's soft enough to be piped, but not melted. Transfer to a piping bag. 

    5. Roll the puff pastry out into a sheet, about 1/4 inch think. Cut 1 1/2 inch squares and place them into two un-greased mini muffin tins. Refrigerate the pans while you make the streusel topping - there should be a decent-sized section of puff pastry left over to use for this.

    5. Spread the brown sugar out on a cutting board, and add a 3 inch piece of the puff pastry. Coat it with brown sugar, and then start chopping it into tiny pieces. The brown sugar keeps it from sticking to itself, and becoming impossible to work with. Keep working until you have 1/4 cup of chopped puff pastry. Scoop this into a bowl with the excess brown sugar. Chop slivered almonds into small pieces and add to the mixture. Stir until well combined. 

    6. Assemble the tarts: Pipe about 1/2 tsp of cream cheese into the center of each square of puff pastry. Top with 1 tsp of the cherries, followed by 1/2 tsp of the streusel topping. Bake at 350 degrees for 15-20 minutes, or until the edges of the puff pastry turn a golden brown. 


Sunshine Curry Dip

Sunshine Curry Dip

Chips and dip is my snack of choice when I need something to munch on while I watch TV. It’s impossible to binge watch The Great British Bake Off (or Baking Show – call it what you will) on Netflix without a snack, for obvious reasons. What I’m dipping my chips in changes all the time, depending on what I’m feeling. There are the obvious choices, like guacamole, salsa, queso, sour cream and onion dip – you get the idea. And then there are the dip options that are completely unique and invented by my dad for the sole purpose of being gobbled down with a new episode of your favorite show. I don’t know if he’ll appreciate that I’ve named his creation Sunshine Curry Dip, but I think that’s really the best way to describe it.

This recipe starts with a base of sour cream and Greek yogurt, although I imagine you could use all sour cream or all Greek yogurt, with similar results. It’s got a good amount of curry powder, sriracha, white balsamic vinegar, and a little turmeric. White balsamic vinegar is better for this recipe than a regular balsamic vinegar, because it’s milder, doesn’t overwhelm the other flavors, and doesn’t discolor the other ingredients. You could potentially sub white wine vinegar for the white balsamic, although I will admit I haven’t tested it.

The last ingredient, and also a key component of naming this recipe, is a dash of Spice & Tea Exchange’s Sunshine Spice Blend. There’s not really a substitute for this blend that I’m aware of. It adds an interesting combination of ginger and citrus notes that combine with the curry for a unique flavor twist. The result of all of this is a light, tangy, slightly spicy, curry-infused cream that you will never be able to stop eating. I had to physically remove myself from the bowl in the photos to keep from eating all of it as soon as I was done taking the pictures.

(Not sponsored – My bottle was from Ocean City and not Florida, like the ones I’ve linked to, but they’re the same product).

I take a lot of the photos for this blog in my parent’s kitchen, because my tiny apartment kitchen doesn’t really satisfy my cooking needs. Often I’ll take home some of the food I’ve made for a post for dinner/dessert. My parents wouldn’t let me take any of the remaining Sunshine Curry Dip home, because they wanted it all for themselves. Luckily for them, I know the recipe now.

This dip is a great choice if you just want something a little more unusual, or if you’ve eaten chips and guac for dinner too many days in a row and need a change. It can be made spicier or milder with small adjustments to the proportions of sriracha to yogurt, and it goes well with a variety of dipping implements. My parents like it with Jackson’s Honest Sweet Potato Chips; I prefer tortilla chips or celery. Whatever you’re dipping in it, I assure you that you’ll become just as hopelessly addicted as I am. This is a dip that you can take to all those summer parties coming up, and know that you won’t find another bowl of the same thing already on the table. Unless of course you and all your friends read here, in which case, hello, and thanks for stopping by. Let me know if you need the location for the support group of people who made this dip, ate it all, and are suffering from withdrawal.

Sunshine Curry Dip

Ingredients

  • 1 1/2 cups sour cream 323g
  • 6 Tbsps Greek yogurt 75g
  • 1 1/2 tsp sriracha
  • 1 1/2 tsp curry powder
  • 1/4 tsp turmeric
  • 2 tsps white balsamic vinegar
  • 1/2 tsp Sunshine Spice Blend

Instructions

  1. Combine all ingredients and stir until well mixed. Dip with your favorite chips or veggies!


Balsamic Strawberry Nachos

Balsamic Strawberry Nachos

Strawberry Nachos aren’t a particularly new concept in the world of imaginative desserts, but they are a particularly delicious concept. Generally, they consist of some kind of cinnamon-sugar chip base, sweetened strawberries, a whipped cream component, and shaved chocolate. Mine follow all of these rules, but I’ve added the twist of balsamic vinegar with the strawberries to elevate the complexity of the flavors a little. It really takes the recipe from just “tasty” to “no, this plate is mine, go get your own!”

Strawberry Nachos are a perfect spring dessert. They’re quick to make, and don’t require a lot of baking time. The crisp cinnamon sugar chips take a total of 15 minutes in the oven for the whole batch, and all the toppings can be prepared during baking time. The best thing about these nachos is the combination of textures. The crunch of the chips with the soft strawberries and the smooth cream make each mouthful delightful. If you need a beautiful spring dessert, and don’t have time for something involved like Pavlova, these are the perfect solution.  Strawberries aren’t quite in season yet technically, but it doesn’t matter when you’re giving them a flavor boost with some sugar and balsamic vinegar. A lot of recipes that involve balsamic strawberries call for a balsamic reduction. As long as you use very high quality balsamic vinegar, this isn’t necessary for this dish. I use Florida Olive Oil’s 18 Year Balsamic Vinegar.

The cream that goes on top is part Cool Whip and part sour cream, with a little added sugar and cinnamon. It’s light and a little sweet, but also has some tang from the sour cream. It works beautifully with the strawberries and the chips, and has a distinctly different flavor than typical strawberry and cream desserts. Not that there’s anything wrong with those – writing about this recipe suddenly has me thinking of all the wonderful desserts I could make with strawberries when they do fully come into season!

After the chips are piled onto a plate, dolloped with cream and sprinkled with chopped strawberries, the whole dish is topped with shaved dark chocolate and sliced almonds. I can think of very few desserts that wouldn’t be improved by a sprinkle of chocolate and almonds. In Strawberry Nachos, the chocolate adds just a hint of flavor that goes especially well with the balsamic vinegar on the strawberries. Just remember that the actual assembly of this dish should take place right before serving, because the strawberries have a fair amount of liquid, and you don’t want that sitting on the chips for too long, making them soggy. Once you serve them, they’ll disappear quickly enough that the juice won’t be a problem.

I was thinking the other day about how fall baking is my favorite kind, what with all the gourds and stews and heavier components (read: piles of cheese and bread). Now that I’ve really gotten my spring baking rolling, I’m re-considering that stance. I could eat fresh, bright Strawberry Nachos every day, but they’re only truly satisfying in the spring and summer. Who wants a light, fruity dessert on a blustery November day? This April I’m focusing on appreciating the breezy, warm(ish) weather we’ve got here in the DC area, and all the delicious food options that go with that. It’s Strawberry Nacho season, and I plan to enjoy every second of it.


Balsamic Strawberry Nachos

Prep Time 10 minutes
Cook Time 15 minutes
Total Time 25 minutes
Servings 4

Ingredients

Cinnamon Sugar Chips

  • 3 7 inch flour tortillas
  • 1 tsp cinnamon
  • 2 tsps sugar
  • butter or canola oil cooking spray

Balsamic Strawberries

  • 1 1/2 cups strawberries, diced
  • 3 Tbsp sugar
  • 3 tsps high quality balsamic vinegar

Cream

  • 1/4 cup sour cream
  • 1/4 cup Cool Whip or whipped cream
  • 1 Tbsp sugar
  • 1/8 tsp cinnamon

Toppings

  • 2 Tbsp shaved dark chocolate
  • 2 Tbsp slivered almonds, roughly chopped

Instructions

  1. Make the cinnamon sugar chips. Preheat your oven to 350 degrees. Stack the flour tortillas and slice them into eight triangles, like a pizza. I actually use a pizza cutter for this job. Spread the triangles in single layers on two baking sheets lined with foil.

    2. Spray the tortillas with a light coating of cooking spray. Stir together cinnamon and sugar, and sprinkle lightly over the tortillas. Bake each tray for 8 minutes.

    3. While the chips are baking, prepare the toppings. Stir together diced strawberries, sugar, and balsamic vinegar. Set aside. In another bowl, mix sour cream, Cool Whip, sugar, and cinnamon. Cover and refrigerate until it's time to use the cream mixture.

    4. When the chips are done, allow them to cool completely before assembling your nachos. You can make all of the components a day ahead, and store in airtight containers until serving time. Strawberries and cream should be refrigerated.

    5. Assemble the nachos. Place the chips on a serving tray, being careful not to have too many overlapping. Use a spoon to drop small dollops of the cream mixture all over the chips. You want the cream to stay in blobs, rather than spreading it around. Start piling strawberries onto the chips in an even layer, being careful not to pick up too much of the liquid in the bowl. Too much liquid with the strawberries will give you soggy chips in no time!

    6. Top with shaved chocolate and slivered almonds, and enjoy!  

Falafel Hummus

Falafel Hummus

I was really hoping I’d invented Falafel Hummus as a concept, which is pretty silly since it seems like everything you can think of has already been done (I like to dream big). A couple Google searches show that this isn’t a completely new concept, but it’s also not all over the place. Well, it should be. I’ve been obsessed with falafel lately. The flavors are so interesting, with the mild, nutty chick peas and the sharp spicy parsley. I have to admit that turning falafel into a dip resulted from my failure to make actual falafel, but I’m not mad at about it even a little. Falafel Hummus is easier to make than falafel, and it has become my new favorite snack.

I started with a recipe from Gourmandelle for Healthy Vegan Falafel, formed the mixture into little patties and tried to fry them (the recipe calls for pan-frying instead of deep-frying), only to end up with squishy, soft, non-fried “falafel.” This is probably a case of my oil not being hot enough, but I can’t say for sure. What I can tell you for sure is that the whole time I was standing at the stove frying, I was eating the falafel “batter” that was still in the bowl. And it was delicious. I’m talking the kind of delicious where the flavors are curious and pleasing in a way where you have to keep tasting it to make sure you’re remembering it properly. And every bite is  better than the last.

I ditched the frying and decided to try the recipe again, but this time with a few additions to turn it into a dip.  During this experiment I left out the almond flour, which turned out to be a huge mistake. The almond flour balances the onion and the parsley in this dip to keep them from tasting bitter. I think almond butter would work as well, if not better, but almond flour worked just fine for me. I added some of the liquid from the can of chick peas and some olive oil to thin it to dip consistency. I also tossed in a couple of dates, which give the whole thing a slight undertone of sweetness, adding another dimension and tying all the flavors together.

I ate way too much of it in a single sitting, dipping warm pita and carrots in it and marveling at how something so similar to a million other versions of hummus could taste so different. It has the added bonus of involving zero frying, so this Falafel Hummus is technically healthier and quicker to make as well. Serve it to your vegan and non-vegan friends alike, or just have it for lunch spread inside a pita with some veggies. It’s perfect to share or to devour on your own when you’re experiencing serious falafel cravings or desperate wanderlust, or in my case, both.


5 from 1 vote
Print

Falafel Hummus

Recipe adapted from Gourmandelle's Healthy Vegan Falafel 

Ingredients

  • 1 can chick peas (drain but keep the water)
  • 2 Tbsp aquafaba (water from the can of chick peas)
  • 1 Tbsp ground flax seeds
  • 1/4 cup fresh parsley, chopped
  • 1/2 carrot, shredded
  • 1/2 yellow onion, diced
  • 3 garlic cloves, mashed
  • 2 Tbsps almond flour
  • 1/2 tsp paprika
  • 1/2 tsp ground cumin
  • 1 Tbsp tahini
  • 2 dates
  • 2 Tbsp olive oil
  • 3/4 tsp salt

Instructions

  1. Place all ingredients in a food processor and pulse until blended but not completely smooth. The dip is better if it's a little chunky. Salt to taste.

    Serve with warm pita, chips, and veggies.

    Note: I mixed mine in my nutri-bullet because I'm obsessed with it, but it definitely was not the very best tool for the job. I recommend using an actual food processor.


Spinach and Artichoke Tarte Soleil

Spinach and Artichoke Tarte Soleil

I try really hard to look at the end of daylight savings as the beginning of those long, glorious, sunny summer days. When you’re losing an hour of precious sleep, it’s hard to remember the bright side. I decided that this year I would stop worrying about the sleep aspect, and celebrate the end of daylight savings with the most appropriate dish I could think of: a Tarte Soleil. It’s made of puff pastry, cut and shaped to look like the most beautiful sunburst, with endless possibilities for fillings – just the thing to help cheer up tired people like us.

Puff pastry works well with all sorts of flavors. I filled mine with creamy, slightly tangy and salty spinach and artichoke dip. I was a little worried that the spinach and artichoke dip would run out of the pastry in the oven and make a huge mess, but it held up quite well. I adapted a recipe from Once Upon a Chef, which uses a Mornay sauce in place of cream cheese/mayo. A Mornay sauce is essentially just a white sauce with shredded cheese, and also a term that I was unaware of until I made my spinach and artichoke dip. You learn something new every day (even a day that’s missing an hour).

A Tarte Soleil is a wonderful thing to know how to make. I’ll be the first to admit that while puff pastry with spinach and artichoke dip is undeniably delicious, it’s not exactly boundary-pushing. But formed into an intricately twisty sun-shape, and baked to perfect golden crispiness, the combination is not only classic, it becomes irresistible.

I made my puff pastry from scratch. I think people assume puff pastry is difficult to make, because you do have to be a little careful about the temperature of the dough. I find that it’s actually a fairly quick and easy process, if you focus on what you’re doing. I would encourage everyone to try making their own at some point, but store-bought crust will work just as well for this recipe. I actually meant to buy mine this time (I’ve read Pepperidge Farm makes a great version), forgot to get it, and then was too lazy to run to the store when it was time to get cooking. So I just made it instead. I’m nothing if not a problem solver. The fact that I also create my own problems may have something to do with that.

The key to a good Tarte Soleil is cutting the sections of filled pastry uniformly, and then twisting them evenly. This is always a challenge for me, because I’m not as meticulous as I might choose to be. It’s important to twist each section of pastry about three times, and make sure the twists are evenly spaced along the section. My other advice would be to stop twisting and pop the whole thing in the freezer for a few minutes if you find your puff pastry is getting too soft and warm to work with. This solves a lot of frustration when trying to get those perfect twists.

My Spinach and Artichoke Tarte Soleil is exactly what I’d like to snack on at a party, but your taste could be drastically different from mine. Luckily, the filling possibilities for Tarte Soleil are endless. You could do a different savory option, like this feta tapenade from Smitten Kitchen, or even choose a sweet filling – I’ve seen loads of versions stuffed with Nutella. Whatever direction you go, it’s sure to be a crowd-pleaser. Even if the crowd is mostly you and your family sitting in your kitchen, eating it straight from the oven. But then, that’s the best sort of crowd, isn’t it?


Spinach and Artichoke Tarte Soleil

Spinach and Artichoke Dip recipe is adapted from Once Upon a Chef's Baked Spinach and Artichoke Dip. I changed it to make it gluten-free. 

Puff Pastry is a basic puff pastry from All Recipes - I used a different method for making it. 

Prep Time 30 minutes
Cook Time 35 minutes
Total Time 1 hour 5 minutes

Ingredients

Puff Pastry

  • 5 cups bread flour
  • 2 1/2 tsps salt
  • 2 cups very cold water
  • 2 cups cold unsalted butter (do not soften)

Spinach and Artichoke Dip Filling

  • 1/4 cup sour cream
  • 4 Tbsps butter, divided use
  • 1/2 tsp corn starch
  • 1 cup heavy cream
  • 1 medium yellow onion, diced
  • 5 oz frozen spinach
  • 9 oz frozen artichoke hearts, chopped
  • 1/3 cup shredded parmesan cheese
  • 1/3 cup shredded Monterey Jack cheese
  • 2 cloves garlic, minced
  • 1 tsp dried thyme

Tarte Soleil

  • flour for rolling
  • 1 egg

Instructions

  1. Make puff pastry, if you are doing it from scratch. Stir together flour and salt in a large bowl. Cut butter into small pieces and add to the bowl. Pour in water gradually, while stirring the mixture - add just enough water to get everything combined into a rough dough. You don't want the butter creamed into the flour, you want it to stay in chunks - this is what causes the dough to form those beautiful, flaky layers in the oven.

    2. Turn the mixture out onto a floured surface. Form it into a rectangle, and gently roll out until it's about a half inch thick. Fold the bottom third up into the middle, and fold the top third down on top of that. Turn it 90 degrees, add more flour to prevent sticking, and roll it out again. Repeat this process three more times, adding flour as needed. Wrap the dough in plastic wrap and refrigerate while you prepare the filling. You can also freeze it for about 10 minutes before using, if your filling is already made.

    Note: While making this dough, you need to work quickly, with very cold water and butter, to prevent the butter from melting into the dough. 

    3. Make the spinach and artichoke dip. Start with the Mornay sauce. Stir together 3 Tbsps butter and sour cream in a sauce pan over medium heat. Stir together cream and corn starch in a small bowl and add to the pan. Let the sauce come to a boil, stirring constantly. When it reaches a boil, turn off the heat and gradually stir in the shredded cheese, until sauce is smooth. It should be fairly thick. 

    4. In a skillet, cook onion over medium heat in the remaining 1 Tbsp of butter until it starts to become translucent. Add spinach, garlic, artichokes, thyme, and salt. Let cook for roughly five minutes, stirring occasionally, until the artichokes start to soften. Pour cheese sauce over the vegetables and stir until well combined.

    5. Prepare your Tarte Soleil. Take half of your puff pastry (leave the other half in the fridge)  and roll out into a 12 inch round on a floured surface. Take a round plate slightly smaller in diameter than your baking tray (I used a pizza tray) and place it upside down on the dough. Trace around it with a knife to form a perfect circle for the base of your Tarte. Place the circle on your baking tray (lined with parchment paper).

    6. Top with a generous layer of filling, leaving about a half inch bare around the outer edge of the circle. You may have some extra filling - don't feel like you need to use all of it, you just want a nice thick, even layer - no gobs. Cover with plastic wrap and refrigerate while you work with the rest of the puff pastry.

    6. Roll the second half of your pastry dough into a 12 inch round and cut a perfect circle as you did with the first layer. Place this layer on top of the first layer with the filling, so that the filling is sandwiched between the two layers. Place a small bowl or glass in the center of the the dough. This will mark the center of your Tarte, the section that doesn't get cut and twisted. 

    7. Cut away from the glass with a knife, slicing the dough into quarter sections. Cut each quarter section in half, and each of those sections in half again, until you have 16 total sections. You can choose to go a step further, cutting each section in half one more time, to end with 32 total sections coming from the center circle. It mostly depends on how many servings you want to make/how much work you want to do. Be careful not to cut through the parchment paper. 

    8. Twist each section 3-4 times, twisting all of the sections in the same direction. Don't just hold the end of a section and twist, because the dough won't automatically twist the way you want it to. The best way to do this is to try to twist each section once near the center circle, once in the middle of the section, and once closer to the end, so they're evenly spaced. 

    9. When all of the sections are twisted, you should have a beautiful sunburst. Beat egg in a small bowl and brush over the pastry. Bake at 350 degrees for 30-35 minutes, until golden brown. Let cool before moving to a serving tray, to prevent Tarte from tearing. 


Salsa Bruschetta

Salsa Bruschetta

This recipe is one of my favorite creations thus far. It happened sort of by accident, ending up in a much different place than it started. The original inspiration was the concept of Pan a la Catalana, and then I started researching recipes, and went a completely different way. I was in the kitchen with my tomatoes and garlic and my baguette, and suddenly I was just adding things to a bowl and tasting and adding some more. I seem to do that a lot lately, which makes me both very excited about what I could create, and very concerned that I’m missing a lot of interesting things that might result from me ever following a recipe properly. But, what would be the fun in that?

The Salsa Bruschetta that has resulted from my impatience and possible over-confidence in the kitchen is fresh, bursting with flavor, and a perfect addition to your favorite tapas recipes – I served it alongside my Baked Patatas Bravas. I used tomato and onion as a base, and added garlic and a bit of balsamic vinaigrette, along with basil, lemon, brown sugar, and olive oil. It’s got a lot of the flavor that you would find in Pan a la Catalana, and in traditional bruschetta, with some sweetness and citrus that really lift the onion and the garlic to make them a little brighter. The lemon and onion are what really take this bruschetta recipe into salsa territory, because there isn’t a lot of  salsa-esque heat. I added a pinch of cayenne, but I didn’t want that to overshadow the freshness of the tomatoes and the lemon. If you’re in the mood for something a bit spicier, I’d recommend adding chopped jalapeno to this recipe.

There’s one more element to this particular version of Bruschetta: After I sliced my baguette, I topped the slices with a light drizzle of olive oil, and a sprinkle of Monterey Jack cheese. Next time I may experiment with mozzarella for a caprese-inspired version, but the Monterey Jack worked extraordinarily well with the Salsa Brushetta. It’s the right amount of salty and creamy to pair with the tangy, slightly sweet flavor of the bruschetta. Cheese isn’t typically a part of bruschetta, possibly because that can take it to pizza-bread territory very quickly. I assure you that very little about this Salsa Bruschetta reminds me of pizza. The flavors are much lighter, yet richer and more complex than something you’d find on a pizza. (Unless it’s a very good, very unusual pizza, of course)!

These are definitely best served fresh, when the cheese is still gooey and melted. They do keep in the fridge fairly well overnight, and I have it on good authority that husbands named Bobby find that leftover Salsa Bruschetta makes an excellent afternoon snack. Whether you’re snacking or having your Salsa Bruschetta as part of a meal – perhaps as an interesting starter – this recipe is one you’ll make again and again. It’s very quick to make, and as uncomplicated as something that looks this elegant can get. No one will believe that you knocked the whole thing together in 20 minutes. But they won’t have much time to worry about that, as they’ll be worried about getting another bite before it all disappears.


Salsa Bruschetta

Prep Time 15 minutes
Cook Time 5 minutes
Total Time 20 minutes

Ingredients

  • 2 medium tomatoes
  • 1/4 small/medium white onion
  • 1 french baguette
  • 1 clove garlic
  • 1/2 Tbsp olive oil + more for drizzling
  • 1/2 tsp balsamic vinegar
  • 3/4 tsp brown sugar
  • 3/4 tsp dried basil
  • 1 dash cracked black pepper
  • 1 1/2 tsps lemon juice
  • 1/2 tsp salt
  • 1 dash cayenne
  • 1/4 cup shredded Monterey Jack

Instructions

  1. Dice tomatoes and mince garlic, stir together. Chop onions in a smaller dice than the tomatoes and add to the bowl. 

    2. Slice baguette into thin slices, about 1/4 of an inch thick. Place in a single layer on a baking sheet lined with foil. Drizzle olive oil lightly over each. Bake in the oven at 350 degrees for 4 minutes. You want the bread crisp on the edges, but still a little soft.

    3. Add remaining ingredients to the salsa mixture, except the cheese. Stir until well combined. Salt to taste - add more cayenne for a spicier salsa. 

    4. When baguette slices are done, remove from oven, top each with a little less than 1/2 Tbsp of Monterey Jack, and return to the oven for 2 minutes, or until cheese is melted. 

    5. Top each baguette with the salsa mixture. Try not to eat the whole batch by yourself. 


Baked Patatas Bravas

Baked Patatas Bravas

I think it’s only appropriate to begin this post by saying that I’ve never been to Spain. If you’d like to take me there, I can be packed and ready in an hour, but until then, my experience with authentic Spanish tapas will remain limited. That said, I have plenty of experience with tapas restaurants in the states – they’re possibly my favorite kind of restaurant. Sitting down with friends to experience not just a dish or two, but instead a wide variety, is how all meals would be served in my ideal world.

One of the best and simplest tapas out there is Patatas Bravas. How could anyone not get excited about golden brown potatoes that are crispy on the outside and soft on the inside, drizzled with a spicy tomato sauce and a creamy garlic aioli? There are a million recipes out there for Patatas Bravas – my intention was to replicate the ones I like best. All the tapas restaurants in my area seem to serve an almost identical version, so hopefully I’ve done it justice!

The spicy tomato sauce is actually very similar to my Tomato Basil Bisque recipe, with a few key flavor alterations. The aioli is a fairly standard lemon garlic aioli. Patatas Bravas are typically fried potatoes, but I chose to bake mine to make them slightly healthier, and for general ease. Deep frying at home is quite a process, compared to throwing a tray in the oven.

Baked fries/chunks of potato are a little difficult to get perfectly crispy in the oven, but the technique I used cooked them just the way I wanted. You start by putting your chopped potatoes in a pot of cold water and bringing it to a boil. Once the pot reaches a boil, you remove your potatoes from the heat, toss them in a couple tablespoons of olive oil and flour, and bake them on a tray at very high heat in the oven. I haven’t tried this method for fries but you better believe I intend to. This technique could also be something that experienced chefs have known about for years, and here I am just discovering it. The more I learn about cooking, the more I find that I will never know enough about cooking.

I served my Patatas Bravas with a cheese board, some salsa bruschetta (a recipe that I will be posting here soon!), and of course some sangria. Can’t forget the sangria. Bobby (my husband) and I basically gobbled it down, sitting on the floor of our apartment (we do have furniture – we’re just weird). I prefer to imagine that we sat on a balcony in Spain, in the warm glow of the last of the day’s sunlight, glasses of cold, fizzy, white sangria in hand, reaching for another helping of everything. Food can transport me the same way a good book does – or maybe I’m just delusional? You be the judge. I’ll be busy eating Patatas Bravas on my “balcony.”


Baked Patatas Bravas

Prep Time 15 minutes
Cook Time 45 minutes
Total Time 1 hour

Ingredients

Potatas

  • 3 russet potatoes
  • 2 Tbsps olive oil
  • 2 Tbsps white flour

Spicy Tomato Sauce

  • 1/4 medium yellow onion
  • 1 Tbsp butter
  • 1 clove garlic
  • 2 Tbsp tomato paste
  • 1/4 cup diced canned tomatoes
  • 1/4 cup chicken broth
  • 1 1/2 tsp brown sugar
  • 1/2 tsp dried basil
  • 1/8 tsp cumin
  • 1/8 tsp chili powder
  • 1/8 tsp cayenne
  • 1/8 tsp dried oregano
  • 1/8 tsp dried thyme

Lemon Garlic Aioli

  • 1/4 cup mayonnaise
  • 1/2 tsp lemon juice
  • 1 tsp olive oil
  • 1/4 tsp garlic powder
  • 1/16 tsp salt

Instructions

  1. Peel and dice potatoes into bite-sized chunks. Place in a pot with enough cold water to submerge them completely. Cook over high heat, just until the water reaches a boil. Drain, keeping the potatoes in the same pot. Add olive oil and flour to the potatoes and shake the pot until they're well coated - this is much easier than stirring to get them evenly coated. 

    2. Line a baking sheet with foil and spray with non-stick cooking spray. Spread potatoes on the tray in a single layer, and cook in the oven at 400 degrees for 30 minutes. Remove from the oven after 15 minutes, and flip the potatoes to ensure they brown on all sides. When they're golden brown and the outsides are all crispy, they're done. 

    3. While the potatoes cook, make your sauces. For the aioli, add all five ingredients to a small bowl and stir until well combined. For the tomato sauce, chop onion and add to a small pot with 1 Tbsp of butter. Let cook until the onion is soft and starting to become transparent. 

    4. Mince 1 clove of garlic and add it to the pot, with the tomato paste, diced tomatoes, and chicken broth. Let it come to a boil, reduce heat, and simmer for 15 minutes. After lowering the heat, add the remaining ingredients, and stir frequently.

    5. Remove sauce from heat and pour into a blender (I used my NutriBullet, as always). Blend until smooth. 

    6. Remove potatoes from the oven, pour into your serving dish and drizzle with both sauces. Enjoy!


Pulled Pork and Cranberry Flatbread

Pulled Pork and Cranberry Flatbread

I was roaming the internet, looking for inspiration, when I came across this cranberry and goat cheese flatbread. It clearly has made the rounds on Pinterest, and for good reason – it’s quite pretty. Having posted a flatbread recipe recently, I figured this would be a great time to try out some interesting new toppings. Although to be fair, you could put just about anything on flatbread and I’d try it. Not to turn this post into an ode to flatbread or anything.

I love the goat cheese and cranberry combination, but I wanted to give the dish another dimension, and make it more filling. With the tart, yet sweet cranberry sauce already in mind, I knew spicy, smoky pulled pork would be the perfect addition. The cranberry sauce is reminiscent of a barbecue sauce on the pulled pork, but with a different, fruitier flavor profile. The goat cheese is a perfect element to mellow some of the spice from the pork, and keep the tang of the cranberry sauce from being overwhelming.

Cranberry sauce seems to get attention only around the holidays, and I think that’s kind of a tragedy. It’s delicious with so many other things besides turkey and stuffing. That said, finding fresh or even frozen cranberries after January 1st is like trying to find truly good gluten-free pizza crust: may exist, but hard to locate. My cranberry sauce calls for part dried cranberries and part canned whole cranberry sauce, so it can (and should!) be made between the months of January and October. My recipe for this is adapted from a Food Network version.

The pulled pork in this recipe is done in the slow cooker, with a rub from Kevin and Amanda. Their recipe has a lot more to it, brining, and cooking in the oven, etc., but I just took the rub, coated my pork, tossed it in the slow cooker with a little water, and let it go, and it’s some of the best pulled pork I’ve ever eaten. Every bite is extremely flavorful and a little spicy, without being overpowering. The goat cheese I used is “La Bonne Vie Garlic and Herb Goat Cheese”- I just got it from my local grocery store, but you could honestly use any decent herb goat cheese. Trader Joe’s has a great, inexpensive one.

Since I’ve essentially given you a rundown of how wonderful all the components of this dish are on their own, you can imagine how I reacted when I tried them together. There was a lot of swooning, and uncivilized devouring, and general elation.


Pulled Pork and Cranberry Flatbread

Pulled pork recipe is adapted from Kevin and Amanda's Perfect Pulled Pork.  

Cranberry sauce recipe is adapted from Gourmet Magazine's Savory Dried Cranberry Sauce - Recipe found through foodnetwork.com

Servings 3 flatbreads

Ingredients

Pulled Pork

  • 1 4-8 lb pork shoulder
  • 1 medium yellow onion
  • 1/2 cup water
  • 1 Tbsp ground cumin
  • 1 Tbsp garlic powder
  • 1 Tbsp onion powder
  • 1 Tbsp chili powder
  • 1 Tbsp cayenne pepper
  • 1 Tbsp salt
  • 1 Tbsp ground black pepper
  • 1 Tbsp paprika
  • 1/2 cup brown sugar

Cranberry Sauce

  • 1/4 cup brown sugar
  • 1/2 Tbsp cornstarch
  • 1/2 cup white wine
  • 3/4 cup chicken broth
  • 1 tsp balsamic vingar
  • 1/2 cup dried cranberries (I used Craisins)
  • 1/2 cup canned whole cranberry sauce
  • 1/8 tsp rosemary
  • 1/8 tsp cinnamon
  • 1/8 tsp tarragon

Other Ingredients

  • 3 large flatbreads
  • 8-12 oz herb goat cheese (2-3 small logs), depending on how much you like goat cheese - I used 12oz.
  • 2 Tbsp fresh thyme or parsley (optional)

Instructions

  1. Slow cook the pork: mix together all dry ingredients to create a rub. Roughly chop yellow onion, and place in slow cooker with the 1/2 cup of water. 

    2. Pat pork shoulder dry with paper towel, and coat generously with the dry rub on all sides. Massage it into the meat with your hands to make sure it really sticks. 

    3. Place pork in the slow cooker, on top of the onions. Cover and let cook on high 4-6 hours, or on low 8-10 hours, until pork is falling off the bone and tender. Remove bone from the pot, and shred the meat with two forks. 

    Note: this pulled pork recipe yields much more pork than you'll need to use for your flatbreads. Extra meat can be frozen to use later.

    4. If you're making your flatbread, do it when the pork is about an hour and a half from being done. You can easily use pre-made flatbread if you prefer. You can find my flatbread recipe linked in the post above.  Instead of splitting the dough into eight pieces like I typically do, I split it into three, to make larger flatbreads. The method for cooking them is the same. 

    5. When your pork is about a half hour from done, make the cranberry sauce. Stir together brown sugar and cornstarch in a small sauce pan. Add white wine and chicken broth and set over low heat. Stir until well combined. Add vinegar, dried cranberries and canned cranberry sauce, rosemary, tarragon, and cinnamon. Simmer for 15 minutes, stirring occasionally. Sauce should be quite thick. Remove from heat. Sauce can be stored in an airtight container in the refrigerator for at least a week. 

    6: Assemble Pulled Pork and Cranberry Flatbreads: spread each flatbread with a generous amount of goat cheese, saving 2-4 oz aside. Top with a layer of pulled pork- you can add as much or as little as you like here. Drizzle with cranberry sauce (again, quantities are up to you).  I used all of my sauce between three flatbreads. Top with small crumbles of the remaining goat cheese. Bake flatbreads in the oven at 350 degrees for about 8 minutes, until the cheese gets soft and the flatbreads are warm and a just little crispy on the bottoms. Garnish with fresh thyme or parsley. 


Warm Butternut and Bell Pepper Salad

Warm Butternut and Bell Pepper Salad

On Sunday, I woke up and realized that I’d barely eaten a single vegetable between Friday and Saturday. Please tell me that happens to you, too. This recipe was born out of a need to make something delicious and vegetable-based, with the ingredients already in my kitchen. It’s funny how sometimes the most wonderful dishes come together that way – and I can guarantee that this dish is indeed wonderful. It’s got soft, slightly sweet butternut squash, bell peppers, garlic, and onions as a base.  To flavor it, I created a cross between a light balsamic vinaigrette and Chinese take-out inspired sauce that works with the nutty squash flavor better than I could’ve dreamed.

I was cooking bacon before I started concocting my “stir-fry,” so I threw some torn, thick-cut bacon in with the mix. It added another dimension to the texture, and I don’t think I even need to remind you how adding the flavor of bacon to just about anything will immediately improve it. I wilted some spinach into it at the end to add a little more color and bulk. I don’t actually love cooked spinach all that much, but the flavor of it sort of disappeared in this dish, so I got more nutrition without that bitter wilted spinach flavor. This is yet another addition to my “make vegetables taste good” file.

I was truly just throwing things in the pan for this one. Chop up the vegetables, saute them, and add your sauce. Then throw in a big handful of fresh spinach, let it cook down, and the result is a perfect alternative to a regular cold salad. The prep and cooking processes take maybe 30 minutes, and you don’t have to stand at the stove the whole time the food is cooking. Since starting this blog, I’ve become very aware of how much I like being able to multitask. If I can make lunch and clean up the kitchen at the same time, (and maybe text and dance and dream up other blog ideas as well), I am a much happier person.

I invented this recipe to be my lunch, but it would make a fabulous side dish for beef or chicken, or even a vegetarian entree if you forgo the bacon (just make sure to taste it and see if it needs an extra dash of salt in that case!). That said, the recipe makes a fairly small portion. Even as a side dish, you may need to double or triple the measurements depending on who you’re feeding. It’s a quick, healthy lunch or dinner for when you want something warm and comforting, but still light and fresh. If you’re doing any kind of low carb diet, then this recipe is definitely for you.

I always mention how recipes are incredibly versatile, but I suppose that as a person who can’t ever follow a recipe without tweaking it, I just think everything is open to interpretation. You could try this dish with other kinds of squash, any greens you like, beets, or mushrooms – the possibilities are endless when you’ve got some onion, garlic, and a great sauce to start.


Warm Butternut and Bell Pepper Salad

Ingredients

  • 2 cloves garlic, minced
  • 1/3 medium white onion
  • 1/2 red bell pepper
  • 2 cups diced butternut squash
  • 2-3 strips of bacon
  • 3 tsps olive oil, divided use
  • 1 tsps balsamic vinegar
  • 2 tsps sesame chili oil
  • 2 tsps soy sauce
  • 2 tsps honey
  • 2 tsps rice wine vinegar
  • 2 tsps brown sugar
  • 1/8 tsp ground ginger
  • 1/2 tsp salt
  • 1 big handful of fresh spinach

Instructions

  1. Chop red bell pepper, onion, bacon, and butternut squash, and mince garlic. Add to skillet on high heat with a tsp of olive oil. Give them a quick stir once every minute or so.

    2. In a small bowl, stir together all remaining ingredients including 2 tsps of olive oil to make the sauce. When the vegetables in the skillet just start to brown, pour half of the sauce over them and stir.

    3. Keep an eye on the skillet, stirring frequently (but not constantly). When the vegetables look like they're almost done (squash and peppers are tender, onions are browned), pour the other half of the sauce into the skillet and stir.

    4. Let cook for 3-4 more minutes, and lower heat. Add fresh spinach to the skillet and stir in. Let it cook just long enough for the spinach to wilt. Remove from heat and serve.

    Note: I place a large pot lid over my skillet after adding the spinach to help it wilt a little faster.


Dark Chocolate Caramel Raspberry Popcorn

Dark Chocolate Caramel Raspberry Popcorn

I’m one of those people who loves awards season. I love all the beautiful people in their gorgeous clothes on the red carpet, and I love when someone funny does a great job hosting. The atmosphere at awards shows seems somehow both laid back and also buzzing with excitement, and I like feeling like I’m a part of it, even though I’m just sitting on my couch. As the Academy Awards are coming up this weekend, I thought it would be fun to create a very fancy snack to eat while watching, since I can’t go be a very fancy person at a huge, televised event.

I looked up the menu for this year’s official Oscars after-party, always catered by Wolfgang Puck. Among other things, he’s planned gold-dusted truffle popcorn. A decadent popcorn seems like just the thing to snack on while watching the Oscars, but I do not have access to gold dust. I mean, I probably could if I tried hard enough, but who really wants to eat gold dust on popcorn, when you can just coat it with beautiful, golden caramel instead? So I started thinking about what would go nicely with caramel, and chocolate came to mind, as it is the most obvious answer in the world. I wanted to add a little something extra, a little more glamour. I’d seen freeze-dried berries in a recipe from my name is yeh recently, and thought they might be the perfect addition. (You have to click on that link, by the way – her photos are gorgeous).

I went with freeze-dried raspberries, and I was so right about adding them to my popcorn. The combination of the slightly salty caramel, the sweet, almost bitter chocolate, and the tart raspberries is completely amazing – and addicting. The tartness of the berries really diffuses the bitterness in the chocolate, so every bite is perfect. This is the kind of recipe you can’t make too often because it’s very rich, but the compelling flavors make it easy to eat the whole batch. The recipe makes a good amount, so there’s plenty to share – if you have the self-control for that.

It starts with whipping up a basic caramel popcorn (only takes 20 minutes, and I highly recommend you eat some of it right away), and then you add a dark chocolate drizzle, followed by chocolate chunks, and crushed, freeze-dried raspberries. You can play with quantities, depending on what you like, but I promise the raspberries give this popcorn some serious star quality. This might be the Meryl Streep of popcorn.

It’ll keep for a couple days in an airtight container, if you have it around that long. Dark Chocolate Caramel Raspberry Popcorn is like a fantastic Oscars dress: custom made for the occasion, but talked about for years to come!


Dark Chocolate Caramel Raspberry Popcorn

Prep Time 5 minutes
Cook Time 20 minutes
Total Time 25 minutes
Servings 8 cups of popcorn

Ingredients

  • 8 cups air-popped popcorn
  • 1 cup brown sugar
  • 1 cup unsalted butter 2 sticks of butter
  • 1/8 tsp salt
  • 1 cup chopped dark chocolate; I just used dark chocolate chips divided use
  • 1 cup whole freeze-dried raspberries

Instructions

  1. Start by popping your popcorn with an air popper - you can also do this in a brown paper bag in the microwave. Place popcorn in a large bowl.

    2. Melt brown sugar, butter, and salt together over high heat. Bring just to a boil - (right when you start to see tiny bubbles), and then reduce heat and let simmer, stirring constantly, for 5 minutes. 

    3. Pour caramel over top of popcorn and stir until the popcorn is all coated. Line a baking sheet with foil and spray with non-stick cooking spray. Pour popcorn out onto the baking sheet, and spread into an even layer. Bake at 350 degrees for 8 minutes. 

    4. While the popcorn is in the oven, melt half of the chopped dark chocolate in a piping bag - you can also use a sandwich baggie. Be sure to melt it in 10 second bursts in the microwave to keep the chocolate from seizing. Crush the freeze-dried raspberries into small pieces.

    5. When the popcorn comes out of the oven, let cool until you can handle it without burning yourself. Eat some, and then drizzle half of the melted dark chocolate over the whole tray. Sprinkle on a 1/4 cup of the chopped dark chocolate bits and half of the raspberries. 

    6. Place the tray in the freezer for 5-10 minutes. Remove from freezer and check that the melted chocolate has mostly firmed up. Stir popcorn around on the tray. Drizzle on the rest of the melted chocolate, and top with the rest of the chopped dark chocolate and raspberries. Freeze for 5-10 more minutes, and then pour into a bowl and enjoy.