Slow Cooker Spicy Shredded Beef

Wow, it’s been a minute since I’ve put up a recipe! In my time off, I’ve honed my cooking skills some more, tested loads of new recipes, traveled to Thailand and found all kinds of new flavor inspiration (more on that in future posts), and did lots of things not related to cooking that I also enjoy! I’m learning to play the guitar, and bullet journaling, and playing old video games that I only ever have time for in January when the world majorly slows down. January also makes me excited to spend a lot of time on snowy days cooking rich, hearty meals that are essentially coziness in food form. Braised beef fits that bill for me, especially when it’s loaded with flavors and spices that make it perfect for any version of a burrito bowl or taco that you could dream up.

Developing this recipe took a while because I fell into what I now think of as the slow-cooker trap. By this, I mean the problem with a lot of slow cooker-centric meals is that we assume we can just dump anything in the mix and it will magically become delicious as it cooks for eight hours. Cue me spending years trying out pre-made sauces and testing several ultimately disappointing recipes for shredded beef, chicken, etc. (I’ve already found my dream come true pulled pork – check it out here!)

This version was the result of me swearing that I would no longer make bland shredded beef. I wanted to season the hell out of it, and make sure every bite had the kick I expect when I bite into something that is promised as having some Mexican inspired flavors. I went through a few tests for this recipe, adding more lime, more jalapenos, more…everything. The more I cook, the more I discover just how easy it is to under-season food and prevent it from reaching its highest potential.

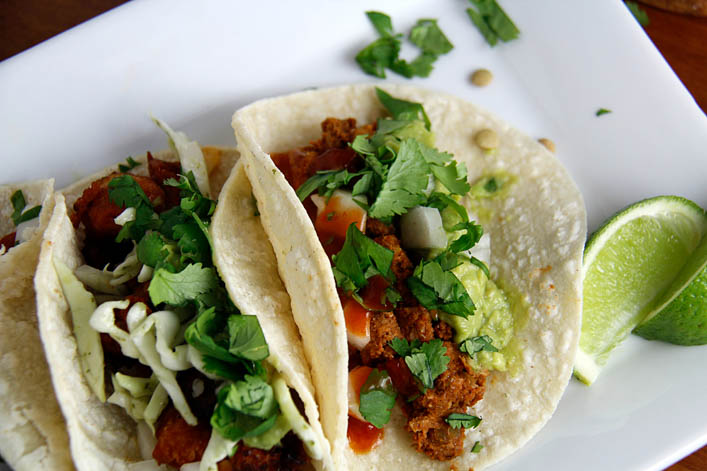
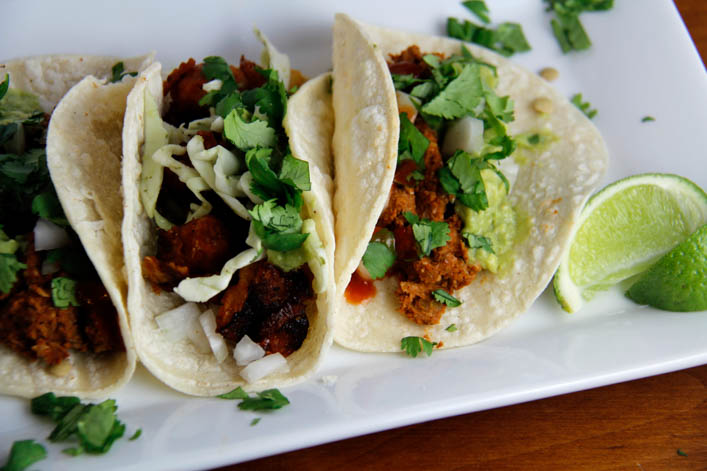
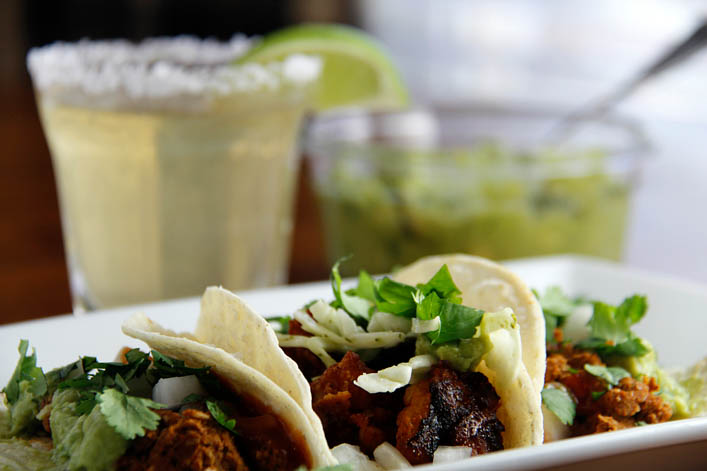
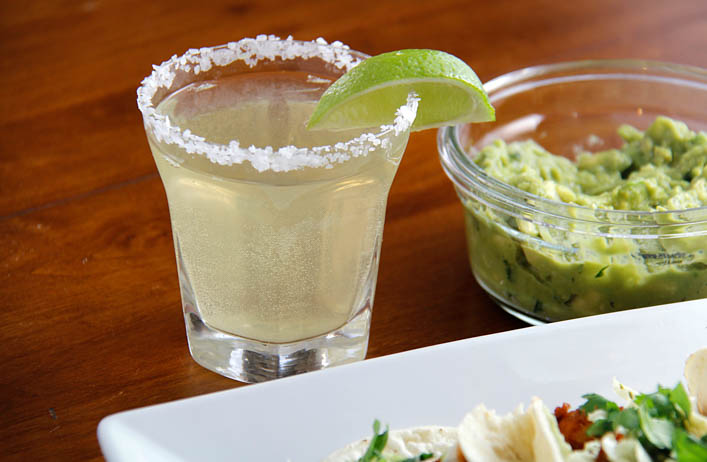
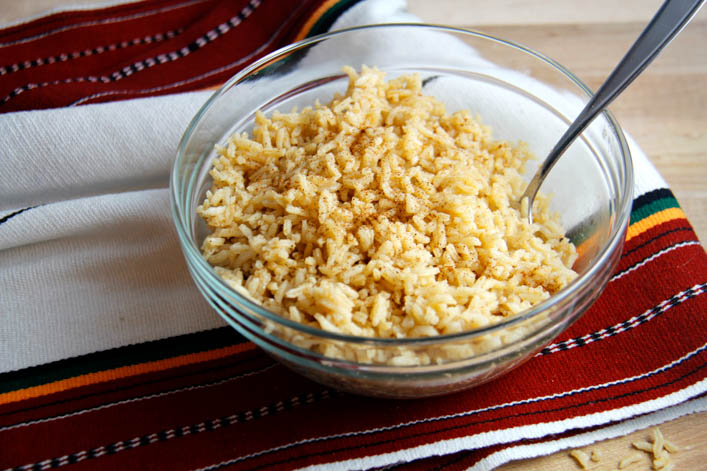
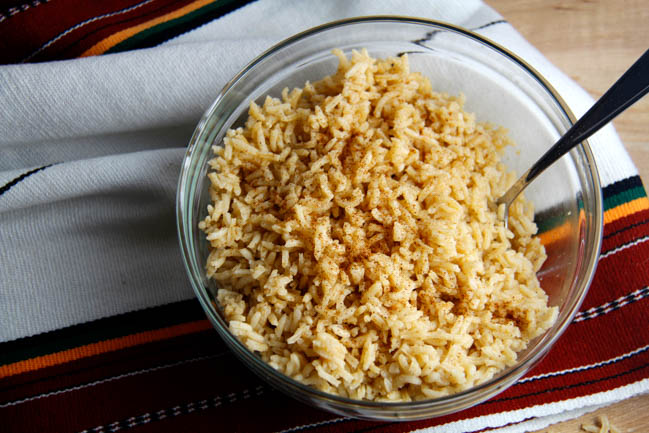
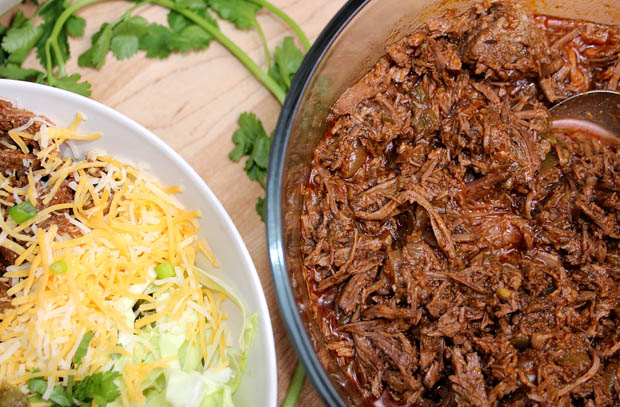
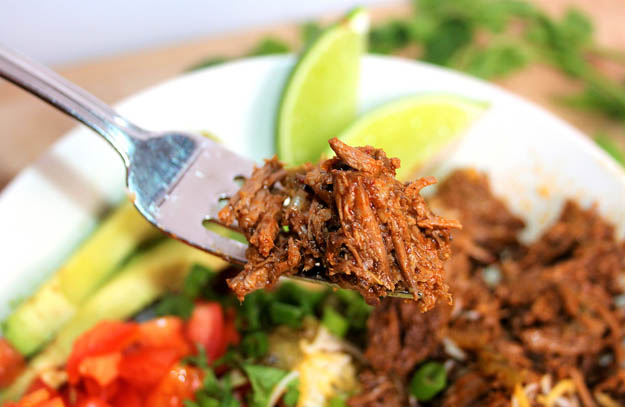
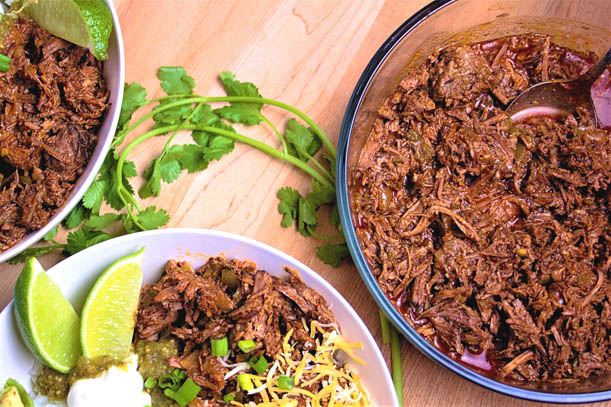
The flavor profile for this shredded beef is reminiscent of Chipotle barbacoa, except that this is arguably better. The lime and jalapeno flavors are more prominent, and the added onion and green pepper give each bite more dimension in flavor and texture. My favorite way to eat it is piled into a homemade burrito bowl, with loads of avocado, salsa, crema, and shredded cabbage for crunch. By the time the beef is finished cooking, it will have a good amount of (absurdly delicious) drippings/fat in with it, and rice in a burrito bowl soaks it up beautifully. If you prefer to use the meat for tacos, which I highly recommend, make sure you drain some of the liquid off before using it. Unless you love extremely messy tacos – I’m not here to judge your taco preferences.


Slow Cooker Spicy Shredded Beef

A 3lb roast yields approximately 8 cups of shredded beef. Honestly more than it sounds like. 

Ingredients

  • 1 3-4lb chuck roast
  • 1 medium onion, cut into strips
  • 1 green bell pepper, de-seeded and cut into strips
  • 1/2 cup beef broth
  • 1/2 cup Mt. Olive diced jalapeno peppers – include some of the liquid from the jar in this measurement
  • 1 4.5oz can mild diced green chiles
  • 1/4 cup lime juice (approx. 2 limes)
  • 2 Tbsps tomato paste
  • 3 tsps onion powder
  • 2 1/2 tsps chili powder
  • 2 tsps paprika
  • 2 tsps garlic powder
  • 2 tsps cumin
  • 1 tsp oregano
  • 1 tsp salt
  • 1 tsp sugar
  • 1/2 tsp freshly ground black pepper

Instructions

  1. Slice the roast into 4-6 chunks and sear in a hot skillet, until all sides of each piece are browned.

    While the meat is cooking, add all other ingredients to the slow cooker, and give them a stir to combine. They don’t need to be completely mixed. Top with the cooked meat and set the slow cooker to low for 8 hours. 

    If you are leaving the slow cooker for the whole eight hours, pull some of the seasonings and vegetables from the bottom of the slow cooker on top of the beef, so that it’s surrounded by the other flavors. If you’ll be able to check the beef periodically, give it a stir every hour or so. 

    After the cooking time is up, shred the beef right in the slow cooker with two forks – it should fall apart very easily. 

    If using for tacos, drain some of the liquid off the meat before serving. 


Vegan Tacos: Buffalo Cauliflower and Green Lentil

Vegan Tacos: Buffalo Cauliflower and Green Lentil

With Cinco de Mayo upon us, it only makes sense to post a taco recipe today. Actually, two taco recipes, because I’m bad at making food decisions. The correct answer to “Which taco recipe should we make?” will always be “All of them.” My friend Amanda, who possibly loves cooking more than I do, posted a pic of these tacos on her Insta recently, and I knew I had to get the recipes. Both are vegan, which isn’t typically in my taco wheelhouse, but we all know I jump at any opportunity to make vegetables taste better. Thank goodness for that, because these tacos are unbelievably delicious, and, you guessed it – healthy. One is green lentil and walnut based, the other has buffalo cauliflower “wings,” and they really do mimic the kind of textures you get with beef and chicken tacos. We dressed them up with guacamole, taco sauce, cilantro, shredded cabbage, lime, and fresh onion, and they tasted like all good tacos do: heaven.

In the past I’ve been skeptical of these so-called “buffalo cauliflower wings,” but then I made them, and tried them in a taco, and they’re great. They’re not quite a dupe for boneless chicken wings, but they’re way closer than I ever could’ve imagined. The recipe for the buffalo cauliflower taco is adapted from Gimme Delicious’ Baked Buffalo Cauliflower Wings. Baking instead of frying them makes them healthier and easier, although I suppose you could fry them if you wanted to. After baking, we coated them in Texas Pete Wing Sauce, although you could definitely try this with barbeque sauce, if you don’t love spicy food. The cauliflower itself gets quite soft, but the battered outsides get nice and crispy. This makes it feel very substantial in the tacos, and you can almost forget that you’re eating a pile of cauliflower.

The second taco recipe was my favorite of the two, because the flavor was every bit the kind of wonderful, taco meat flavor I wanted. It starts with cooked green lentils, blended with walnuts and spices, and quickly becomes a perfect taco filling that I never would have dreamed up on my own. The spices are a blend of chili powder, cumin, paprika, salt, and pepper, with a little tomato paste added. Since the lentils and the nuts are all fairly mild, it’s easy to give them a lot of bold taco flavor. I think they hold the flavors from the spices better than beef or chicken ever would, so you don’t need a load of extra sauce on top. You can use a mix of walnuts and cashews if that’s what you have on hand, and I’d guess a different kind of lentil would yield similar results, although I haven’t tested that theory. The recipe for this taco is adapted from Oh She Glows’ Ultimate Green Taco Wraps. She uses lettuce as wraps instead of tortillas, but I love carbs a little too much for that.

You can go crazy with the toppings, and add beans, corn, salsa – whatever floats your boat. We topped the buffalo cauliflower tacos with shredded cabbage, diced onion, cilantro, guacamole, and Panera’s Asian Sesame Dressing, which added a really nice hint of sweetness to the tacos. The green lentil tacos were topped with mild Ortega taco sauce, guacamole, diced onion and cilantro. We used Whole Foods guacamole, because I’m obsessed with it, and it’s honestly cheaper than making your own fresh guac. I’d go so far as to say that I like it more than Chipotle guac, which is really the best recommendation I can give anything.

I plan to repeat these tacos for dinner on loads of nights that don’t happen to fall on Cinco de Mayo. They’re very filling for being mostly veggies, and they’re quick to make. The buffalo cauliflower is probably the most labor-intensive part, and that really just involves chopping cauliflower, stirring together the batter and coating the cauliflower in it, before baking it in the oven. Either or both of these recipes are a perfect addition to any taco night. Meat eaters will love them, regardless of their meat-free status, because they’re packed with delicious flavor and great textures.

We made a whole day of creating this blog post, because tacos are just better with good drinks and friends, (and a vat of guacamole that doesn’t need to be photographed, so you can dive right in). While Amanda and I were making the tacos, Bobby was making sure we had a constant supply of margaritas. What a guy, am I right? I’m not saying margaritas are compulsory for a good taco night, but they’re definitely the cherry jalepeno on top, as far as I’m concerned.


Buffalo Cauliflower Bite Tacos

Adapted from Gimme Delicious' Baked Buffalo Cauliflower Wings

Ingredients

  • 1 head of cauliflower
  • 3/4 cup flour
  • 3/4 cup almond milk
  • 2 Tbsps garlic powder
  • 1 tsp paprika
  • 1 tsp cumin
  • 1 tsp salt
  • 1/2 tsp pepper
  • 1/2 cup wing sauce (I used Texas Pete Wing Sauce)
  • 6 inch corn tortillas
  • shredded cabbage
  • guacamole
  • cilantro, chopped
  • diced white onion
  • Asian Sesame Dressing from Panera, or dressing of your choice

Instructions

  1. Chop the cauliflower into bite size florets. Preheat oven to 450 degrees.

    2. In a large bowl, stir together almond milk, flour, and all of the seasonings. Add the cauliflower florets to the bowl and stir until well coated. Spray a baking sheet lined with foil liberally with non-stick cooking spray. Pour the cauliflower onto the sheet and spread into a single layer. Bake for 10 minutes, remove from the oven and rotate the cauliflower, and then bake for an additional 10 minutes. 

    3. Remove the cauliflower from the oven and drizzle the wing sauce evenly over top. Bake for another 20 minutes.

    4. While the cauliflower is cooking, prepare your choice of toppings for the tacos.

    5.Warm tortillas on the stove or in the microwave, and fill with buffalo cauliflower, and top with guacamole, onion, cilantro, cabbage, and dressing, or whatever suits you!


Green Lentil and Walnut Tacos

Recipe adapted from Oh She Glows' Ultimate Green Taco Wraps with Lentil-Walnut Taco Meat

Ingredients

  • 1 1/4 cups cooked green lentils 3/4 cup uncooked
  • 1 cup walnuts
  • 1 Tbsp olive oil
  • 3 Tbsp water (add more if it seems dry)
  • 1 Tbsp tomato paste
  • 1 tsp paprika
  • 1 tsp chili powder
  • 1 tsp cumin
  • 1 tsp salt
  • 1/2 tsp pepper
  • 6 inch corn tortillas
  • cilantro, chopped
  • guacamole
  • taco sauce (I used Ortega, mild)
  • white onion, diced
  • lime

Instructions

  1. Cook green lentils on the stove. Add them to a small pot with 1 1/2 cups water, bring to a boil, and then reduce to a simmer. Cook for 20-30 minutes until lentils are tender. Preheat the oven to 300 degrees and spread walnuts on a baking sheet lined with foil. Toast in the oven for about 10 minutes. Check them after the first 5 minutes, and then keep an eye on them so they don't burn.

    2. Blend lentils, nuts, olive oil, and all spices in a food processor or blender until well combined and a thick paste forms. 

    3. Warm the lentil "meat" up in a pan on medium heat for a few minutes, or just microwave. Add to tortillas with taco sauce, cilantro, onion, guacamole, and a squeeze of lime. 

Tex-Mex Rice

Tex-Mex Rice

I intend to post on this blog about delicious Mexican food for as long as humanly possible. With that in mind, I think it makes sense to share my favorite side dish to go with things like Salsa Verde Chicken Enchiladas. This Tex-Mex rice is a family recipe, and it’s a far cry from the stuff you sometimes get in restaurants with chunks of peas and carrots that were clearly recently defrosted.

This Tex-Mex rice is cooked in olive oil and chicken broth, and flavored with onion, garlic, and chili powder; oregano; cumin; and a little bit of enchilada sauce. It’s a perfect choice to complement black beans and just about any version of tacos, enchiladas, or burrito you want to make. The rice definitely isn’t spicy, but it has a depth of flavor that makes it delicious even just eaten by itself.

Tex-Mex rice doesn’t take much longer to make than traditional rice, because the only extra steps are browning it briefly in olive oil, and adding the seasonings. It can be made while the rest of dinner is cooking, and it keeps well in an air-tight container, in the refrigerator, for about a week. This rice has a slightly higher nutrition content than plain or cilantro-lime rice, since it’s cooked in chicken broth. You can also make it with vegetable broth to keep it animal-product free.

My favorite way to eat Tex-Mex rice is in a big burrito bowl, because it’s a perfectly mild, yet flavorful, base to build on with just about any Mexican flavors. However you decide to serve it, in a burrito, a bowl, or just on the side, this recipe will change the way you look at rice.

Tex-Mex Rice

Servings 3 cups

Ingredients

  • 1 cup raw white rice
  • 3/4 Tbsp olive oil
  • 14oz chicken broth (or a mix of broth and water, or vegetable broth)
  • 1 Tbsp enchilada sauce or smooth salsa
  • 1/2 tsp salt
  • 1/2 tsp onion powder
  • 1/2 tsp garlic powder
  • 1/2 tsp chili powder
  • 1/2 tsp cumin
  • 1/8 tsp dried leaf oregano

Instructions

  1. Stir together seasonings and salt, set aside. If the broth is cold, warm it to at least room temperature. Combine broth with the enchilada sauce. Set aside.

    2. Heat the olive oil in a medium pot with a tightly-fitting lid (lid off). Add the rice, and stir over medium-high heat until lightly browned, just to an ivory or light tan color.

    3. Stir the seasonings into the rice, and then add the broth. Stir once, to distribute evenly. When the broth comes to a full boil, put the lid on the pot, and turn the heat to the lowest setting. Let cook for 20 minutes. Do not remove the lid during cooking time. Check for doneness after 20 minutes; if the liquid has not been completely absorbed, cover the pot again and let it cook another 5 minutes or so.

    For best texture, cook a day or two ahead of serving, cool, and then refrigerate. Reheat in the microwave just before serving.