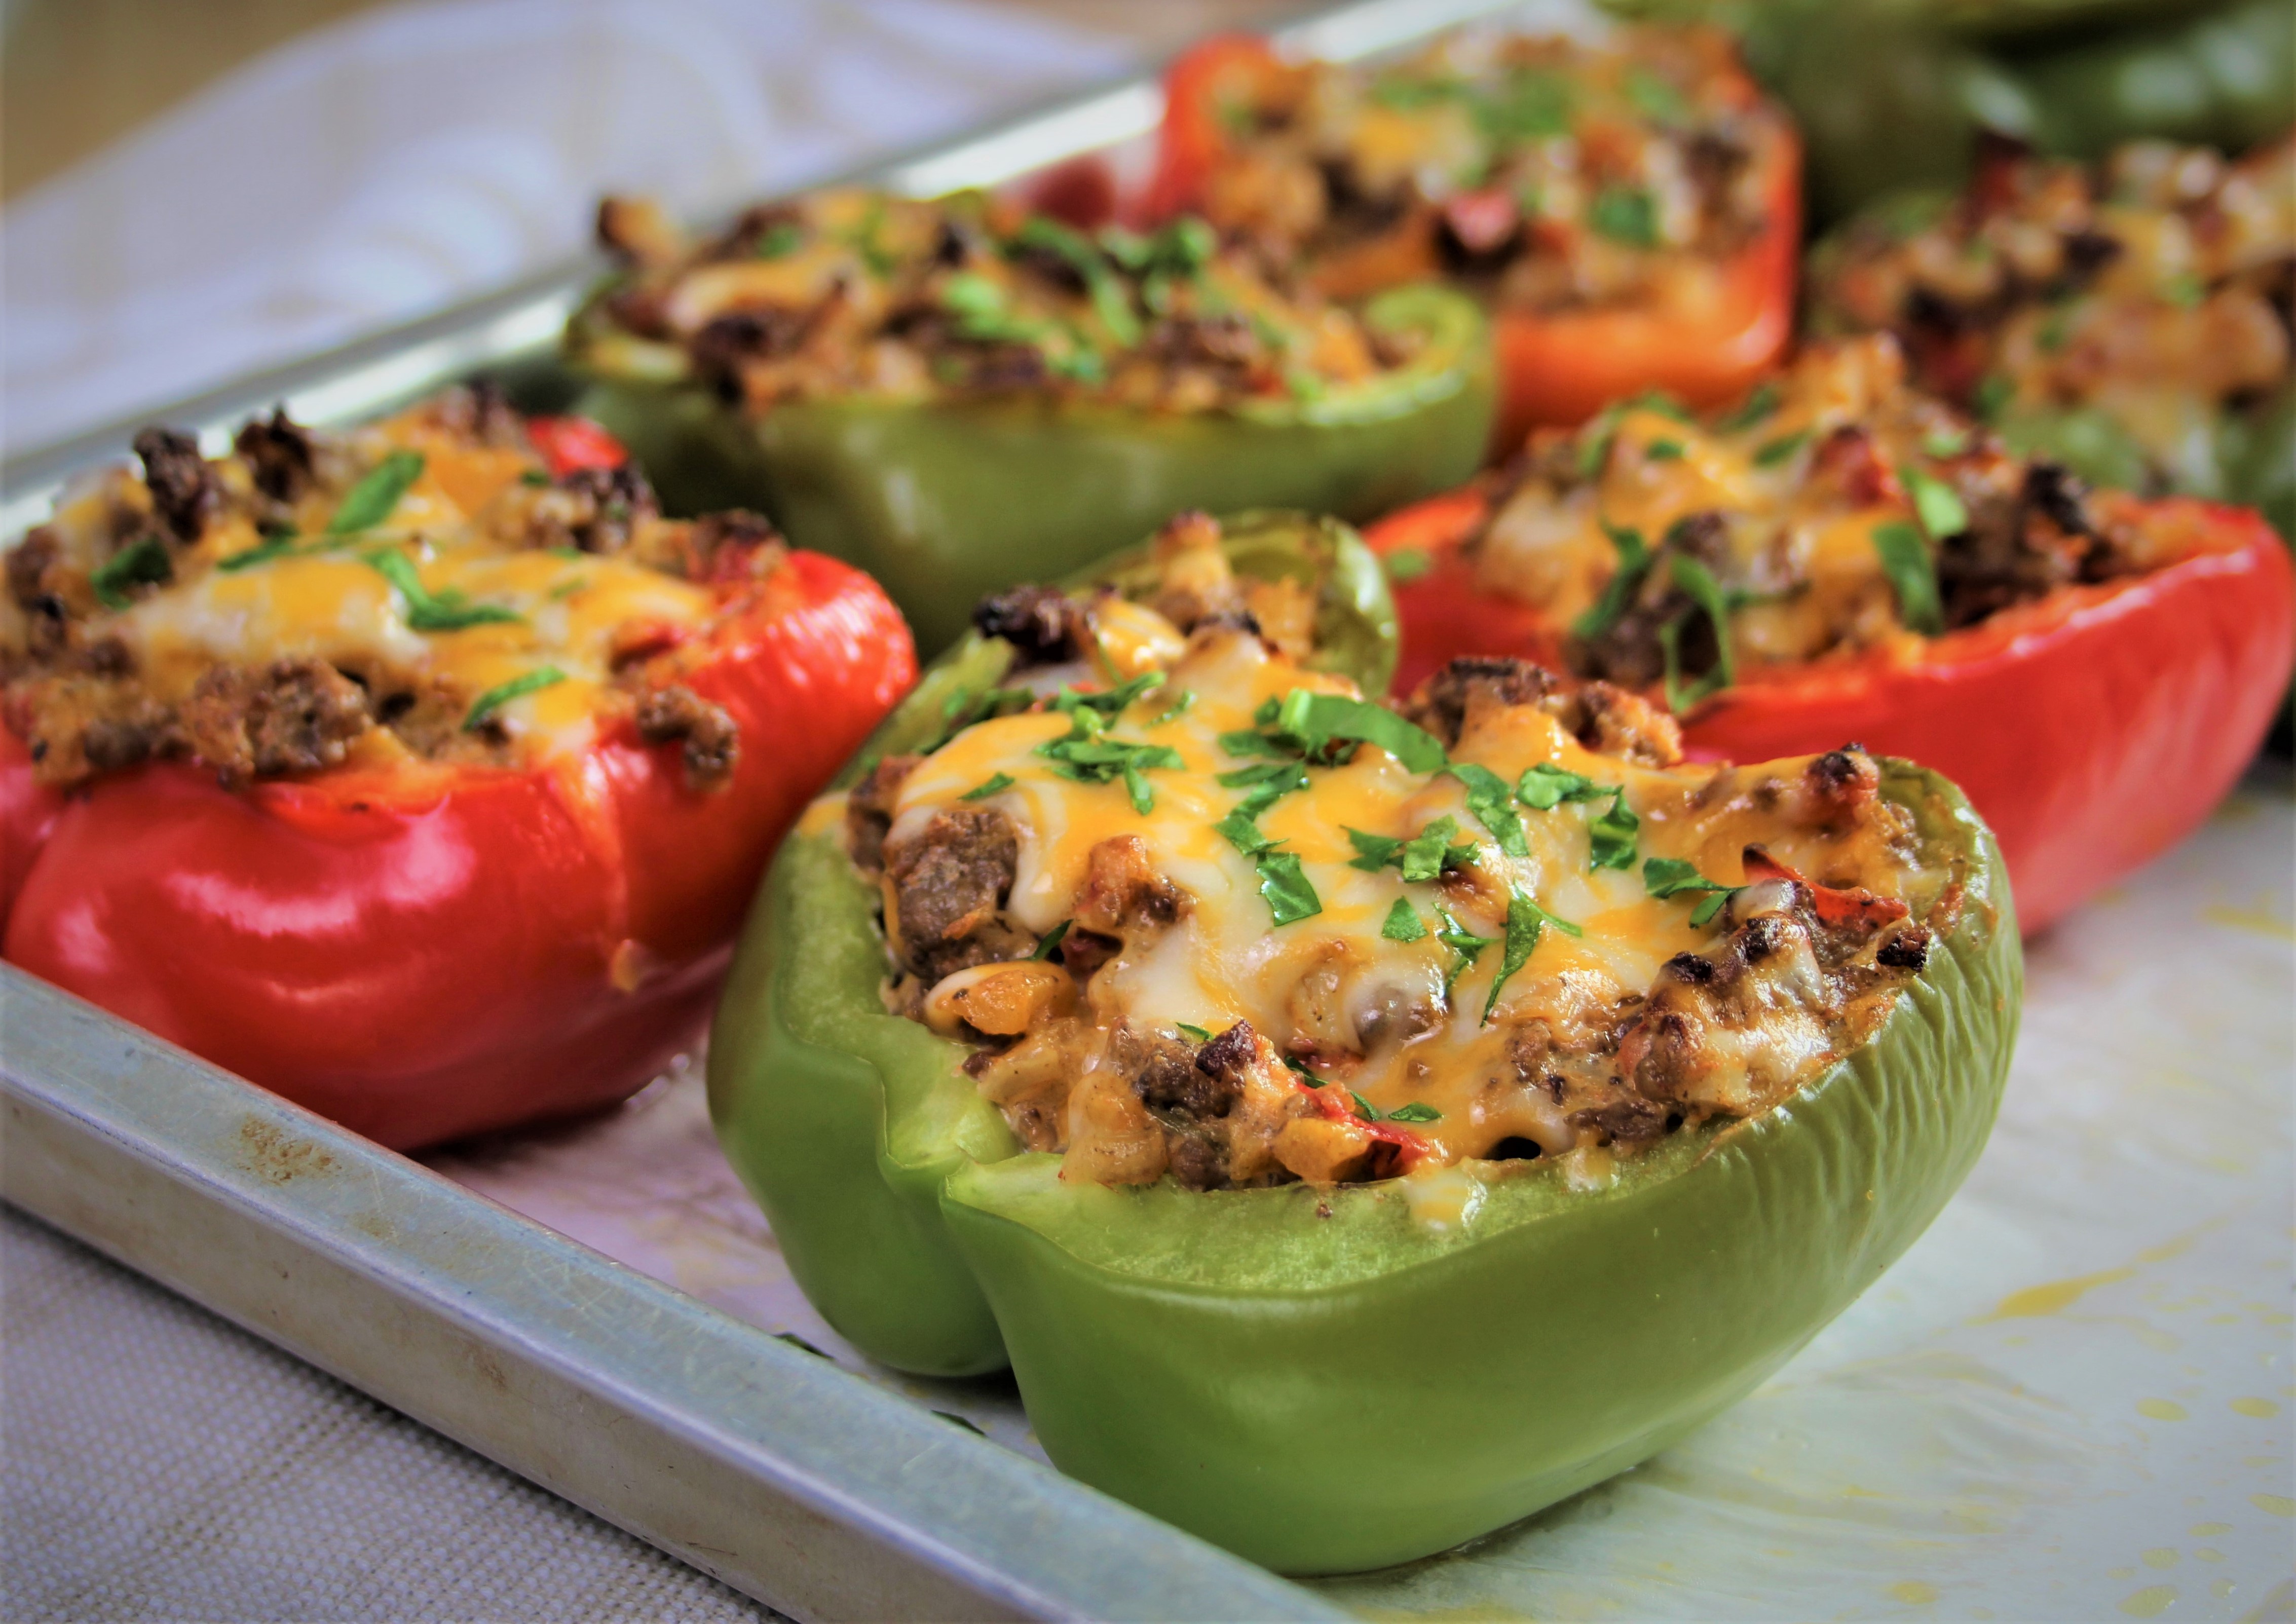
Grain-Free Stuffed Peppers

There are a lot of things that I don’t understand, like how calculus works, and why dad shoes were ever a popular fashion trend. Something that has often confused me is the presence of rice in a stuffed pepper. Rice has its place, but of all the filling and delicious things you could put in a bell pepper, rice seems like a bland choice. Bell peppers are already kind of bland by themselves, and if you’re making them the star of the show, the filling really needs to burst with interesting flavors. 

This version of a stuffed pepper was inspired both by the leftovers in my fridge, and my craving for something that would really satisfy me, without being absurdly bad for me. (What else is new?) I started with some cooked ground beef and leftover crumbled breakfast sausage. The sausage is one of the things that makes the dish, because it’s very flavorful and fatty, without being overpowering. The fat content is important because it helps make these peppers an extremely satiating dinner choice, even though they’re heavy on the veggies.
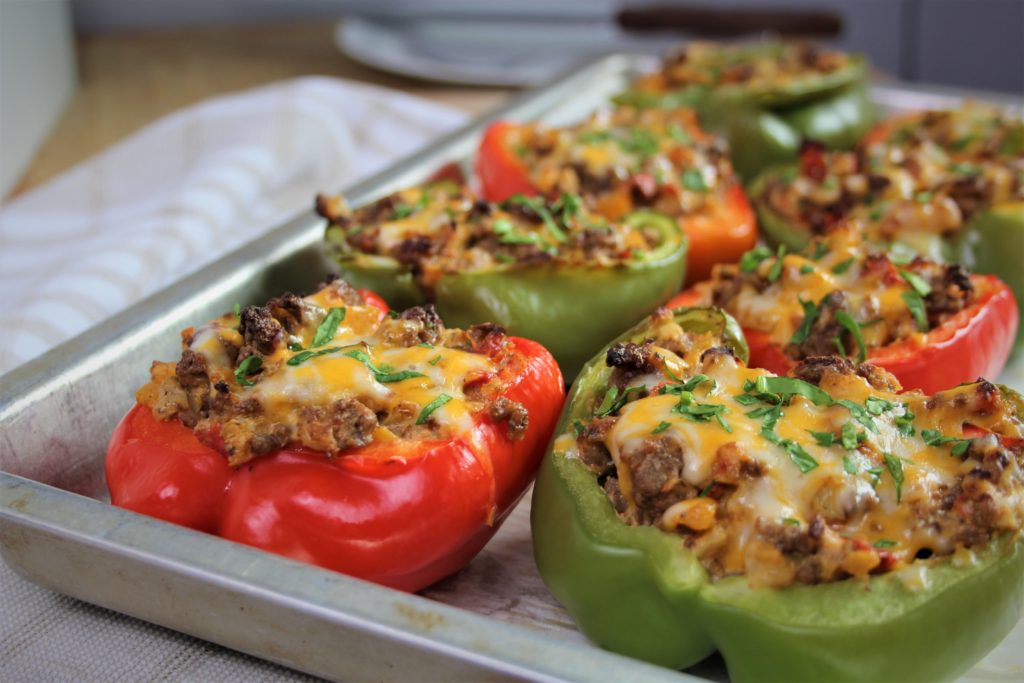
This is one of those recipes that’s endlessly adaptable, which could be why there are a million versions already in existence. For these, I sautéed diced onions, garlic, butternut squash, and chopped cherry tomatoes in olive oil, added the cooked meat and a few tablespoons of cream cheese, and it kind of tasted like a miracle. A gooey, cheesey, fragrant miracle. A little cumin and salt, along with some scallions, go in at the end to make the flavor really pop – honestly you don’t even need the peppers, you could just eat the filling straight from the pan. The finished product is something like healthier queso fundido-stuffed peppers, because in all honesty, I’d eat the filling straight from the pan with a bag of chips.

The filling can be made completely ahead, and then just heated up when you’re ready to stuff the peppers. They only take about 25 minutes in the oven, so if you prep ahead this is a pretty quick dinner. Bobby and I typically have a pepper each, and are truly groaning about how full we are by the time we’re done eating. I’m about to make them to take photographs for this post and I’m practically drooling over my keyboard as I type! 


4 from 1 vote
Print

Grain-Free Stuffed Peppers

Servings 4

Ingredients

  • 4 bell peppers, halved, seeds removed
  • 4 slices provolone cheese
  • 1 Tbsp olive oil
  • 1 medium onion, diced small
  • 1/2 cup butternut squash, diced small
  • 4-6 cloves garlic, minced
  • 1 cup cherry tomatoes, quartered
  • 16 oz ground beef, cooked and drained
  • 4 oz crumbled breakfast sausage, cooked and drained
  • 8 oz cream cheese, softened
  • 2 scallions, chopped
  • 1 tsp salt
  • 2 tsps cumin
  • 1/2 tsp cayenne pepper, optional
  • 1/2 cup cheddar jack, shredded, optional

Instructions

  1. Place half a slice of provolone into each pepper half. Set peppers on a baking sheet lined with foil, sprayed with non-stick cooking spray, or parchment paper. Preheat oven to 400 degrees.

    2. Sautee onions, butternut squash, and cherry tomatoes in olive oil until soft. Add garlic and cook for an additional 2-3 minutes.

    3. Stir in cooked ground beef and cooked sausage, softened cream cheese, and remaining ingredients. When everything is evenly mixed, spoon mixture into the peppers – you may have some leftover. Top each pepper with a sprinkle of cheddar jack or any cheese you have on hand – this is more for appearance than flavor, so skip if you like.

    4. Bake peppers for 25-30 minutes. They're done when the peppers are soft enough to pierce easily with a fork.

    * I've used ground turkey in these before, and while still tasty, I've found that the results are decidedly better with beef.
Slow Cooker Spicy Shredded Beef

Wow, it’s been a minute since I’ve put up a recipe! In my time off, I’ve honed my cooking skills some more, tested loads of new recipes, traveled to Thailand and found all kinds of new flavor inspiration (more on that in future posts), and did lots of things not related to cooking that I also enjoy! I’m learning to play the guitar, and bullet journaling, and playing old video games that I only ever have time for in January when the world majorly slows down. January also makes me excited to spend a lot of time on snowy days cooking rich, hearty meals that are essentially coziness in food form. Braised beef fits that bill for me, especially when it’s loaded with flavors and spices that make it perfect for any version of a burrito bowl or taco that you could dream up.

Developing this recipe took a while because I fell into what I now think of as the slow-cooker trap. By this, I mean the problem with a lot of slow cooker-centric meals is that we assume we can just dump anything in the mix and it will magically become delicious as it cooks for eight hours. Cue me spending years trying out pre-made sauces and testing several ultimately disappointing recipes for shredded beef, chicken, etc. (I’ve already found my dream come true pulled pork – check it out here!)

This version was the result of me swearing that I would no longer make bland shredded beef. I wanted to season the hell out of it, and make sure every bite had the kick I expect when I bite into something that is promised as having some Mexican inspired flavors. I went through a few tests for this recipe, adding more lime, more jalapenos, more…everything. The more I cook, the more I discover just how easy it is to under-season food and prevent it from reaching its highest potential.
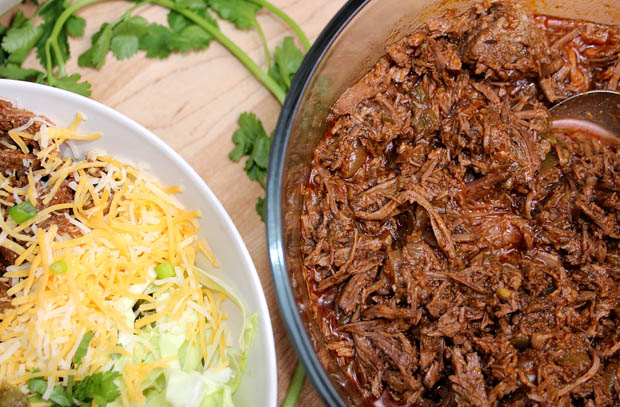
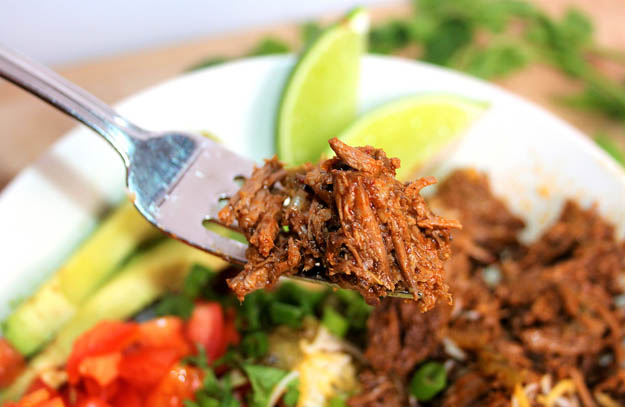
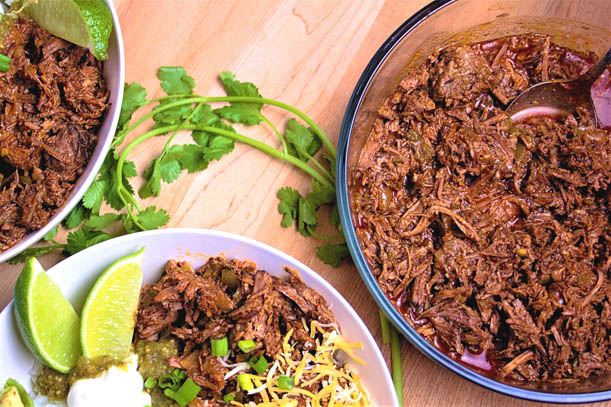
The flavor profile for this shredded beef is reminiscent of Chipotle barbacoa, except that this is arguably better. The lime and jalapeno flavors are more prominent, and the added onion and green pepper give each bite more dimension in flavor and texture. My favorite way to eat it is piled into a homemade burrito bowl, with loads of avocado, salsa, crema, and shredded cabbage for crunch. By the time the beef is finished cooking, it will have a good amount of (absurdly delicious) drippings/fat in with it, and rice in a burrito bowl soaks it up beautifully. If you prefer to use the meat for tacos, which I highly recommend, make sure you drain some of the liquid off before using it. Unless you love extremely messy tacos – I’m not here to judge your taco preferences.


Slow Cooker Spicy Shredded Beef

A 3lb roast yields approximately 8 cups of shredded beef. Honestly more than it sounds like. 
Ingredients

  • 1 3-4lb chuck roast
  • 1 medium onion, cut into strips
  • 1 green bell pepper, de-seeded and cut into strips
  • 1/2 cup beef broth
  • 1/2 cup Mt. Olive diced jalapeno peppers – include some of the liquid from the jar in this measurement
  • 1 4.5oz can mild diced green chiles
  • 1/4 cup lime juice (approx. 2 limes)
  • 2 Tbsps tomato paste
  • 3 tsps onion powder
  • 2 1/2 tsps chili powder
  • 2 tsps paprika
  • 2 tsps garlic powder
  • 2 tsps cumin
  • 1 tsp oregano
  • 1 tsp salt
  • 1 tsp sugar
  • 1/2 tsp freshly ground black pepper

Instructions

  1. Slice the roast into 4-6 chunks and sear in a hot skillet, until all sides of each piece are browned.

    While the meat is cooking, add all other ingredients to the slow cooker, and give them a stir to combine. They don’t need to be completely mixed. Top with the cooked meat and set the slow cooker to low for 8 hours. 

    If you are leaving the slow cooker for the whole eight hours, pull some of the seasonings and vegetables from the bottom of the slow cooker on top of the beef, so that it’s surrounded by the other flavors. If you’ll be able to check the beef periodically, give it a stir every hour or so. 

    After the cooking time is up, shred the beef right in the slow cooker with two forks – it should fall apart very easily. 

    If using for tacos, drain some of the liquid off the meat before serving. 


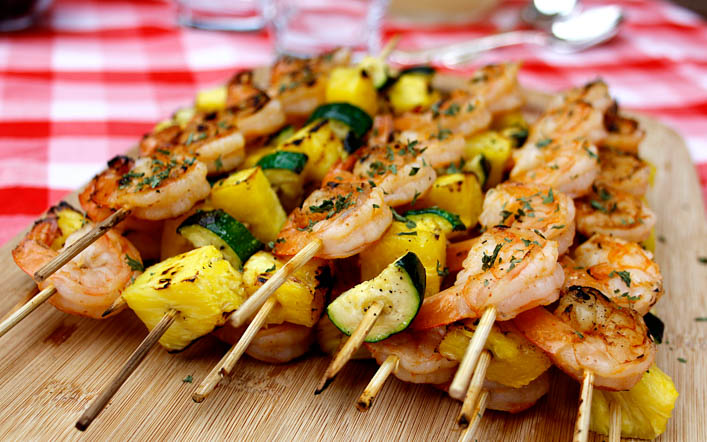
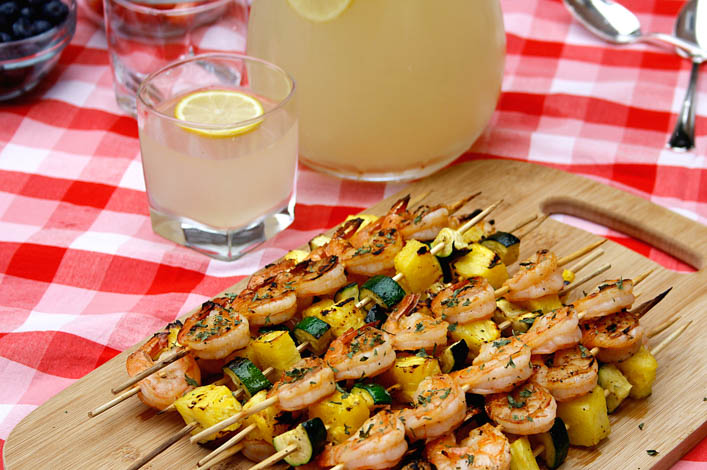
Sriracha Shrimp Skewers with Pineapple

Sriracha Shrimp Skewers with Pineapple

Since I’m in “do summer things” mode, I’ve been super excited to experiment with some grilling recipes. Now that we’ve been getting the occasional cool-but-not-too-cold summer evening, I’ve been obsessed with eating outdoors. Dinner straight from the grill is one of those magical things that you can only do when the weather permits, so it’s important to take advantage of those clear, golden evening hours whenever possible.

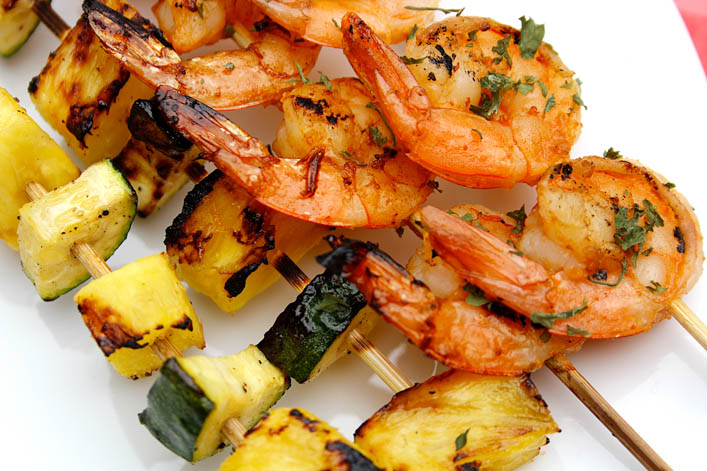
My favorite grilled foods are shrimp and pineapple, so figuring out what to make was a no-brainer. But I wanted to create a marinade for the shrimp that would knock anyone’s socks off. Recently, I bought a bottle of Sriracha for the first time in about a year. It was one of those things where I ate too much of it, and then couldn’t stand it for a long time. Now that it’s back in my life and I remember how wonderful it is, it only made sense to put it in my marinade. I added it to some pineapple juice, garlic, salt, ginger, and coconut milk. I can’t explain why – please tell me if you know what crazy science is at work here – but coconut milk and pineapple juice make the shrimp take on a tender, buttery texture. I’d never realized that I wanted shrimp to melt in my mouth until I cooked them in this marinade, and now I don’t know how I went without it for this long. Don’t worry if you, like me, abhor the flavor of coconut. I promise – cross my heart, hope to die – that you cannot taste it on the shrimp. Coconut milk doesn’t even smell like coconut.
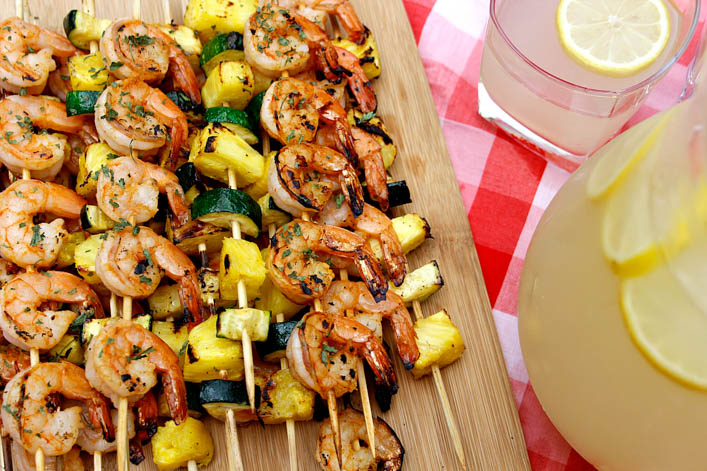
I let my shrimp marinate for maybe 30 minutes before cooking it, and it picked up amazing flavor. It’s mildly sweet and salty, with just a tiny kick from the Sriracha and ginger. The pineapple juice gives it a citrus-y flavor that works beautifully with the ginger, and of course makes it pair perfectly with the grilled pineapple. I like this recipe because it doesn’t take a million years to prepare, and you can cook for a lot of people at once, since you’re doing it on the grill.  You can make rice and a big pitcher of lemonade/sangria to go with dinner while the shrimp is getting all delicious in the marinade, and let the grill heat up while you prepare the skewers.

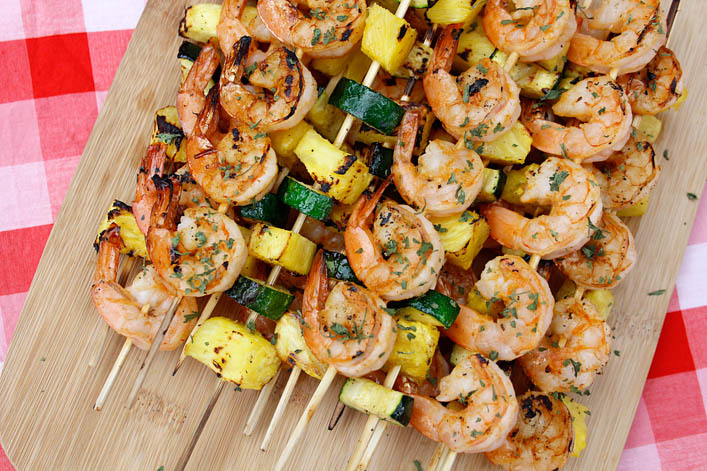
I discovered throughout the process of testing this recipe that skewers are a million times easier to cook if you only put one kind of food on them. Trying to cook skewers with shrimp, pineapple, and zucchini chunks – and making sure that everything cooked evenly and properly – was just annoying. Maybe there’s a secret I don’t know about the art of the kebob, but threading meat and produce on separate skewers just makes sense. You don’t have to worry about uncooked shrimp touching pineapple where it won’t get enough heat (my main concern), and you don’t have to cut your pineapple and zucchini to precise shrimp-sized pieces so they’ll cook evenly with the shrimp.

If you don’t like grilling or you don’t like shrimp, don’t worry – you can cook the shrimp on the stove with similar results, or you can use the marinade on chicken. I marinated some chicken in it, and then used the cooked chicken to make delicious bowls for dinner a few days ago, with rice, Sriracha yogurt, sauteed zucchini, and crushed pita chips. However you use it, this marinade will make your food taste like summer – especially if you have dinner outside on the patio, with a cold drink and your favorite people. And if you really want to take it over the top, you can always have Balsamic Cherry Chocolate Ice Cream for dessert. Just a suggestion.


Sriracha Shrimp Marinade

Servings 4 servings

Ingredients

Shrimp Skewers

  • 1 1/2 lbs raw shrimp, peeled and de-veined
  • 1/4 cup pineapple juice
  • 2 Tbsps sriracha
  • 2 Tbsps coconut milk (I used canned coconut milk)
  • 1/4 tsp salt
  • 1 tsp garlic powder
  • 1/4 tsp ground ginger

Pineapple and Zucchini Skewers

  • 1 medium zucchini
  • 2 cups pineapple chunks - about 1/2 a fresh pineapple
  • 1/2 Tbsp olive oil
  • 1/8 tsp salt
  • 1/8 tsp fresh black pepper

Instructions

  1. Note: Soak wooden skewers in water for at least 30 minutes before use.

    Combine all marinade ingredients in a shallow bowl. Place shrimp in the marinade and stir until all of it it well coated. Cover and let rest in the refrigerator for 30 minutes to 1 hour. 

    2. Slice pineapple and zucchini into bite-sized chunks. Season the zucchini with olive oil, salt and pepper. Thread onto skewers, leaving a little space between each piece. 

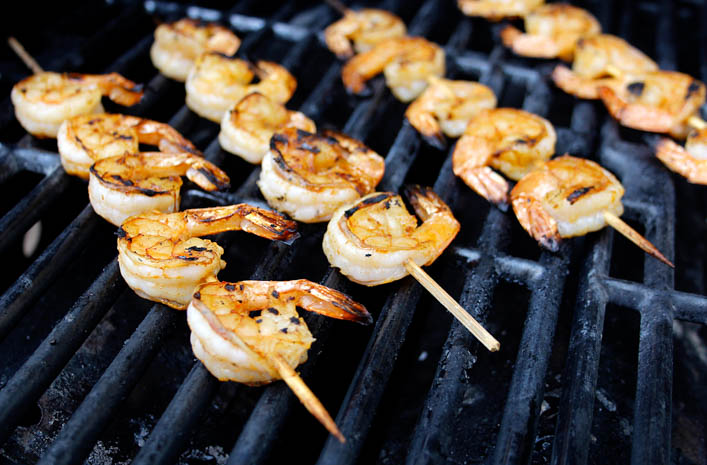
    3. Pre-heat the grill. Thread shrimp onto skewers (keep separate from those with the pineapple and zucchini).

    4. Cook skewers over medium-high heat on grill until shrimp curl and turn pink/lose transparency. Pineapple and zucchini should cook until tender - about 4-6 minutes on direct heat, and then move to indirect heat to continue getting soft. Sprinkle the cooked shrimp with dried parsley, if you're feeling fancy. 


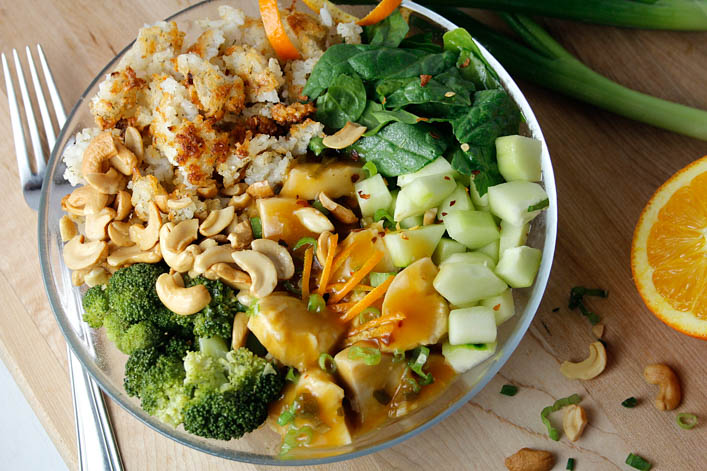
Orange Chicken Crispy Rice Salad

Orange Chicken Crispy Rice Salad

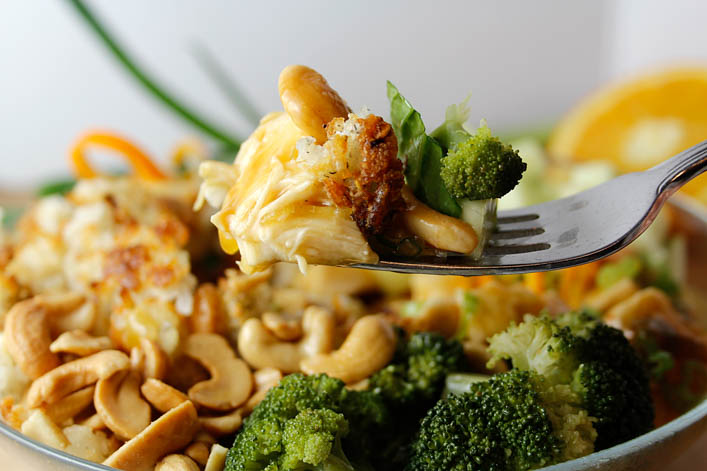
There are two important things to understand about this recipe for Orange Chicken Crispy Rice Salad. The first is that it’s hilariously American, as is the case with all of my recipes that approach cuisines from other countries. The second is that it’s absolutely delicious regardless of authenticity. The inspiration for this concept came from my first experience with a crispy rice salad at Doi Moi in D.C. Their food is Southeast Asian, and so delicious – I definitely recommend a trip if you’re near 14th street. Their crispy rice salad involves fermented pork, which I have never worked with before, so I decided to combine the concept with something a little more familiar: orange chicken.

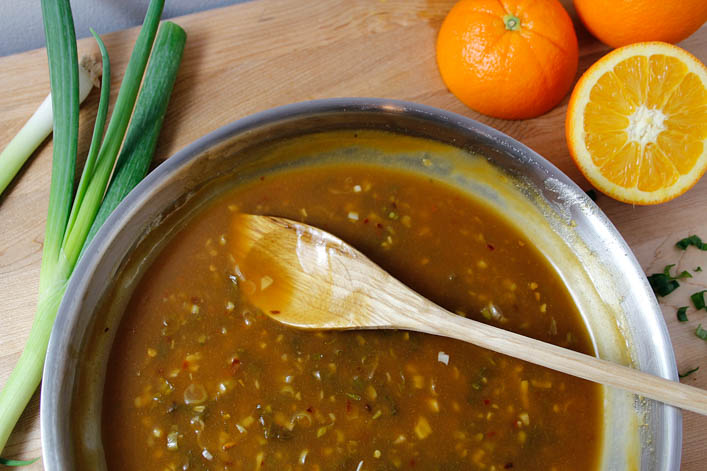
I have wild dreams of someday being one of those people who just throws all kinds of interesting ingredients into a dish without a second thought. I love trying new foods and flavors, and I make a conscious effort to order outside of my comfort zone at restaurants, but sometimes you just have to stick with some of what you know when you’re trying a new recipe concept. The point of that being that the sauce for my orange chicken started with a Panda Express copycat recipe, and I haven’t really done that much to it. I’m okay with that, however, as Panda Express orange chicken is a delicious gift from the heavens.

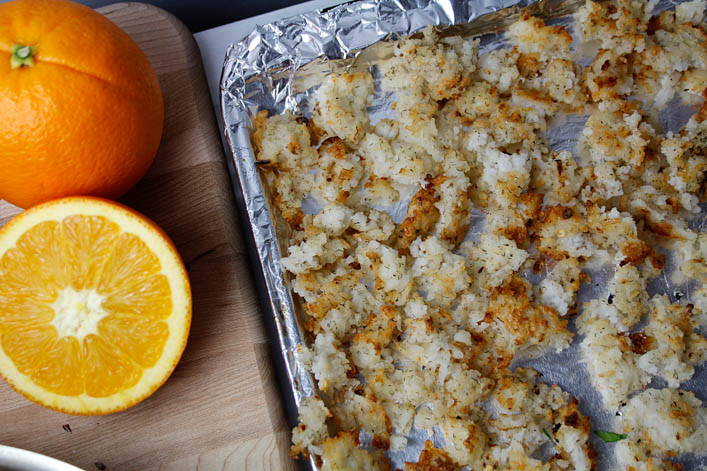
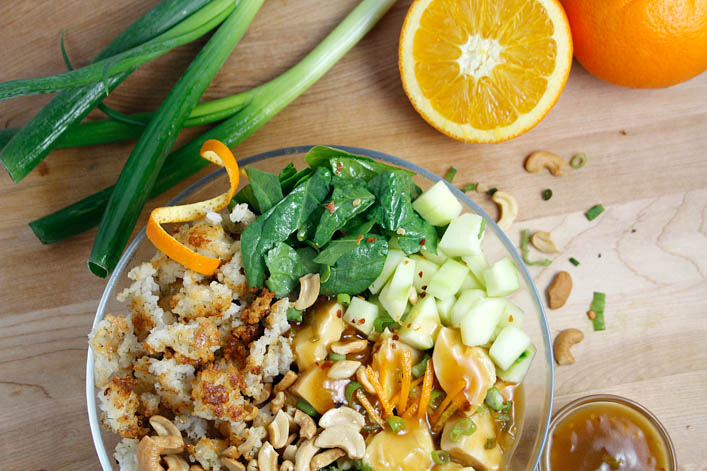
The crispy rice is, of course, the real standout of this salad, and the whole reason for its existence. I didn’t even know that crispy rice was a thing until a few months ago, but the version I made up for this recipe is one of my new favorite things. I started with a recipe from Ayesha Curry, which set me on the right path flavor- and texture-wise. I flavored mine with Greek yogurt, lemon, dill, salt, pepper, and red pepper flakes. Her recipe calls for crisping the rice in a pan on the stove, but mostly I just kept burning things that way. I found it much easier to get the results I wanted by toasting the rice on a tray in the oven. The result is crisp, slightly chewy, very flavorful rice that clumps together into bites like croutons in the salad.

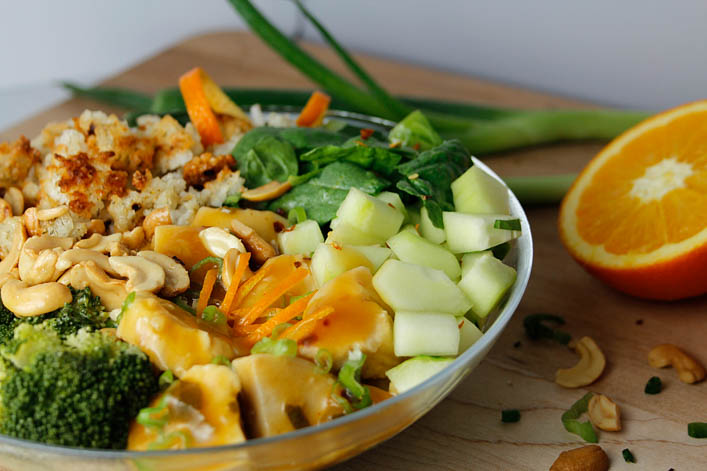
This salad could easily have gone in the direction of very-bad-for-you, but with summer coming, I figured I’d keep it light. I used grilled chicken instead of fried, loaded the base of the salad with spinach, broccoli and cucumber, and topped it with some cashews for added crunch and nutrition. I think a variety of textures is what separates a great salad from the merely decent – they can get a bit boring if every bite is the same. This salad has a combination of crunchy and chewy and soft components that combine with the bright flavor of the orange chicken and the lightly spicy crispy rice, to make a pretty perfect meal.

This salad is a perfect start to break away from a typical boring lunch time. You can only eat Caesar salad so many times in a row before you want to stab yourself with your fork. Not that there’s anything wrong with Caesar salad. Crispy Rice Orange Chicken Salad is, as always, open to interpretation. I invite you to try it with lemon chicken or switch out the cashews for pecans. Maybe add roasted Brussels sprouts in place of the broccoli. Just promise me that whatever you do, you’ll keep the crispy rice – it’s truly something different and wonderful, and I can’t wait to make it again.


Orange Chicken Crispy Rice Salad

Orange Chicken Sauce adapted from Food.com's Panda Express Copycat Orange Chicken 


Ingredients

Crispy Rice

  • 3 cups cooked rice (1 cup uncooked)
  • 1/4 cup plain Greek yogurt 61g
  • 2 Tbsps lemon juice
  • 1 1/4 tsps red pepper flakes
  • 1 1/4 tsps dried dill
  • 1/2 tsp pepper
  • 1 tsp salt

Orange Chicken

  • 1 lb chicken breast
  • 2 Tbsps olive oil - divided use
  • 1 cup orange juice (fresh squeezed or bottled)
  • 3 Tbsps soy sauce
  • 1/3 cup brown sugar
  • 2 Tbsps rice wine vinegar
  • 1 Tbsp ground ginger
  • 1/2 cup green onion, chopped
  • 2 tsps garlic, minced
  • 1 tsp red chili flakes
  • 1/2 cup water
  • 2 Tbsps cornstarch

Salad

  • 2 cups baby spinach
  • 1 cup diced cucumber, de-seeded
  • 1 cup steamed broccoli florets
  • 1/2 cup dry roasted cashews

Instructions

  1. Prepare the crispy rice. Stir together the cooked rice, yogurt, lemon juice, red pepper flakes, dill, pepper, and salt until well mixed. Spread into one even layer on a baking tray lined with foil. Bake at 400 degrees for 20 minutes, stir the rice around on the tray, and bake for another 30 minutes. It's done when the top of the rice has browned and the clumps are crispy on the edges and soft inside. Once the rice has cooled slightly, transfer to a cutting board and chop larger clumps into bite-sized pieces. 

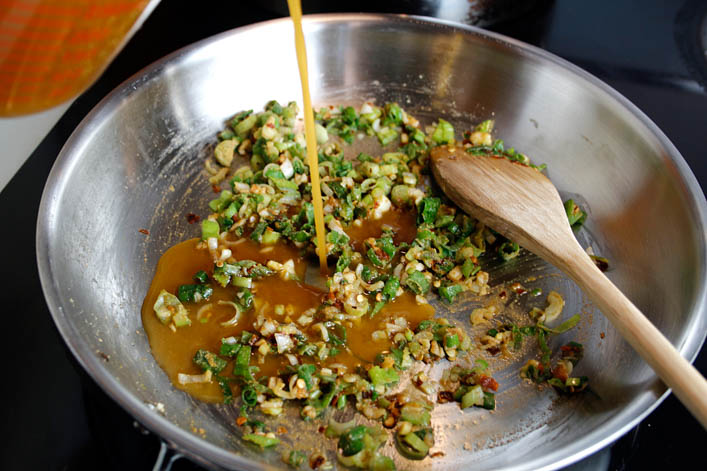
    2. While the rice bakes, make the orange chicken. Slice the chicken breast into bite-sized pieces and sautee in a skillet over high heat, with a Tbsp of olive oil. Remove to the side. To make the sauce, combine orange juice, soy sauce, brown sugar, and rice wine in a small bowl and set aside. Using the same skillet from the chicken, heat 1 Tbsp of olive oil. Stir together the green onion, ginger, garlic, 1 Tbsp of olive oil, and chili flakes and add to the hot skillet. Cook for about a minute until fragrant, and then add the orange juice mixture. 

    3. Let the sauce come to a simmer, over medium-heat, about 9 minutes. Do not let it come to a full boil. Stir together the corn starch and water, and add to the sauce. Stir gently for an additional 3 minutes, until the sauce begins to thicken. Lower heat and cook for 3 more minutes. Remove from heat and add the chicken, stirring until well-coated.

    4. To assemble the salad, fill a bowl with chopped spinach, diced cucumber, broccoli florets, and cashews. Top with a generous helping of orange chicken and crispy rice. Enjoy!

    Note: Leftover orange sauce can be refrigerated in an airtight container for up to a week. 


Sunshine Curry Crispy Chicken Sandwiches

Sunshine Curry Crispy Chicken Sandwiches

Sandwiches are my favorite food. Hands down, no question – food enveloped in other food is the best way to eat anything. I’m including quesadillas and hot dogs in this category because I love them, but I promise I won’t fight you if you don’t believe they’re sandwiches. One thing I think we can all agree on is that a really good crispy chicken sandwich is one of the best things in life. When I’ve got flavorful breading with a nice crunch surrounding moist, perfectly cooked chicken, all enveloped in a hearty roll with delicious toppings, there is almost nothing I would rather eat.

Marinating chicken in a sour cream mixture is a great way to help ensure that the chicken stays tender through the cooking process. When I was working on my Sunshine Curry Dip recipe, it occurred to me that it would make a delicious chicken marinade, so I plopped a bunch into a Ziplock with a couple of raw chicken breasts, and let it sit overnight to get all delicious. I breaded the chicken and baked it in the oven, because I’m not always up for the process that is deep frying. Not having a deep fryer, I just do it on the stove, and it’s a bit of a mess – really only worth it when I’m making food for people besides myself and Bobby. So, baked crispy chicken sandwiches are where it’s at these days.

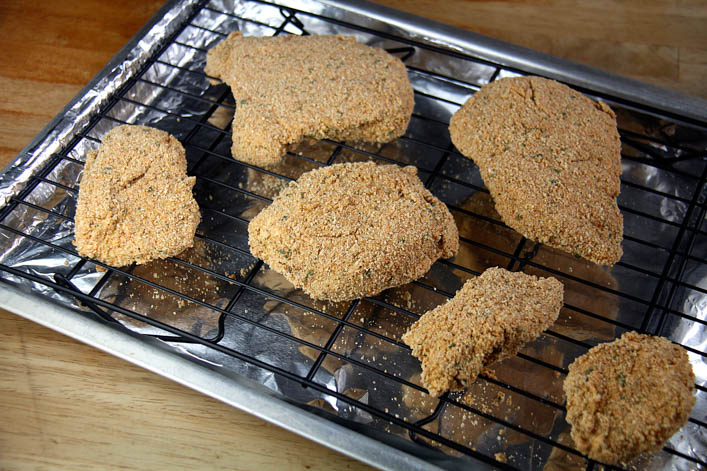
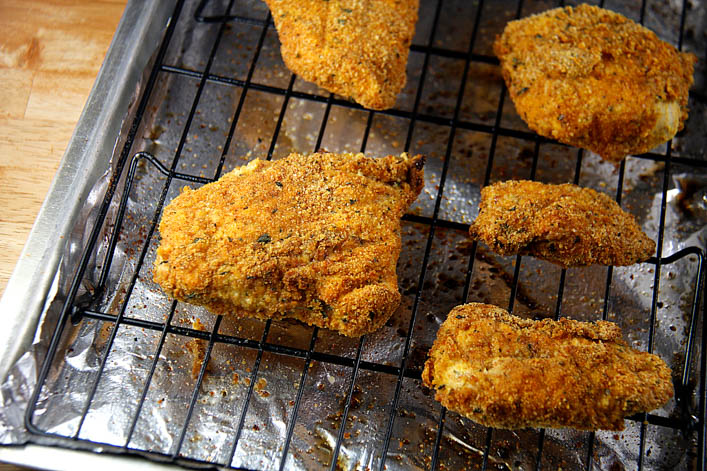
It goes without saying that baking something in the oven will never yield the same results as frying it. However, there are a lot of methods out there for baking chicken to get perfectly crispy breading that doesn’t get soggy or fall apart. For this recipe, I dried my chicken breasts with paper towel to remove a lot of the marinade, leaving just enough to help the breading stick. Then I dredged the chicken pieces in the breadcrumbs, set them on a cooling rack, and refrigerated the whole thing for about a half hour. Here’s the really important part: I took the cooling rack out of the refrigerator, plopped the whole thing on a tray lined with foil, and lightly spritzed each piece of chicken with olive oil spray. This method keeps the chicken from sitting directly on the tray, so the breading on the underside doesn’t get soft. Another bonus is that you barely need to use any oil: just a quick spray on each side (flip them gently) was enough for beautiful color and proper crispiness.

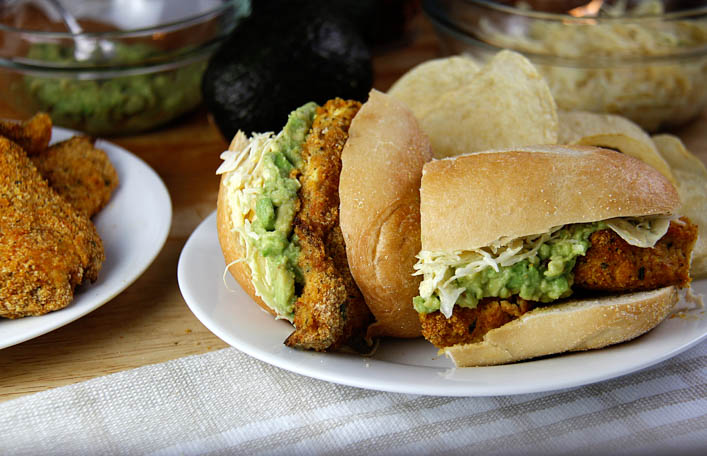
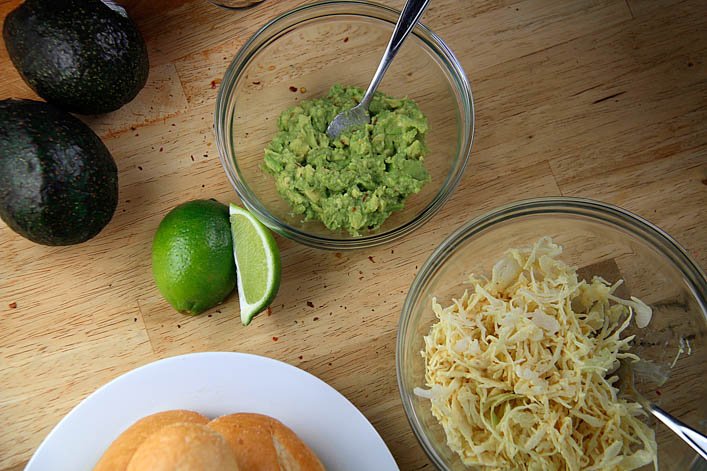
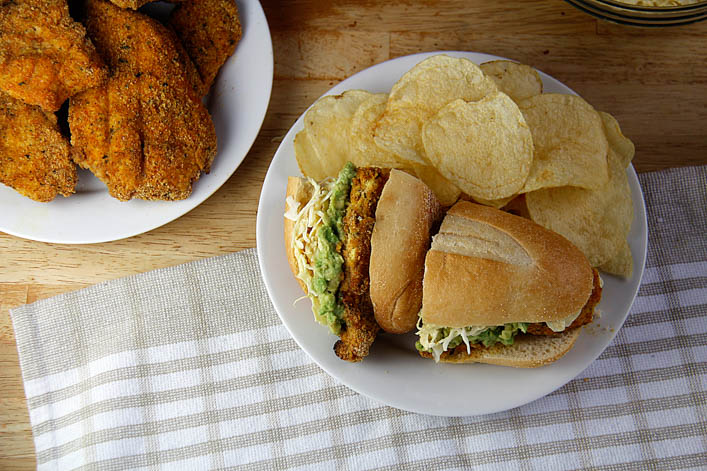
For the breading, I put curry powder along with salt, pepper, and paprika into some Italian breadcrumbs, to help the flavor from the marinade really shine through. I topped my sandwiches with avocado mashed with a little lime and cayenne, and a cabbage slaw, which is really just the Sunshine Curry Dip stirred in with shredded cabbage, to give the sandwich a little extra crunch and tang. (‘Crunch and Tang’ sounds like one of those weird animal duos, like a bear who is bffs with a monkey). The tart flavor of the cabbage slaw works beautifully with the mild avocado, and the combination of textures from the toppings and the crispy chicken really make this sandwich a winner.

This concept would be easy to double/triple for a large group. You could just set the chicken out on a platter and let everyone go nuts with the toppings. This idea works especially well for picky eaters. Apparently there are people in the world who don’t want avocado on a sandwich – you really meet all kinds these days. I served these sandwiches with potato chips, but you could just as easily throw a salad on the side, if you’re not trying to completely ruin your diet. Although I mean, the chicken is baked, and cabbage and avocado are involved, so this sandwich is basically a salad all by itself. I’ll leave it at that and let you contemplate if a salad on bread is still a salad. Although your head probably still hurts from trying to decide if a quesadilla is a sandwich.


Sunshine Curry Crispy Chicken Sandwiches

Servings 4 sandwiches

Ingredients

Sunshine Curry Dip (Marinade)

  • 1 1/2 cups sour cream
  • 6 Tbsps Greek yogurt
  • 1 1/2 tsps curry powder
  • 1 1/2 tsps Sriracha
  • 1/4 tsp turmeric
  • 2 tsps white balsamic vinegar
  • 1/2 Sunshine Spice Blend

Sunshine Curry Crispy Chicken Sandwiches

  • 2 chicken breasts
  • 1 cup Italian bread crumbs
  • 1 Tbsp curry powder
  • 1/2 Tbsp paprika
  • 1/4 tsp turmeric
  • 1 1/4 tsp salt
  • 1/2 tsp pepper
  • 2 avocados, mashed
  • 1 Tbsp lime juice
  • 1/2 tsp red pepper flakes
  • 2 cups shredded cabbage
  • 4 sandwich rolls

Instructions

  1. Mix together all of the ingredients for the Sunshine Curry Dip. Add about 1 cup to a gallon-size Ziplock bag. Slice each chicken breast into 3-4 large pieces, and add to the bag. Seal and refrigerate for at least 4 hours, overnight if possible. 

    2. Stir together bread crumbs, curry powder, paprika, turmeric, 1 tsp of salt, and the pepper in a shallow bowl. When you are ready to bread the chicken, remove pieces from the marinade and wipe most of the marinade off - leave just a little to help the breading stick. Dredge them in the breadcrumb mixture until well coated, and set them on a cooling rack. Place the cooling rack in the refrigerator for half an hour, to help the breading set further. 

    3. Remove the cooling rack from the refrigerator, and place on a baking sheet lined with foil. Lightly spray each piece of chicken with olive oil cooking spray, and bake at 400 degrees for 8 minutes. Remove the tray from the oven, gently flip the pieces of chicken, and give them another spray of olive oil. Bake in the oven for another 8 minutes. 

    4. While the chicken is baking, prepare the toppings. Mash together the avocado, 1/4 tsp salt, lime juice, and red pepper flakes, and set aside. Stir the shredded cabbage into 1/3 cup of the leftover Sunshine Curry Dip. 

    5. When the chicken is done, allow to cool slightly, and then build your sandwiches.  

Vegan Tacos: Buffalo Cauliflower and Green Lentil

Vegan Tacos: Buffalo Cauliflower and Green Lentil

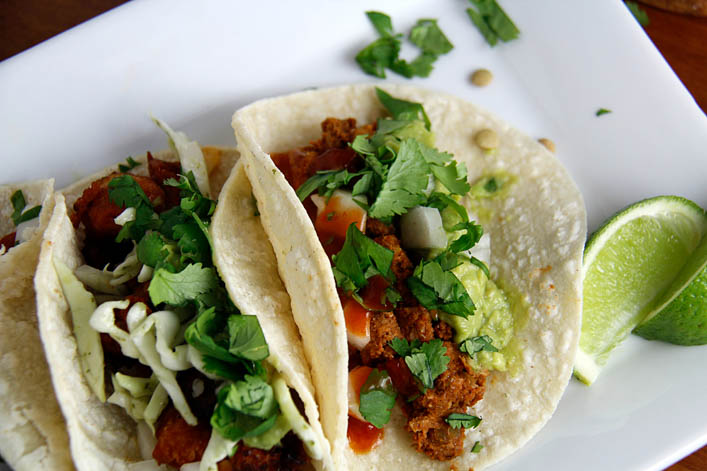
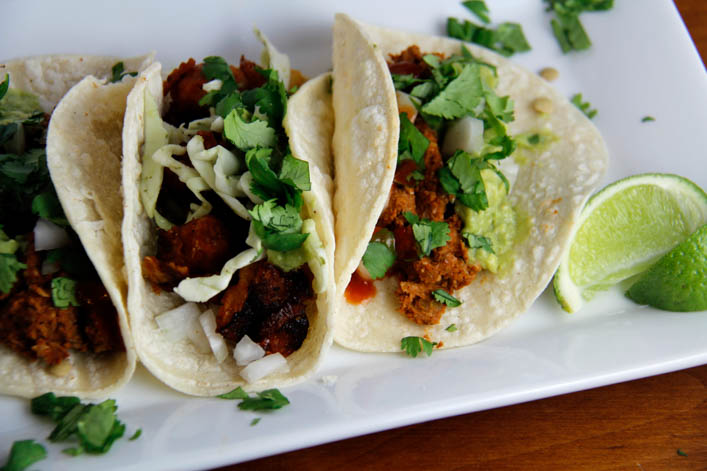
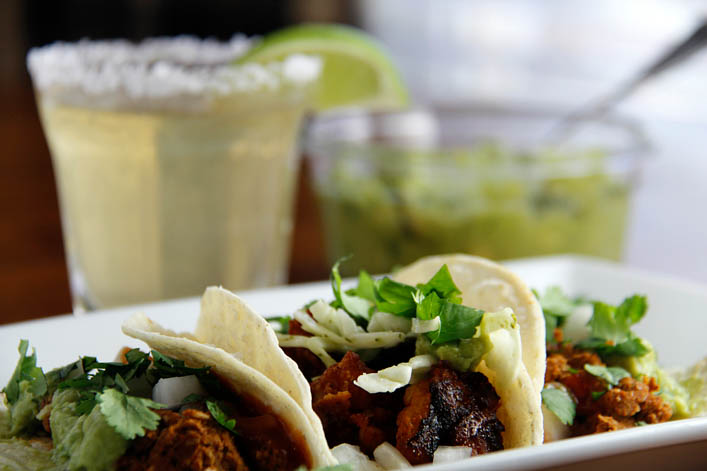
With Cinco de Mayo upon us, it only makes sense to post a taco recipe today. Actually, two taco recipes, because I’m bad at making food decisions. The correct answer to “Which taco recipe should we make?” will always be “All of them.” My friend Amanda, who possibly loves cooking more than I do, posted a pic of these tacos on her Insta recently, and I knew I had to get the recipes. Both are vegan, which isn’t typically in my taco wheelhouse, but we all know I jump at any opportunity to make vegetables taste better. Thank goodness for that, because these tacos are unbelievably delicious, and, you guessed it – healthy. One is green lentil and walnut based, the other has buffalo cauliflower “wings,” and they really do mimic the kind of textures you get with beef and chicken tacos. We dressed them up with guacamole, taco sauce, cilantro, shredded cabbage, lime, and fresh onion, and they tasted like all good tacos do: heaven.

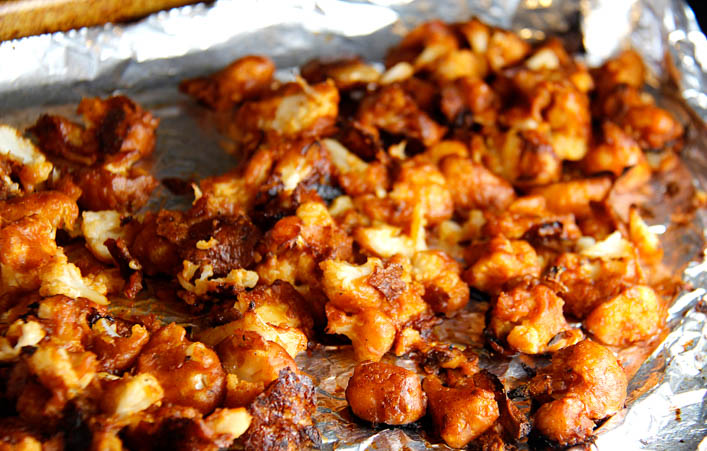
In the past I’ve been skeptical of these so-called “buffalo cauliflower wings,” but then I made them, and tried them in a taco, and they’re great. They’re not quite a dupe for boneless chicken wings, but they’re way closer than I ever could’ve imagined. The recipe for the buffalo cauliflower taco is adapted from Gimme Delicious’ Baked Buffalo Cauliflower Wings. Baking instead of frying them makes them healthier and easier, although I suppose you could fry them if you wanted to. After baking, we coated them in Texas Pete Wing Sauce, although you could definitely try this with barbeque sauce, if you don’t love spicy food. The cauliflower itself gets quite soft, but the battered outsides get nice and crispy. This makes it feel very substantial in the tacos, and you can almost forget that you’re eating a pile of cauliflower.

The second taco recipe was my favorite of the two, because the flavor was every bit the kind of wonderful, taco meat flavor I wanted. It starts with cooked green lentils, blended with walnuts and spices, and quickly becomes a perfect taco filling that I never would have dreamed up on my own. The spices are a blend of chili powder, cumin, paprika, salt, and pepper, with a little tomato paste added. Since the lentils and the nuts are all fairly mild, it’s easy to give them a lot of bold taco flavor. I think they hold the flavors from the spices better than beef or chicken ever would, so you don’t need a load of extra sauce on top. You can use a mix of walnuts and cashews if that’s what you have on hand, and I’d guess a different kind of lentil would yield similar results, although I haven’t tested that theory. The recipe for this taco is adapted from Oh She Glows’ Ultimate Green Taco Wraps. She uses lettuce as wraps instead of tortillas, but I love carbs a little too much for that.

You can go crazy with the toppings, and add beans, corn, salsa – whatever floats your boat. We topped the buffalo cauliflower tacos with shredded cabbage, diced onion, cilantro, guacamole, and Panera’s Asian Sesame Dressing, which added a really nice hint of sweetness to the tacos. The green lentil tacos were topped with mild Ortega taco sauce, guacamole, diced onion and cilantro. We used Whole Foods guacamole, because I’m obsessed with it, and it’s honestly cheaper than making your own fresh guac. I’d go so far as to say that I like it more than Chipotle guac, which is really the best recommendation I can give anything.

I plan to repeat these tacos for dinner on loads of nights that don’t happen to fall on Cinco de Mayo. They’re very filling for being mostly veggies, and they’re quick to make. The buffalo cauliflower is probably the most labor-intensive part, and that really just involves chopping cauliflower, stirring together the batter and coating the cauliflower in it, before baking it in the oven. Either or both of these recipes are a perfect addition to any taco night. Meat eaters will love them, regardless of their meat-free status, because they’re packed with delicious flavor and great textures.

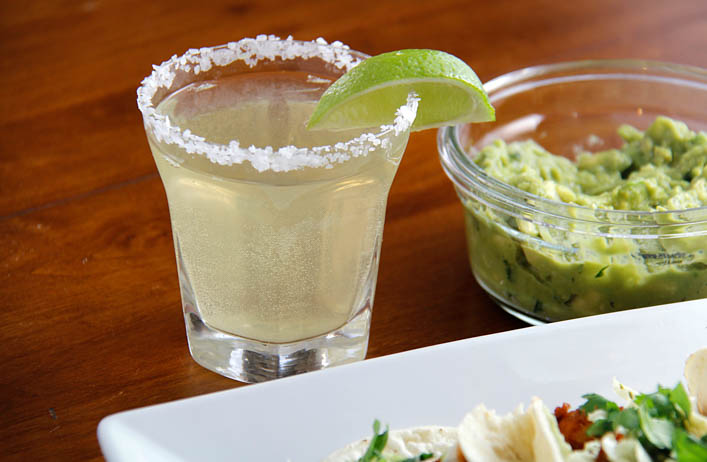
We made a whole day of creating this blog post, because tacos are just better with good drinks and friends, (and a vat of guacamole that doesn’t need to be photographed, so you can dive right in). While Amanda and I were making the tacos, Bobby was making sure we had a constant supply of margaritas. What a guy, am I right? I’m not saying margaritas are compulsory for a good taco night, but they’re definitely the cherry jalepeno on top, as far as I’m concerned.


Buffalo Cauliflower Bite Tacos

Adapted from Gimme Delicious' Baked Buffalo Cauliflower Wings

Ingredients

  • 1 head of cauliflower
  • 3/4 cup flour
  • 3/4 cup almond milk
  • 2 Tbsps garlic powder
  • 1 tsp paprika
  • 1 tsp cumin
  • 1 tsp salt
  • 1/2 tsp pepper
  • 1/2 cup wing sauce (I used Texas Pete Wing Sauce)
  • 6 inch corn tortillas
  • shredded cabbage
  • guacamole
  • cilantro, chopped
  • diced white onion
  • Asian Sesame Dressing from Panera, or dressing of your choice

Instructions

  1. Chop the cauliflower into bite size florets. Preheat oven to 450 degrees.

    2. In a large bowl, stir together almond milk, flour, and all of the seasonings. Add the cauliflower florets to the bowl and stir until well coated. Spray a baking sheet lined with foil liberally with non-stick cooking spray. Pour the cauliflower onto the sheet and spread into a single layer. Bake for 10 minutes, remove from the oven and rotate the cauliflower, and then bake for an additional 10 minutes. 

    3. Remove the cauliflower from the oven and drizzle the wing sauce evenly over top. Bake for another 20 minutes.

    4. While the cauliflower is cooking, prepare your choice of toppings for the tacos.

    5.Warm tortillas on the stove or in the microwave, and fill with buffalo cauliflower, and top with guacamole, onion, cilantro, cabbage, and dressing, or whatever suits you!


Green Lentil and Walnut Tacos

Recipe adapted from Oh She Glows' Ultimate Green Taco Wraps with Lentil-Walnut Taco Meat

Ingredients

  • 1 1/4 cups cooked green lentils 3/4 cup uncooked
  • 1 cup walnuts
  • 1 Tbsp olive oil
  • 3 Tbsp water (add more if it seems dry)
  • 1 Tbsp tomato paste
  • 1 tsp paprika
  • 1 tsp chili powder
  • 1 tsp cumin
  • 1 tsp salt
  • 1/2 tsp pepper
  • 6 inch corn tortillas
  • cilantro, chopped
  • guacamole
  • taco sauce (I used Ortega, mild)
  • white onion, diced
  • lime

Instructions

  1. Cook green lentils on the stove. Add them to a small pot with 1 1/2 cups water, bring to a boil, and then reduce to a simmer. Cook for 20-30 minutes until lentils are tender. Preheat the oven to 300 degrees and spread walnuts on a baking sheet lined with foil. Toast in the oven for about 10 minutes. Check them after the first 5 minutes, and then keep an eye on them so they don't burn.

    2. Blend lentils, nuts, olive oil, and all spices in a food processor or blender until well combined and a thick paste forms. 

    3. Warm the lentil "meat" up in a pan on medium heat for a few minutes, or just microwave. Add to tortillas with taco sauce, cilantro, onion, guacamole, and a squeeze of lime. 

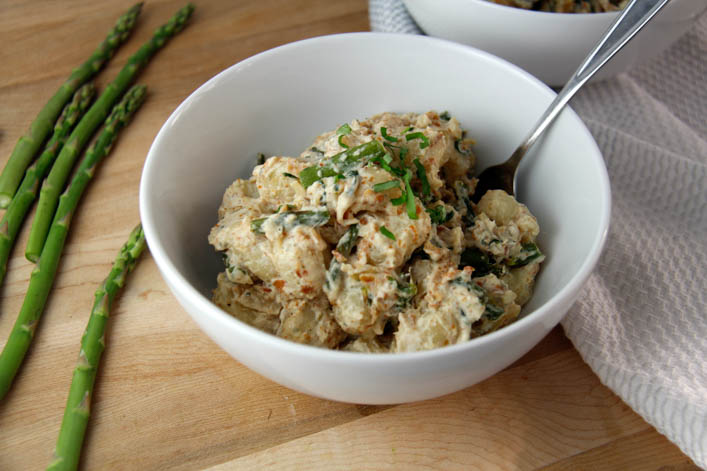
Asparagus Pancetta Gnocchi with Ricotta Sauce

Asparagus Pancetta Gnocchi with Ricotta Sauce

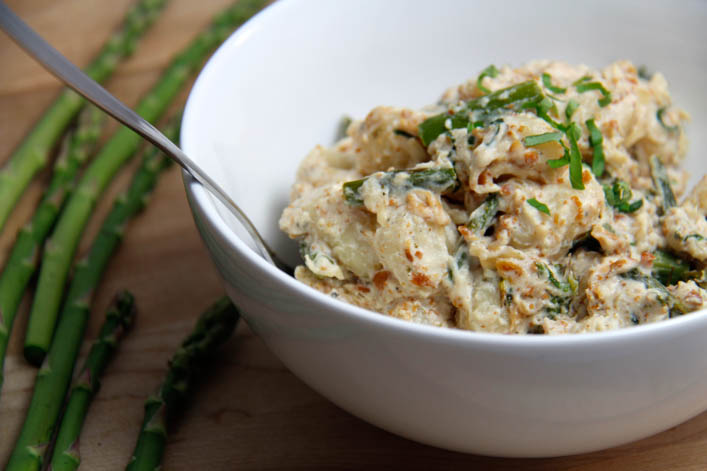
I was searching for asparagus inspiration, because it’s a major spring vegetable, and I almost sort of like it. I’m trying to transition that ambivalence to full-on like. This recipe sort of hides the asparagus, but it does still have it, so that’s sort of a step in the right direction, yes? I was originally looking at Smitten Kitchen’s Spring Asparagus Pancetta Hash – can you tell I’m a fangirl? I only mention her like every 5th blog post. I was all set to just make the recipe to see if I liked it, but then I started tumbling into the depths of Google and found Gnocchi with Asparagus and Pancetta from My Recipes. And then I started thinking about sauces, and things really spiraled out of control. My search for a light, but flavorful, asparagus-based recipe morphed into a pasta dish with a creamy sauce. I can’t tell you how often this happens to me. Pasta dishes with creamy sauce are very high on my list of the good things in life.

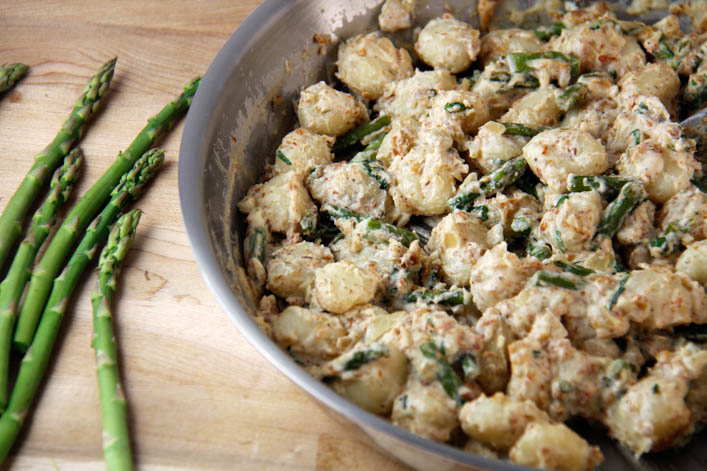
The creamy sauce for this dish isn’t a typical alfredo. It’s ricotta-based, with lots of fresh garlic and basil, and some dried tarragon. It’s about the lightest creamy sauce you can make that still uses whole-milk cheese. This keeps the dish from feeling too heavy for the bright spring days we’ve been having. If you let it thicken on the stove long enough, after adding in the cooked pancetta, asparagus, and gnocchi, you end up with a kind of cross between creamy pasta and a warm, delicious potato salad. The pillow-y gnocchi goes perfectly with the thick sauce, and the asparagus adds bursts of crunch in each bite.

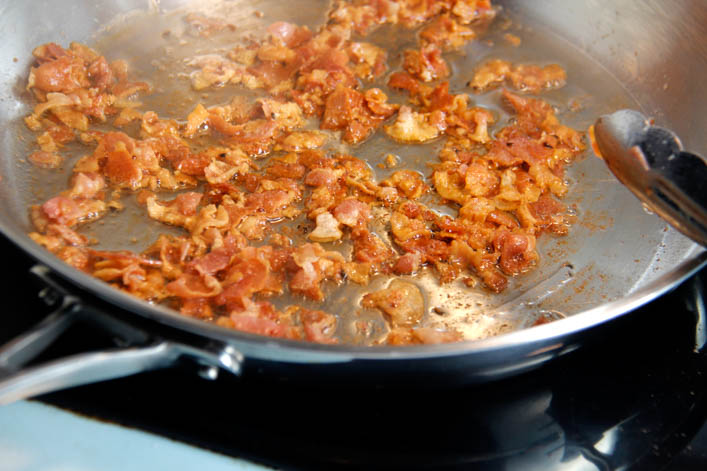
I cooked the pancetta first, so I could toss the asparagus into the skillet afterwards, with all that delicious pancetta grease. I chopped the asparagus into 1-inch pieces, and let them cook for about 5 minutes. This let them get just barely soft on the outside, while picking up the lovely pancetta flavor. I tend to find asparagus a little bitter, but cooking it like this made me want to just eat it straight from the pan. The only thing I’d change about this recipe for next time would be doubling the asparagus, because it really did sort of disappear among the gnocchi.

This dish makes a fairly small amount, about two good-sized portions, so it would be a perfect date-night option. If you want to get all fancy and cook for someone you like, I’m pretty sure they’d want to see you again after this one. It’s easy to make, but it sounds and looks so much more impressive than it really is. This isn’t quite a one-pot recipe, but it’s close. You can fry the pancetta, then cook the asparagus, and then make the sauce right in the same pan. The only other thing to do is cook the gnocchi, but even that only takes about 5 minutes. If gnocchi isn’t your favorite, you could try this dish with regular pasta or maybe some tortellini, because you can never have too much cheese. You can also use bacon in place of the pancetta.

The week leading up to Easter was one of the busiest I’ve had in a long time, so I’ve been eating on the go a lot. It felt great to get back into the kitchen and come up with something new and delicious, that also didn’t take a million years to cook. I had my Asparagus Pancetta Gnocchi for dinner yesterday, and it was such a nice balance of comforting (after a very busy week), and light and fresh. I have a feeling I’ll be making this one again soon – with more asparagus next time!

Asparagus Pancetta Gnocchi with Ricotta Sauce

Adapted from Asparagus Pancetta Hash from Smitten Kitchen, and Gnocchi with Asparagus and Pancetta from My Recipes. 

Ingredients

  • gnocchi
  • 1/2 medium yellow onion, diced
  • 3 cloves garlic, minced
  • 1 cup ricotta cheese
  • 1/2 cup whole milk
  • 4 oz pancetta
  • 1/2 tsp dried tarragon
  • 1/8 tsp dill
  • 1/2 tsp salt
  • 1/2 tsp fresh ground black pepper
  • 8-10 fresh basil leaves, thinly sliced
  • 1/2 lb asparagus

Instructions

  1. Dice the pancetta and cook in a skillet over medium heat, stirring occasionally, until crispy. Remove to a plate lined with paper towel to soak up excess grease. Slice the asparagus into one-inch sections and add to the skillet, after removing the pancetta. Cook on medium heat for about 5 minutes, until the outside is slightly tender.

    2. While asparagus is cooking, chop onion and garlic. Remove cooked asparagus from the pan and add onion and garlic.  There should still be plenty of grease in the skillet from the pancetta, but you can add a Tbsp of olive oil if it seems too dry. Cook the onion and garlic until the onion softens. Start cooking the gnocchi according to the directions on the package (typically, add to a large pot of boiling water and let cook for 4-5 minutes, until all the gnocchi floats to the top).

    3. Add ricotta and milk to the onion and garlic. Stir gently until the ricotta softens and becomes smooth. Lower heat, and stir in gnocchi, pancetta, and asparagus. Add salt, pepper, basil, tarragon, and dill, and stir until well-mixed. Add more salt to taste. If you prefer a thinner sauce, it should be ready to serve at this point. For a thicker sauce, let cook on low for another minute or two before serving. 


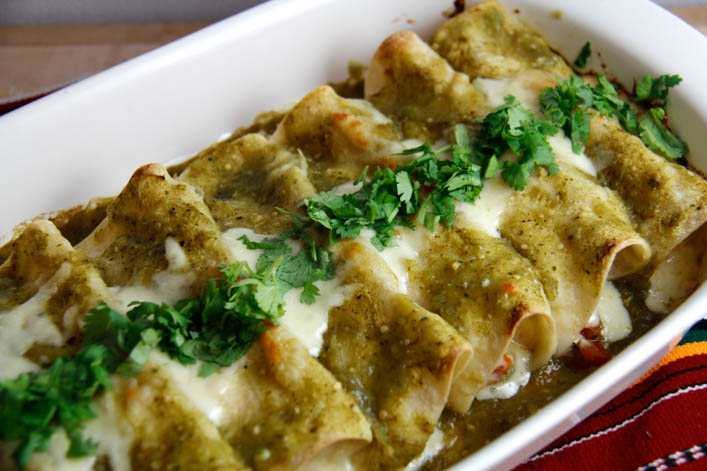
Salsa Verde Chicken Enchiladas

Salsa Verde Chicken Enchiladas

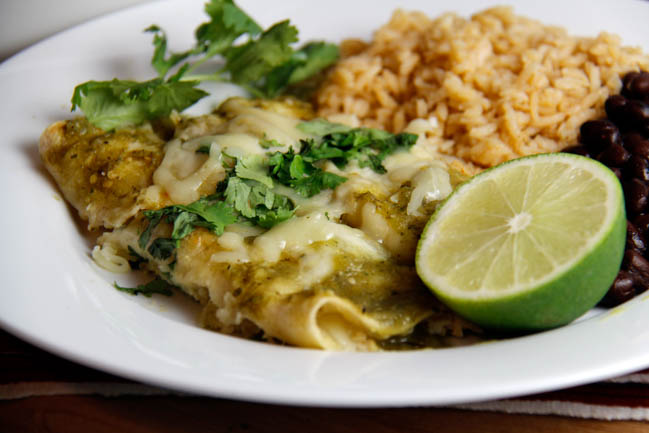
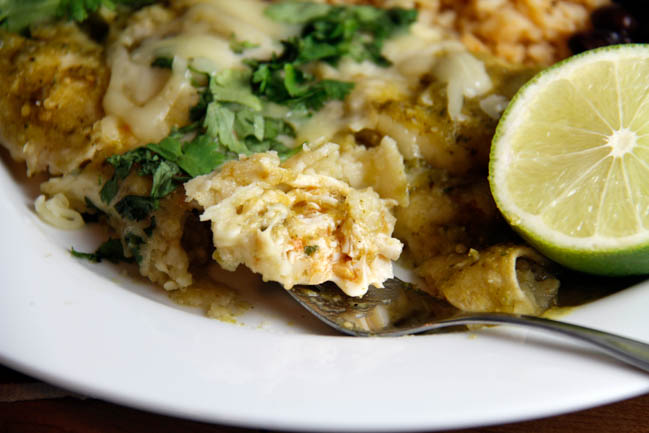
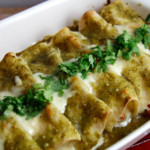
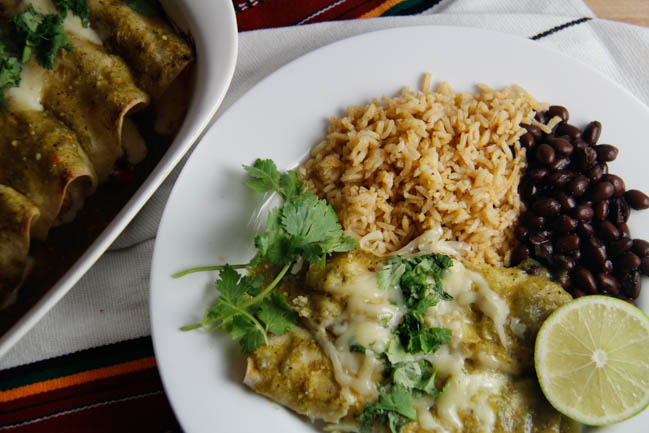
Most of the time when I’m dreaming up blog posts, I try to be inventive and give recipes delicious new twists. Other times, I’m just hungry for something really specific, and I get inspired to test recipes until I make my dream version of a classic. Salsa Verde Chicken Enchiladas is one such classic that I didn’t want to change too much. Why mess with perfection? These enchiladas are bursting with flavor, the chicken is moist and perfectly seasoned, and they aren’t hard to make at all. As a person who eats at a lot of Mexican restaurants, I can say that these are absolutely restaurant quality. All they need are some rice and beans on the side, and maybe a margarita or two.

Before testing this recipe, the only experience I had with salsa verde was eating a lot of it. I have found a wonderful version that is so much simpler to make than I ever would have imagined. Don’t you just love it when your favorite foods are actually so easy to throw together? I combined recipes for salsa verde from Tyler Florence and The Flavor Blender and I think I may have made the sauce of my dreams. I have been putting it on everything I eat and I’m not sure I’ll ever stop. I love the tangy, spicy flavor, and it can be made as hot or mild as you like, in case spicy food isn’t your favorite. Spicy food is definitely my favorite. But I actually prefer it toned down in a salsa like this, because there are so many interesting flavors at play, and I really want to be able to taste all of them.

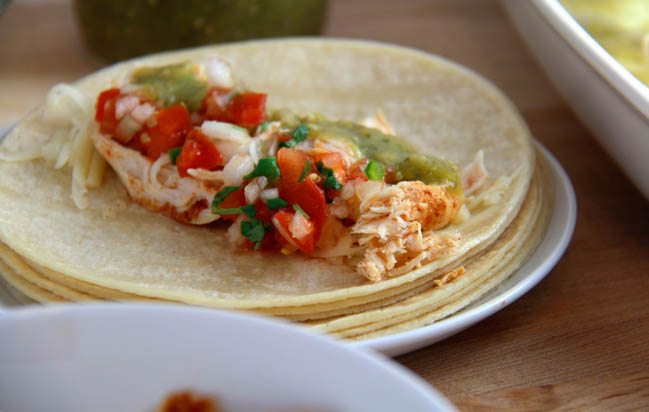
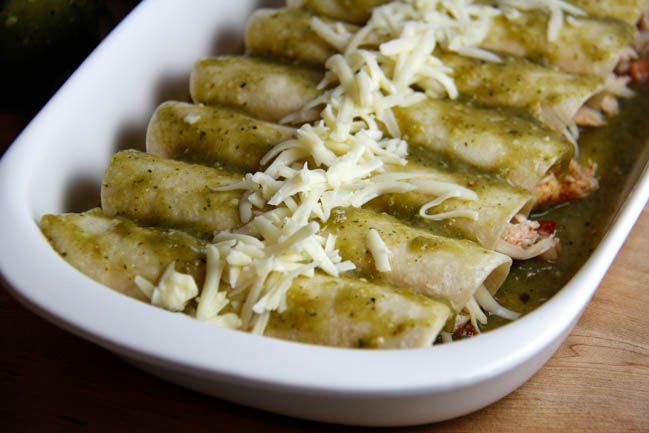
Making enchiladas can seem like kind of an arduous process, because you have to prepare all of the ingredients and then fill and roll them. It definitely takes some time, but a lot of that is really just letting things cook in the oven. You start by roasting the tomatillos, peppers, and onions for the salsa verde. Then you roast a couple of chicken breasts with some olive oil and seasonings. You blend your salsa together, whip up a quick fresh tomato salsa while the chicken is cooking, shred the chicken after it’s done, and then you’re ready to assemble the enchiladas. I do recommend doing all of this before you start on the margaritas, but everyone has her own method!

Can we talk for a second about how Mexican food is the best food? My husband and I went to Mexico for our honeymoon and I’m dying to go back purely for the food. (That’s a lie, I also want to go back to lay out at a beautiful resort in Playa Del Carmen while someone brings me a cocktail, and relax all day). Anyway, even when we went off of the resort to eat, it seemed like the food wasn’t all that different from what you can get in a really good Mexican restaurant in D.C. I don’t know if this makes me really excited about D.C. or confused about Mexico, but I do know that it means Mexican food is consistently wonderful, if you know what to look for. And if all else fails, you now have a seriously amazing Salsa Verde Chicken Enchilada recipe up your sleeve!

These Enchiladas are probably one of my favorite things I’ve ever made. They’re stuffed with chicken, plenty of cheese, and fresh tomato salsa to brighten up the filling a little. Add a squeeze of lime, an extra dollop of salsa verde, and some cilantro on top, and you won’t even know what hit you. These are perfect to serve to a bigger group, because you can make a couple large trays at a time, and even pre-bake them, and then just heat them up in the oven when you want to serve. If you somehow end up with extra salsa verde, or want to prepare it ahead of time, it can be stored in an airtight container in the fridge for a week. I’m so excited to try variations on the filling with these, but every time I start considering that, I think about how much I really just want the perfect chicken version. It’s like I said before, some things just don’t need to be changed, because they’re exactly right the way they are.


Salsa Verde Chicken Enchiladas

Salsa Verde recipe adapted from Tyler Florence and The Flavor Blender.

Servings 16 enchiladas

Ingredients

Salsa Verde

  • 1 lb tomatillos, de-husked and washed
  • 1 poblano pepper
  • 2 jalapeno peppers
  • 4 cloves garlic, wrapped in foil
  • 1 medium white onion
  • 3/4 cup chicken broth
  • 1/2 cup cilantro
  • 2 tsps cumin
  • 3 Tbsp lime juice
  • 1 tsp salt

Chicken Filling

  • 2 lbs chicken breasts
  • 4 Tbsp olive oil, divided use
  • 1 Tbsp paprika
  • 1 Tbsp cumin
  • 1 Tbsp garlic powder
  • 1 tsp salt
  • 16 soft corn tortillas
  • 2 cups shredded Monterey Jack cheese

Fresh Tomato Salsa

  • 2 tomatoes
  • 1/2 medium white onion
  • 1/2 jalapeno
  • 1 Tbsp lime juice
  • 1/2 tsp salt
  • 3 Tbsps cilantro, chopped

Instructions

  1. Make the salsa verde. Place de-husked tomatillos, poblano, jalapeno, and garlic cloves (wrap the garlic cloves in foil to prevent burning) on a baking tray lined with foil. Broil in the oven for 7 minutes. Cut a white onion into quarters. Remove the tray from the oven, add the onions to it, and bake for an additional 7 minutes. 

    2. Place two chicken breasts on a baking sheet and pour two Tbsps of olive oil over top. Stir together spices and sprinkle evenly over top. After the salsa verde ingredients are out of the oven, reduce oven temperature to 350 degrees, and bake chicken for 35-40 minutes. 

    3. Allow tray of broiled tomatillos and peppers to cool, and then de-stem the tomatillos, poblano, and jalapenos, and cut into quarters. For the jalapenos, de-seed them if you want a milder salsa. Leave in the seeds of one jalapeno if you want the salsa to have a kick without being extremely hot. Add all of the ingredients from the tray to a food processor (my NutriBullet was perfect for this), and run until everything is broken down and mixed. Add the remaining ingredients to the food processor and pulse until well-blended.

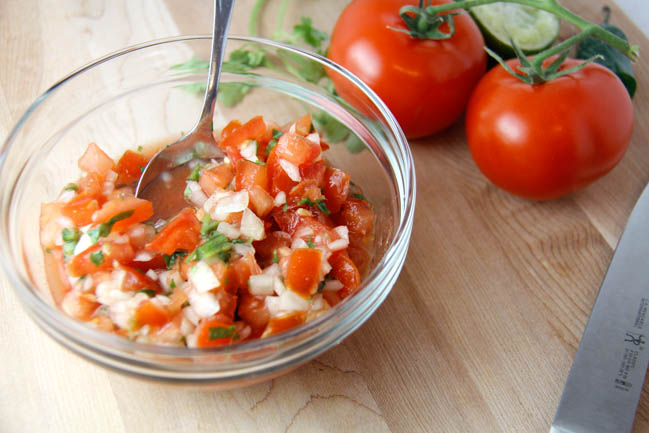
    4. Make the fresh tomato salsa. Dice tomatoes and onion, and de-seed and finely chop jalapeno. Stir together all ingredients, adding more salt to taste. 

    5. When the chicken is done, allow to cool slightly, and place on a plate. Shred each chicken breast with two forks. 

    6. Spread salsa verde in the bottoms of 2 9x13 baking pans, about 1/4 cup for each. Assemble your enchiladas: Heat the tortillas in the microwave, and then brush them on each side with olive oil. This keeps them from breaking when you roll them. Fill each with a sprinkle of shredded cheese, chicken, and about a Tbsp of each kind of salsa. Roll, and place in the baking pan. When the pans are full, spread more salsa verde over the tops of the enchiladas, and sprinkle generously with cheese. Bake pans at 350 degrees for about 25-30 minutes, until the cheese just starts to lightly brown on top. Top each enchilada off with a little more salsa verde before serving. 


Quick Cauliflower Pizza Crust (That Doesn’t Taste Like Cauliflower)

Quick Cauliflower Pizza Crust (That Doesn’t Taste Like Cauliflower)

Whoever claims that cauliflower pizza crust made from scratch is quick and easy is lying to you. You have to rice the cauliflower and cook it and squeeze it. Squeezing it is an arduous task at best, because you really do have to wring as much moisture out as possible to achieve a good crust. If you’re making more than one pizza, which I usually am, because cauliflower crusts are not very large or filling, then it takes double the time and effort. It quickly becomes an expensive, time consuming endeavor to feed more than one person with cauliflower crust pizza.

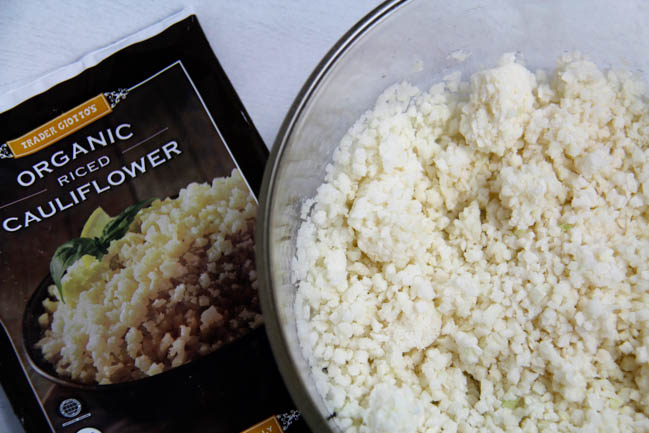
Fortunately, I’ve discovered the secret weapon. Trader Joe’s Frozen, Riced Cauliflower. It’s only $1.99 for a 12 oz bag, which happens to be exactly the right amount for a beautiful crust, and it’s cheaper than buying fresh cauliflower that you’d have to rice and squeeze yourself. I do think you can buy frozen, riced cauliflower in regular grocery stores – I use Trader Joe’s because I love their store, and it’s the first time I discovered such a magical product.

* not sponsored, just love the product *

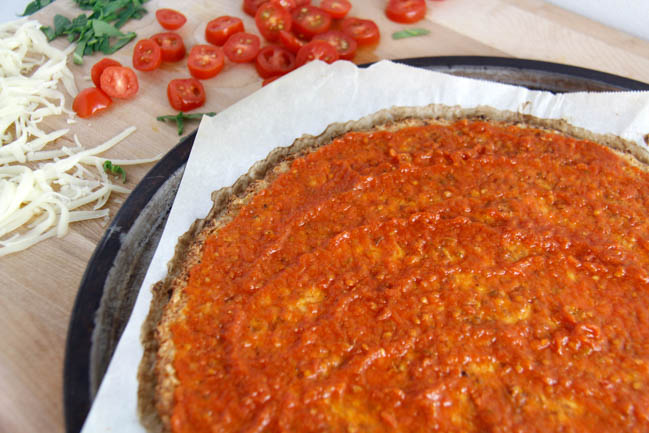
When you freeze food, it tends to lose some of its distinct flavor over time. I think this is at play with the frozen cauliflower, and why it makes such a wonderful crust: it doesn’t taste like vegetables. It also doesn’t have a huge amount of moisture, even after you defrost it. I pour it into a bowl, microwave for a minute or two, and then pat the top dry with a paper towel. No squeezing involved at all. Do you know what that means? You’re smart and you probably do, but I tell you anyway. That means that this crust takes approximately five minutes to make. Defrost the cauliflower, pat dry, toss in some cheese, an egg, and some seasonings, stir and pour out onto your tray to shape the mix into a nice crust-like circle. Although to be honest, when I’m making it to eat instead of photograph, mine tends to look like a very wobbly rectangle.

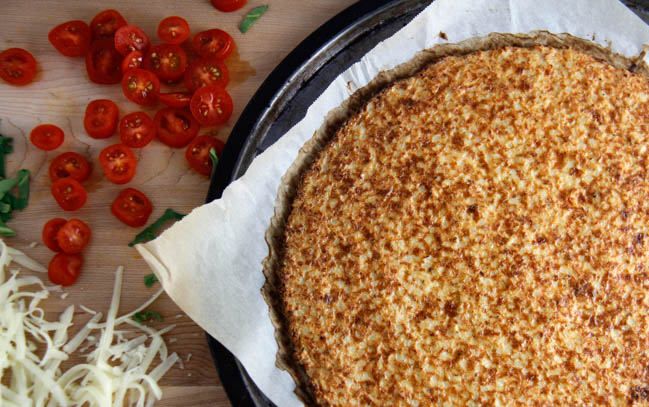
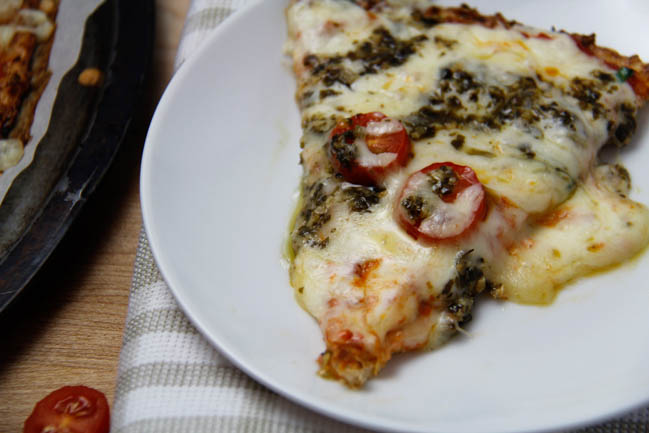
Now, about that cheese that I so casually mentioned. I think of the cheese as my second secret weapon: goat cheese. For Cauliflower Pizza Crust, most people use Parmesan to help bind the crust together. I’ve swapped that for garlic and herb goat cheese, and it’s made a world of difference. The only other ingredients I add to my crust are an egg, some Italian herbs and salt. The crust still crisps up just right, and doesn’t taste like cauliflower even a little bit. The single caveat of the whole endeavor is that the crust needs about 40 minutes to bake properly, so it could be considered time-consuming in that regard. We all know at this point how impatient I am when it comes to wanting to eat what I make, though, so believe me when I say it’s worth the time.

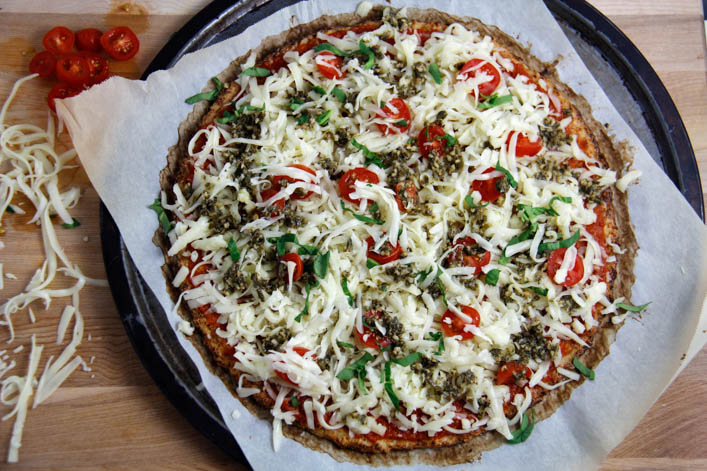
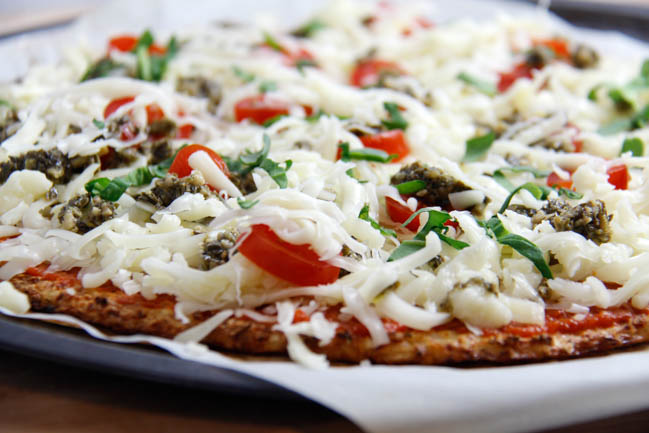
I topped my pizza with mozzarella, cherry tomatoes, basil and pesto. Pesto is my new favorite thing to put on pizza – it just adds a whole new dimension to the flavor. I tested this crust topped like a traditional margarita pizza with fresh mozzarella, but the fresh cheese has a lot more moisture to it, and makes the pizza difficult to eat without a fork and knife. If you don’t mind that, then definitely give fresh mozzarella a try, it tasted outstanding. I am very happy to say that my days of squeezing moisture out of cauliflower until my hands fall off are completely behind me, and I promise that once you try this method, yours will be too.


5 from 2 votes
Print

Quick Cauliflower Pizza Crust (That Doesn't Taste Like Cauliflower)

Prep Time 7 minutes
Cook Time 40 minutes
Total Time 47 minutes
Servings 1 pizza

Ingredients

Cauliflower Crust

  • 1 12oz bag frozen, riced cauliflower
  • 1 egg
  • 4 oz garlic and herb goat cheese
  • 1/2 tsp salt
  • 1 tsp Italian seasoning

Toppings

  • 2 cups pizza sauce
  • 2 cups shredded mozzarella cheese
  • 1/2 cup pesto
  • sliced cherry tomatoes
  • basil

Instructions

  1. Preheat oven to 400 degrees. Line a baking sheet (round or rectangle) with parchment paper. 

    2. Place frozen cauliflower in a microwave-safe bowl. Microwave for about 2 minutes until the cauliflower has started to defrost. Pat the top of the cauliflower with a paper towel to remove excess moisture. 

    3. Add goat cheese to the cauliflower and microwave for an additional 30 seconds. Add egg, seasoning, and salt. Stir until well combined. The mixture will seem a little soft and wet. If you don't have garlic and herd goat cheese, you can use plain goat cheese and add an extra tsp of the Italian seasoning. 

    4. Pour the mixture out onto the parchment paper and flatten into a circle (or whatever shape you like, really) about 10-11 inches in diameter, and 1/2 inch thick. 

    5. Bake for 40 minutes, rotating the tray halfway through baking time to ensure even color. Baked crust will be a dark, golden brown and the edges will be crispy. Top with sauce, cheese, and whatever else you fancy and bake for  5-10 minutes until the cheese melts and browns very slightly on top. 


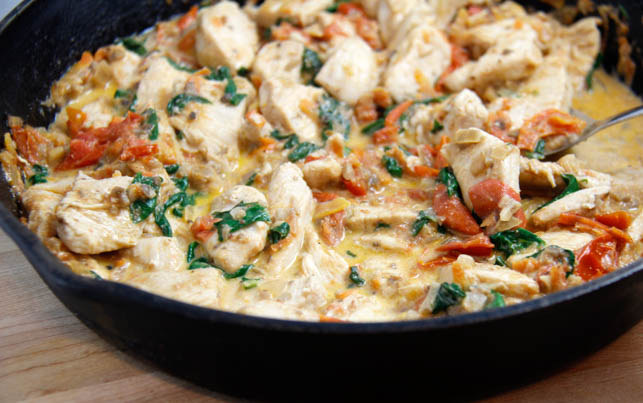
Better Chicken Vino Bianco

Better Chicken Vino Bianco

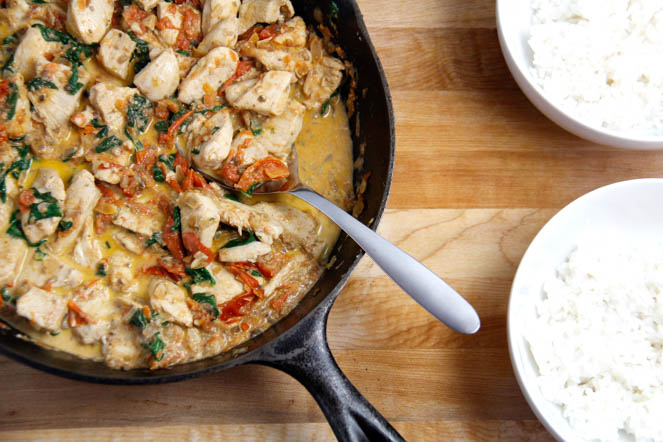
This recipe is one of my favorite dinners, and only partly because the recipe involves wine. It’s pretty quick to make, and all the prep can be done ahead of time, so you don’t have to spend hours in the kitchen to make something wonderful. Since the chicken doesn’t actually cook in the sauce, you can buy a roasted chicken and use that if you’re especially short on time. Short cuts that don’t diminish the final product are essentially just examples of good time management, right?

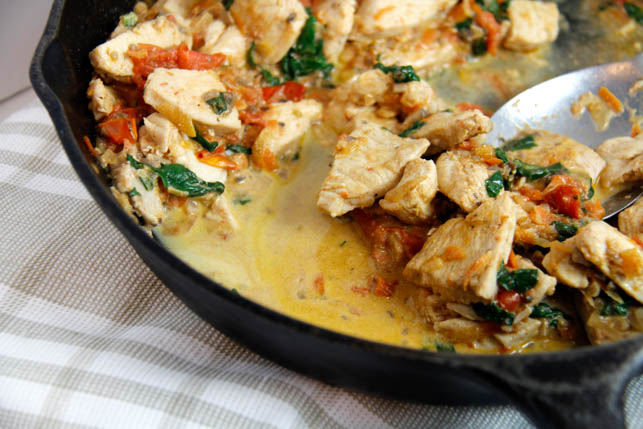
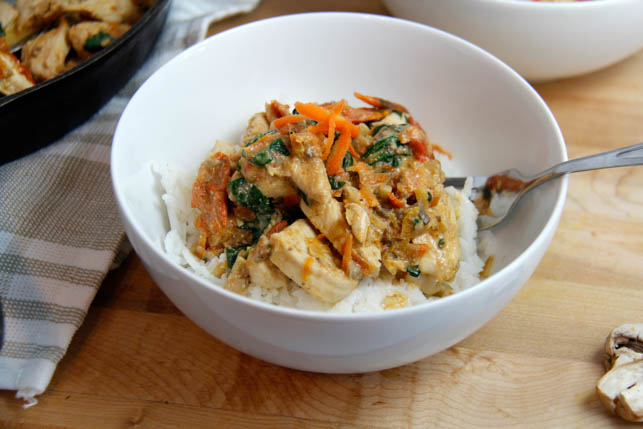
Chicken Vino Bianco is typically served over pasta, but I chose to make this dish with rice. The rice absorbs the sauce better than pasta ever could, soaking up the flavor and making sure it ends up in your mouth instead of on the bottom of the dish. The sauce itself is rich and creamy, without feeling heavy, and the flavor of the wine comes through without being overpowering. You can use chicken broth and maybe a little lemon juice in place of the wine and still have a silky, beautifully flavored sauce.

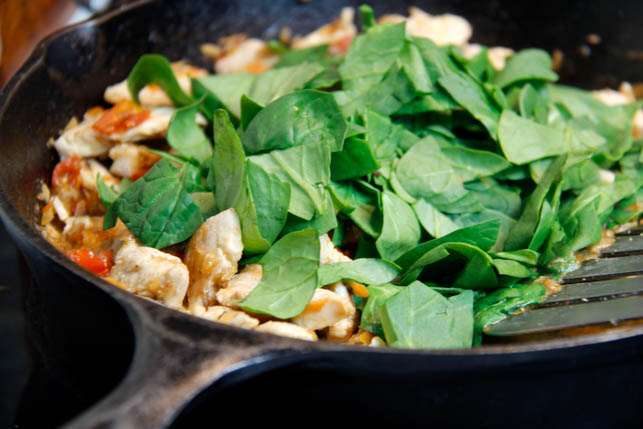
Better Chicken Vino Bianco is loaded with vegetables, but you hardly even notice them because with a little wine and cream in the mix, all the vegetables cook down into the glorious, smooth sauce. This recipe involves fresh grape tomatoes, spinach, shredded carrot, onion, and mushrooms. The tomatoes add a freshness that balances the heavy cream, and the onions, carrot, and spinach add loads of flavor as well as bulk and color.

Every recipe for Chicken Vino Bianco I looked at called for mushrooms. I’ll just say it – I hate mushrooms. I’ve been on a quest to force myself to like foods that I hate, in order to broaden my palate (it’s too complicated to be a food-lover who hates popular flavors like mushrooms and bananas). This was a great place to start, because I chopped the mushrooms so small that they all but disappeared into the sauce, and I could forget they were there.

I’ve tried the recipe sans mushrooms and the flavor just wasn’t the same. If you happen to love them, you can just roughly chop them before adding them to the skillet. You can do that with all of the vegetables in this dish, depending on what you like. If you’re of the vegetarian persuasion, you could also opt to increase the mushrooms in place of the chicken. I don’t think I’ll ever like mushrooms enough to live that life, but I hear some people think they’re amazing. Teach me your ways, please.

Like most of my recipes, this one was developed over time, based on a lot of similar recipes. I love taking a concept and changing it to fit my personal needs – especially when the result is something this tasty!  With its irresistible sauce and depth of flavors, Better Chicken Vino Bianco is a beautiful, savory dish that still feels light and healthy. And thank goodness for that, since it practically comes with a built-in wine course. The recipe only calls for a cup, and it would be a shame to waste the rest!


Better Chicken Vino Bianco


Prep Time 20 minutes
Cook Time 30 minutes
Total Time 50 minutes

Ingredients

  • 3 chicken breasts
  • 2 Tbsp olive oil
  • 1 cup yellow onion, diced
  • 1 cup shredded carrot
  • 4 garlic cloves, minced
  • 1 1/2 cup mushrooms, chopped
  • 1 cup quartered grape tomatoes
  • 1/2 cup heavy cream
  • 1 cup dry white wine
  • 1 tsp salt

Instructions

  1. Slice chicken into bite sized pieces and cook in a Tbsp of olive oil. Cook gently, over medium heat, to prevent chicken drying out. Remove cooked chicken from the skillet.

    2. Place onion, shredded carrot, garlic, and a Tbsp of olive oil in the same skillet over medium heat. Let cook until everything starts to soften, stirring occasionally.

    3. While onions are cooking, cut tomatoes into quarters, and chop mushrooms - I diced mine very very small, but you could just chop them roughly if you love mushrooms. Add both to the skillet with 1 tsp of salt and let cook until soft. 

    4. Add wine to the skillet and bring to a simmer. Cook until the sauce starts to reduce. Turn off heat and add cream. Stir until well combined. Salt to taste. Add chicken to the skillet and mix until coated with sauce. 

    5. Serve over warm rice or pasta.