Sriracha Shrimp Skewers with Pineapple

Sriracha Shrimp Skewers with Pineapple

Since I’m in “do summer things” mode, I’ve been super excited to experiment with some grilling recipes. Now that we’ve been getting the occasional cool-but-not-too-cold summer evening, I’ve been obsessed with eating outdoors. Dinner straight from the grill is one of those magical things that you can only do when the weather permits, so it’s important to take advantage of those clear, golden evening hours whenever possible.
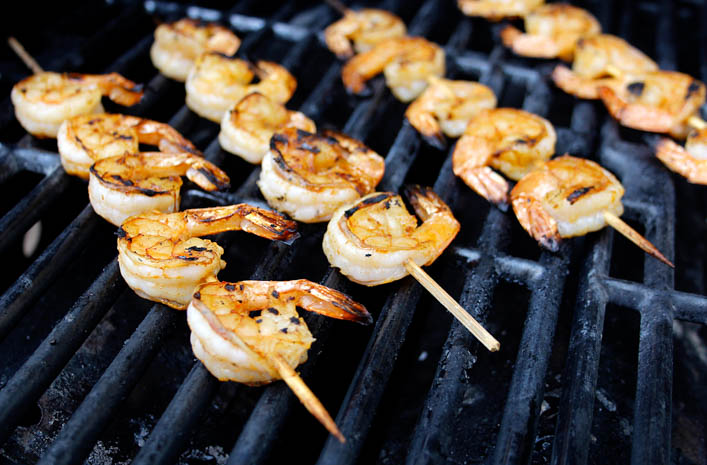
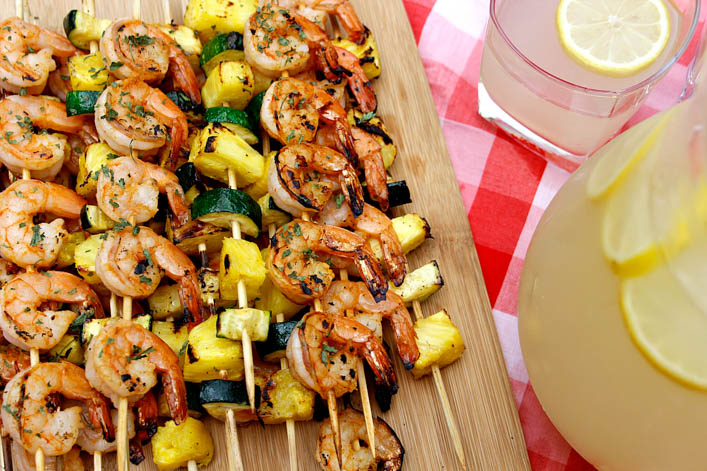
My favorite grilled foods are shrimp and pineapple, so figuring out what to make was a no-brainer. But I wanted to create a marinade for the shrimp that would knock anyone’s socks off. Recently, I bought a bottle of Sriracha for the first time in about a year. It was one of those things where I ate too much of it, and then couldn’t stand it for a long time. Now that it’s back in my life and I remember how wonderful it is, it only made sense to put it in my marinade. I added it to some pineapple juice, garlic, salt, ginger, and coconut milk. I can’t explain why – please tell me if you know what crazy science is at work here – but coconut milk and pineapple juice make the shrimp take on a tender, buttery texture. I’d never realized that I wanted shrimp to melt in my mouth until I cooked them in this marinade, and now I don’t know how I went without it for this long. Don’t worry if you, like me, abhor the flavor of coconut. I promise – cross my heart, hope to die – that you cannot taste it on the shrimp. Coconut milk doesn’t even smell like coconut.
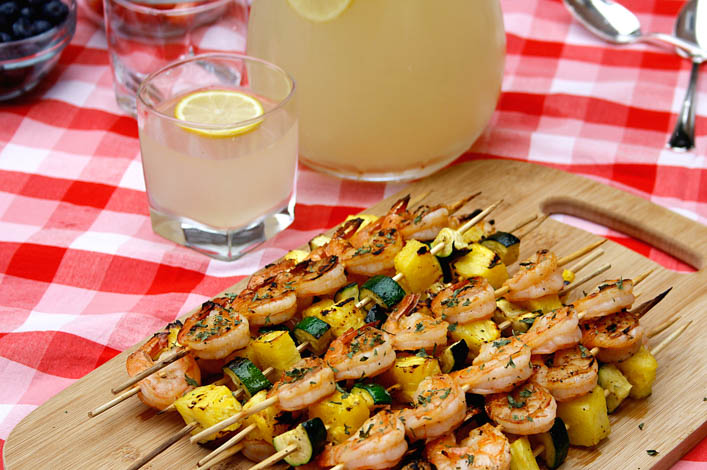
I let my shrimp marinate for maybe 30 minutes before cooking it, and it picked up amazing flavor. It’s mildly sweet and salty, with just a tiny kick from the Sriracha and ginger. The pineapple juice gives it a citrus-y flavor that works beautifully with the ginger, and of course makes it pair perfectly with the grilled pineapple. I like this recipe because it doesn’t take a million years to prepare, and you can cook for a lot of people at once, since you’re doing it on the grill.  You can make rice and a big pitcher of lemonade/sangria to go with dinner while the shrimp is getting all delicious in the marinade, and let the grill heat up while you prepare the skewers.
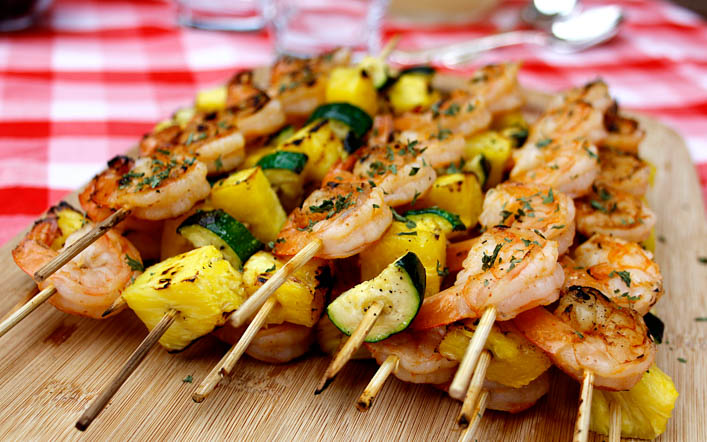
I discovered throughout the process of testing this recipe that skewers are a million times easier to cook if you only put one kind of food on them. Trying to cook skewers with shrimp, pineapple, and zucchini chunks – and making sure that everything cooked evenly and properly – was just annoying. Maybe there’s a secret I don’t know about the art of the kebob, but threading meat and produce on separate skewers just makes sense. You don’t have to worry about uncooked shrimp touching pineapple where it won’t get enough heat (my main concern), and you don’t have to cut your pineapple and zucchini to precise shrimp-sized pieces so they’ll cook evenly with the shrimp.
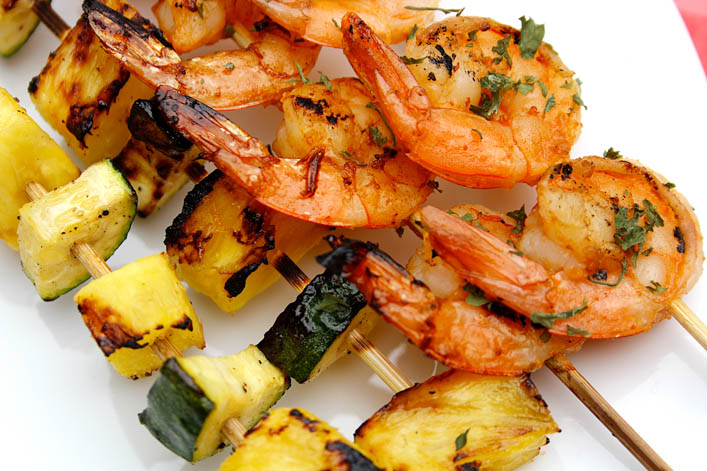
If you don’t like grilling or you don’t like shrimp, don’t worry – you can cook the shrimp on the stove with similar results, or you can use the marinade on chicken. I marinated some chicken in it, and then used the cooked chicken to make delicious bowls for dinner a few days ago, with rice, Sriracha yogurt, sauteed zucchini, and crushed pita chips. However you use it, this marinade will make your food taste like summer – especially if you have dinner outside on the patio, with a cold drink and your favorite people. And if you really want to take it over the top, you can always have Balsamic Cherry Chocolate Ice Cream for dessert. Just a suggestion.


Sriracha Shrimp Marinade

Servings 4 servings

Ingredients

Shrimp Skewers

  • 1 1/2 lbs raw shrimp, peeled and de-veined
  • 1/4 cup pineapple juice
  • 2 Tbsps sriracha
  • 2 Tbsps coconut milk (I used canned coconut milk)
  • 1/4 tsp salt
  • 1 tsp garlic powder
  • 1/4 tsp ground ginger

Pineapple and Zucchini Skewers

  • 1 medium zucchini
  • 2 cups pineapple chunks - about 1/2 a fresh pineapple
  • 1/2 Tbsp olive oil
  • 1/8 tsp salt
  • 1/8 tsp fresh black pepper

Instructions

  1. Note: Soak wooden skewers in water for at least 30 minutes before use.

    Combine all marinade ingredients in a shallow bowl. Place shrimp in the marinade and stir until all of it it well coated. Cover and let rest in the refrigerator for 30 minutes to 1 hour. 

    2. Slice pineapple and zucchini into bite-sized chunks. Season the zucchini with olive oil, salt and pepper. Thread onto skewers, leaving a little space between each piece. 

    3. Pre-heat the grill. Thread shrimp onto skewers (keep separate from those with the pineapple and zucchini).

    4. Cook skewers over medium-high heat on grill until shrimp curl and turn pink/lose transparency. Pineapple and zucchini should cook until tender - about 4-6 minutes on direct heat, and then move to indirect heat to continue getting soft. Sprinkle the cooked shrimp with dried parsley, if you're feeling fancy. 


Sweet Potato Summer Salad: Two Ways

Sweet Potato Summer Salad: Two Ways

I bought a new car a few days ago, because my old one was declared totaled after a fender bender. And on the day I bought my car, my laptop died. 2017 is perhaps not going to be my year after all. In the midst of misfortunes such as these, I turn to food to lift my spirits, because food rarely fails me. While I couldn’t be online blogging, I was able to test some new recipe ideas to dazzle you with. Today’s recipe is unusual in the best way, because it’s not a combination of flavors that you see a lot, but I’m so happy it’s in my life now.

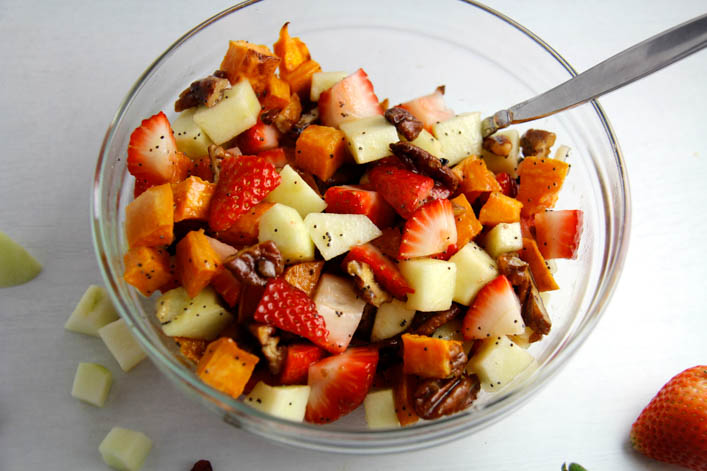
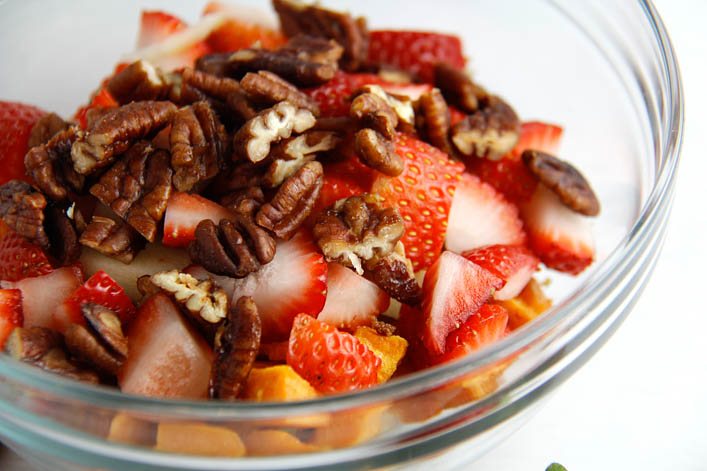
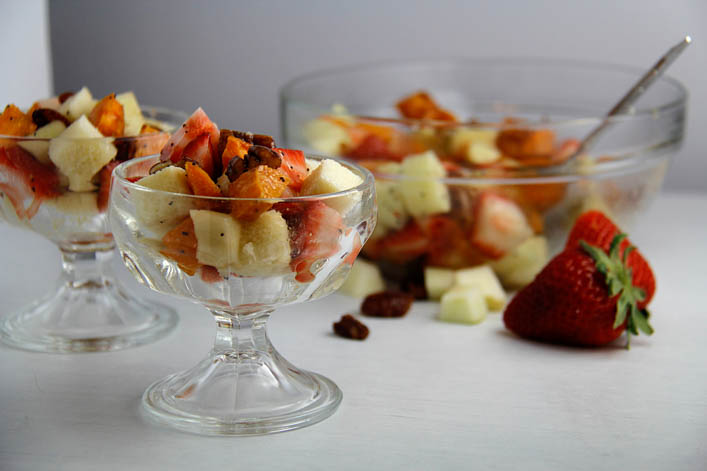
I give you Sweet Potato Summer Salad. No longer will I stand for sweet potatoes being associated only with the holidays. Mixed with the right flavors, they’re perfect for spring and summer. This salad is a mix of roasted sweet potato, strawberries, apples, and spicy toasted pecans, tossed in an orange poppy seed dressing. I’ve adapted the Orange Poppy Seed Dressing recipe from Skinny Ms., reducing the honey to keep the whole dish from being too sweet. This dressing adds a light, zingy touch of citrus to the heartier sweet potatoes, and ties it together with the other fruits. The mix of crisp apple, soft, sweet strawberry, and rich sweet potato, with the crunch of the pecans and poppy seeds, makes this dish a textural dream. I highly recommend throwing it all in a bowl and serving it as is, but if you want to add a little something extra, I have a few ideas for you.

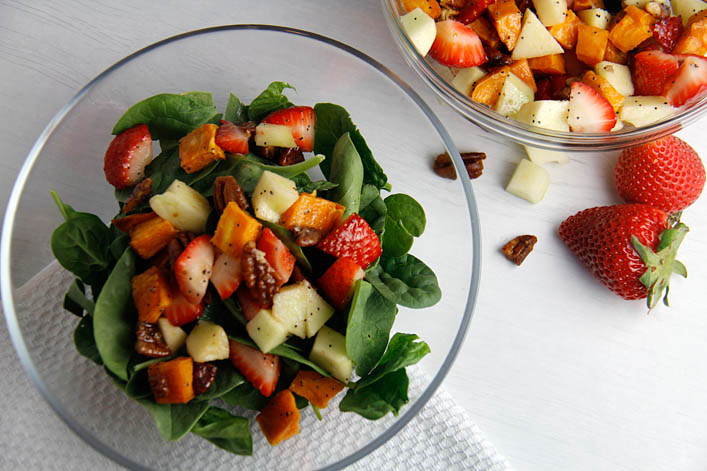
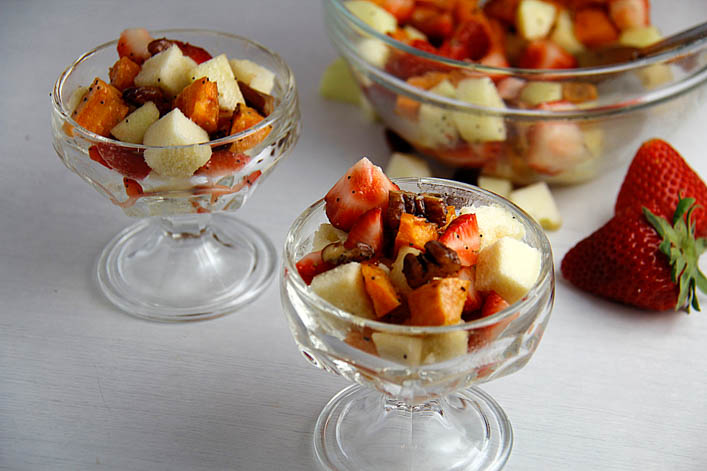
This salad works beautifully as a component in more traditional salads, served over a bed of greens and drizzled with a little more of the dressing. You could add meat or more nuts and seeds to make it more of a meal, but it definitely doesn’t need it. Alternatively, Sweet Potato Summer Salad also makes a fabulous dessert. I stirred little cubes of pound cake in with it, which added the perfect boost of sweetness and made the whole thing feel more decadent. You could take the dessert concept a step further and top yours with whipped cream or ice cream, with an extra drizzle of the dressing to balance the sweetness. Both versions offer a very interesting take on their respective food groups (if you count dessert as a food group, which I do). Will it matter if you omit the poppy seeds? Of course not, but in my opinion they add elegance to the salad and a striking contrast to the colorful fruit. You could also experiment with substituting chia seeds, if that’s what you have on hand.

This dish is complex and delicious, and you can still feel good about eating it. Even as a dessert it’s mostly a serving of fruit, and the dressing is packed with flavor, so you don’t need a lot of it. To be fair, I feel good about eating just about everything except coconut and bleu cheese, but it’s nice to have healthy options when summer is coming. Really fast. In less than a month. I feel like everyone I talk to lately is all “how is it May already?” Sweet Potato Summer Salad is the perfect dish to help usher in the new season, so we can all wonder less about where the year has gone, and wonder more about whether or not there’s enough left for a second helping!

5 from 1 vote
Print

Sweet Potato Summer Salad

Orange Poppy Seed Dressing recipe adapted from Skinny Ms.

Ingredients

Sweet Potato Summer Salad

  • 1 large sweet potato
  • 1/4 cup pecans
  • 1/2 Tbsp honey
  • 1 oz orange juice
  • 1/4 tsp cayenne
  • 1/2 granny smith apple, peeled
  • 8-10 large strawberries

Orange Poppy Seed Dressing

  • 1/4 cup orange juice
  • 1 Tbsp honey
  • 2 Tbsps olive oil
  • 1/2 Tbsp poppy seeds
  • 1/4 tsp salt
  • 1/4 tsp pepper
  • 1 tsp Dijon mustard

Instructions

  1. Preheat the oven to 400 degrees. Peel and cube the sweet potato, and place on a baking sheet lined with foil. Drizzle about a tsp of olive oil over top and stir the potatoes around until they're all coated. Sprinkle brown sugar and salt over top. Bake for 15 minutes, remove from the oven and stir the potatoes around on the tray, and then bake for an additional 15 minutes. 

    2. Roughly chop the pecans, and spread them on a baking sheet lined with foil. Place in the oven to toast for about 5 minutes - they can go in at the same time as the sweet potatoes. They may need an extra minute or so to get nice and toasty, but be careful not to burn them. Stir together 1/2 Tbsp of honey, 2 oz of orange juice, and the cayenne. Stir toasted pecans into this mixture, and then spread them out on the baking sheet to dry. After the sweet potatoes are done cooking, you can set the tray of pecans in the warm oven, with the door slightly ajar, to help them dry.

    3. Peel and cube the apple, and slice the strawberries into bite-sized chunks. Whisk together the dressing ingredients, until well combined. The poppy seeds will rise to the top, so you'll need to re-whisk it before pouring over the salad. 

    4. Add the potatoes, apple, strawberries, and pecans to a bowl, and toss with about half of the dressing. The other half of the dressing can be drizzled over greens topped with the sweet potato summer salad, or ice cream/pound cake, mixed with the salad. Both versions are delicious!


Tex-Mex Rice

Tex-Mex Rice

I intend to post on this blog about delicious Mexican food for as long as humanly possible. With that in mind, I think it makes sense to share my favorite side dish to go with things like Salsa Verde Chicken Enchiladas. This Tex-Mex rice is a family recipe, and it’s a far cry from the stuff you sometimes get in restaurants with chunks of peas and carrots that were clearly recently defrosted.

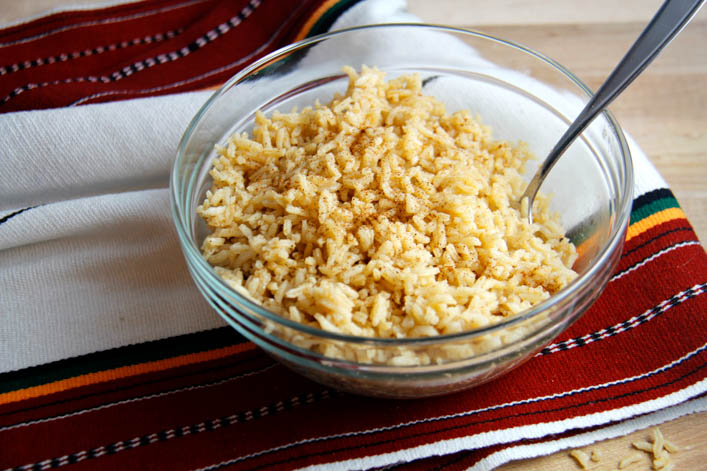
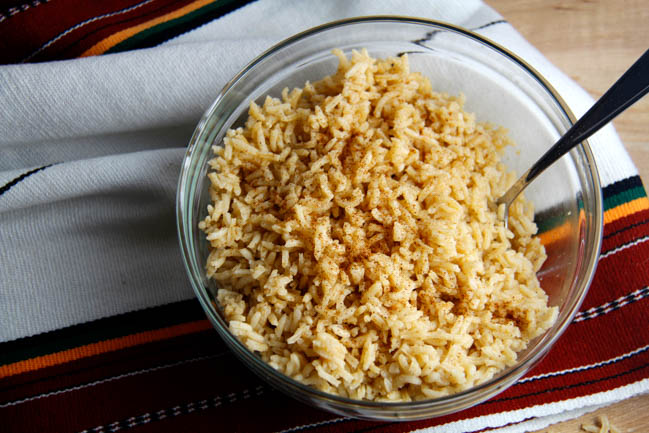
This Tex-Mex rice is cooked in olive oil and chicken broth, and flavored with onion, garlic, and chili powder; oregano; cumin; and a little bit of enchilada sauce. It’s a perfect choice to complement black beans and just about any version of tacos, enchiladas, or burrito you want to make. The rice definitely isn’t spicy, but it has a depth of flavor that makes it delicious even just eaten by itself.

Tex-Mex rice doesn’t take much longer to make than traditional rice, because the only extra steps are browning it briefly in olive oil, and adding the seasonings. It can be made while the rest of dinner is cooking, and it keeps well in an air-tight container, in the refrigerator, for about a week. This rice has a slightly higher nutrition content than plain or cilantro-lime rice, since it’s cooked in chicken broth. You can also make it with vegetable broth to keep it animal-product free.

My favorite way to eat Tex-Mex rice is in a big burrito bowl, because it’s a perfectly mild, yet flavorful, base to build on with just about any Mexican flavors. However you decide to serve it, in a burrito, a bowl, or just on the side, this recipe will change the way you look at rice.

Tex-Mex Rice

Servings 3 cups

Ingredients

  • 1 cup raw white rice
  • 3/4 Tbsp olive oil
  • 14oz chicken broth (or a mix of broth and water, or vegetable broth)
  • 1 Tbsp enchilada sauce or smooth salsa
  • 1/2 tsp salt
  • 1/2 tsp onion powder
  • 1/2 tsp garlic powder
  • 1/2 tsp chili powder
  • 1/2 tsp cumin
  • 1/8 tsp dried leaf oregano

Instructions

  1. Stir together seasonings and salt, set aside. If the broth is cold, warm it to at least room temperature. Combine broth with the enchilada sauce. Set aside.

    2. Heat the olive oil in a medium pot with a tightly-fitting lid (lid off). Add the rice, and stir over medium-high heat until lightly browned, just to an ivory or light tan color.

    3. Stir the seasonings into the rice, and then add the broth. Stir once, to distribute evenly. When the broth comes to a full boil, put the lid on the pot, and turn the heat to the lowest setting. Let cook for 20 minutes. Do not remove the lid during cooking time. Check for doneness after 20 minutes; if the liquid has not been completely absorbed, cover the pot again and let it cook another 5 minutes or so.

    For best texture, cook a day or two ahead of serving, cool, and then refrigerate. Reheat in the microwave just before serving.


Falafel Hummus

Falafel Hummus

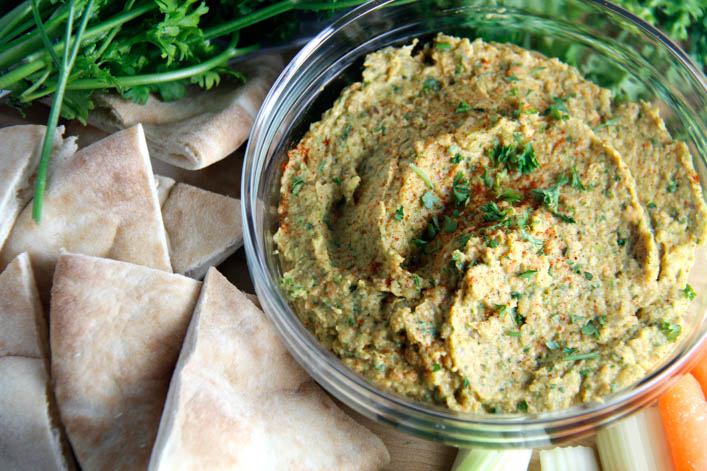
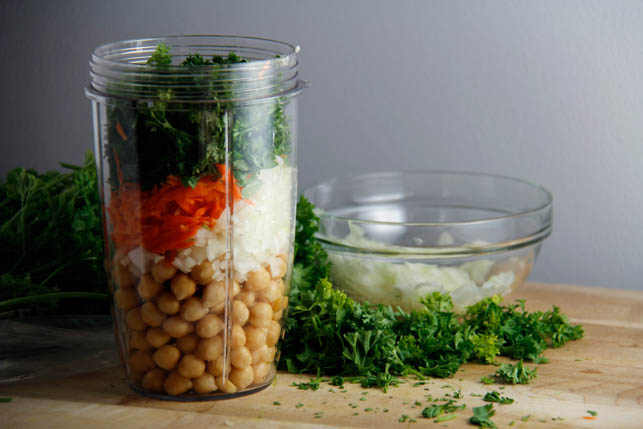
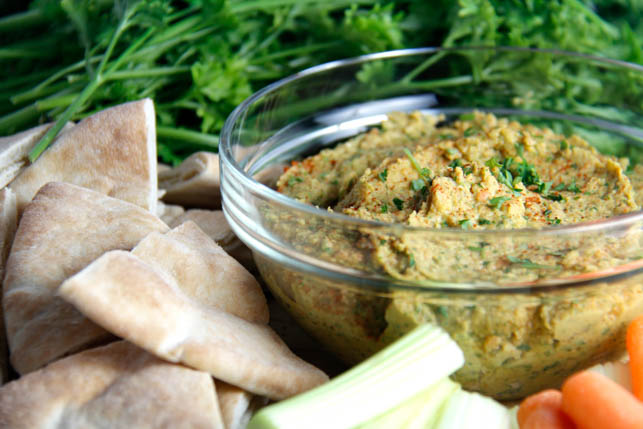
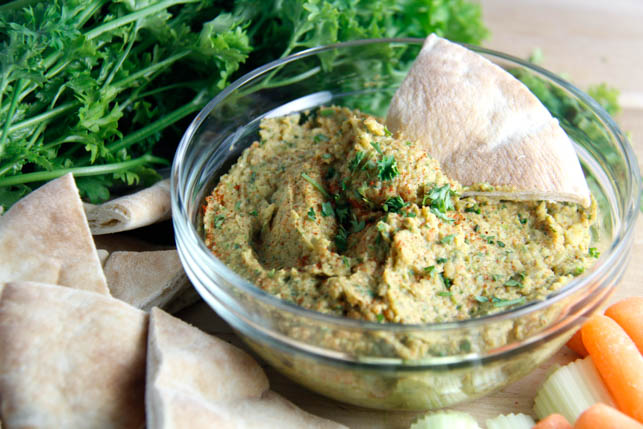
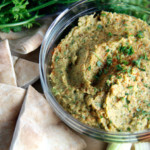
I was really hoping I’d invented Falafel Hummus as a concept, which is pretty silly since it seems like everything you can think of has already been done (I like to dream big). A couple Google searches show that this isn’t a completely new concept, but it’s also not all over the place. Well, it should be. I’ve been obsessed with falafel lately. The flavors are so interesting, with the mild, nutty chick peas and the sharp spicy parsley. I have to admit that turning falafel into a dip resulted from my failure to make actual falafel, but I’m not mad at about it even a little. Falafel Hummus is easier to make than falafel, and it has become my new favorite snack.

I started with a recipe from Gourmandelle for Healthy Vegan Falafel, formed the mixture into little patties and tried to fry them (the recipe calls for pan-frying instead of deep-frying), only to end up with squishy, soft, non-fried “falafel.” This is probably a case of my oil not being hot enough, but I can’t say for sure. What I can tell you for sure is that the whole time I was standing at the stove frying, I was eating the falafel “batter” that was still in the bowl. And it was delicious. I’m talking the kind of delicious where the flavors are curious and pleasing in a way where you have to keep tasting it to make sure you’re remembering it properly. And every bite is  better than the last.

I ditched the frying and decided to try the recipe again, but this time with a few additions to turn it into a dip.  During this experiment I left out the almond flour, which turned out to be a huge mistake. The almond flour balances the onion and the parsley in this dip to keep them from tasting bitter. I think almond butter would work as well, if not better, but almond flour worked just fine for me. I added some of the liquid from the can of chick peas and some olive oil to thin it to dip consistency. I also tossed in a couple of dates, which give the whole thing a slight undertone of sweetness, adding another dimension and tying all the flavors together.

I ate way too much of it in a single sitting, dipping warm pita and carrots in it and marveling at how something so similar to a million other versions of hummus could taste so different. It has the added bonus of involving zero frying, so this Falafel Hummus is technically healthier and quicker to make as well. Serve it to your vegan and non-vegan friends alike, or just have it for lunch spread inside a pita with some veggies. It’s perfect to share or to devour on your own when you’re experiencing serious falafel cravings or desperate wanderlust, or in my case, both.


5 from 1 vote
Print

Falafel Hummus

Recipe adapted from Gourmandelle's Healthy Vegan Falafel 

Ingredients

  • 1 can chick peas (drain but keep the water)
  • 2 Tbsp aquafaba (water from the can of chick peas)
  • 1 Tbsp ground flax seeds
  • 1/4 cup fresh parsley, chopped
  • 1/2 carrot, shredded
  • 1/2 yellow onion, diced
  • 3 garlic cloves, mashed
  • 2 Tbsps almond flour
  • 1/2 tsp paprika
  • 1/2 tsp ground cumin
  • 1 Tbsp tahini
  • 2 dates
  • 2 Tbsp olive oil
  • 3/4 tsp salt

Instructions

  1. Place all ingredients in a food processor and pulse until blended but not completely smooth. The dip is better if it's a little chunky. Salt to taste.

    Serve with warm pita, chips, and veggies.

    Note: I mixed mine in my nutri-bullet because I'm obsessed with it, but it definitely was not the very best tool for the job. I recommend using an actual food processor.


Salsa Bruschetta

Salsa Bruschetta

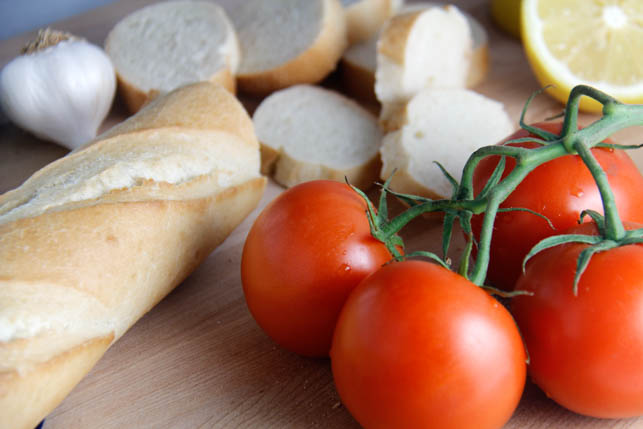
This recipe is one of my favorite creations thus far. It happened sort of by accident, ending up in a much different place than it started. The original inspiration was the concept of Pan a la Catalana, and then I started researching recipes, and went a completely different way. I was in the kitchen with my tomatoes and garlic and my baguette, and suddenly I was just adding things to a bowl and tasting and adding some more. I seem to do that a lot lately, which makes me both very excited about what I could create, and very concerned that I’m missing a lot of interesting things that might result from me ever following a recipe properly. But, what would be the fun in that?

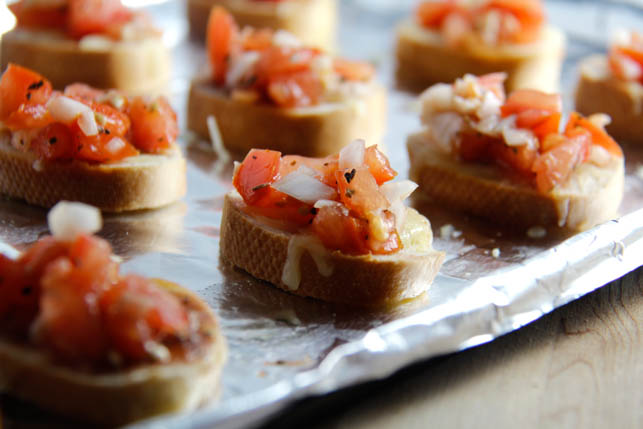
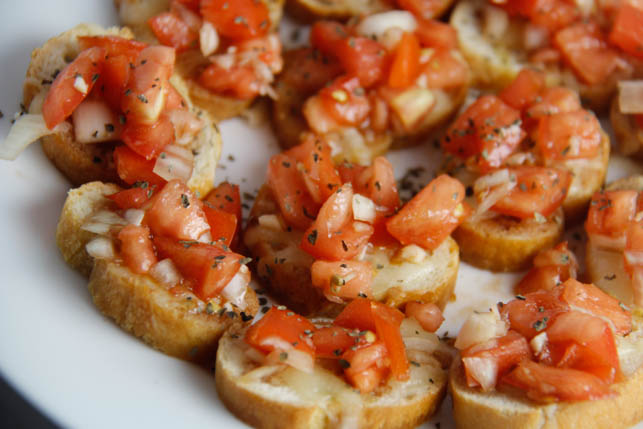
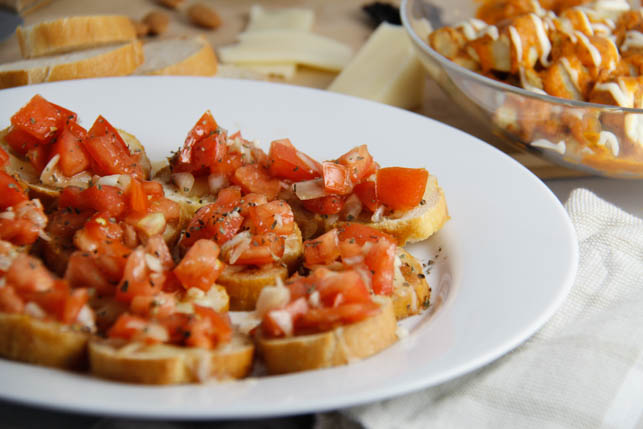
The Salsa Bruschetta that has resulted from my impatience and possible over-confidence in the kitchen is fresh, bursting with flavor, and a perfect addition to your favorite tapas recipes – I served it alongside my Baked Patatas Bravas. I used tomato and onion as a base, and added garlic and a bit of balsamic vinaigrette, along with basil, lemon, brown sugar, and olive oil. It’s got a lot of the flavor that you would find in Pan a la Catalana, and in traditional bruschetta, with some sweetness and citrus that really lift the onion and the garlic to make them a little brighter. The lemon and onion are what really take this bruschetta recipe into salsa territory, because there isn’t a lot of  salsa-esque heat. I added a pinch of cayenne, but I didn’t want that to overshadow the freshness of the tomatoes and the lemon. If you’re in the mood for something a bit spicier, I’d recommend adding chopped jalapeno to this recipe.

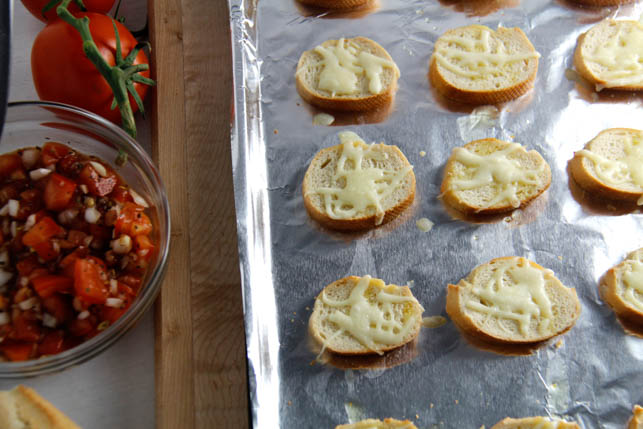
There’s one more element to this particular version of Bruschetta: After I sliced my baguette, I topped the slices with a light drizzle of olive oil, and a sprinkle of Monterey Jack cheese. Next time I may experiment with mozzarella for a caprese-inspired version, but the Monterey Jack worked extraordinarily well with the Salsa Brushetta. It’s the right amount of salty and creamy to pair with the tangy, slightly sweet flavor of the bruschetta. Cheese isn’t typically a part of bruschetta, possibly because that can take it to pizza-bread territory very quickly. I assure you that very little about this Salsa Bruschetta reminds me of pizza. The flavors are much lighter, yet richer and more complex than something you’d find on a pizza. (Unless it’s a very good, very unusual pizza, of course)!

These are definitely best served fresh, when the cheese is still gooey and melted. They do keep in the fridge fairly well overnight, and I have it on good authority that husbands named Bobby find that leftover Salsa Bruschetta makes an excellent afternoon snack. Whether you’re snacking or having your Salsa Bruschetta as part of a meal – perhaps as an interesting starter – this recipe is one you’ll make again and again. It’s very quick to make, and as uncomplicated as something that looks this elegant can get. No one will believe that you knocked the whole thing together in 20 minutes. But they won’t have much time to worry about that, as they’ll be worried about getting another bite before it all disappears.


Salsa Bruschetta

Prep Time 15 minutes
Cook Time 5 minutes
Total Time 20 minutes

Ingredients

  • 2 medium tomatoes
  • 1/4 small/medium white onion
  • 1 french baguette
  • 1 clove garlic
  • 1/2 Tbsp olive oil + more for drizzling
  • 1/2 tsp balsamic vinegar
  • 3/4 tsp brown sugar
  • 3/4 tsp dried basil
  • 1 dash cracked black pepper
  • 1 1/2 tsps lemon juice
  • 1/2 tsp salt
  • 1 dash cayenne
  • 1/4 cup shredded Monterey Jack

Instructions

  1. Dice tomatoes and mince garlic, stir together. Chop onions in a smaller dice than the tomatoes and add to the bowl. 

    2. Slice baguette into thin slices, about 1/4 of an inch thick. Place in a single layer on a baking sheet lined with foil. Drizzle olive oil lightly over each. Bake in the oven at 350 degrees for 4 minutes. You want the bread crisp on the edges, but still a little soft.

    3. Add remaining ingredients to the salsa mixture, except the cheese. Stir until well combined. Salt to taste - add more cayenne for a spicier salsa. 

    4. When baguette slices are done, remove from oven, top each with a little less than 1/2 Tbsp of Monterey Jack, and return to the oven for 2 minutes, or until cheese is melted. 

    5. Top each baguette with the salsa mixture. Try not to eat the whole batch by yourself. 


Baked Patatas Bravas

Baked Patatas Bravas

I think it’s only appropriate to begin this post by saying that I’ve never been to Spain. If you’d like to take me there, I can be packed and ready in an hour, but until then, my experience with authentic Spanish tapas will remain limited. That said, I have plenty of experience with tapas restaurants in the states – they’re possibly my favorite kind of restaurant. Sitting down with friends to experience not just a dish or two, but instead a wide variety, is how all meals would be served in my ideal world.

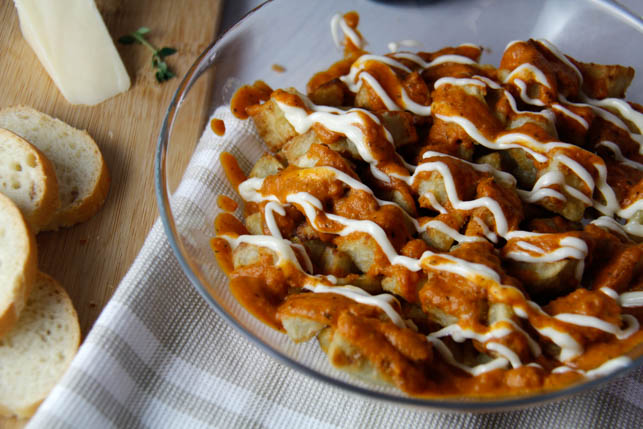
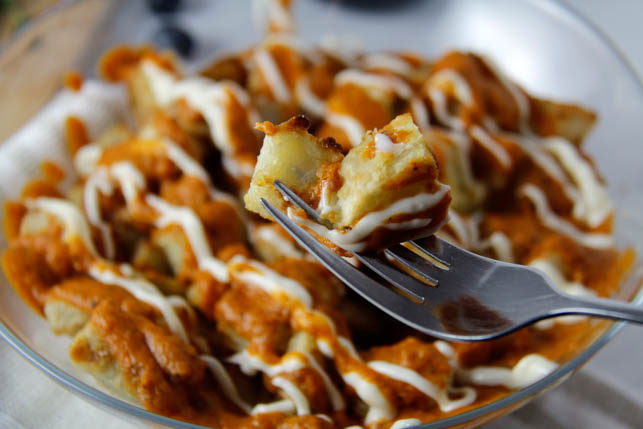
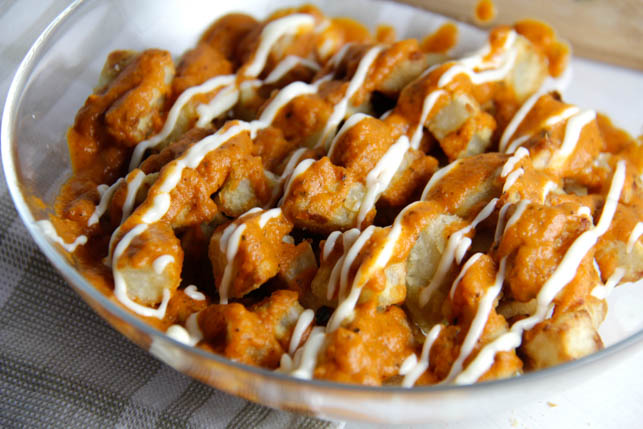
One of the best and simplest tapas out there is Patatas Bravas. How could anyone not get excited about golden brown potatoes that are crispy on the outside and soft on the inside, drizzled with a spicy tomato sauce and a creamy garlic aioli? There are a million recipes out there for Patatas Bravas – my intention was to replicate the ones I like best. All the tapas restaurants in my area seem to serve an almost identical version, so hopefully I’ve done it justice!

The spicy tomato sauce is actually very similar to my Tomato Basil Bisque recipe, with a few key flavor alterations. The aioli is a fairly standard lemon garlic aioli. Patatas Bravas are typically fried potatoes, but I chose to bake mine to make them slightly healthier, and for general ease. Deep frying at home is quite a process, compared to throwing a tray in the oven.

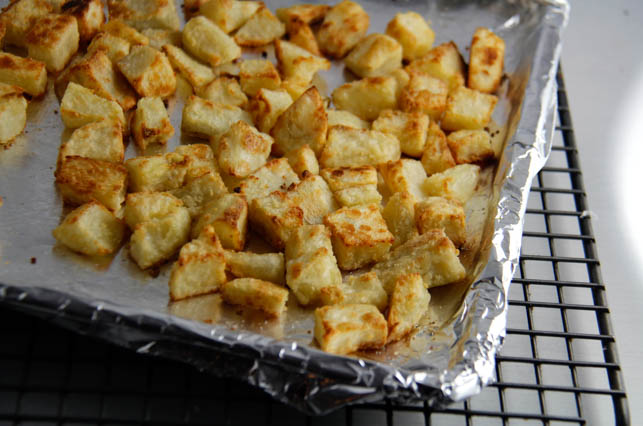
Baked fries/chunks of potato are a little difficult to get perfectly crispy in the oven, but the technique I used cooked them just the way I wanted. You start by putting your chopped potatoes in a pot of cold water and bringing it to a boil. Once the pot reaches a boil, you remove your potatoes from the heat, toss them in a couple tablespoons of olive oil and flour, and bake them on a tray at very high heat in the oven. I haven’t tried this method for fries but you better believe I intend to. This technique could also be something that experienced chefs have known about for years, and here I am just discovering it. The more I learn about cooking, the more I find that I will never know enough about cooking.

I served my Patatas Bravas with a cheese board, some salsa bruschetta (a recipe that I will be posting here soon!), and of course some sangria. Can’t forget the sangria. Bobby (my husband) and I basically gobbled it down, sitting on the floor of our apartment (we do have furniture – we’re just weird). I prefer to imagine that we sat on a balcony in Spain, in the warm glow of the last of the day’s sunlight, glasses of cold, fizzy, white sangria in hand, reaching for another helping of everything. Food can transport me the same way a good book does – or maybe I’m just delusional? You be the judge. I’ll be busy eating Patatas Bravas on my “balcony.”


Baked Patatas Bravas

Prep Time 15 minutes
Cook Time 45 minutes
Total Time 1 hour

Ingredients

Potatas

  • 3 russet potatoes
  • 2 Tbsps olive oil
  • 2 Tbsps white flour

Spicy Tomato Sauce

  • 1/4 medium yellow onion
  • 1 Tbsp butter
  • 1 clove garlic
  • 2 Tbsp tomato paste
  • 1/4 cup diced canned tomatoes
  • 1/4 cup chicken broth
  • 1 1/2 tsp brown sugar
  • 1/2 tsp dried basil
  • 1/8 tsp cumin
  • 1/8 tsp chili powder
  • 1/8 tsp cayenne
  • 1/8 tsp dried oregano
  • 1/8 tsp dried thyme

Lemon Garlic Aioli

  • 1/4 cup mayonnaise
  • 1/2 tsp lemon juice
  • 1 tsp olive oil
  • 1/4 tsp garlic powder
  • 1/16 tsp salt

Instructions

  1. Peel and dice potatoes into bite-sized chunks. Place in a pot with enough cold water to submerge them completely. Cook over high heat, just until the water reaches a boil. Drain, keeping the potatoes in the same pot. Add olive oil and flour to the potatoes and shake the pot until they're well coated - this is much easier than stirring to get them evenly coated. 

    2. Line a baking sheet with foil and spray with non-stick cooking spray. Spread potatoes on the tray in a single layer, and cook in the oven at 400 degrees for 30 minutes. Remove from the oven after 15 minutes, and flip the potatoes to ensure they brown on all sides. When they're golden brown and the outsides are all crispy, they're done. 

    3. While the potatoes cook, make your sauces. For the aioli, add all five ingredients to a small bowl and stir until well combined. For the tomato sauce, chop onion and add to a small pot with 1 Tbsp of butter. Let cook until the onion is soft and starting to become transparent. 

    4. Mince 1 clove of garlic and add it to the pot, with the tomato paste, diced tomatoes, and chicken broth. Let it come to a boil, reduce heat, and simmer for 15 minutes. After lowering the heat, add the remaining ingredients, and stir frequently.

    5. Remove sauce from heat and pour into a blender (I used my NutriBullet, as always). Blend until smooth. 

    6. Remove potatoes from the oven, pour into your serving dish and drizzle with both sauces. Enjoy!


Warm Butternut and Bell Pepper Salad

Warm Butternut and Bell Pepper Salad

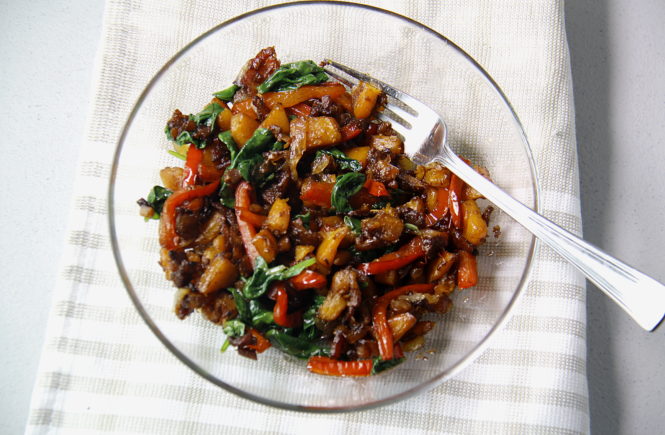
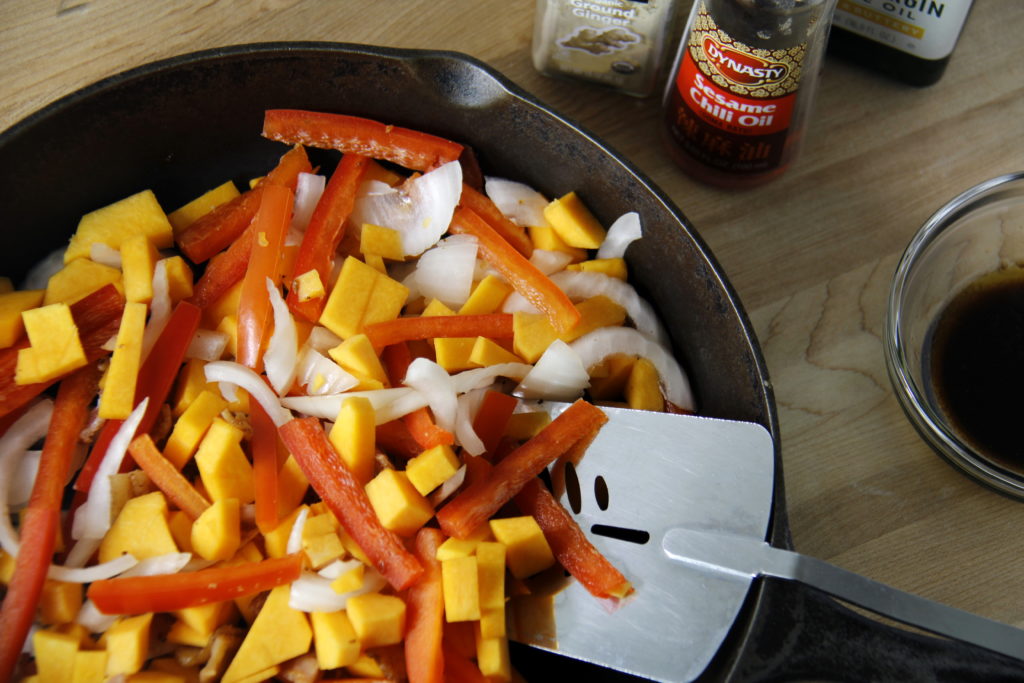
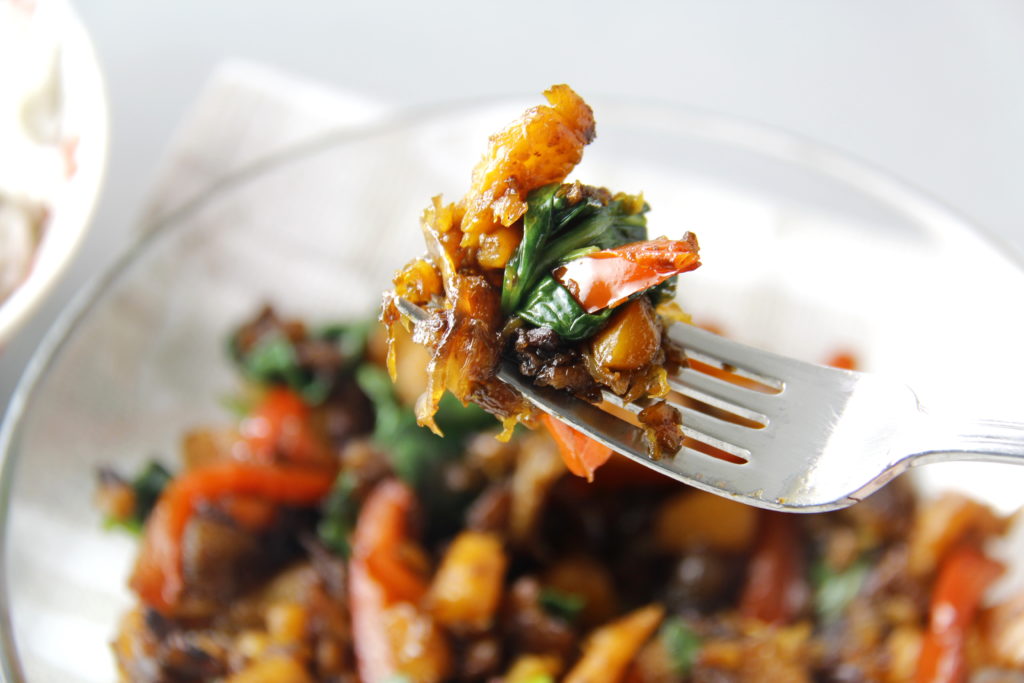
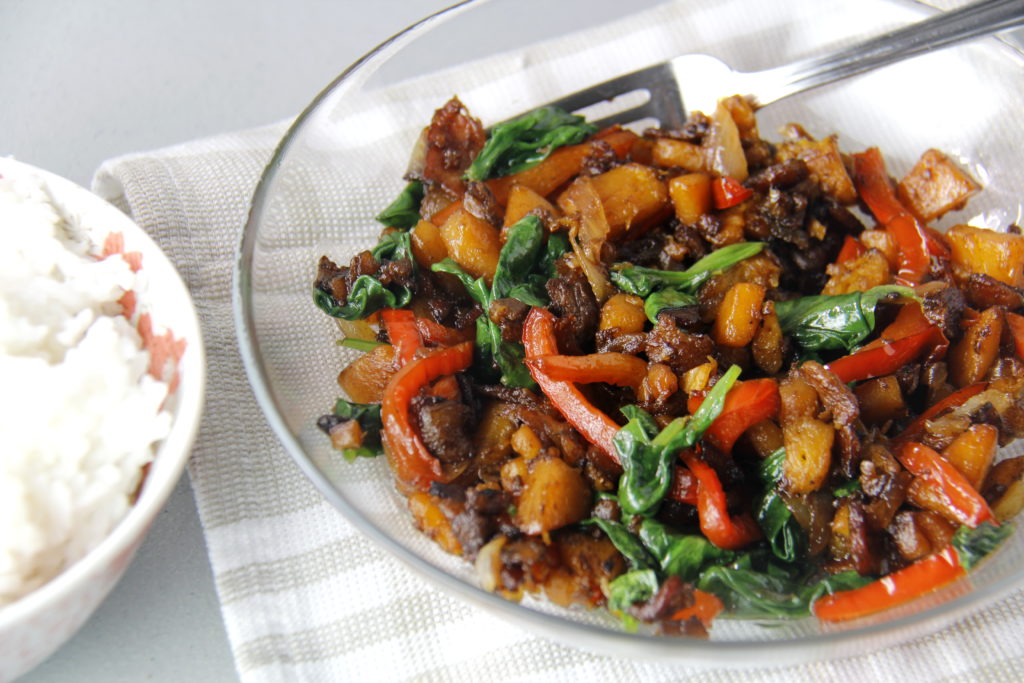
On Sunday, I woke up and realized that I’d barely eaten a single vegetable between Friday and Saturday. Please tell me that happens to you, too. This recipe was born out of a need to make something delicious and vegetable-based, with the ingredients already in my kitchen. It’s funny how sometimes the most wonderful dishes come together that way – and I can guarantee that this dish is indeed wonderful. It’s got soft, slightly sweet butternut squash, bell peppers, garlic, and onions as a base.  To flavor it, I created a cross between a light balsamic vinaigrette and Chinese take-out inspired sauce that works with the nutty squash flavor better than I could’ve dreamed.

I was cooking bacon before I started concocting my “stir-fry,” so I threw some torn, thick-cut bacon in with the mix. It added another dimension to the texture, and I don’t think I even need to remind you how adding the flavor of bacon to just about anything will immediately improve it. I wilted some spinach into it at the end to add a little more color and bulk. I don’t actually love cooked spinach all that much, but the flavor of it sort of disappeared in this dish, so I got more nutrition without that bitter wilted spinach flavor. This is yet another addition to my “make vegetables taste good” file.

I was truly just throwing things in the pan for this one. Chop up the vegetables, saute them, and add your sauce. Then throw in a big handful of fresh spinach, let it cook down, and the result is a perfect alternative to a regular cold salad. The prep and cooking processes take maybe 30 minutes, and you don’t have to stand at the stove the whole time the food is cooking. Since starting this blog, I’ve become very aware of how much I like being able to multitask. If I can make lunch and clean up the kitchen at the same time, (and maybe text and dance and dream up other blog ideas as well), I am a much happier person.

I invented this recipe to be my lunch, but it would make a fabulous side dish for beef or chicken, or even a vegetarian entree if you forgo the bacon (just make sure to taste it and see if it needs an extra dash of salt in that case!). That said, the recipe makes a fairly small portion. Even as a side dish, you may need to double or triple the measurements depending on who you’re feeding. It’s a quick, healthy lunch or dinner for when you want something warm and comforting, but still light and fresh. If you’re doing any kind of low carb diet, then this recipe is definitely for you.

I always mention how recipes are incredibly versatile, but I suppose that as a person who can’t ever follow a recipe without tweaking it, I just think everything is open to interpretation. You could try this dish with other kinds of squash, any greens you like, beets, or mushrooms – the possibilities are endless when you’ve got some onion, garlic, and a great sauce to start.


Warm Butternut and Bell Pepper Salad

Ingredients

  • 2 cloves garlic, minced
  • 1/3 medium white onion
  • 1/2 red bell pepper
  • 2 cups diced butternut squash
  • 2-3 strips of bacon
  • 3 tsps olive oil, divided use
  • 1 tsps balsamic vinegar
  • 2 tsps sesame chili oil
  • 2 tsps soy sauce
  • 2 tsps honey
  • 2 tsps rice wine vinegar
  • 2 tsps brown sugar
  • 1/8 tsp ground ginger
  • 1/2 tsp salt
  • 1 big handful of fresh spinach

Instructions

  1. Chop red bell pepper, onion, bacon, and butternut squash, and mince garlic. Add to skillet on high heat with a tsp of olive oil. Give them a quick stir once every minute or so.

    2. In a small bowl, stir together all remaining ingredients including 2 tsps of olive oil to make the sauce. When the vegetables in the skillet just start to brown, pour half of the sauce over them and stir.

    3. Keep an eye on the skillet, stirring frequently (but not constantly). When the vegetables look like they're almost done (squash and peppers are tender, onions are browned), pour the other half of the sauce into the skillet and stir.

    4. Let cook for 3-4 more minutes, and lower heat. Add fresh spinach to the skillet and stir in. Let it cook just long enough for the spinach to wilt. Remove from heat and serve.

    Note: I place a large pot lid over my skillet after adding the spinach to help it wilt a little faster.


Perfect Flatbread

Perfect Flatbread

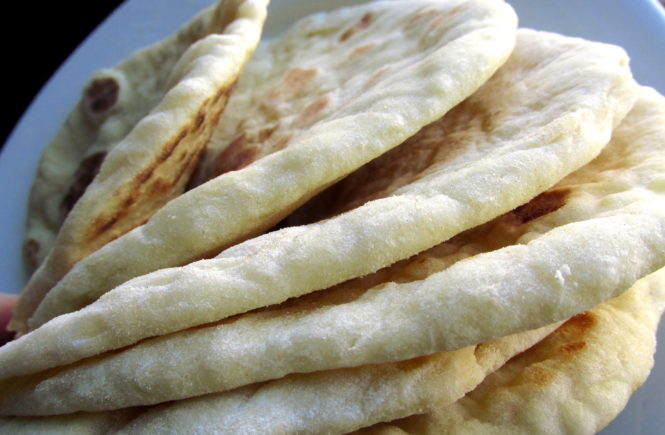
I began my hunt for a great flatbread recipe online, and didn’t have to try too many before I found a seriously amazing option. This recipe is directly from Mel’s Kitchen Cafe, and I wanted to make it and post it here to make sure this recipe gets the attention it deserves.  I incorporate it into a lot of my own dishes. This flatbread is light and soft, with the right amount of chewy, and most importantly, flavorful. I’ve tried a few flatbread recipes that got the texture right, but were bland and boring. This flatbread recipe is truly delicious by itself, or wrapped around just about anything you can think of.

Flatbread in grocery stores is criminally expensive. It’s one of those things that I never buy because I know I can make it on my own for a small percentage of grocery store prices. The best part? This flatbread recipe is way better than anything you buy in the store, and you can eat it at its absolute freshest, right out of the skillet. If there’s something better than warm, fresh bread, with a slight crunch on the outside edges, then I just haven’t found it yet. I suppose that goes for all bread, but flatbread doesn’t need to be sliced or buttered…just eaten!

This flatbread is beyond easy to make. It’s one of those recipes that involves more waiting for the dough to rise than actual cooking, but don’t worry – you only have to wait about an hour total. That’s plenty of time to get the rest of dinner ready, so you can throw these in a pan and have them fresh and hot to go with whatever else you’re serving. They do need to be cooked individually, but each flatbread only takes about two minutes in the pan – if you have a large griddle you can absolutely do more at a time. I generally roll one out, get it in the skillet, and then roll the next one while the first is cooking.

The key to this recipe is the bread flour. You may be tempted to whip out some all-purpose flour because you don’t want to shell out the dough for a bag of bread flour that you’ll only use for this recipe, but bread flour will yield softer, chewier flatbread. After you experience the flatbread from this recipe, you’ll be so happy to have the extra bread flour around to make these again! The original on Mel’s Kitchen Cafe notes that you can use 2 3/4 cups of all-purpose flour plus 1/4 cup wheat gluten, definitely a good solution if you have wheat gluten on hand instead of bread flour.

I have a single request if you decide to try out this recipe: please please eat at least a bite straight out of the skillet (don’t burn yourself). I cannot accurately describe exactly how gratifying and wonderful this is, when the flatbread is warm and fluffy, and smells delicious. I’m afraid it’s not something re-heating the flatbread can quite capture. It does freeze well if you want to make a lot at a time, and it’s completely delicious re-heated, just not exactly like when it’s fresh. But then again, how many things are better re-heated?

Perfect Flatbread

Recipe from Mel's Kitchen Cafe - Slight adaptations on cooking method from Homemade With An Upgrade.

Ingredients

  • 2 tsp rapid rise yeast
  • 1 tsp granulated sugar
  • 1 tsp salt
  • 1 Tbsp olive oil
  • 1/2 cup milk, heated until just warm, about 100 degrees
  • 2/3 cup water, heated until just warm, about 100 degrees
  • 3 cups bread flour

Instructions

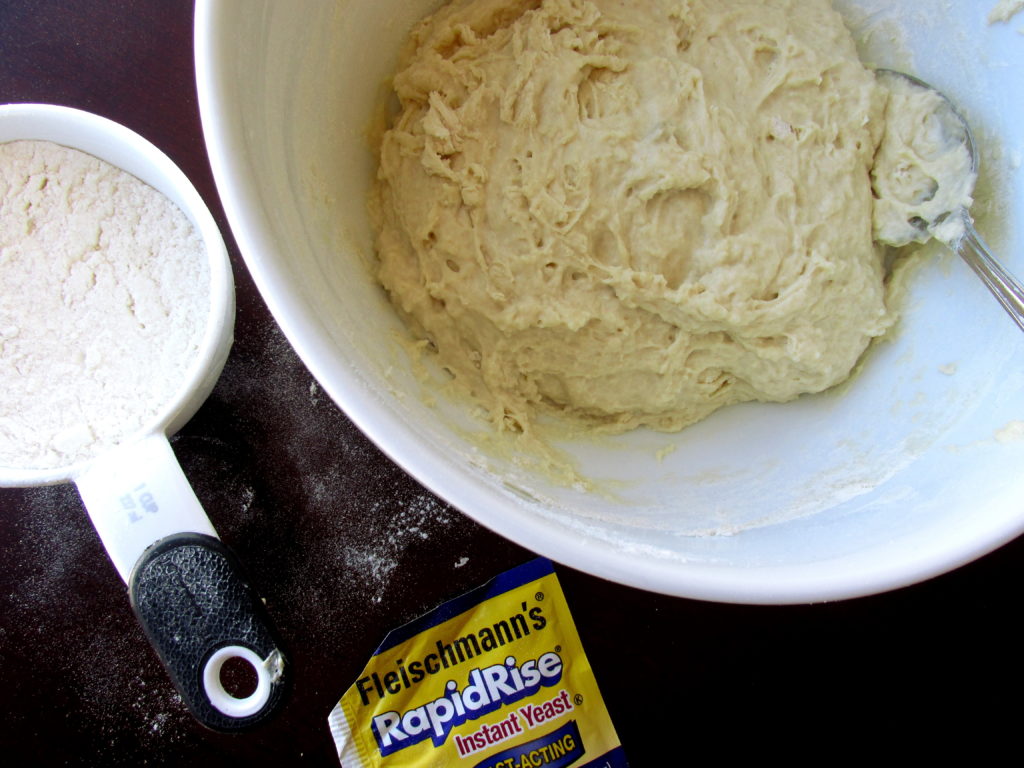
  1. Stir together yeast, sugar, salt, oil, milk, water, and 1 cup bread flour.

    2. Stir in another 1 1/2 cups of the bread flour, until a shaggy dough forms. At this point, turn the dough out onto a clean surface. 

    3. Use the remaining 1/2 cup of flour to lightly flour the surface. Knead the dough, adding flour from the the surface you're kneading on, until it's elastic and smooth - usually I end up adding about 1/4 cup of flour through this process. 

    4. Place the ball of dough in a greased bowl, cover with plastic wrap or a clean dishcloth and set somewhere warm to rise until it doubles in size, about 45 minutes to 1 hour. 

    5. When dough has risen, separate it into 6-8 even balls and set on a tray to rest for 10-15 minutes. 

    6. After the dough has rested, heat a skillet or griddle until hot. You want to keep it on a medium heat level once it gets hot. 

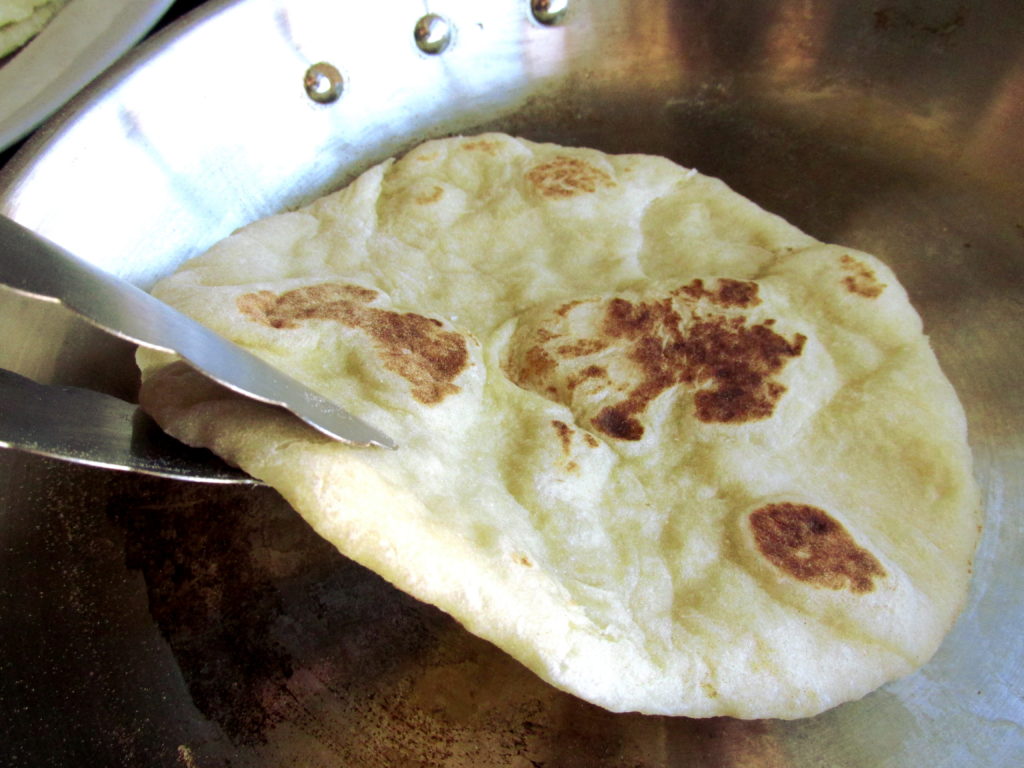
    7. Roll out one of the dough balls on a floured surface to a circle roughly 1/8 inch thick, and transfer to the skillet. Let cook for around 2 minutes on one side, until golden, and spots of color develop. Flip with a pair of tongs and let cook for 1-2 minutes on the other side. Transfer to a plate/your mouth. While the flatbread is cooking, roll out another to go into the skillet - continue this process until dough is all gone. 

    Note: I like to turn my oven onto its lowest heat when I separate the flatbread dough into balls. Then, when I'm ready to start cooking, I turn off the heat on the oven, and place the plate for the finished flatbread inside, adding each to the plate as they come out of the skillet. This keeps them warm and fresh until I'm ready to serve!


Black Bean Confetti Salad

Black Bean Confetti Salad

Black Bean Confetti Salad is possibly my favorite recipe of all time. The original is from Smitten Kitchen, and it honestly changed the way I thought about bell peppers. When I started learning to cook, a lot of the motivation was (and still is) to find delicious ways of preparing vegetables so I’d want to eat more of them. I used to be very bell-pepper-ambivalent. They were too sweet and too crunchy, which is generally not a combination I enjoy in my produce. Putting them in this recipe has really helped me re-think bell peppers. I’ve found that you can learn to like almost any food if you prepare it with flavors you already love.

I became obsessed with food way before I discovered this recipe, but making and eating this stuff over the years is largely responsible for me finally sitting down and creating the food blog I’ve always dreamed of. This isn’t my own recipe, but I’ve tweaked it, adding green onion, and honey and cayenne to the dressing. I think the changes really enhance this recipe. Playing with recipes like this is so satisfying, especially when my experiments work out.

I just desperately want everyone to know about this salad, because not only does it taste like a dream, it’s also extremely healthy. Black Bean Confetti Salad is a big bowl of fresh vegetables, fiber, protein, and healthy fats – what could be better for keeping your New Year’s resolution going?

It might seem like more of a salsa than a salad, and I absolutely invite you to enjoy it with chips (and a margarita), but it also makes a fabulous side dish. I served it with Cajun-seasoned tilapia and rice recently, and they went together beautifully – that sort of meal is also inexpensive, which I love. Proof you don’t need to spend a ton of money to eat well.

This recipe makes a fairly large amount, so you could halve it, although I don’t know why you would. I personally have to force myself not to eat the whole bowlful by itself as soon as I’ve finished making it. This is partially because it’s actually better the next day, when the flavors have had time to meld, and because I think eating an entire can of black beans in one sitting would destroy me.

I’ve made a number of changes to the original recipe, including the addition of scallions. This is definitely the kind of recipe where you can play around with the spices and ingredients to really make it fit your taste. The Smitten Kitchen original suggests adding cilantro if that’s something you really love.

Black Bean Confetti Salad

Adapted, with slight changes, from Smitten Kitchen's Black Bean Confetti Salad.

Servings 5 cups

Ingredients

  • 2 15oz cans black beans, drained and rinsed
  • 1 small white onion
  • 2-3 scallions
  • 1 red bell pepper
  • 1 yellow bell pepper
  • 1 orange bell pepper

Dressing

  • 3 Tbsp olive oil
  • 1 tsp cumin
  • 1/2 tsp honey
  • 3/4 tsp salt
  • 1/8 tsp cayenne
  • 1 large lime

Instructions

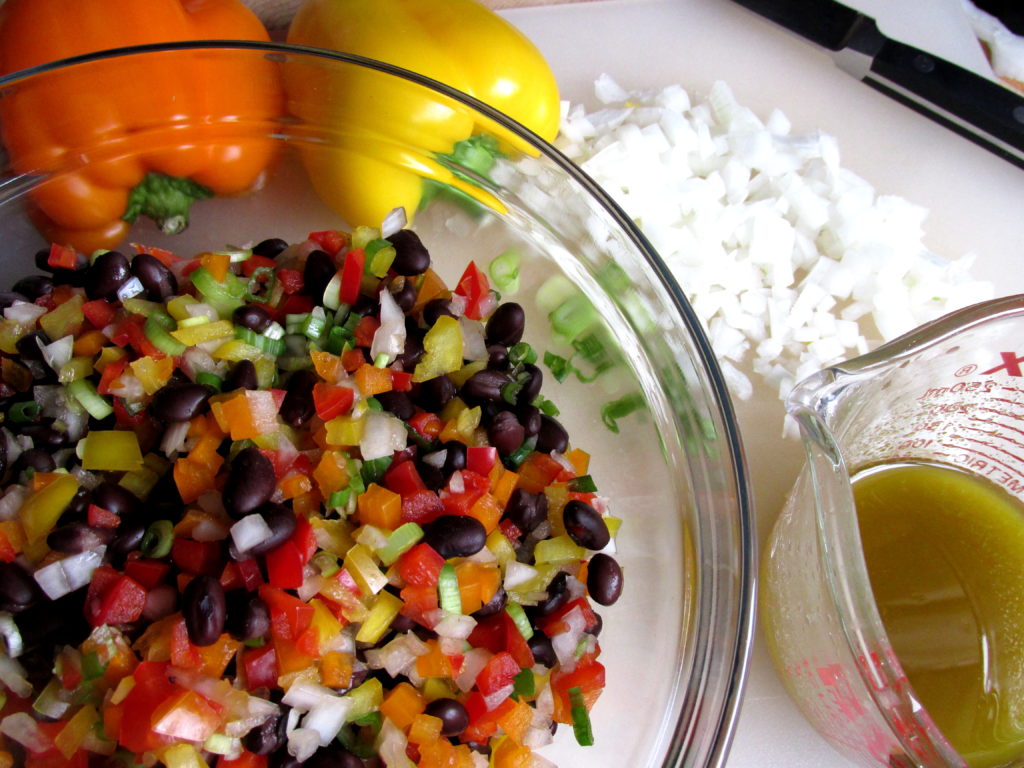
  1. Step 1: Dice onions, scallions, and bell peppers - small is better; you want the pieces to be about the same size as the beans.

    Step 2: Drain and rinse black beans. Stir together with onions, scallions and peppers.

    Step 3: Pour olive oil into a liquid measuring cup, and add salt, honey, cayenne, cumin. Add lime juice until the amount in the measuring cup reaches 1/3 cup. Whisk until the salt is completely dissolved. 

    Step 4: Pour over salad and stir. This salad can be stored and served the next day, and will stay good for up to five days in the refrigerator. It's actually better the next day because the flavors meld overnight!


Easy Sunday Brunch: Mini Quiches

Easy Sunday Brunch: Mini Quiches

Breakfast food might be the best kind of food there is. I’m not a morning person though, so I prefer my breakfast food to be served for brunch. Or dinner if we’re being honest, but that’s much less trendy. “Easy Sunday Dinner: Mini Quiches” doesn’t have the same ring to it.

When I’m making brunch/breakfast for dinner, I typically get carried away and want some of everything. I want a full plate: pancakes, hash browns, and eggs and bacon. Cooking all of those at once without spending your whole morning in the kitchen is nearly impossible. Thus, I present to you my take on the Mini Quiche. It’s not the first of its kind, and possibly not the best there is, but it is the best I’ve come across. Warm, flaky pastry dough encases sharp cheddar cheese, eggs that get fluffy without being dry, and crispy bacon crumbles that can be subbed out for sausage, ham, or spinach and peppers.
Read More