Tex-Mex Rice

Tex-Mex Rice

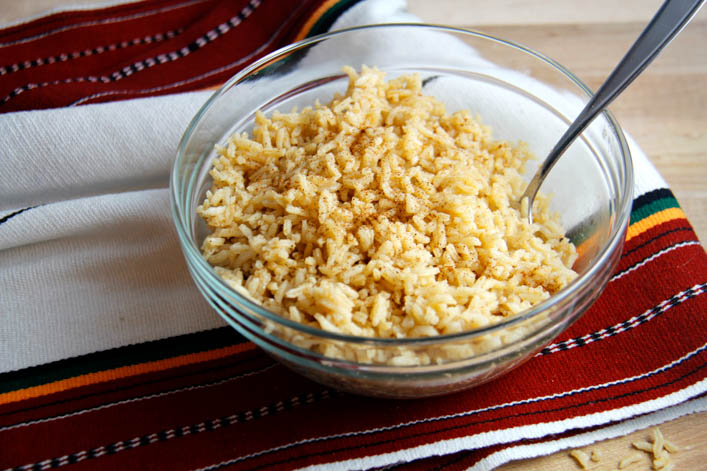
I intend to post on this blog about delicious Mexican food for as long as humanly possible. With that in mind, I think it makes sense to share my favorite side dish to go with things like Salsa Verde Chicken Enchiladas. This Tex-Mex rice is a family recipe, and it’s a far cry from the stuff you sometimes get in restaurants with chunks of peas and carrots that were clearly recently defrosted.

This Tex-Mex rice is cooked in olive oil and chicken broth, and flavored with onion, garlic, and chili powder; oregano; cumin; and a little bit of enchilada sauce. It’s a perfect choice to complement black beans and just about any version of tacos, enchiladas, or burrito you want to make. The rice definitely isn’t spicy, but it has a depth of flavor that makes it delicious even just eaten by itself.
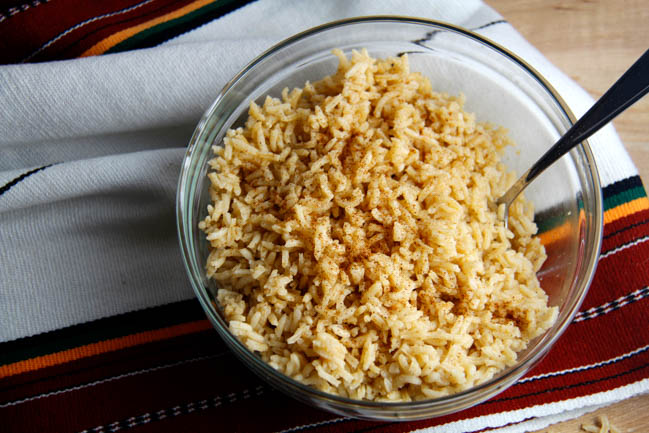
Tex-Mex rice doesn’t take much longer to make than traditional rice, because the only extra steps are browning it briefly in olive oil, and adding the seasonings. It can be made while the rest of dinner is cooking, and it keeps well in an air-tight container, in the refrigerator, for about a week. This rice has a slightly higher nutrition content than plain or cilantro-lime rice, since it’s cooked in chicken broth. You can also make it with vegetable broth to keep it animal-product free.

My favorite way to eat Tex-Mex rice is in a big burrito bowl, because it’s a perfectly mild, yet flavorful, base to build on with just about any Mexican flavors. However you decide to serve it, in a burrito, a bowl, or just on the side, this recipe will change the way you look at rice.

Tex-Mex Rice

Servings 3 cups

Ingredients

  • 1 cup raw white rice
  • 3/4 Tbsp olive oil
  • 14oz chicken broth (or a mix of broth and water, or vegetable broth)
  • 1 Tbsp enchilada sauce or smooth salsa
  • 1/2 tsp salt
  • 1/2 tsp onion powder
  • 1/2 tsp garlic powder
  • 1/2 tsp chili powder
  • 1/2 tsp cumin
  • 1/8 tsp dried leaf oregano

Instructions

  1. Stir together seasonings and salt, set aside. If the broth is cold, warm it to at least room temperature. Combine broth with the enchilada sauce. Set aside.

    2. Heat the olive oil in a medium pot with a tightly-fitting lid (lid off). Add the rice, and stir over medium-high heat until lightly browned, just to an ivory or light tan color.

    3. Stir the seasonings into the rice, and then add the broth. Stir once, to distribute evenly. When the broth comes to a full boil, put the lid on the pot, and turn the heat to the lowest setting. Let cook for 20 minutes. Do not remove the lid during cooking time. Check for doneness after 20 minutes; if the liquid has not been completely absorbed, cover the pot again and let it cook another 5 minutes or so.

    For best texture, cook a day or two ahead of serving, cool, and then refrigerate. Reheat in the microwave just before serving.
Salsa Bruschetta

Salsa Bruschetta

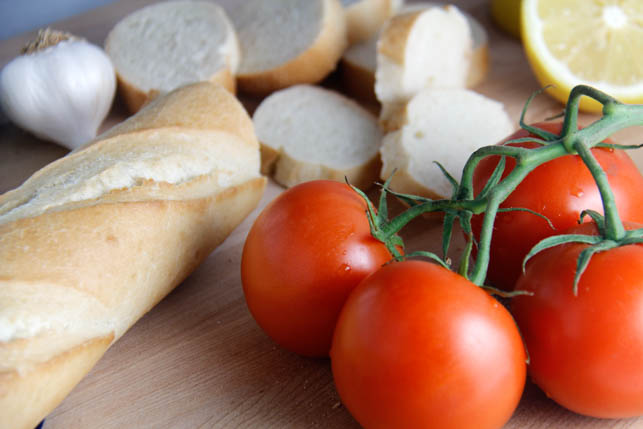
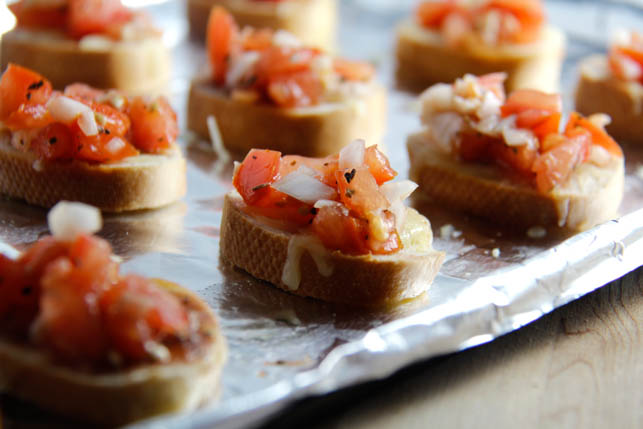
This recipe is one of my favorite creations thus far. It happened sort of by accident, ending up in a much different place than it started. The original inspiration was the concept of Pan a la Catalana, and then I started researching recipes, and went a completely different way. I was in the kitchen with my tomatoes and garlic and my baguette, and suddenly I was just adding things to a bowl and tasting and adding some more. I seem to do that a lot lately, which makes me both very excited about what I could create, and very concerned that I’m missing a lot of interesting things that might result from me ever following a recipe properly. But, what would be the fun in that?

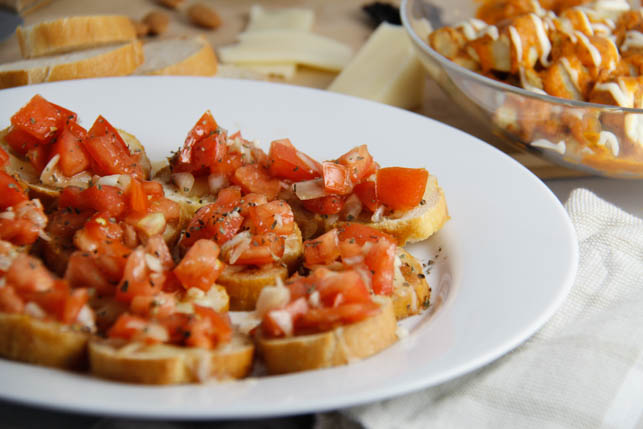
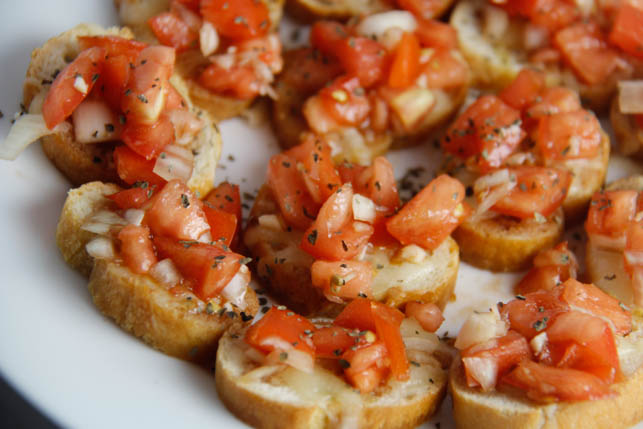
The Salsa Bruschetta that has resulted from my impatience and possible over-confidence in the kitchen is fresh, bursting with flavor, and a perfect addition to your favorite tapas recipes – I served it alongside my Baked Patatas Bravas. I used tomato and onion as a base, and added garlic and a bit of balsamic vinaigrette, along with basil, lemon, brown sugar, and olive oil. It’s got a lot of the flavor that you would find in Pan a la Catalana, and in traditional bruschetta, with some sweetness and citrus that really lift the onion and the garlic to make them a little brighter. The lemon and onion are what really take this bruschetta recipe into salsa territory, because there isn’t a lot of  salsa-esque heat. I added a pinch of cayenne, but I didn’t want that to overshadow the freshness of the tomatoes and the lemon. If you’re in the mood for something a bit spicier, I’d recommend adding chopped jalapeno to this recipe.

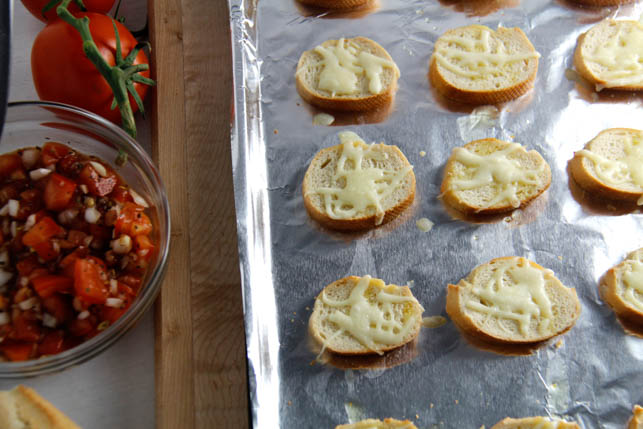
There’s one more element to this particular version of Bruschetta: After I sliced my baguette, I topped the slices with a light drizzle of olive oil, and a sprinkle of Monterey Jack cheese. Next time I may experiment with mozzarella for a caprese-inspired version, but the Monterey Jack worked extraordinarily well with the Salsa Brushetta. It’s the right amount of salty and creamy to pair with the tangy, slightly sweet flavor of the bruschetta. Cheese isn’t typically a part of bruschetta, possibly because that can take it to pizza-bread territory very quickly. I assure you that very little about this Salsa Bruschetta reminds me of pizza. The flavors are much lighter, yet richer and more complex than something you’d find on a pizza. (Unless it’s a very good, very unusual pizza, of course)!

These are definitely best served fresh, when the cheese is still gooey and melted. They do keep in the fridge fairly well overnight, and I have it on good authority that husbands named Bobby find that leftover Salsa Bruschetta makes an excellent afternoon snack. Whether you’re snacking or having your Salsa Bruschetta as part of a meal – perhaps as an interesting starter – this recipe is one you’ll make again and again. It’s very quick to make, and as uncomplicated as something that looks this elegant can get. No one will believe that you knocked the whole thing together in 20 minutes. But they won’t have much time to worry about that, as they’ll be worried about getting another bite before it all disappears.


Salsa Bruschetta

Prep Time 15 minutes
Cook Time 5 minutes
Total Time 20 minutes

Ingredients

  • 2 medium tomatoes
  • 1/4 small/medium white onion
  • 1 french baguette
  • 1 clove garlic
  • 1/2 Tbsp olive oil + more for drizzling
  • 1/2 tsp balsamic vinegar
  • 3/4 tsp brown sugar
  • 3/4 tsp dried basil
  • 1 dash cracked black pepper
  • 1 1/2 tsps lemon juice
  • 1/2 tsp salt
  • 1 dash cayenne
  • 1/4 cup shredded Monterey Jack

Instructions

  1. Dice tomatoes and mince garlic, stir together. Chop onions in a smaller dice than the tomatoes and add to the bowl. 

    2. Slice baguette into thin slices, about 1/4 of an inch thick. Place in a single layer on a baking sheet lined with foil. Drizzle olive oil lightly over each. Bake in the oven at 350 degrees for 4 minutes. You want the bread crisp on the edges, but still a little soft.

    3. Add remaining ingredients to the salsa mixture, except the cheese. Stir until well combined. Salt to taste - add more cayenne for a spicier salsa. 

    4. When baguette slices are done, remove from oven, top each with a little less than 1/2 Tbsp of Monterey Jack, and return to the oven for 2 minutes, or until cheese is melted. 

    5. Top each baguette with the salsa mixture. Try not to eat the whole batch by yourself. 


Pulled Pork and Cranberry Flatbread

Pulled Pork and Cranberry Flatbread

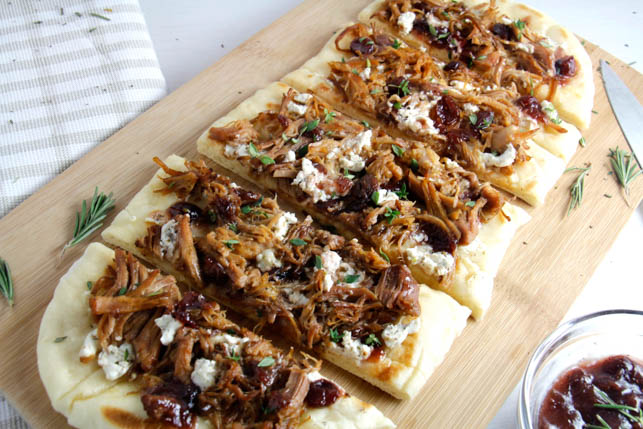
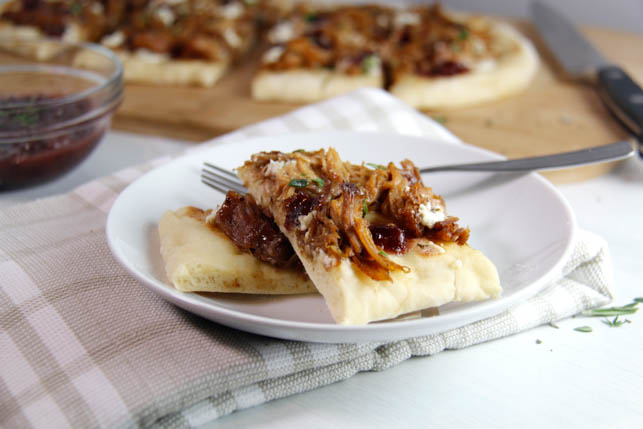
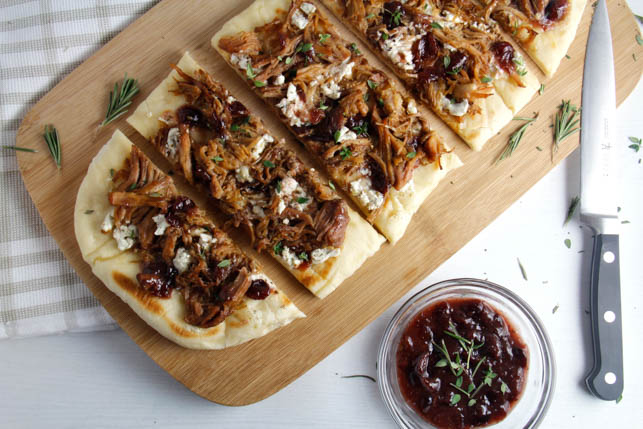
I was roaming the internet, looking for inspiration, when I came across this cranberry and goat cheese flatbread. It clearly has made the rounds on Pinterest, and for good reason – it’s quite pretty. Having posted a flatbread recipe recently, I figured this would be a great time to try out some interesting new toppings. Although to be fair, you could put just about anything on flatbread and I’d try it. Not to turn this post into an ode to flatbread or anything.

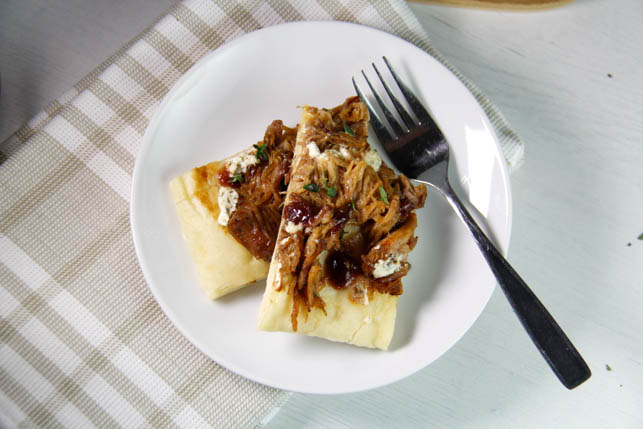
I love the goat cheese and cranberry combination, but I wanted to give the dish another dimension, and make it more filling. With the tart, yet sweet cranberry sauce already in mind, I knew spicy, smoky pulled pork would be the perfect addition. The cranberry sauce is reminiscent of a barbecue sauce on the pulled pork, but with a different, fruitier flavor profile. The goat cheese is a perfect element to mellow some of the spice from the pork, and keep the tang of the cranberry sauce from being overwhelming.

Cranberry sauce seems to get attention only around the holidays, and I think that’s kind of a tragedy. It’s delicious with so many other things besides turkey and stuffing. That said, finding fresh or even frozen cranberries after January 1st is like trying to find truly good gluten-free pizza crust: may exist, but hard to locate. My cranberry sauce calls for part dried cranberries and part canned whole cranberry sauce, so it can (and should!) be made between the months of January and October. My recipe for this is adapted from a Food Network version.

The pulled pork in this recipe is done in the slow cooker, with a rub from Kevin and Amanda. Their recipe has a lot more to it, brining, and cooking in the oven, etc., but I just took the rub, coated my pork, tossed it in the slow cooker with a little water, and let it go, and it’s some of the best pulled pork I’ve ever eaten. Every bite is extremely flavorful and a little spicy, without being overpowering. The goat cheese I used is “La Bonne Vie Garlic and Herb Goat Cheese”- I just got it from my local grocery store, but you could honestly use any decent herb goat cheese. Trader Joe’s has a great, inexpensive one.

Since I’ve essentially given you a rundown of how wonderful all the components of this dish are on their own, you can imagine how I reacted when I tried them together. There was a lot of swooning, and uncivilized devouring, and general elation.


Pulled Pork and Cranberry Flatbread

Pulled pork recipe is adapted from Kevin and Amanda's Perfect Pulled Pork.  

Cranberry sauce recipe is adapted from Gourmet Magazine's Savory Dried Cranberry Sauce - Recipe found through foodnetwork.com

Servings 3 flatbreads

Ingredients

Pulled Pork

  • 1 4-8 lb pork shoulder
  • 1 medium yellow onion
  • 1/2 cup water
  • 1 Tbsp ground cumin
  • 1 Tbsp garlic powder
  • 1 Tbsp onion powder
  • 1 Tbsp chili powder
  • 1 Tbsp cayenne pepper
  • 1 Tbsp salt
  • 1 Tbsp ground black pepper
  • 1 Tbsp paprika
  • 1/2 cup brown sugar

Cranberry Sauce

  • 1/4 cup brown sugar
  • 1/2 Tbsp cornstarch
  • 1/2 cup white wine
  • 3/4 cup chicken broth
  • 1 tsp balsamic vingar
  • 1/2 cup dried cranberries (I used Craisins)
  • 1/2 cup canned whole cranberry sauce
  • 1/8 tsp rosemary
  • 1/8 tsp cinnamon
  • 1/8 tsp tarragon

Other Ingredients

  • 3 large flatbreads
  • 8-12 oz herb goat cheese (2-3 small logs), depending on how much you like goat cheese - I used 12oz.
  • 2 Tbsp fresh thyme or parsley (optional)

Instructions

  1. Slow cook the pork: mix together all dry ingredients to create a rub. Roughly chop yellow onion, and place in slow cooker with the 1/2 cup of water. 

    2. Pat pork shoulder dry with paper towel, and coat generously with the dry rub on all sides. Massage it into the meat with your hands to make sure it really sticks. 

    3. Place pork in the slow cooker, on top of the onions. Cover and let cook on high 4-6 hours, or on low 8-10 hours, until pork is falling off the bone and tender. Remove bone from the pot, and shred the meat with two forks. 

    Note: this pulled pork recipe yields much more pork than you'll need to use for your flatbreads. Extra meat can be frozen to use later.

    4. If you're making your flatbread, do it when the pork is about an hour and a half from being done. You can easily use pre-made flatbread if you prefer. You can find my flatbread recipe linked in the post above.  Instead of splitting the dough into eight pieces like I typically do, I split it into three, to make larger flatbreads. The method for cooking them is the same. 

    5. When your pork is about a half hour from done, make the cranberry sauce. Stir together brown sugar and cornstarch in a small sauce pan. Add white wine and chicken broth and set over low heat. Stir until well combined. Add vinegar, dried cranberries and canned cranberry sauce, rosemary, tarragon, and cinnamon. Simmer for 15 minutes, stirring occasionally. Sauce should be quite thick. Remove from heat. Sauce can be stored in an airtight container in the refrigerator for at least a week. 

    6: Assemble Pulled Pork and Cranberry Flatbreads: spread each flatbread with a generous amount of goat cheese, saving 2-4 oz aside. Top with a layer of pulled pork- you can add as much or as little as you like here. Drizzle with cranberry sauce (again, quantities are up to you).  I used all of my sauce between three flatbreads. Top with small crumbles of the remaining goat cheese. Bake flatbreads in the oven at 350 degrees for about 8 minutes, until the cheese gets soft and the flatbreads are warm and a just little crispy on the bottoms. Garnish with fresh thyme or parsley. 


Warm Butternut and Bell Pepper Salad

Warm Butternut and Bell Pepper Salad

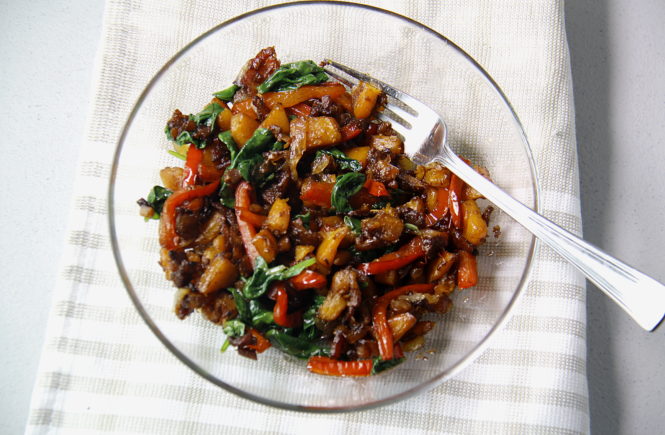
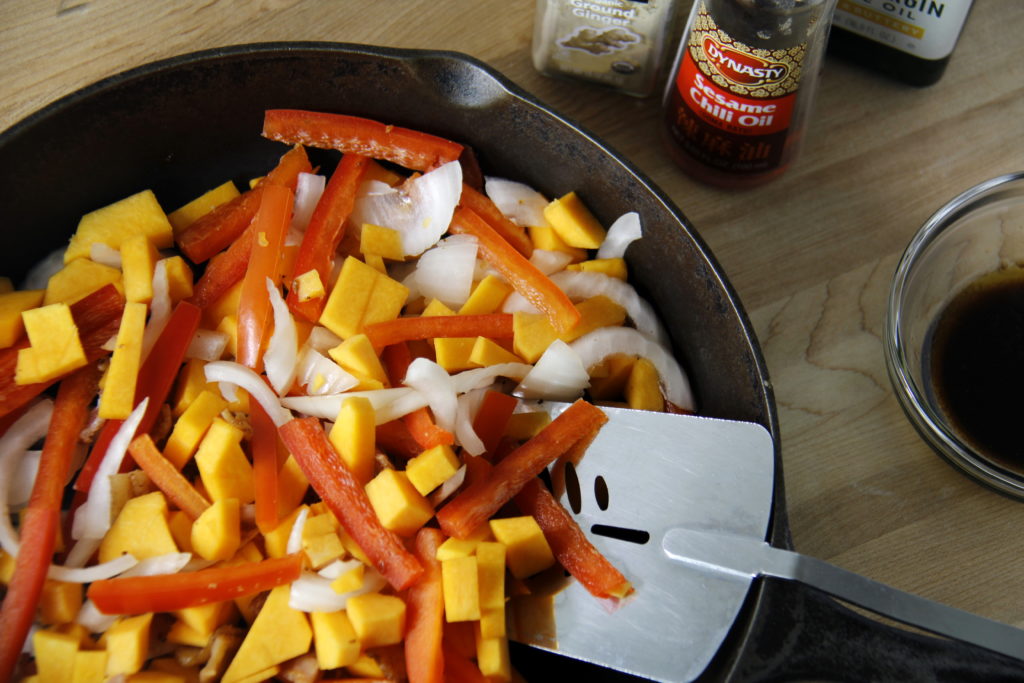
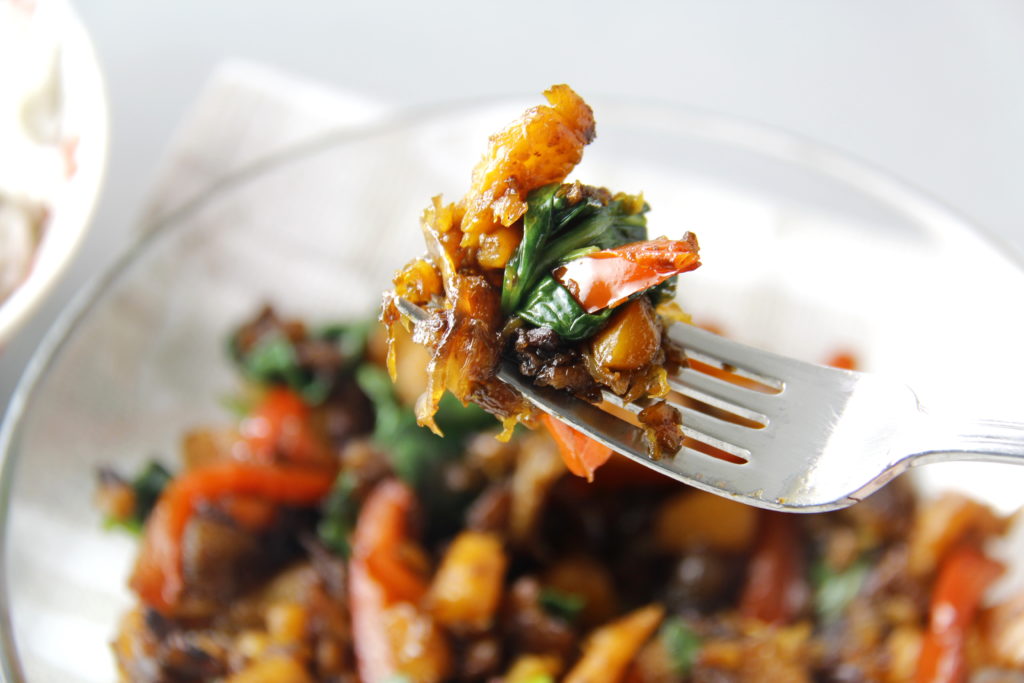
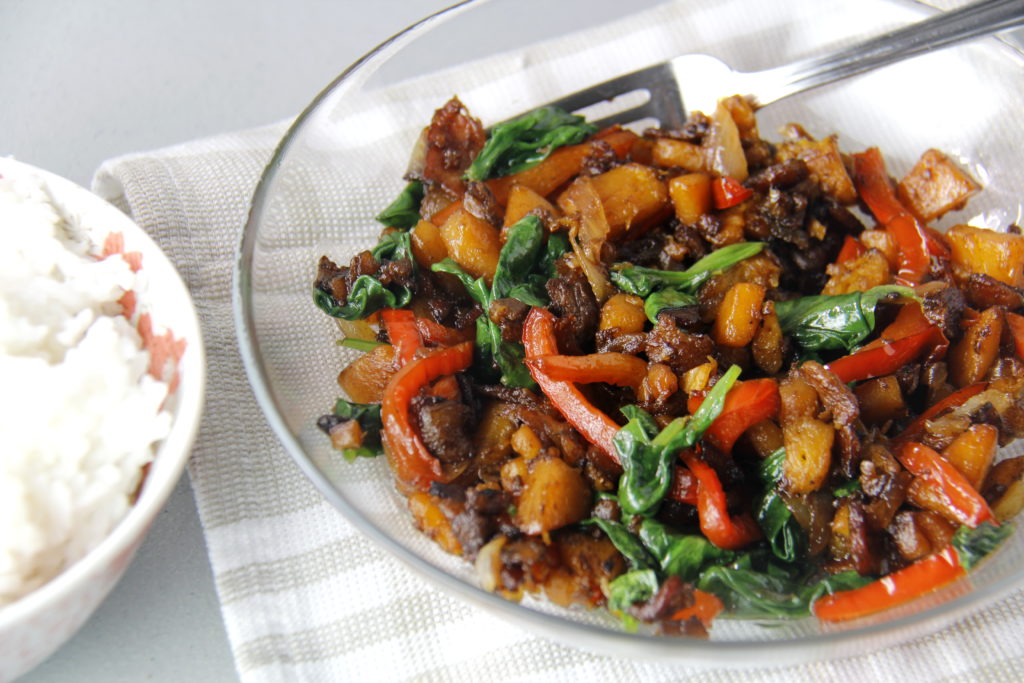
On Sunday, I woke up and realized that I’d barely eaten a single vegetable between Friday and Saturday. Please tell me that happens to you, too. This recipe was born out of a need to make something delicious and vegetable-based, with the ingredients already in my kitchen. It’s funny how sometimes the most wonderful dishes come together that way – and I can guarantee that this dish is indeed wonderful. It’s got soft, slightly sweet butternut squash, bell peppers, garlic, and onions as a base.  To flavor it, I created a cross between a light balsamic vinaigrette and Chinese take-out inspired sauce that works with the nutty squash flavor better than I could’ve dreamed.

I was cooking bacon before I started concocting my “stir-fry,” so I threw some torn, thick-cut bacon in with the mix. It added another dimension to the texture, and I don’t think I even need to remind you how adding the flavor of bacon to just about anything will immediately improve it. I wilted some spinach into it at the end to add a little more color and bulk. I don’t actually love cooked spinach all that much, but the flavor of it sort of disappeared in this dish, so I got more nutrition without that bitter wilted spinach flavor. This is yet another addition to my “make vegetables taste good” file.

I was truly just throwing things in the pan for this one. Chop up the vegetables, saute them, and add your sauce. Then throw in a big handful of fresh spinach, let it cook down, and the result is a perfect alternative to a regular cold salad. The prep and cooking processes take maybe 30 minutes, and you don’t have to stand at the stove the whole time the food is cooking. Since starting this blog, I’ve become very aware of how much I like being able to multitask. If I can make lunch and clean up the kitchen at the same time, (and maybe text and dance and dream up other blog ideas as well), I am a much happier person.

I invented this recipe to be my lunch, but it would make a fabulous side dish for beef or chicken, or even a vegetarian entree if you forgo the bacon (just make sure to taste it and see if it needs an extra dash of salt in that case!). That said, the recipe makes a fairly small portion. Even as a side dish, you may need to double or triple the measurements depending on who you’re feeding. It’s a quick, healthy lunch or dinner for when you want something warm and comforting, but still light and fresh. If you’re doing any kind of low carb diet, then this recipe is definitely for you.

I always mention how recipes are incredibly versatile, but I suppose that as a person who can’t ever follow a recipe without tweaking it, I just think everything is open to interpretation. You could try this dish with other kinds of squash, any greens you like, beets, or mushrooms – the possibilities are endless when you’ve got some onion, garlic, and a great sauce to start.


Warm Butternut and Bell Pepper Salad

Ingredients

  • 2 cloves garlic, minced
  • 1/3 medium white onion
  • 1/2 red bell pepper
  • 2 cups diced butternut squash
  • 2-3 strips of bacon
  • 3 tsps olive oil, divided use
  • 1 tsps balsamic vinegar
  • 2 tsps sesame chili oil
  • 2 tsps soy sauce
  • 2 tsps honey
  • 2 tsps rice wine vinegar
  • 2 tsps brown sugar
  • 1/8 tsp ground ginger
  • 1/2 tsp salt
  • 1 big handful of fresh spinach

Instructions

  1. Chop red bell pepper, onion, bacon, and butternut squash, and mince garlic. Add to skillet on high heat with a tsp of olive oil. Give them a quick stir once every minute or so.

    2. In a small bowl, stir together all remaining ingredients including 2 tsps of olive oil to make the sauce. When the vegetables in the skillet just start to brown, pour half of the sauce over them and stir.

    3. Keep an eye on the skillet, stirring frequently (but not constantly). When the vegetables look like they're almost done (squash and peppers are tender, onions are browned), pour the other half of the sauce into the skillet and stir.

    4. Let cook for 3-4 more minutes, and lower heat. Add fresh spinach to the skillet and stir in. Let it cook just long enough for the spinach to wilt. Remove from heat and serve.

    Note: I place a large pot lid over my skillet after adding the spinach to help it wilt a little faster.


Black Bean Confetti Salad

Black Bean Confetti Salad

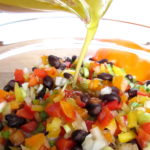
Black Bean Confetti Salad is possibly my favorite recipe of all time. The original is from Smitten Kitchen, and it honestly changed the way I thought about bell peppers. When I started learning to cook, a lot of the motivation was (and still is) to find delicious ways of preparing vegetables so I’d want to eat more of them. I used to be very bell-pepper-ambivalent. They were too sweet and too crunchy, which is generally not a combination I enjoy in my produce. Putting them in this recipe has really helped me re-think bell peppers. I’ve found that you can learn to like almost any food if you prepare it with flavors you already love.

I became obsessed with food way before I discovered this recipe, but making and eating this stuff over the years is largely responsible for me finally sitting down and creating the food blog I’ve always dreamed of. This isn’t my own recipe, but I’ve tweaked it, adding green onion, and honey and cayenne to the dressing. I think the changes really enhance this recipe. Playing with recipes like this is so satisfying, especially when my experiments work out.

I just desperately want everyone to know about this salad, because not only does it taste like a dream, it’s also extremely healthy. Black Bean Confetti Salad is a big bowl of fresh vegetables, fiber, protein, and healthy fats – what could be better for keeping your New Year’s resolution going?

It might seem like more of a salsa than a salad, and I absolutely invite you to enjoy it with chips (and a margarita), but it also makes a fabulous side dish. I served it with Cajun-seasoned tilapia and rice recently, and they went together beautifully – that sort of meal is also inexpensive, which I love. Proof you don’t need to spend a ton of money to eat well.

This recipe makes a fairly large amount, so you could halve it, although I don’t know why you would. I personally have to force myself not to eat the whole bowlful by itself as soon as I’ve finished making it. This is partially because it’s actually better the next day, when the flavors have had time to meld, and because I think eating an entire can of black beans in one sitting would destroy me.

I’ve made a number of changes to the original recipe, including the addition of scallions. This is definitely the kind of recipe where you can play around with the spices and ingredients to really make it fit your taste. The Smitten Kitchen original suggests adding cilantro if that’s something you really love.

Black Bean Confetti Salad

Adapted, with slight changes, from Smitten Kitchen's Black Bean Confetti Salad.

Servings 5 cups

Ingredients

  • 2 15oz cans black beans, drained and rinsed
  • 1 small white onion
  • 2-3 scallions
  • 1 red bell pepper
  • 1 yellow bell pepper
  • 1 orange bell pepper

Dressing

  • 3 Tbsp olive oil
  • 1 tsp cumin
  • 1/2 tsp honey
  • 3/4 tsp salt
  • 1/8 tsp cayenne
  • 1 large lime

Instructions

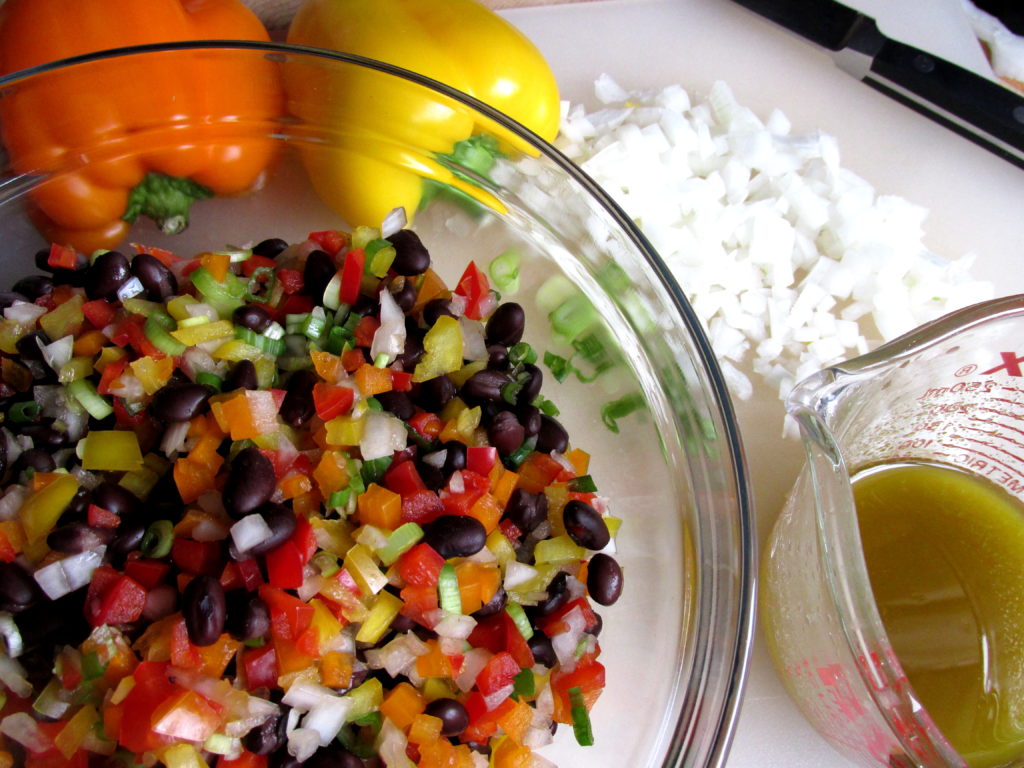
  1. Step 1: Dice onions, scallions, and bell peppers - small is better; you want the pieces to be about the same size as the beans.

    Step 2: Drain and rinse black beans. Stir together with onions, scallions and peppers.

    Step 3: Pour olive oil into a liquid measuring cup, and add salt, honey, cayenne, cumin. Add lime juice until the amount in the measuring cup reaches 1/3 cup. Whisk until the salt is completely dissolved. 

    Step 4: Pour over salad and stir. This salad can be stored and served the next day, and will stay good for up to five days in the refrigerator. It's actually better the next day because the flavors meld overnight!


Easy Sunday Brunch: Mini Quiches

Easy Sunday Brunch: Mini Quiches

Breakfast food might be the best kind of food there is. I’m not a morning person though, so I prefer my breakfast food to be served for brunch. Or dinner if we’re being honest, but that’s much less trendy. “Easy Sunday Dinner: Mini Quiches” doesn’t have the same ring to it.

When I’m making brunch/breakfast for dinner, I typically get carried away and want some of everything. I want a full plate: pancakes, hash browns, and eggs and bacon. Cooking all of those at once without spending your whole morning in the kitchen is nearly impossible. Thus, I present to you my take on the Mini Quiche. It’s not the first of its kind, and possibly not the best there is, but it is the best I’ve come across. Warm, flaky pastry dough encases sharp cheddar cheese, eggs that get fluffy without being dry, and crispy bacon crumbles that can be subbed out for sausage, ham, or spinach and peppers.
Read More

Vegan Cashew Cream Spinach Dip

Vegan Cashew Cream Spinach Dip

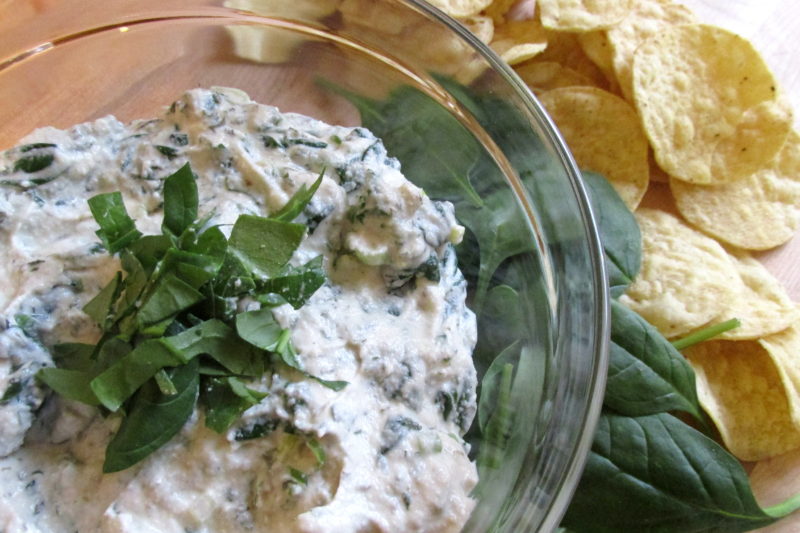
Reading the title of this post, I can only assume you’re thinking that while a vegan spinach dip will surely be healthier than a regular version, it can’t possibly be as delicious. It’s not an exact dup for the spinach dip you’re used to, but it’s pretty close. And it is beyond delicious, in a “maybe one more bite…just one more… and one more…” sort of way. The base is made of cashew cream, which is a wonderful surprise the first time you experience it – it’s a bit sweeter than your typical creamy dip bases, so it needs to be flavored differently, but the texture isn’t gritty like you might expect. As long as you give it enough time in your food processor, (or beloved NutriBullet), it gives you a perfect, smooth starting point for your spinach dip. Bonus: cashew cream is crazy easy to whip up, and doesn’t require any unusual ingredients – just cashews, water, lemon juice, and salt.

Read More

Classic Baked Macaroni and Cheese

Classic Baked Macaroni and Cheese

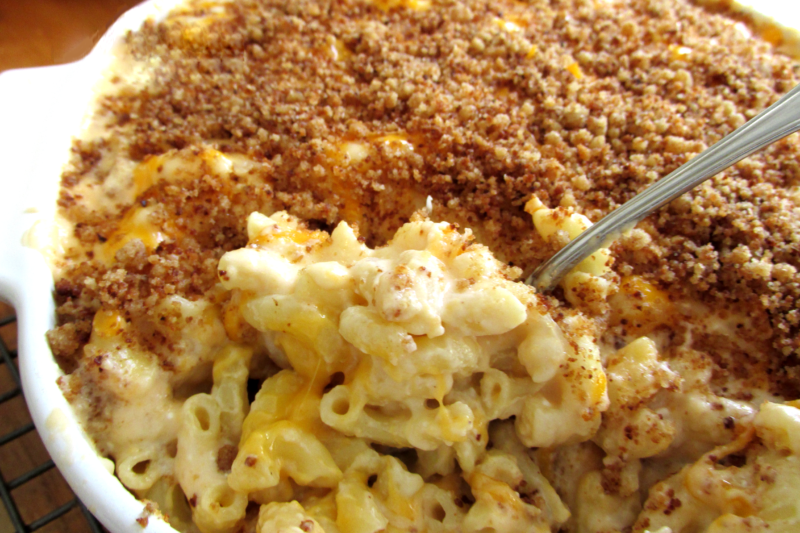
I generally like eating healthy – really, I do. But, seeing as it’s January and we’re all buried under blankets (the wool kind or the snow kind), I figured a little comfort food was in order. This macaroni and cheese couldn’t even pretend to resemble diet food. It’s the exact opposite, and I’m pretty sure that’s why it tastes so damn good. It’s got everything a really good macaroni and cheese requires: creamy sauce, stretchy, melty cheese throughout, and a depth of flavors that go beyond just “cheesy.”

You know how you weigh the payoff of a recipe against the work it takes? Especially if it’s a pretty involved one? Well I did the weighing for you this time, and I promise that this macaroni and cheese is worth every second. I know, because I ate almost a quarter of the dish by myself as soon as I pulled it out of the oven. I may have burnt my tongue, but it was still worth it.

Read More