Grain-Free Stuffed Peppers

There are a lot of things that I don’t understand, like how calculus works, and why dad shoes were ever a popular fashion trend. Something that has often confused me is the presence of rice in a stuffed pepper. Rice has its place, but of all the filling and delicious things you could put in a bell pepper, rice seems like a bland choice. Bell peppers are already kind of bland by themselves, and if you’re making them the star of the show, the filling really needs to burst with interesting flavors. 

This version of a stuffed pepper was inspired both by the leftovers in my fridge, and my craving for something that would really satisfy me, without being absurdly bad for me. (What else is new?) I started with some cooked ground beef and leftover crumbled breakfast sausage. The sausage is one of the things that makes the dish, because it’s very flavorful and fatty, without being overpowering. The fat content is important because it helps make these peppers an extremely satiating dinner choice, even though they’re heavy on the veggies.
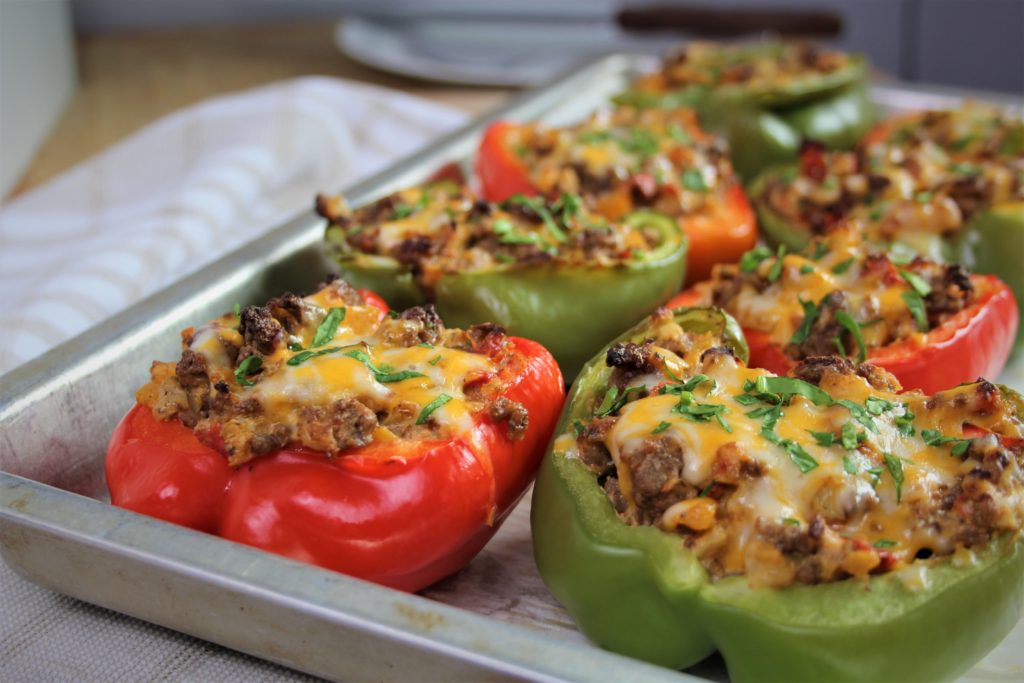
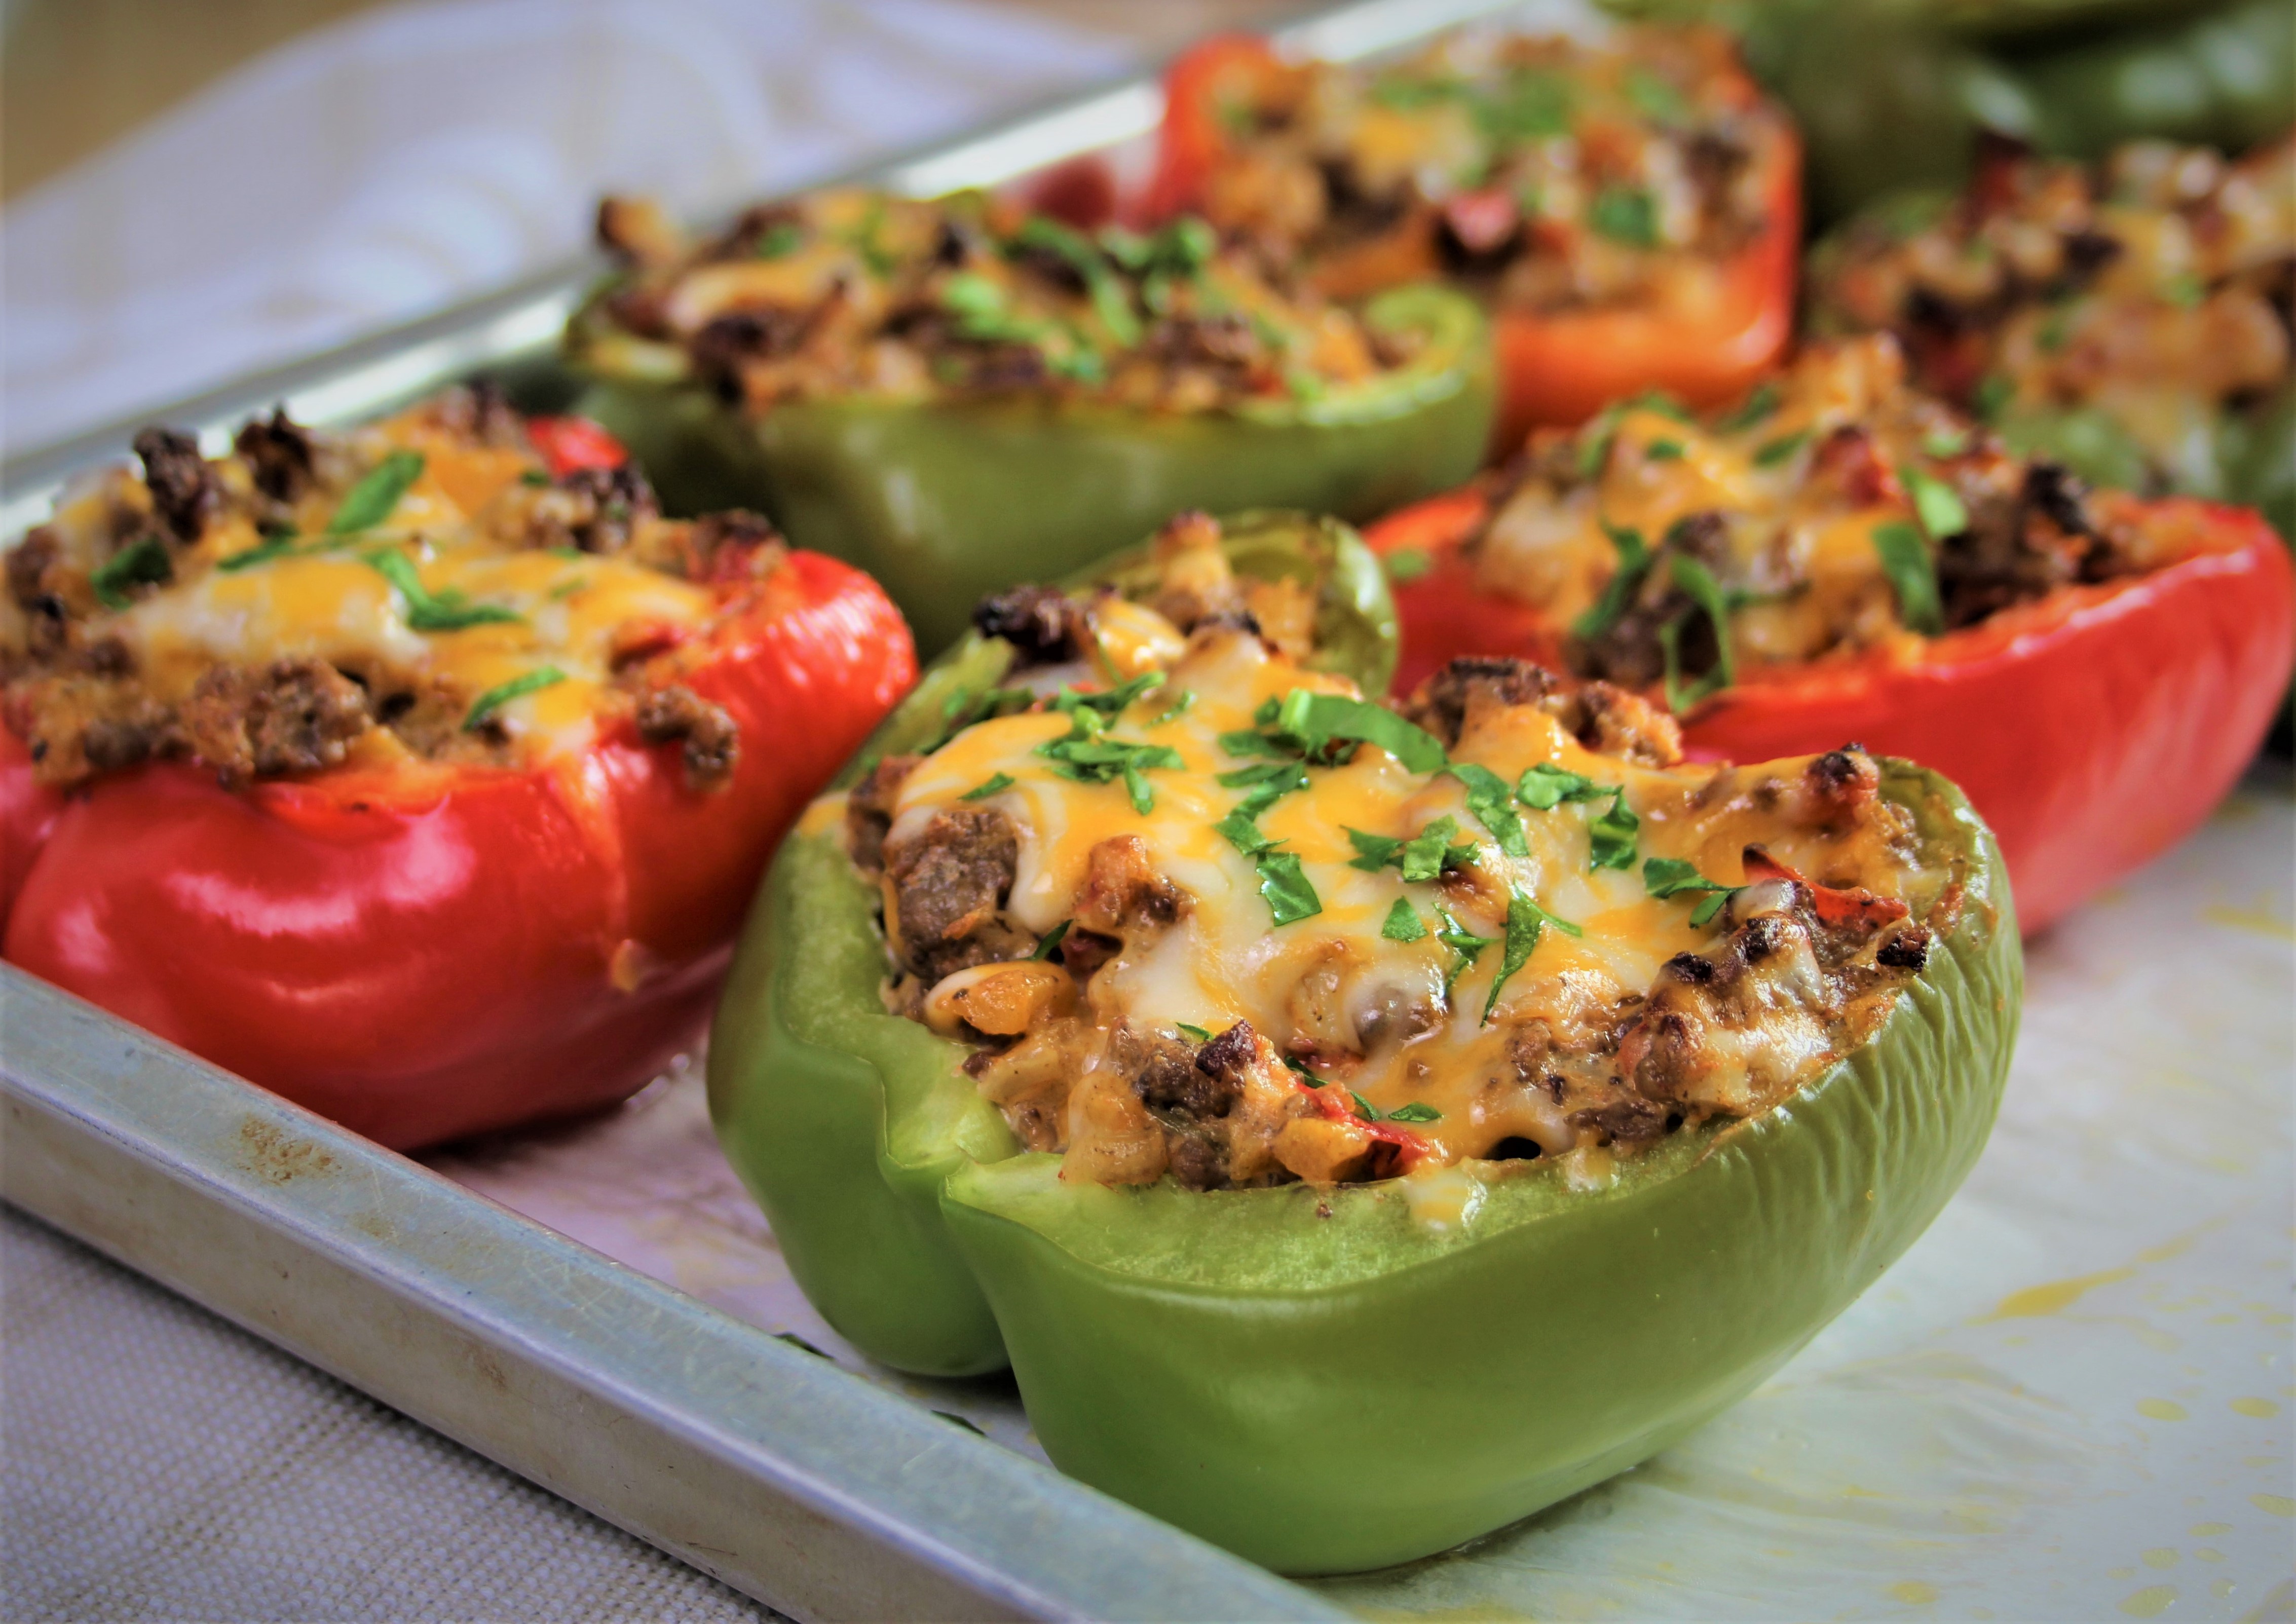
This is one of those recipes that’s endlessly adaptable, which could be why there are a million versions already in existence. For these, I sautéed diced onions, garlic, butternut squash, and chopped cherry tomatoes in olive oil, added the cooked meat and a few tablespoons of cream cheese, and it kind of tasted like a miracle. A gooey, cheesey, fragrant miracle. A little cumin and salt, along with some scallions, go in at the end to make the flavor really pop – honestly you don’t even need the peppers, you could just eat the filling straight from the pan. The finished product is something like healthier queso fundido-stuffed peppers, because in all honesty, I’d eat the filling straight from the pan with a bag of chips.

The filling can be made completely ahead, and then just heated up when you’re ready to stuff the peppers. They only take about 25 minutes in the oven, so if you prep ahead this is a pretty quick dinner. Bobby and I typically have a pepper each, and are truly groaning about how full we are by the time we’re done eating. I’m about to make them to take photographs for this post and I’m practically drooling over my keyboard as I type! 


4 from 1 vote
Print

Grain-Free Stuffed Peppers

Servings 4

Ingredients

  • 4 bell peppers, halved, seeds removed
  • 4 slices provolone cheese
  • 1 Tbsp olive oil
  • 1 medium onion, diced small
  • 1/2 cup butternut squash, diced small
  • 4-6 cloves garlic, minced
  • 1 cup cherry tomatoes, quartered
  • 16 oz ground beef, cooked and drained
  • 4 oz crumbled breakfast sausage, cooked and drained
  • 8 oz cream cheese, softened
  • 2 scallions, chopped
  • 1 tsp salt
  • 2 tsps cumin
  • 1/2 tsp cayenne pepper, optional
  • 1/2 cup cheddar jack, shredded, optional

Instructions

  1. Place half a slice of provolone into each pepper half. Set peppers on a baking sheet lined with foil, sprayed with non-stick cooking spray, or parchment paper. Preheat oven to 400 degrees.

    2. Sautee onions, butternut squash, and cherry tomatoes in olive oil until soft. Add garlic and cook for an additional 2-3 minutes.

    3. Stir in cooked ground beef and cooked sausage, softened cream cheese, and remaining ingredients. When everything is evenly mixed, spoon mixture into the peppers – you may have some leftover. Top each pepper with a sprinkle of cheddar jack or any cheese you have on hand – this is more for appearance than flavor, so skip if you like.

    4. Bake peppers for 25-30 minutes. They're done when the peppers are soft enough to pierce easily with a fork.

    * I've used ground turkey in these before, and while still tasty, I've found that the results are decidedly better with beef.

Healthier Cream of Crab Soup

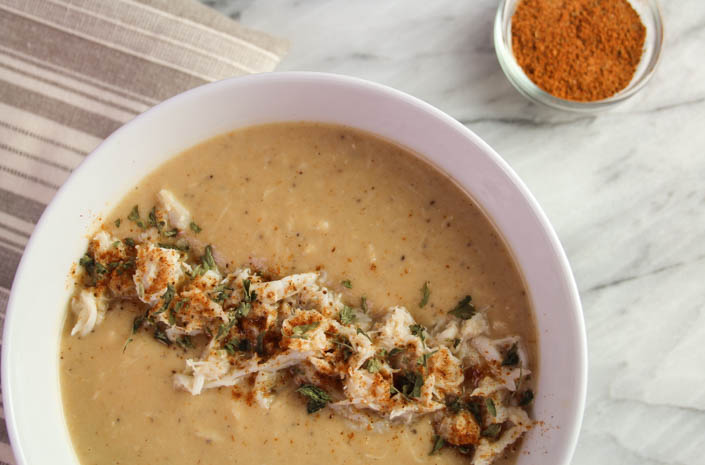
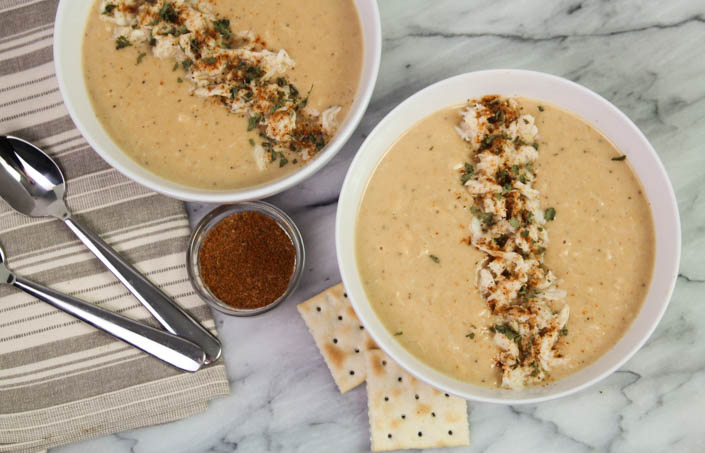
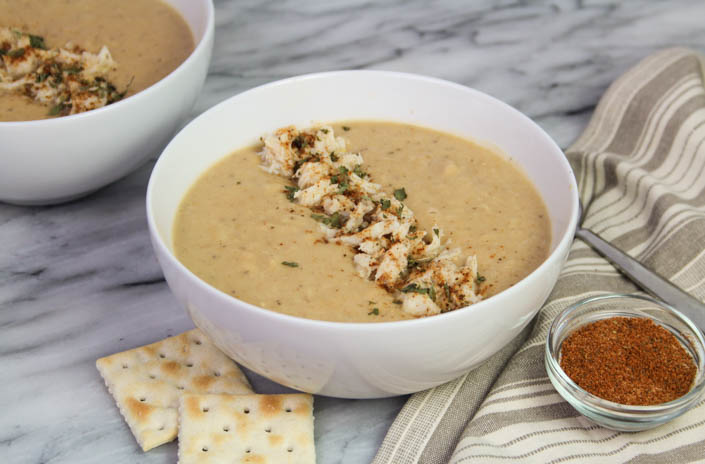
My husband, Bobby, and his family are seafood fiends. They’re the only people I know who have oysters on Thanksgiving and crab cakes with Christmas dinner (not that I’m complaining – I’m definitely a fan of seafood). This of course means that one of Bobby’s absolute, hands-down favorite foods in the world is cream of crab soup. I love it too, but I’ve always been vaguely aware of the fact that it’s made with loads of heavy cream, which on top of being extremely calorie-dense, doesn’t always sit well with my stomach. I was in the grocery store a couple weeks ago, and I came upon a container of local (read: very expensive) crab meat marked half-off, and of course snatched it up immediately. That sort of thing just does not happen very often, and not buying it would’ve been an insult to the unexpectedly generous, crab-meat-providing universe. I didn’t want to risk getting caught in a random, sudden, blizzard on my way out of the store because I rejected such a wonderful gift, after all. I live in Maryland, though, so that might’ve happened anyway.

I was then faced with the decision of how to use my crab meat, since it’s something I cook with fairly infrequently. I started researching cream of crab soup recipes, and was a little discouraged. They’re all basically 80% heavy cream, with some crab meat and sherry (and Old Bay if you love yourself) thrown in. I decided to start with ideas from other lighter soup recipes I’ve made in the past, like my Lighter Broccoli Cheddar Soup, combined with the concept of adding cauliflower, the healthy, low calorie substitute for all things, apparently, and it spiraled from there.

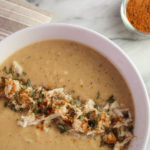
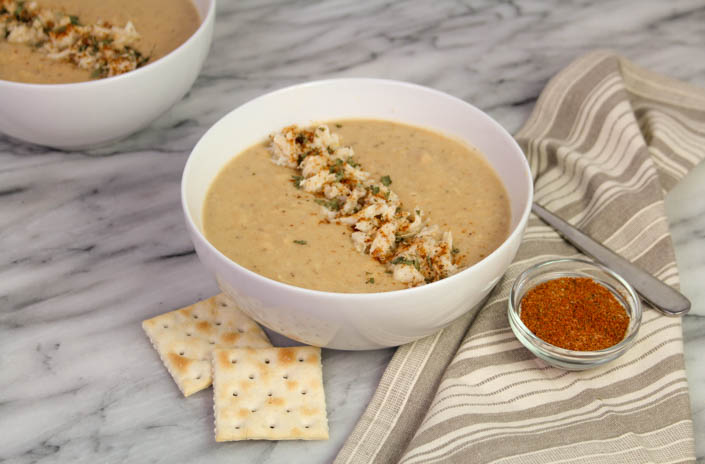
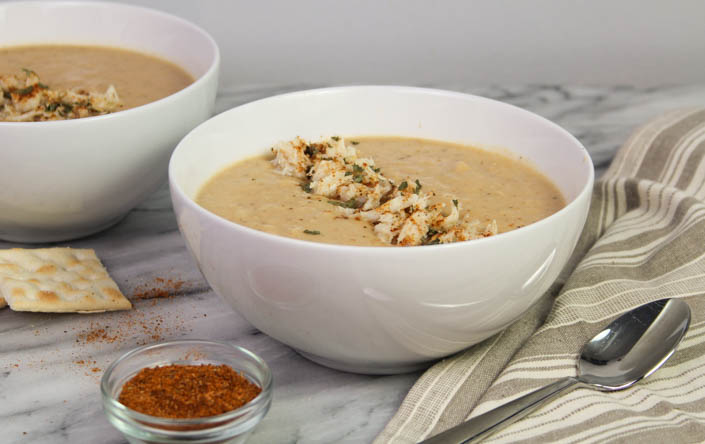
The base of this recipe is onion, butternut squash, cauliflower, and white beans, all simmered together in chicken broth until soft, and then pureed until silky smooth. It basically starts out as baby food. I know. But don’t let that deter you, because I swear on all the half-priced, high-quality crab meat in the land that you don’t taste all the healthy stuff in the final product. To the veggie/bean base, I added seasonings, the crab, and good amount of half & half – because as much as I like the nutritious components here, it wouldn’t be cream of crab soup without some actual cream.

The result is nothing short of astounding. My crab-soup-loving husband agrees heartily. This cream of crab soup has the same smooth texture he’s used to, interrupted only by those wonderful lumps of crab meat. It’s extremely similar in flavor to the full-fat kind, especially if you add the sherry and use a heavy hand with the Old Bay, as I do. I will admit that this is a Maryland kind of cream of crab soup – if Old Bay isn’t your jam, you’ll need to add more in the way of other seasonings, and a decent amount of salt. Honestly, I’m so pleased with the way this recipe turned out that I might even go nuts and buy full-price crab meat so I can make another batch!


Healthier Cream of Crab Soup

Makes approximately 16 cups 

Ingredients

  • 1 medium onion, roughly chopped
  • 1 Tbsp olive oil
  • 1/2 Tbsp garlic, minced
  • 5 cups cauliflower florets (about 1/2 a head of cauliflower)
  • 1 cup butternut squash, chopped into cubes
  • 1 15.5oz can white beans (I use cannelini)
  • 5-6 cups chicken broth (just enough to cover the vegetables in the pot
  • 1/2 tsp freshly ground black pepper
  • 1 1/2 tsps celery salt
  • 2 Tbsps Old Bay
  • 1 1/2 cups half & half
  • 1 Tbsp cooking sherry
  • 1 lb lump crabmeat

Instructions

  1. Add onion and olive oil to a large pot and cook on medium heat until onion softens. Add the garlic and cook for one more minute.

    2. Add the cauliflower, butternut squash, beans, and just enough chicken broth to submerge everything. Bring soup to a boil, and then reduce heat and simmer for 20 minutes, or until the vegetables are fork tender. 

    3. Allow the soup to cool slightly, and then blend until completely smooth. I do it in batches in a Nutri-Bullet.

    4. Return blended soup to the pot, and re-heat it gently over medium heat. Stir in pepper, celery salt, and Old Bay. While the soup is reheating, warm up the half & half on the stove or in the microwave, until it is hot to the touch. 

    5. Gradually stir the heated half & half into the soup. Reduce heat to low, and do not let the soup boil. Stir in the cooking sherry and crab meat – you can microwave the crab for a few seconds just to warm it up before adding it to the soup. 

    6. Serve and enjoy!

    Notes:

    You may find that the amount of Old Bay is too much for you, unless you like it’s flavor as I do – You can add a partial amount of the Old Bay measurement to your soup, and then just add salt as needed from there.

    If you have the time and devotion to very smooth soup, remove the skins from the white beans you use. It makes a world of difference in the texture, as most blenders, even the Nutri-Bullet, have a hard time fully breaking down the skins. 

    This yields a fairly thin soup (compared to a normal cream of crab at least), as I don’t use a roux at the beginning – lots of my family eat gluten free, and removing the roux makes this soup gluten free. If you want a thicker end result that’s still gluten free, dissolve 1 Tbsp of corn starch in 2 Tbsps of water, and add to the soup after you have blended it and returned it to the stove. Bring the soup to a boil and then immediately reduce the heat and proceed with the rest of the recipe as written. 


Slow Cooker Spicy Shredded Beef

Wow, it’s been a minute since I’ve put up a recipe! In my time off, I’ve honed my cooking skills some more, tested loads of new recipes, traveled to Thailand and found all kinds of new flavor inspiration (more on that in future posts), and did lots of things not related to cooking that I also enjoy! I’m learning to play the guitar, and bullet journaling, and playing old video games that I only ever have time for in January when the world majorly slows down. January also makes me excited to spend a lot of time on snowy days cooking rich, hearty meals that are essentially coziness in food form. Braised beef fits that bill for me, especially when it’s loaded with flavors and spices that make it perfect for any version of a burrito bowl or taco that you could dream up.

Developing this recipe took a while because I fell into what I now think of as the slow-cooker trap. By this, I mean the problem with a lot of slow cooker-centric meals is that we assume we can just dump anything in the mix and it will magically become delicious as it cooks for eight hours. Cue me spending years trying out pre-made sauces and testing several ultimately disappointing recipes for shredded beef, chicken, etc. (I’ve already found my dream come true pulled pork – check it out here!)

This version was the result of me swearing that I would no longer make bland shredded beef. I wanted to season the hell out of it, and make sure every bite had the kick I expect when I bite into something that is promised as having some Mexican inspired flavors. I went through a few tests for this recipe, adding more lime, more jalapenos, more…everything. The more I cook, the more I discover just how easy it is to under-season food and prevent it from reaching its highest potential.

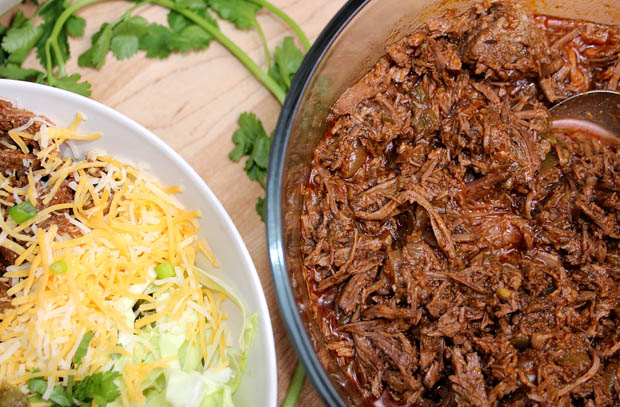
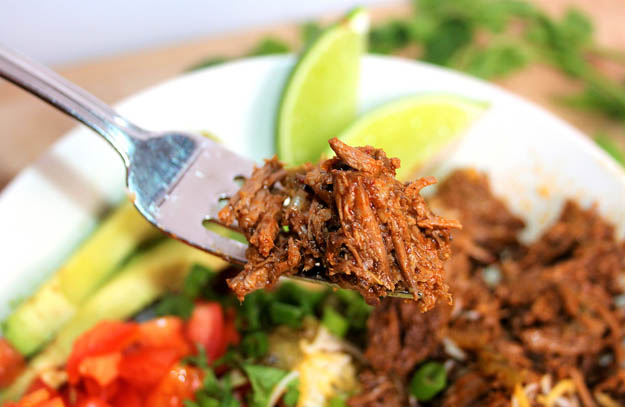
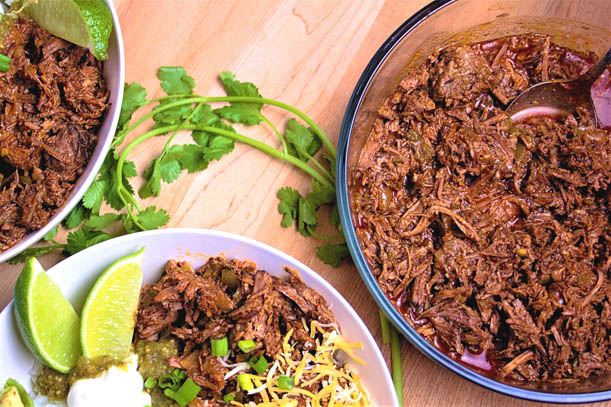
The flavor profile for this shredded beef is reminiscent of Chipotle barbacoa, except that this is arguably better. The lime and jalapeno flavors are more prominent, and the added onion and green pepper give each bite more dimension in flavor and texture. My favorite way to eat it is piled into a homemade burrito bowl, with loads of avocado, salsa, crema, and shredded cabbage for crunch. By the time the beef is finished cooking, it will have a good amount of (absurdly delicious) drippings/fat in with it, and rice in a burrito bowl soaks it up beautifully. If you prefer to use the meat for tacos, which I highly recommend, make sure you drain some of the liquid off before using it. Unless you love extremely messy tacos – I’m not here to judge your taco preferences.


Slow Cooker Spicy Shredded Beef

A 3lb roast yields approximately 8 cups of shredded beef. Honestly more than it sounds like. 

Ingredients

  • 1 3-4lb chuck roast
  • 1 medium onion, cut into strips
  • 1 green bell pepper, de-seeded and cut into strips
  • 1/2 cup beef broth
  • 1/2 cup Mt. Olive diced jalapeno peppers – include some of the liquid from the jar in this measurement
  • 1 4.5oz can mild diced green chiles
  • 1/4 cup lime juice (approx. 2 limes)
  • 2 Tbsps tomato paste
  • 3 tsps onion powder
  • 2 1/2 tsps chili powder
  • 2 tsps paprika
  • 2 tsps garlic powder
  • 2 tsps cumin
  • 1 tsp oregano
  • 1 tsp salt
  • 1 tsp sugar
  • 1/2 tsp freshly ground black pepper

Instructions

  1. Slice the roast into 4-6 chunks and sear in a hot skillet, until all sides of each piece are browned.

    While the meat is cooking, add all other ingredients to the slow cooker, and give them a stir to combine. They don’t need to be completely mixed. Top with the cooked meat and set the slow cooker to low for 8 hours. 

    If you are leaving the slow cooker for the whole eight hours, pull some of the seasonings and vegetables from the bottom of the slow cooker on top of the beef, so that it’s surrounded by the other flavors. If you’ll be able to check the beef periodically, give it a stir every hour or so. 

    After the cooking time is up, shred the beef right in the slow cooker with two forks – it should fall apart very easily. 

    If using for tacos, drain some of the liquid off the meat before serving. 


The Hot Fudge Mug Brownie

The mug brownie concept is a God-send to any chocoholic who tries not to keep too much junk food in their house. You can mix one up if you really want it, but it’s not like a full batch of cookies, staring you in the face, shouting “Eat me, I’m wonderful.” The reality of mug brownies however, is that they never seem to capture that real brownie goodness. They’re nearly always on the cakey side, too sweet, and often they’re just too damn big. A brownie that fills up an entire mug sounds completely wonderful, but also sounds like mountain of sugar. For me, the point of a mug brownie is to have a quick, easy, single serve dessert that keeps me from baking an entire batch of brownies, that I can have every day without worrying that I’m eating more dessert than actual food.

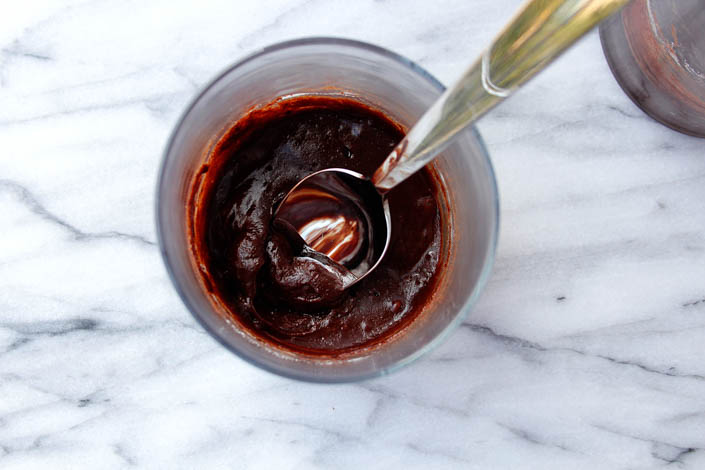
I offer you the perfected concept: The Hot Fudge Mug Brownie. It’s small, rich, and honestly more like perfect, thick, dark chocolate sludge than an actual brownie, because I like mine reaaallly fudgey. Like basically undercooked. But there’s no egg in this one, so it’s totally fine. I’m aware that referring to food as “sludge” is perhaps not the most appealing – but it’s really the best word to describe the texture. Just remember, it’s rich, chocolate sludge.

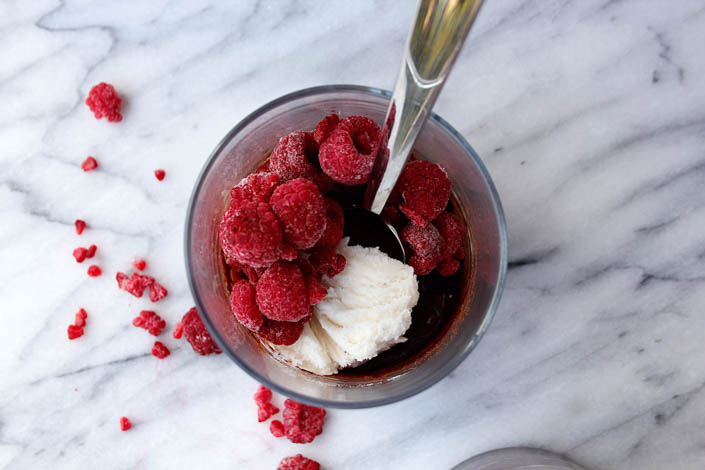
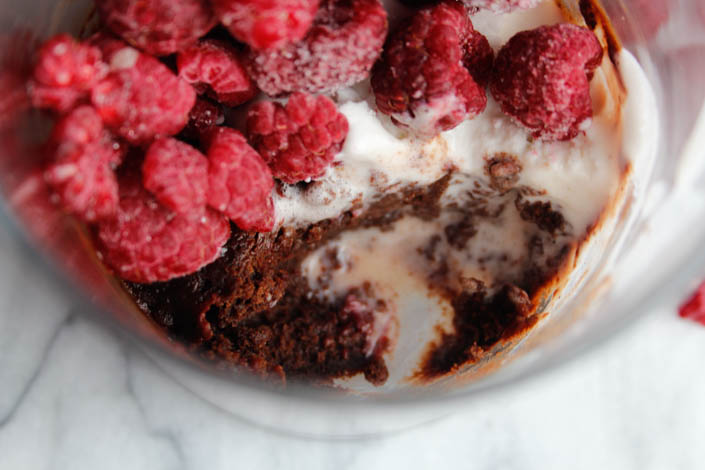
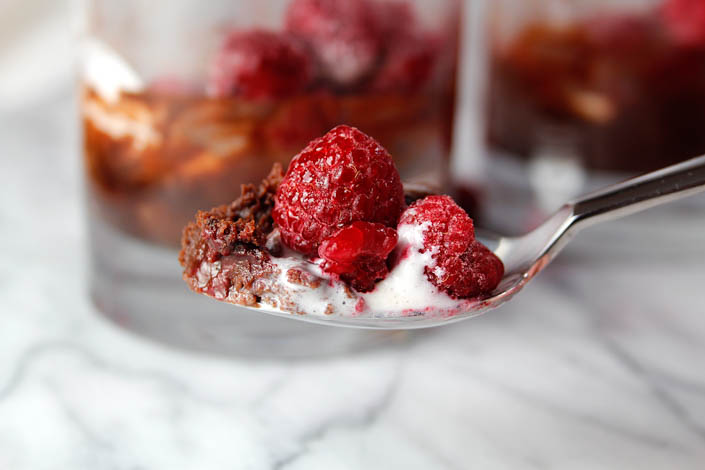
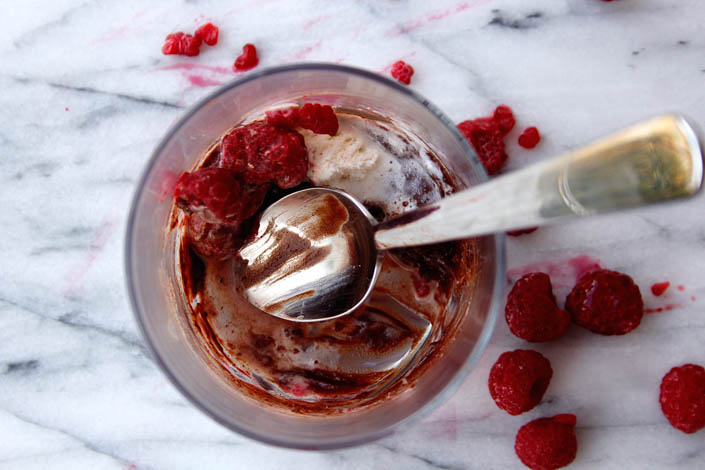
There’s one more thing: Because this brownie isn’t overly-sweet, I top mine with a scoop of vanilla ice cream and frozen raspberries. Suddenly it’s a perfect little sundae in a cup that still only has about 160 calories, full flavor, and the added bonus of nutrition from the raspberries. You can literally have this for dessert every single day. It’s the most satisfying dessert you can make in 5 minutes, and a million times better than staring at a whole pan of brownies and trying to will yourself not to eat the entire thing. Unless you had a really terrible day – then I strongly advise you to eat as many brownies as you need to.

I tested this recipe at a couple of different lengths and microwave power settings, and found that a few seconds or a few hundred watts makes a fair difference in texture, so use the cooking guide that’s down with the recipe to get your mug brownie just right.


Hot Fudge Mug Brownie

Ingredients

  • 1/2 Tbsp salted butter
  • 1 Tbsp cocoa
  • 1 Tbsp water
  • 1 Tbsp granulated sugar
  • 1 Tbsp all purpose flour

Instructions

  1. Add butter to a mug or a glass and microwave for 10-15 seconds, until butter is completely melted. Stir in cocoa until completely blended. Stir in water until blended. This order is important to keep the brownie batter from clumping. Stir in sugar and then flour.

    *If you want to use unsalted butter, just add a pinch of salt when you add the flour.


    Microwave according to how gooey/fudgey you want your brownie.


    1200 Watt Microwave

    10 Seconds: rich, chocolate goop - excellent with ice cream

    15 Seconds: thicker, sludgey chocolate goop - my favorite

    20 Seconds: solid, cake-ier brownie


    700 Watt Microwave

    15 Seconds: rich, chocolate goop

    20 Seconds: thicker, sludgey chocolate goop

    25 Seconds: solid, cake-ier brownie


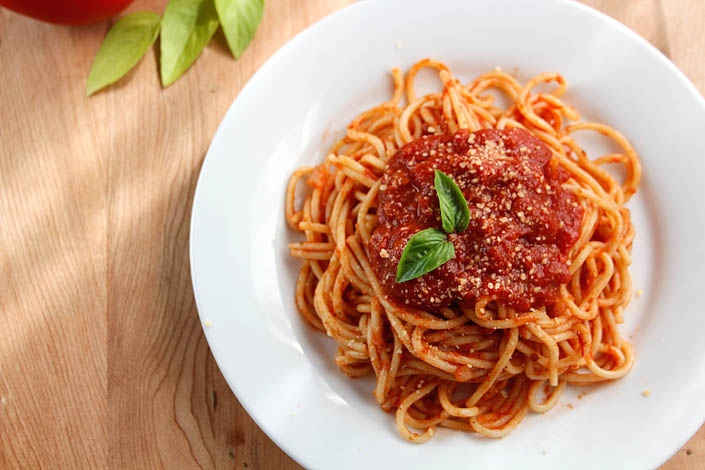
Tinkered Tomato Sauce

Tinkered Tomato Sauce

Remember how I didn’t blog very much last fall? That’s because I was living it up in Italy! Bobby and I went for two weeks to see Venice and Rome (and Belgium at the beginning of the trip, but that doesn’t really fit the theme). Venice is the most magnificent place I’ve ever been in my whole life, and I miss it constantly. I ate pizza for lunch and pasta for dinner nearly every day, and I have zero regrets. Here’s a quick peek at our trip…is it time for me to go back yet?

    .     


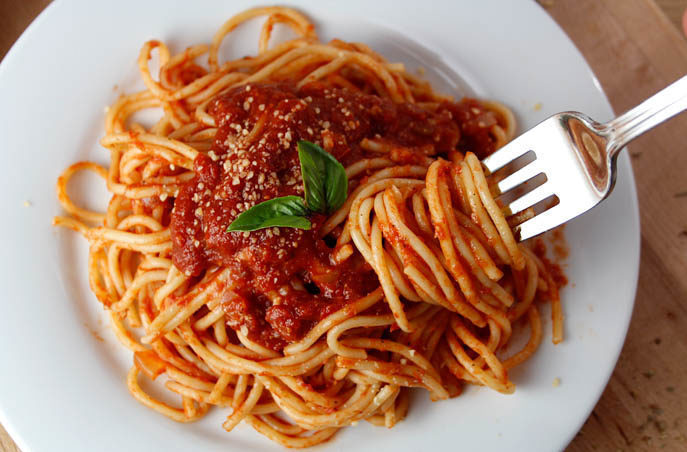
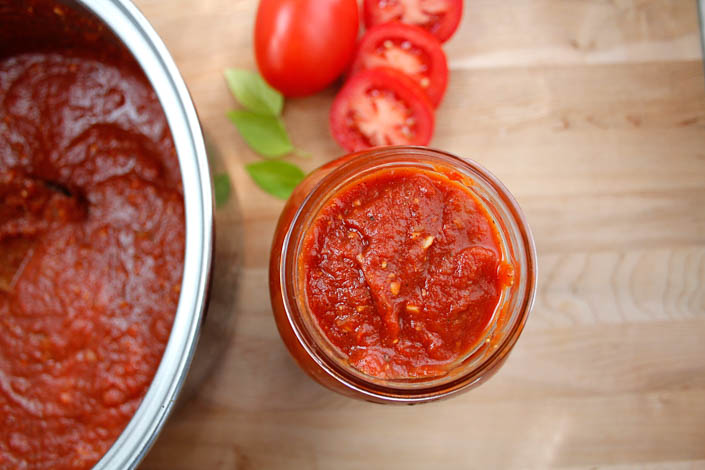
Upon returning home, I was obsessed with getting my mom’s recipe for tomato sauce. She’s been working on it for years, and I don’t think I had a proper appreciation for good tomato sauce until I went on this trip. My mom’s sauce is aptly named Tinkered Tomato Sauce, since she experimented with it for so long before getting it just right. It has that bright tomato flavor, deep warm garlic base, and bold spices that are sautéed in olive oil at the beginning of the cooking process to help them become as rich and aromatic as possible. This sauce is good on homemade pizza or as a pasta topping, and it’ll make you want to never buy a jar of sauce off the shelf again. It’s easy to make, too – and you can make an enormous batch and freeze some until you need more.

The holidays and the fall wedding season took over my life when we got back from our trip, so try not to hold it against me that it’s taken me this long to share! Of course, once you taste it, you probably will hold it against me, since it’s that wonderful, but I hope we can get past that. Now go make some and pretend you’re in a gondola, drifting down a canal in Venice as someone feeds you pizza and the gondolier sings…instead of talking on his cell phone like he did for us.

Tinkered Tomato Sauce

Servings 3 cups, before straining

Ingredients

  • 3 Tbsps extra virgin olive oil
  • 1 medium onion, finely chopped
  • 1 Tbsp garlic, minced or pressed
  • 2 tsps dried leaf oregano
  • 1 tsp dried leaf basil
  • 1 tsp salt
  • 1 tsp sugar
  • 1 tsp crushed dried red pepper flakes
  • 1/2 tsp dried leaf marjoram
  • 1/2 tsp dried rosemary
  • 1/4 tsp dried leaf thyme
  • 1/4 tsp dried ground sage
  • 28 oz can plain crushed tomatoes
  • dash of fresh ground black pepper
  • 1/4 cup tomato paste
  • 1 Tbsp unsalted butter
  • 1 Tbsp parmesan cheese

Instructions

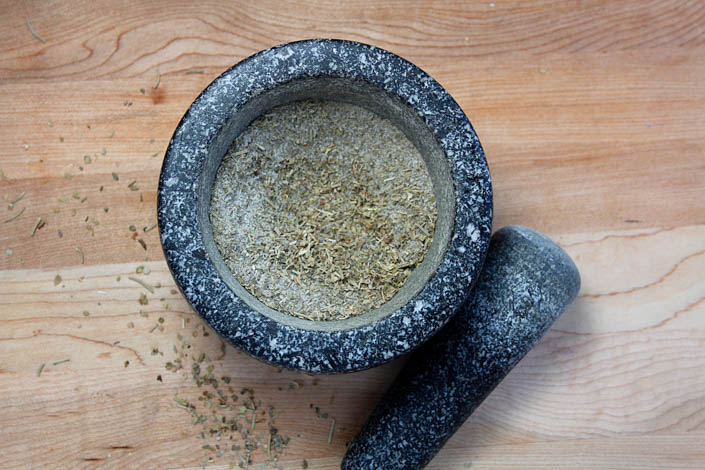
  1. Saute the onion in the olive oil until soft. While it is cooking, crush all the herbs and spices {except the red pepper) with mortar and pestle, and immediately add to the onion (at least 5 mins cooking time for the herbs etc). Stir in the garlic and crushed red pepper and saute for 1 minute longer.

    Stir in the remaining ingredients, simmer over low heat for 30 – 45 minutes. Taste and adjust  - add more salt if desired.

    Can be put through the blender and strained for a smoother sauce (which allows use of chopped instead of crushed tomatoes and a rougher chop of the onion and garlic); it will be quite thin after straining.  


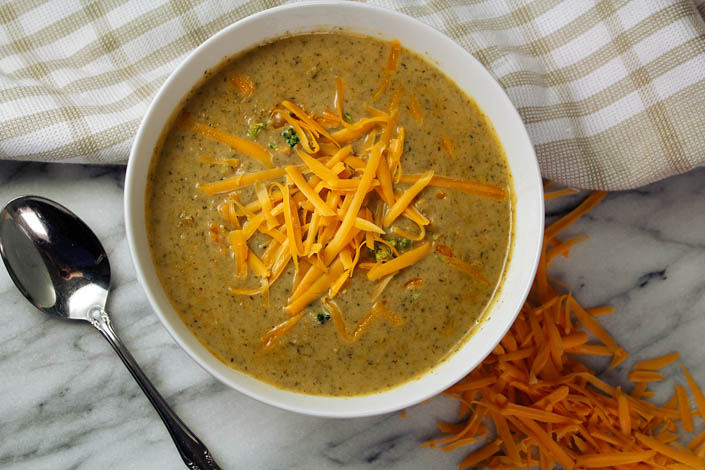
Lighter Broccoli Cheddar Soup

Lighter Broccoli Cheddar Soup

Happy 2018! I’m so excited to be back at creating content after a very busy holiday season! This recipe is inspired by everyone’s favorite New Year’s Resolution to hate: to start eating better. While I’ve given up on dieting as a concept – I’ve discovered that it makes me profoundly miserable – everyone likes to eat healthier if it’s delicious and painless. This soup is perfect to help you start 2018 off with your resolutions going strong.

Adapted from a recipe in the Washington Post, originally by Ellie Krieger, it’s the lightest broccoli cheddar soup you could make, with all of the flavor and richness of a soup that’s usually heavy on cream and cheese. Cannellini beans are the star of this show, blending together perfectly to substitute for a lot of that heavy cream. I’d never even eaten a cannellini bean before experimenting with this recipe, so I can attest, with no long-harbored love of them, that they really don’t alter the flavor of the soup at all – just the texture and creaminess. Shelled chickpeas work just as well in this recipe, so you could use those instead. My changes to the original recipe are mostly changes to the seasonings. With so much of the fat removed from this recipe, it felt like it needed a good flavor boost, and I’m very happy with how it turned out.

I’ll admit that when I make this soup, I think to myself that it’s so healthy, it won’t matter if I top it with a little extra (read: way too much) cheddar cheese. Cheddar is in the name, after all. Every year, my brother makes a New Year’s resolution to eat a Five Guys burger at least once a month for the whole year, and I’ve found that really inspiring. Imagine making a resolution that you know for sure that you’ll be able to keep – and thoroughly enjoy! So, I’m resolving to have extra cheese on my food whenever I feel I should. I’ll let you know how it goes. My other resolution is to save money, so my husband and I can buy our first house this year, so this recipe is about to become even more of a staple in our home. It’s the least expensive way to make broccoli cheddar soup – especially if you make your own chicken stock, as I do. I guess you could call this double-whammy broccoli cheddar soup, since it’s easy on the wallet and the scale. Are you sold yet? I’m adding more broccoli to my grocery list as I type this.

You can play around with the amount of milk and cheese you add, depending on just how calorie conscious you want to be with it – you already know what I suggest doing. You can also blend it until it’s completely smooth, or opt to leave chunks of broccoli, if you’re into that. Either way it’s a perfect starter or lunch, especially served with some kind of cheesy roll or toasty garlic bread.

I’m well aware that my cheese obsession is out of hand. Don’t send help.

Lighter Broccoli Cheddar Soup

Adapted from Broccoli Cheddar Soup, by Ellie Krieger, as printed in the Washington Post.

Prep Time 10 minutes
Cook Time 45 minutes
Total Time 55 minutes
Servings 4

Ingredients

  • 1 medium onion, diced
  • 2 Tbsp butter
  • 4 1/2 cups chicken broth
  • 1 large head of broccoli, cut into bite-size pieces about 6 cups
  • 1 14.5oz can cannelini beans or chick peas
  • 1 tsp powdered mustard
  • 2 1/2 tsps salt
  • 1 tsp paprika
  • 1/2 tsp garlic powder
  • 1/2 tsp onion powder
  • 1/2 tsp ground black pepper
  • 1/8 tsp ground thyme
  • 1/8 tsp ground sage
  • 3/4 cup 1% milk
  • 1 cup shredded sharp cheddar cheese, plus more for garnishes

Instructions

  1. Add onion and butter to a large pot and cook over medium heat until onions soften and start to brown.

    2. Add the chicken broth, broccoli and beans. Turn heat up to high and allow the soup to come to a boil. Stir in all seasonings. Reduce heat, cover, and allow to simmer for 15 minutes, stirring occasionally.

    3. Let the soup cool slightly, and then blend until smooth (I used my NutriBullet, as always) and return to the pot. Stir in the milk and cheese until well combined. Serve immediately and garnish with extra cheese on top.


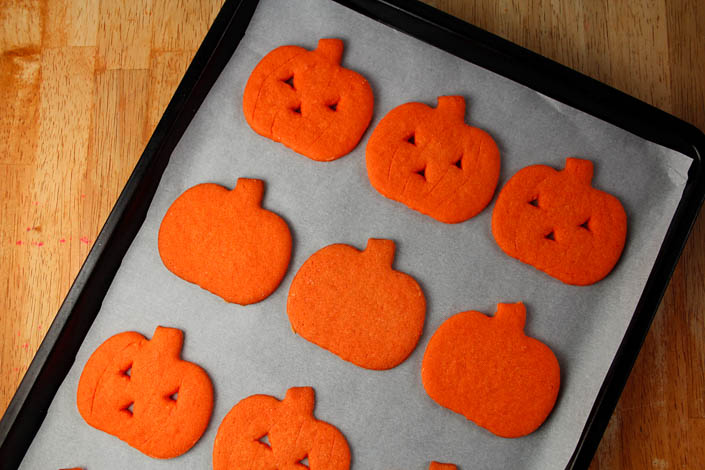
Jack O’Lantern Sandwich Cookies

Jack O’Lantern Sandwich Cookies

I didn’t intentionally theme this month based on sandwich cookies, but would that really upset anyone? Sandwich cookies rank with the best desserts – especially when they’re this cute! These Jack O’ Lantern Sandwich Cookies are among my absolute favorite childhood Halloween memories. I grew up helping my mom make them, and to this day I think they’re one of the most delicious treats I know how to make. The cookies are firm without being crunchy, and they have a wonderful sweet, buttery flavor that evokes a cross between a sugar cookie and a perfectly baked shortbread. Filled with a classic vanilla buttercream frosting, they become the kind of sandwich cookie that packaged cookies only dream of being.

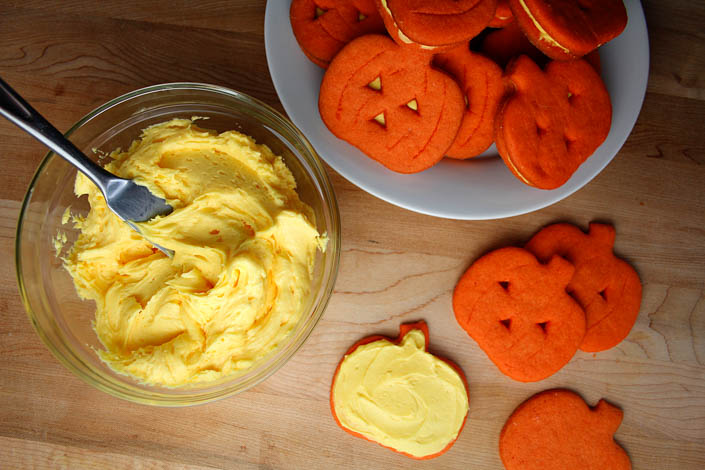
The beauty of this recipe is that it doesn’t require any crazy cookie decorating skills. All you have to do is use a great pumpkin cookie cutter (perhaps while you watch The Great Pumpkin), and a paring knife to slice little triangles in the dough for the eyes and noses of your jack o’ lanterns. A yellow buttercream goes between the cookies, so it looks like the jack o’ lantern has a lit candle inside – no extra skill work required. I like these cookies sans mouths because I think they’re elegant in their simplicity, while still looking fun, and most importantly, delicious. Halloween baking always has the potential to go to a very goofy, over-the-top place, where treats look festive, but not necessarily appetizing. It’s one of my baking mantras to never sacrifice how mouth-wateringly edible something looks in the name of making it look cute.

There are a few things you should know before you make these cookies. The first is that the dough does require time to chill, so plan accordingly. The dough itself comes together in all of about five minutes, so you can make a batch now and be ready to cut and bake it tonight. The second is that these cookies are fairly fragile, so one or two will break no matter what you do. You’ll want to eat these broken ones immediately, which is fine, since broken cookies have no calories. It’s a well-known scientific fact. That said, as long as you handle them gently, and frost them with the cookie laying on a flat surface, too much breakage won’t be an issue. You can also roll your dough out slightly thicker than the 1/8 of an inch that I usually go for, to yield sturdier cookies.


Halloween theme aside, this cookie recipe is like the holy grail of roll-and-cut cookie recipes: easy to whip up, buttery without being too soft, crisp without being crunchy, and perfect for all forms of cookie decorating because it’s endlessly versatile. You can use food coloring to make the dough and frosting any color of the rainbow, and cut it into just about any shape you desire. I use this recipe to make Christmas cookies, and heart-shaped cookies for Valentine’s day. You can also substitute any flavor frosting or even a chocolate ganache for the filling, or just bake the cookies a little thicker and top them with frosting and sprinkles – no sandwiching required. Jack O’ Lanterns are easily my favorite way to use this recipe because Halloween is the best, but I won’t blame you if you find yourself loving this recipe for beautiful frosted Christmas cookies instead!

Jack O'Lantern Sandwich Cookies

Ingredients

Jack O' Lantern Sugar Cookies

  • 3/4 cup butter, softened
  • 1/4 cup sugar
  • 1/4 cup brown sugar
  • 1 egg yolk
  • 12 drops yellow food coloring
  • 4 drops red food coloring
  • 1 3/4 cups flour
  • 1/8 tsp salt
  • 3/4 tsp baking powder

Vanilla Frosting

  • 1/2 cup butter
  • 1 1/2 cups powdered sugar, divided use
  • 1 Tbsp milk
  • 2 dashes salt
  • 10 drops yellow food coloring
  • 1/4 tsp vanilla

Instructions

  1. Make the cookie dough: cream together butter and sugars. Beat in the yolk, and red and yellow food colorings.

    2. Stir remaining ingredients together, and add to butter mixture. Mix well. Chill for 4 hours or overnight.

    3. Roll dough to 1/8" - 1/4” thickness, and cut into pumpkin shapes with a cookie cutter. Using a small, sharp knife, cut triangle eyes and noses on half of the pumpkins. You can also draw curved lines with the tip of a knife on the surface of the cookies, to mimic the ridges on a real pumpkin - just be careful not to cut all the way through the cookie.

    4. Bake at 350° F for 8 - 10 minutes, or until the edges are just barely, or just about to, brown. Cool completely on a wire rack.

    5. To make the frosting, cream together butter and 1 cup of the powdered sugar. Stir in vanilla, salt, and milk. Stir in remaining powdered sugar. When sugar is completely incorporated, add food coloring and stir until frosting is uniform. Optional: Whip in a stand mixer on high speed, to yield more fluffy, voluminous frosting.

    5. When completely cool, spread the non-face pumpkins with the icing, and top with the pumpkins with faces. DO NOT try to press the top cookies down to make the icing squeeze up through the cut-outs - it will just break the cookies.


Chocolate Peanut Butter Sandwich (Wedding) Cookies

Chocolate Peanut Butter Sandwich (Wedding) Cookies

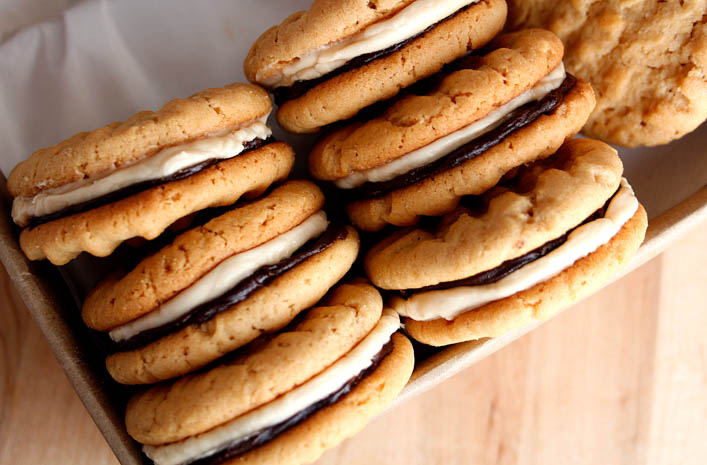
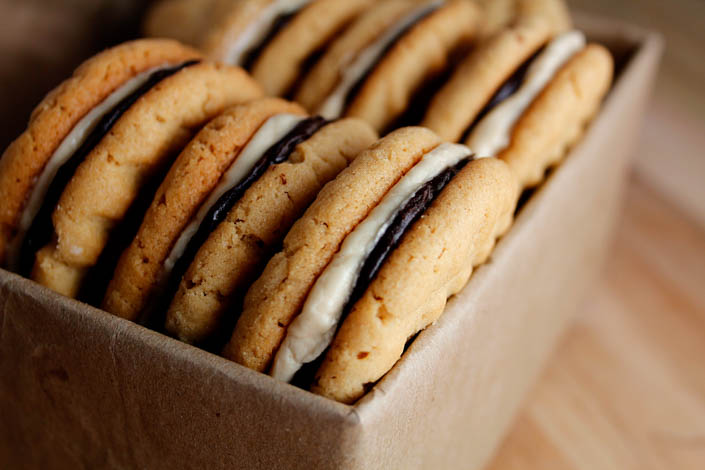
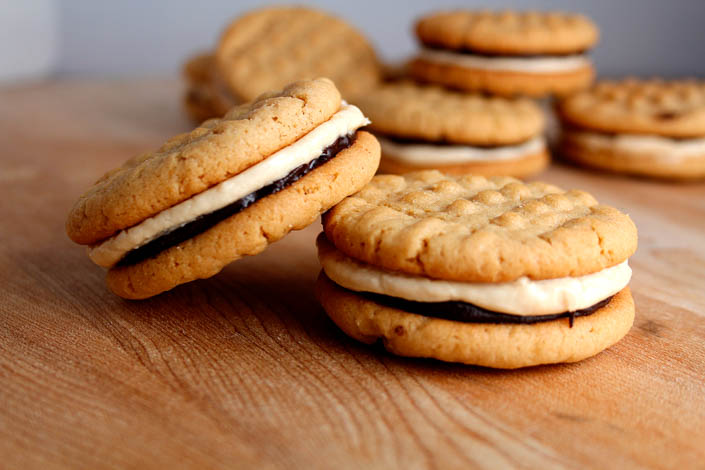
A year ago today, I married Bobby. It was truly the best day I could ever have imagined, but the planning was incredibly stressful. I did a lot of the detail work myself – I made the invitations and a lot of the centerpieces, which, looking back, I don’t really recommend. I would have enjoyed the planning process a lot more if I’d been a little more hands-off. One DIY thing that I highly recommend is making baked goods for wedding favors. But not just any baked goods: these peanut butter and chocolate sandwich cookies are absolutely perfect in every way. They’re delicious (we got SO many compliments on them), they freeze very well, they’re that wonderful combination of salty/sweet, chewy/crunchy – and they look super cute in little boxes, tied with ribbon.

I asked my mom to make the favors for my wedding, partially to save money, and partially to send guests home with a favor that they would actually enjoy having. The best wedding favors are edible, tasty, and of course, visually pleasing, with bonus points if you can personalize them with a simple tag or sticker added to the packaging. We decided on peanut butter and chocolate for the cookies, since I chose a white chocolate raspberry wedding cake – something Bobby had absolutely no interest in eating. If you read my last post, you know that peanut butter and chocolate is the only flavor combination in the world, according to Bobby.

We were inspired by Flourless Peanut Butter Chocolate Ganache Sandwich Cookies from Two Peas & Their Pod, and didn’t do a lot to change the look of the cookie itself, because they really are stunning. But the original version wasn’t exactly what I was looking for flavor-wise, or make-ahead-wise, so we had to do some serious recipe experimentation.

The first task was finding a peanut butter cookie recipe that was stiff enough to sandwich without falling apart, but soft enough to give when bitten into, so the frosting wouldn’t squish out the sides. It also had to freeze well, so it could be made ahead of time – I can’t imagine how we would’ve pulled this off if my mom hadn’t been working on them in the months leading up to the wedding. After rounds of testing with different brands of peanut butter, flourless vs flour-filled dough (the version we made is not gluten-free, but the original is, so give it a look if you want something gluten-free), and different levels of sweetness, we settled on our cookie, and got to work creating the fillings. We loved the way Two Peas & Their Pod did it, piling on a sweet, creamy, peanut butter filling and a rich, chocolate ganache, but needed to experiment with them to make sure the flavors went perfectly with our revised peanut butter cookie. The thing about chocolate and peanut butter is that you have to be very careful with the balance of sweetness/saltiness/bitterness, to keep the flavor from being cloying or bland. We used my brothers as taste testers, and had them try so many combinations that they actually started joking about wanting to eat anything but wedding cookies. They’ve gotten over it, I think, because the batch I made for this post got eaten in all of two hours, once I’d finished photographing it.

We put three cookies in each favor box, which meant we had to make about 300 of them – 600 peanut butter cookies to sandwich together. Starting about two months out from the wedding, we made the peanut butter cookies and the fillings in large batches, frosted and sandwiched them, wrapped them well, and then immediately froze them. We weighed the dough and the exact amount of frosting that went on each cookie, so they’d be perfectly uniform. They keep so well in the freezer, even with the frosting, that when they defrost they taste and feel like they were baked that morning. They’re little peanut butter and chocolate miracles. We put them in favor boxes the evening before the wedding, straight from the freezer. Since the frosting was rock-solid, they were easy to package neatly, and they defrosted perfectly overnight.

The process of making tons of these cookies wedding-perfect is time-consuming and repetitive, and demands attention to detail and lots of freezer space. It would be monumentally more difficult to execute for a very large wedding, especially if you’re not already an experienced baker. That said, these can be made literal months in advance – so you’ll have plenty of time to practice, and the effort yields superbly satisfying results. The recipe I’m posting here is scaled to make about 36 sandwich cookies, as opposed to 300, so the concept is perfect for smaller events as well. If you don’t require perfection and uniformity, you can skip weighing the dough and fillings, and the results will still be completely delicious. It’s my plan to make these every October 8th for the rest of my life…and freeze a bunch and save them to eat later in the year, because why not? They will always remind me of the most wonderful evening, being surrounded by my friends and family, wearing my princess dress, and marrying the love of my life. That’s a lot of pressure to put on a cookie, but there’s no cookie better suited than these.

Chocolate Peanut Butter Sandwich (Wedding) Cookies

This recipe is heavily adapted from Peanut Butter Chocolate Ganache Sandwich Cookies from Two Peas & Their Pod

Ingredients

Peanut Butter Cookies

  • 2 1/2 cups flour 300g
  • 1 tsp baking powder
  • 1 tsp baking soda
  • 1/4 tsp salt
  • 14 Tbsps butter 198g
  • 1 cup sugar 200g
  • 1 cup brown sugar 215g
  • 1 cup + 2 Tbsps peanut butter 284g
  • 2 eggs

Creamy Peanut Butter Frosting

  • 2 Tbsps peanut butter 32g
  • 1 Tbsp butter, softened 14g
  • 3 Tbsps powdered sugar 25g
  • 2 Tbsp + 1 tsp milk
  • 1 cup, scant powdered sugar 115g

Chocolate Ganache

  • 1/2 cup semi-sweet chocolate chips 85g
  • 1/4 cup heavy cream
  • 4 Tbsps salted butter 56g
  • 6 Tbsps cocoa 30g

Instructions

  1. Make the cookies: stir together flour, baking powder, baking soda, and salt. Set aside. Cream the butter with the two sugars, and then cream in the peanut butter. Stir in the eggs.

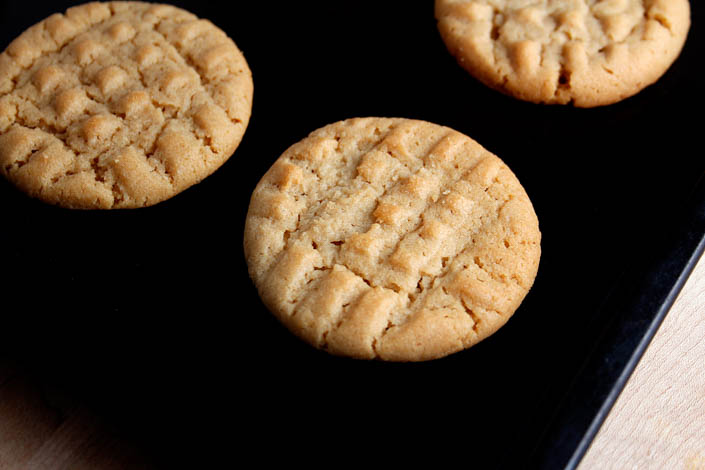
    2. Chill the dough at least 4 hours, or overnight. Roll into 18 g balls, and place on baking sheet. Press the balls with the back of a fork to create a criss-cross pattern on the tops. Chill dough balls while preheating oven to 350 degrees (or while previous tray is baking). Bake for 7 minutes, 40 seconds; turn tray, bake for 2 minutes. Cool on wire rack.

    3. Make the peanut butter frosting by adding all of the ingredients to a mixer in the order listed, and beating until well combined after each addition of sugar, and then until fluffy. 

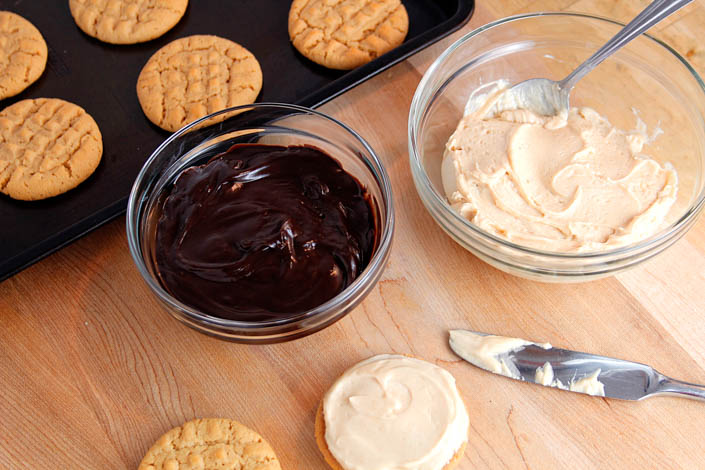
    4. To make the chocolate ganache, heat the heavy cream in the microwave just until very warm (for us, that was 25 seconds). Pour over chocolate chips in a heavy bowl. Let sit 1 minute, then stir until smooth. Melt the butter in a separate bowl, and stir in the cocoa until smooth. Combine the two chocolates. Allow to cool to room temperature.

    5. To assemble the cookies, place 8g of ganache (roughly 1/2 Tbsp) on one cookie, and 16g of peanut butter frosting on another cookie. Press the two cookies gently together. 

    Cookies will be good in the freezer for up to a year, but will be at their best quality if used within 4 months of freezing. 


Bobby’s Surprise 30th Birthday Dinner (and Reese’s Cake)!

Throwing a surprise party is not for the faint of heart. All the planning and subterfuge is exhausting, particularly when you’re virtually incapable of asking for help. I had planned to go all out with a huge party for Bobby’s 30th, but then realized that I had neither the money nor the will to pull that off, so I changed tack – I threw him a surprise dinner with all of his closest friends. It was easy to switch since I realized this early enough, and a small gathering fit his personality better than a giant blow out would have anyway – thank goodness for my sanity.

I made a dinner reservation at The Smith in Penn Quarter, DC, which is an incredible spot. It’s got a very bright, lively atmosphere and the decor is all subway tiles and huge, open windows. It’s very New York cool. The food and drinks are great too – for cocktails I like the “Smoke ‘Em if You Got ‘Em” because I’m a mezcal fan – it’s fruity and smoky and perfect for a warm summer evening. I didn’t take a lot of photos at dinner because I’m just plain bad at remembering to do things like that. I get caught up in the moment and somehow always regret not having photographic evidence – there’s got to be a sweet spot between living in the now and capturing it for later, but I haven’t quite found it yet.

. ……  
I had our friends go to the restaurant and get seated, and then I brought Bobby a few minutes later. We walked in, and I made a bee-line towards them. Bobby followed, confused of course, because we hadn’t even asked for a table, and then realized what was going on. If you’ve ever thrown a surprise party, you’ll know what a pleasure it is to see all the planning finally come together. I turned around to watch Bobby’s face break into a huge grin as everyone shouted “Surprise!” Or, more accurately, I think they shouted “Bobby!!!” – I was a little distracted at that point, overwhelmed with sheer relief that we’d pulled it off. There was lots of hugging and Bobby shouting “Holy shit! You guys tricked me!” Some of our friends live a few hours away, so it was especially nice to be reunited with everyone for such a fun occasion.

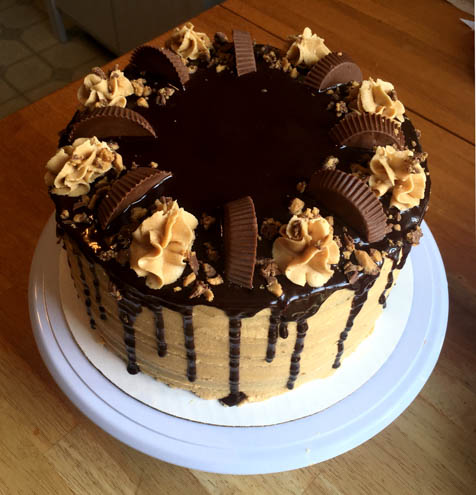
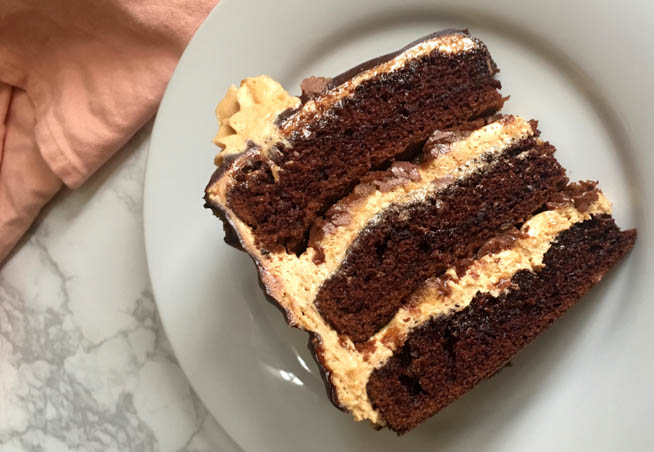
After dinner, we went to the hotel suite I’d booked, so that we could have a few more drinks – and cake! – without spending all of our money. Spending all of your money on drinks at bars in DC is absurdly easy to do if you start too early – pre-gaming is the only way to avoid it. We toasted to Bobby, and to turning 30, and to all being able to celebrate together, and watched him blow out the candles on his birthday cake. The cake I made was always going to be a Reese’s cake, because as far as Bobby is concerned, there is no other flavor profile worth his time. When you’ve been with someone long enough, and made a good number of peanut butter and chocolate birthday cakes, you have to stretch a little to make the concept seem fresh and exciting. Thankfully, there are more than a few ways to cake a Reese’s, and the internet led me to this beautiful cake from Life Love and Sugar. 

I didn’t realize at the time that I was going to post this as anything other than a quick Instagram, or I would’ve taken a better picture!

The issue with making the cake was that, although I’ve made plenty of cakes in the past, I am in no way a professional at decorating them. I don’t think I understood crumb coats at all until about two years ago. Two days before the party, I was at Michael’s buying a cake turntable so that I could attempt to frost this all-important 30th birthday cake with those pretty, intentionally textured, Instagram-worthy sides. After a little trial and error, and a batch of  peanut butter frosting that separated for some frustratingly unknowable reason, it was done, and I’m definitely not mad at how it turned out. It’s gratifying to know that the hours I’ve spent watching cake frosting videos on Insta have contributed to my life in such a tangible way. I’m not including the recipe here because I didn’t change anything about it – follow the link above for directions!

We did a little bar hopping later in the night – checking out Cuba Libre to make fools of ourselves attempting to salsa dance, and then heading to a couple of much quieter places near Chinatown. Our friends are all in that stage of life where they’re getting married or buying a house or getting a new puppy, so we had a lot to catch up on. A little after one, we all piled into an Uber to pay a visit to Mr. Abe Lincoln. The DC monuments at night are breathtaking in a way that they never are during the day. There are little-to-no crowds, and everything is lit up with spotlights. It’s incredibly peaceful, and a perfect way to wind down the night, after you’ve spent a lot of time in noisy bars. You can walk down along the reflecting pool to the WWII memorial, and revel in the warm summer air – sans the sun making you all sweaty and 8,000 other tourists hurrying you along. If you’re like us, you’ll bring a “water bottle” with you to keep your buzz going – just a suggestion.

When we were all too hungry and tired to continue our impromptu tour, we returned to our hotel to stuff ourselves with pizza (shout out to Papa John’s for being open until 4am) and more cake, and eventually pass out. The surprise went exactly as planned, and the whole night was relaxing and fun, and about as unpretentious as you can get in a city full of hipsters and politicians. Bobby has said over and over that he truly had no idea that the surprise was going to happen. I never realized I was so sneaky. Even if you don’t have sneaky plans to throw a surprise dinner/party anytime soon, make sure you check out that Reese’s cake – and definitely see the monuments at night if you’re in town.


Sriracha Shrimp Skewers with Pineapple

Sriracha Shrimp Skewers with Pineapple

Since I’m in “do summer things” mode, I’ve been super excited to experiment with some grilling recipes. Now that we’ve been getting the occasional cool-but-not-too-cold summer evening, I’ve been obsessed with eating outdoors. Dinner straight from the grill is one of those magical things that you can only do when the weather permits, so it’s important to take advantage of those clear, golden evening hours whenever possible.

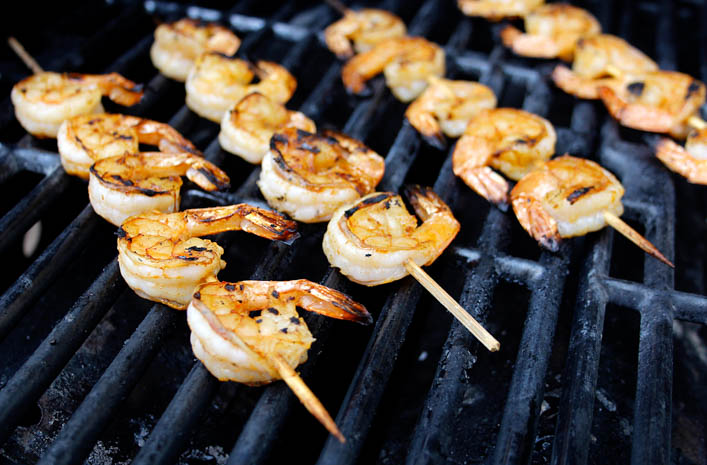
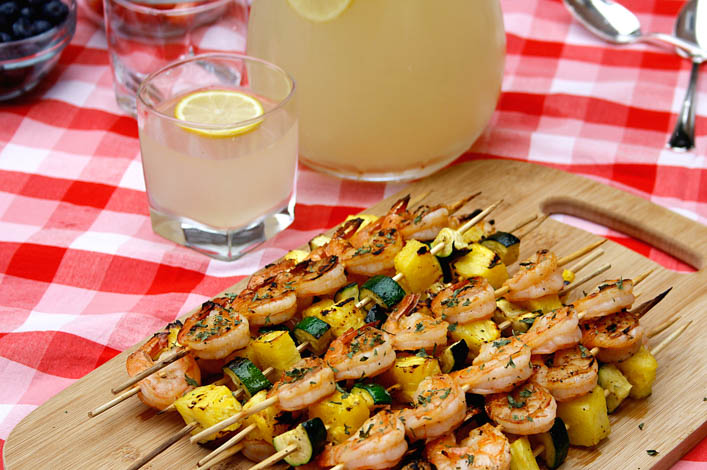
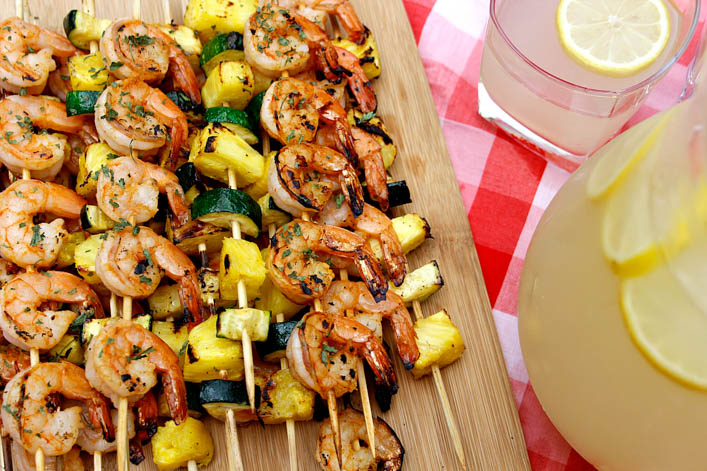
My favorite grilled foods are shrimp and pineapple, so figuring out what to make was a no-brainer. But I wanted to create a marinade for the shrimp that would knock anyone’s socks off. Recently, I bought a bottle of Sriracha for the first time in about a year. It was one of those things where I ate too much of it, and then couldn’t stand it for a long time. Now that it’s back in my life and I remember how wonderful it is, it only made sense to put it in my marinade. I added it to some pineapple juice, garlic, salt, ginger, and coconut milk. I can’t explain why – please tell me if you know what crazy science is at work here – but coconut milk and pineapple juice make the shrimp take on a tender, buttery texture. I’d never realized that I wanted shrimp to melt in my mouth until I cooked them in this marinade, and now I don’t know how I went without it for this long. Don’t worry if you, like me, abhor the flavor of coconut. I promise – cross my heart, hope to die – that you cannot taste it on the shrimp. Coconut milk doesn’t even smell like coconut.

I let my shrimp marinate for maybe 30 minutes before cooking it, and it picked up amazing flavor. It’s mildly sweet and salty, with just a tiny kick from the Sriracha and ginger. The pineapple juice gives it a citrus-y flavor that works beautifully with the ginger, and of course makes it pair perfectly with the grilled pineapple. I like this recipe because it doesn’t take a million years to prepare, and you can cook for a lot of people at once, since you’re doing it on the grill.  You can make rice and a big pitcher of lemonade/sangria to go with dinner while the shrimp is getting all delicious in the marinade, and let the grill heat up while you prepare the skewers.

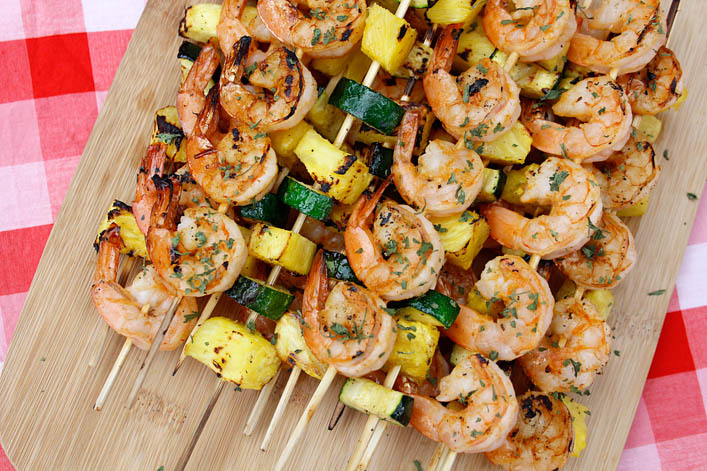
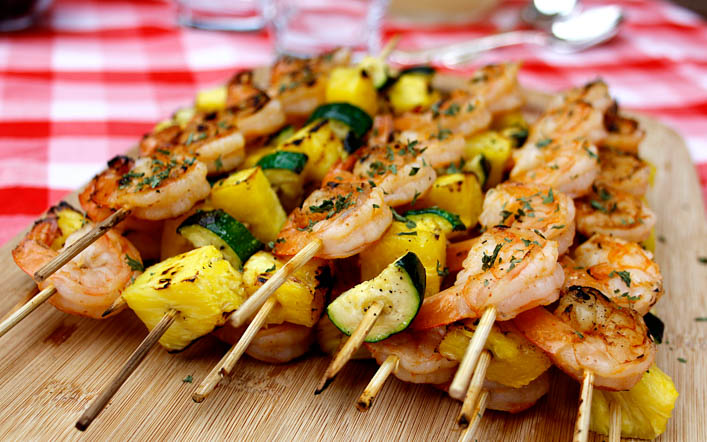
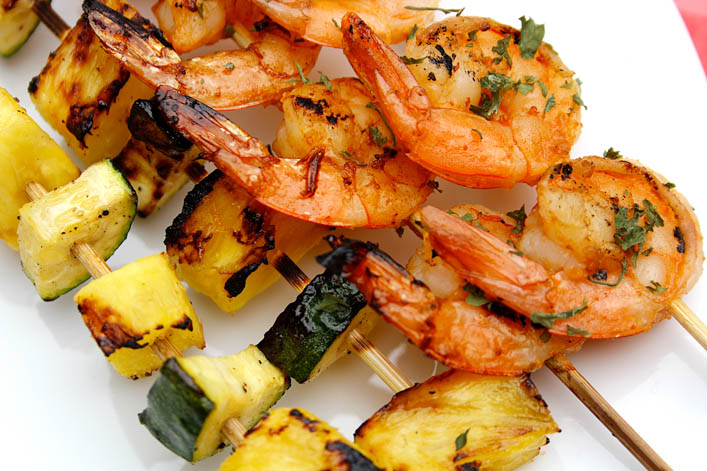
I discovered throughout the process of testing this recipe that skewers are a million times easier to cook if you only put one kind of food on them. Trying to cook skewers with shrimp, pineapple, and zucchini chunks – and making sure that everything cooked evenly and properly – was just annoying. Maybe there’s a secret I don’t know about the art of the kebob, but threading meat and produce on separate skewers just makes sense. You don’t have to worry about uncooked shrimp touching pineapple where it won’t get enough heat (my main concern), and you don’t have to cut your pineapple and zucchini to precise shrimp-sized pieces so they’ll cook evenly with the shrimp.

If you don’t like grilling or you don’t like shrimp, don’t worry – you can cook the shrimp on the stove with similar results, or you can use the marinade on chicken. I marinated some chicken in it, and then used the cooked chicken to make delicious bowls for dinner a few days ago, with rice, Sriracha yogurt, sauteed zucchini, and crushed pita chips. However you use it, this marinade will make your food taste like summer – especially if you have dinner outside on the patio, with a cold drink and your favorite people. And if you really want to take it over the top, you can always have Balsamic Cherry Chocolate Ice Cream for dessert. Just a suggestion.


Sriracha Shrimp Marinade

Servings 4 servings

Ingredients

Shrimp Skewers

  • 1 1/2 lbs raw shrimp, peeled and de-veined
  • 1/4 cup pineapple juice
  • 2 Tbsps sriracha
  • 2 Tbsps coconut milk (I used canned coconut milk)
  • 1/4 tsp salt
  • 1 tsp garlic powder
  • 1/4 tsp ground ginger

Pineapple and Zucchini Skewers

  • 1 medium zucchini
  • 2 cups pineapple chunks - about 1/2 a fresh pineapple
  • 1/2 Tbsp olive oil
  • 1/8 tsp salt
  • 1/8 tsp fresh black pepper

Instructions

  1. Note: Soak wooden skewers in water for at least 30 minutes before use.

    Combine all marinade ingredients in a shallow bowl. Place shrimp in the marinade and stir until all of it it well coated. Cover and let rest in the refrigerator for 30 minutes to 1 hour. 

    2. Slice pineapple and zucchini into bite-sized chunks. Season the zucchini with olive oil, salt and pepper. Thread onto skewers, leaving a little space between each piece. 

    3. Pre-heat the grill. Thread shrimp onto skewers (keep separate from those with the pineapple and zucchini).

    4. Cook skewers over medium-high heat on grill until shrimp curl and turn pink/lose transparency. Pineapple and zucchini should cook until tender - about 4-6 minutes on direct heat, and then move to indirect heat to continue getting soft. Sprinkle the cooked shrimp with dried parsley, if you're feeling fancy.