Balsamic Cherry Chocolate Ice Cream

Balsamic Cherry Chocolate Ice Cream

I’m very big on doing seasonal activities because I think those are the times that I stop and really appreciate the present moment. Making and eating ice cream both seem like perfect ways to relax and spend a little time really enjoying summer before the insanity of fall/holidays/back to school, etc. come rushing towards us. Not to mention it’s the perfect way to impress guests at summer parties. I can’t think of anything more wonderfully extra than scooping up some homemade ice cream at a barbecue or pool party.

Ice Cream Dishes from Crate and Barrel

Ice cream is one of those things that seems difficult to make, but I think that’s just because it requires several hours and special equipment to do it right. Most people (myself included, until just recently) are perfectly happy buying their ice cream in tubs from the store – making your own in this day and age can feel something akin to churning your own butter! But what are you to do when you think of an amazing ice cream concept that you can’t buy? Well, first you get an ice cream maker. I got this one and it works absolutely beautifully. It’s a little on the pricey side, but it’s easy to use, easy to clean, and does a great job. It’s an especially good investment if you want to make unique flavors or you’re looking to create healthier treats by controlling the sugar you’re putting in.

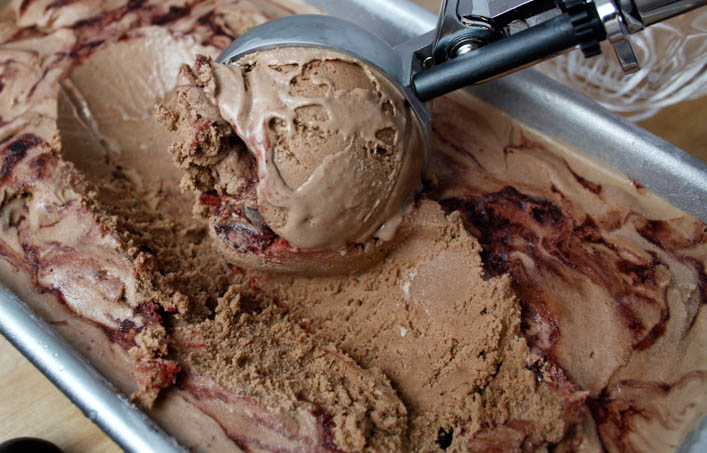
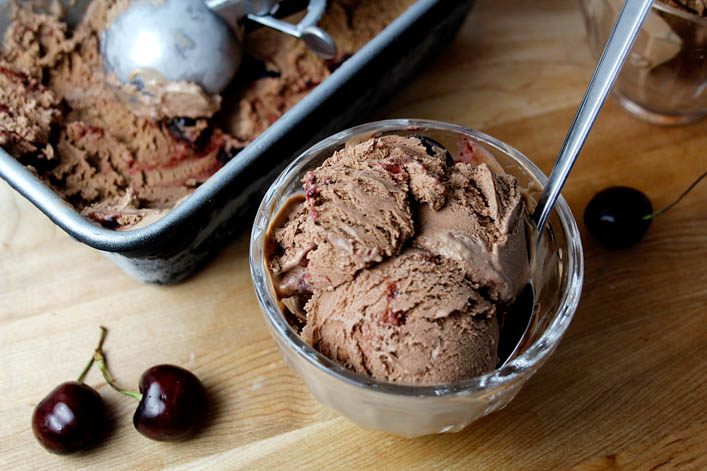
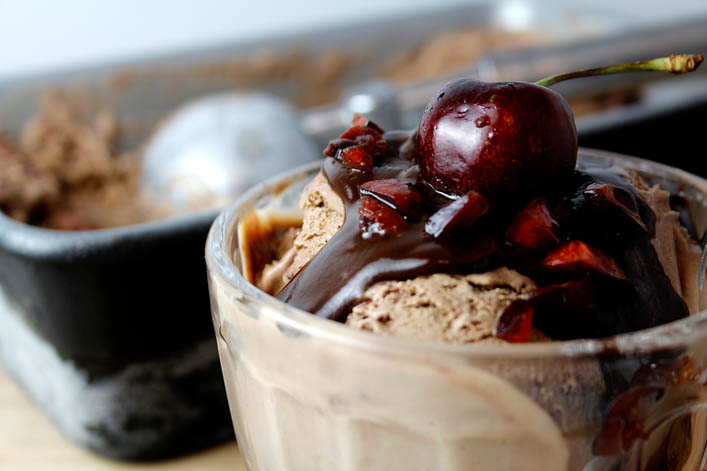
A while ago, I bought some cherry balsamic vinegar from Secolari, a specialty shop in Columbia, Md. And when I got home, I put some of it on chocolate ice cream because the man at the store told me to. I don’t always do what people at stores recommend, but this guy seemed to know his stuff. Suffice it to say, my life was changed forever. I go through phases where the only dessert I want to eat is ice cream, but the usual flavors can get pretty boring. Cherry balsamic vinegar on ice cream re-energizes it in a whole new way. It adds a warmth and slight savoriness to the flavor that is anything but dull. I decided it was time to take those flavors and create a brand new, swirled Balsamic Cherry Chocolate Ice Cream, and I am so glad I did.

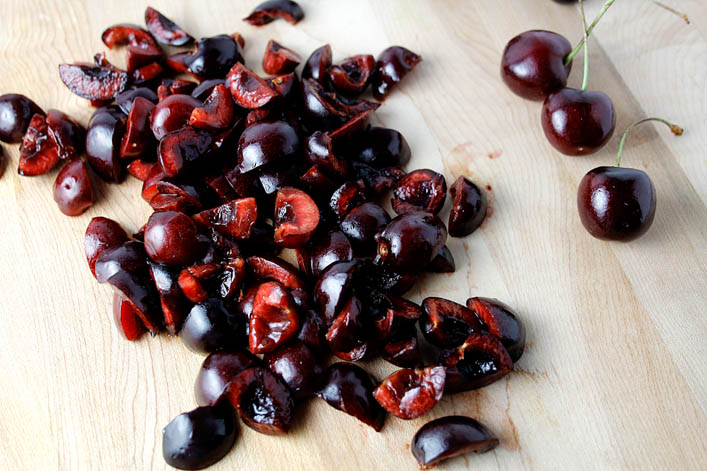
For the base of my ice cream I started with Alton Brown’s Chocolate Ice Cream Recipe, from Good Eats. By itself it’s near perfect, although I did add the tiniest pinch of salt to help the chocolate-y flavor really stand out. Then, I cooked fresh cherries with a little sugar and a good helping of the cherry balsamic vinegar to create the sauce I wanted to swirl into the ice cream. I’m not going to lie to you – this ice cream is basically irresistible. It’s like a perfect chocolate covered cherry translated into something even more decadent. It’s not so heavy on the balsamic that kids won’t like it – although the second time you make it you could definitely add more to amplify the flavor contrast.

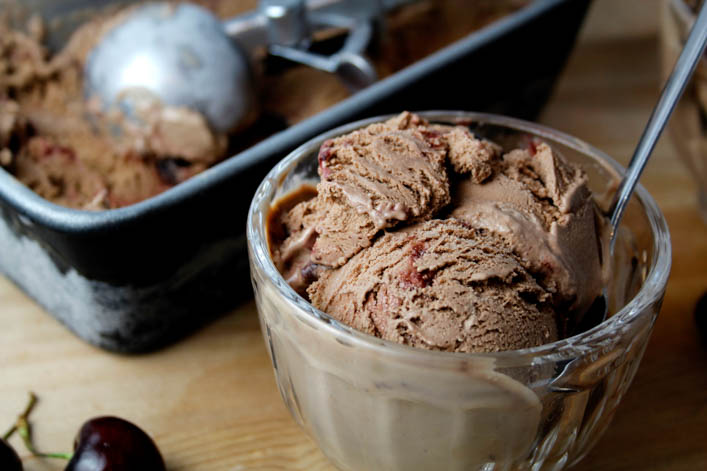
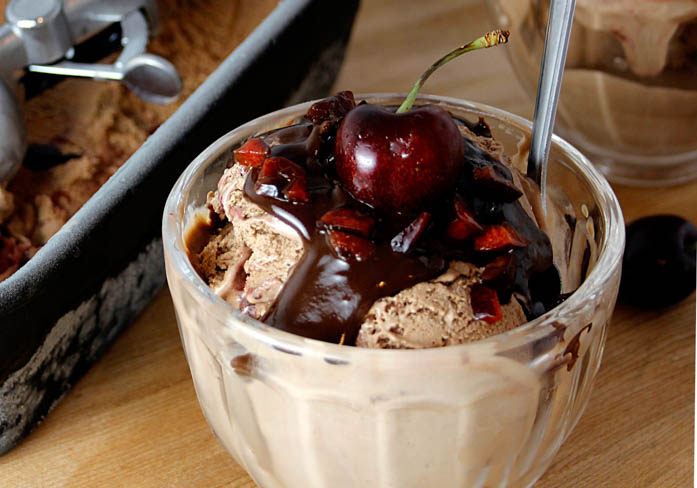
The balance of ice cream to cherry balsamic swirl is just right, so you’re not overwhelmed by the cherry parts, but you’re not digging through your container searching for them either. The small cherry pieces in the sauce get kind of chewy when frozen, giving every bite a really wonderful texture. Of course I couldn’t just leave well enough alone and enjoy this ice cream, so I added hot fudge on top. But not just any hot fudge – salted chocolate hot fudge. If you like salty-sweet things, then this is essentially compulsory – the sweet ice cream with the tangy cherries and salty-sweet sauce is nothing short of magic. I made my sauce from scratch, adapting this New York Times recipe. It’s very quick and easy to make, and tastes so much better than the stuff you get out of a jar. I actually hadn’t made my own hot fudge before this, but I don’t plan on going back.

Creating this recipe has cause me to fall down an ice cream rabbit hole. Realizing that I can, in just a few hours, make exist any flavor of ice cream that I can dream up, is weirdly surreal. I guess I always knew that was possible, but making a big batch of any ice cream you want at home seems too good to be true. What a wonderful thing to discover mid-July.  Thank goodness that DC summer is incredibly humid and very hot, so it’s important to eat ice cream almost every day in the name of keeping your sanity. That’s the real reason I’m sharing this recipe and encouraging you to go buy that ice cream maker. I want to help save your sanity. I’m just trying to make the world a better place.

I suddenly have new-found respect for ice cream parlors.


Balsamic Cherry Chocolate Ice Cream

Chocolate ice cream recipe very slightly adapted from Alton Brown's Chocolate Ice Cream Recipe.

Salted hot fudge recipe slightly adapted from Doris's Salty Hot Fudge Recipe, by Kim Severson in the New York Times.

Ingredients

Chocolate Ice Cream

  • 3 cups half-and-half
  • 1/2 cup cocoa
  • 1 cup heavy cream
  • 8 large egg yolks
  • 1 1/4 cup sugar 250g
  • 2 tsps vanilla exract
  • 1 tiny pinch salt

Balsamic Cherry Swirl

  • 8oz fresh cherries
  • 2 Tbsps sugar
  • 2 Tbsps water
  • 3 Tbsps cherry balsamic vinegar

Salted Chocolate Hot Fudge

  • 1/4 cup salted butter
  • 1/4 cup cocoa
  • 1 oz unsweetened chocolate
  • 1/2 cup heavy cream
  • 1/3 cup sugar
  • 1 tsp vanilla extract
  • 1/8 tsp salt

Instructions

Balsamic Cherry Chocolate Ice Cream

  1. Note: This recipe does require an ice cream maker - Makes 1 1/2 Quarts


    Whisk together cocoa and 1 cup of half-and-half in a sauce pan over medium heat, until combined. Stir in the rest of the hal- and-half and the heavy cream. Bring to a simmer. 

    2. Whisk egg yolks until they're slightly lighter in color, and then gradually stir in the sugar. When the cream mixture begins to simmer, remove from heat and temper the eggs and sugar by adding it to them a little at a time until 1/3 has been added. Pour everything in the bowl back into the sauce pan, and stir until well combined. Return the pan to the stove over low heat. Stir frequently until the mixture thickens and reaches 175 degrees F. It should be thick enough to coat the back of a spoon. 

    3. Pour the mixture into a large, shallow dish, and allow to sit out at room temperature for 30 minutes. Stir in the vanilla extract, and transfer the dish to the refrigerator or freezer, covered loosely with paper towel until it reaches 50 degrees F or below - this usually take around 2 hours. You can leave it overnight, but once it cools to 50 degrees, cover the dish tightly. 

    4. While the ice cream mix is chilling, make the balsamic cherry sauce. Pit and quarter the cherries, and add to a sauce pan with the sugar. Let cook for 8-10 minutes over low heat, stirring occasionally until the cherries soften and release a lot of juice. Add the water and balsamic vinegar and cook for an additional five minutes. The mixture will thicken some as it cooks, but should remain fairly thin. Pour into a bowl and chill in the fridge until you are ready to use it. This sauce can be stored in an airtight container for about a week, so you can prepare it ahead of time. 

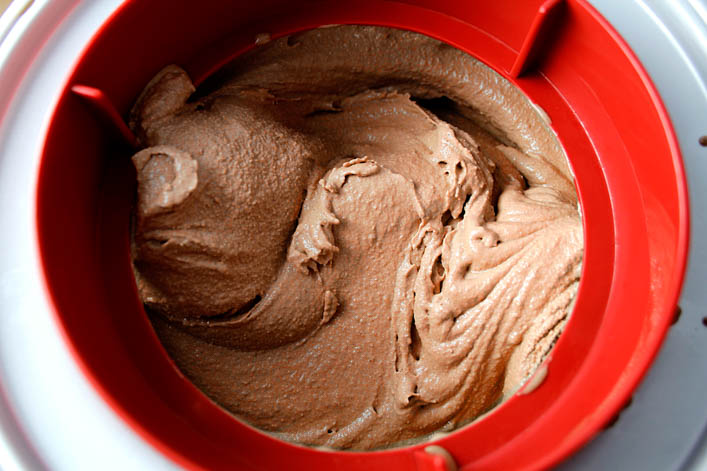
    5. Churn the ice cream. Pour the 50-degree mixture into an ice cream maker, and process according to the directions for your machine. Add your tiny pinch of salt just before turning on the ice cream maker. While churning, place a 9-inch loaf pan in the freezer. 

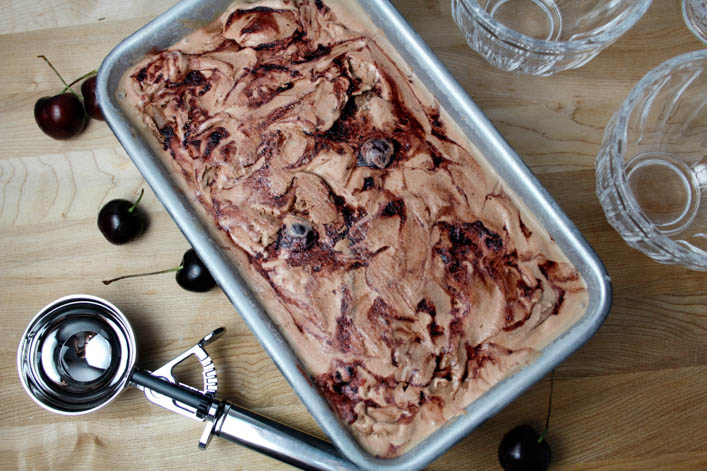
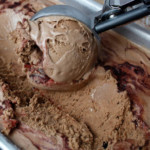
    6. After about 25-30 minutes, the ice cream should look like soft serve. At this point, turn off the machine and remove the loaf plan from the freezer. Scoop about 1/5 of the ice cream into the pan, and spread it into an even layer. Top with 1/5 of the balsamic cherry sauce, and continue working in layers like this until you're out of ice cream and sauce. Cover the pan with foil and freeze for at least 2-3 hours to let it solidify. 


Salted Chocolate Hot Fudge

  1. Melt together the butter, and unsweetened chocolate in a sauce pan over medium heat. Add cocoa, sugar, and heavy cream, and stir until the sauce is completely smooth. Remove from heat, and stir in salt and vanilla. Pour over your favorite ice cream. 

    This sauce will keep for at least a week in an airtight container in the refrigerator. 


Orange Chicken Crispy Rice Salad

Orange Chicken Crispy Rice Salad

There are two important things to understand about this recipe for Orange Chicken Crispy Rice Salad. The first is that it’s hilariously American, as is the case with all of my recipes that approach cuisines from other countries. The second is that it’s absolutely delicious regardless of authenticity. The inspiration for this concept came from my first experience with a crispy rice salad at Doi Moi in D.C. Their food is Southeast Asian, and so delicious – I definitely recommend a trip if you’re near 14th street. Their crispy rice salad involves fermented pork, which I have never worked with before, so I decided to combine the concept with something a little more familiar: orange chicken.

I have wild dreams of someday being one of those people who just throws all kinds of interesting ingredients into a dish without a second thought. I love trying new foods and flavors, and I make a conscious effort to order outside of my comfort zone at restaurants, but sometimes you just have to stick with some of what you know when you’re trying a new recipe concept. The point of that being that the sauce for my orange chicken started with a Panda Express copycat recipe, and I haven’t really done that much to it. I’m okay with that, however, as Panda Express orange chicken is a delicious gift from the heavens.

The crispy rice is, of course, the real standout of this salad, and the whole reason for its existence. I didn’t even know that crispy rice was a thing until a few months ago, but the version I made up for this recipe is one of my new favorite things. I started with a recipe from Ayesha Curry, which set me on the right path flavor- and texture-wise. I flavored mine with Greek yogurt, lemon, dill, salt, pepper, and red pepper flakes. Her recipe calls for crisping the rice in a pan on the stove, but mostly I just kept burning things that way. I found it much easier to get the results I wanted by toasting the rice on a tray in the oven. The result is crisp, slightly chewy, very flavorful rice that clumps together into bites like croutons in the salad.

This salad could easily have gone in the direction of very-bad-for-you, but with summer coming, I figured I’d keep it light. I used grilled chicken instead of fried, loaded the base of the salad with spinach, broccoli and cucumber, and topped it with some cashews for added crunch and nutrition. I think a variety of textures is what separates a great salad from the merely decent – they can get a bit boring if every bite is the same. This salad has a combination of crunchy and chewy and soft components that combine with the bright flavor of the orange chicken and the lightly spicy crispy rice, to make a pretty perfect meal.

This salad is a perfect start to break away from a typical boring lunch time. You can only eat Caesar salad so many times in a row before you want to stab yourself with your fork. Not that there’s anything wrong with Caesar salad. Crispy Rice Orange Chicken Salad is, as always, open to interpretation. I invite you to try it with lemon chicken or switch out the cashews for pecans. Maybe add roasted Brussels sprouts in place of the broccoli. Just promise me that whatever you do, you’ll keep the crispy rice – it’s truly something different and wonderful, and I can’t wait to make it again.


Orange Chicken Crispy Rice Salad

Orange Chicken Sauce adapted from Food.com's Panda Express Copycat Orange Chicken 


Ingredients

Crispy Rice

  • 3 cups cooked rice (1 cup uncooked)
  • 1/4 cup plain Greek yogurt 61g
  • 2 Tbsps lemon juice
  • 1 1/4 tsps red pepper flakes
  • 1 1/4 tsps dried dill
  • 1/2 tsp pepper
  • 1 tsp salt

Orange Chicken

  • 1 lb chicken breast
  • 2 Tbsps olive oil - divided use
  • 1 cup orange juice (fresh squeezed or bottled)
  • 3 Tbsps soy sauce
  • 1/3 cup brown sugar
  • 2 Tbsps rice wine vinegar
  • 1 Tbsp ground ginger
  • 1/2 cup green onion, chopped
  • 2 tsps garlic, minced
  • 1 tsp red chili flakes
  • 1/2 cup water
  • 2 Tbsps cornstarch

Salad

  • 2 cups baby spinach
  • 1 cup diced cucumber, de-seeded
  • 1 cup steamed broccoli florets
  • 1/2 cup dry roasted cashews

Instructions

  1. Prepare the crispy rice. Stir together the cooked rice, yogurt, lemon juice, red pepper flakes, dill, pepper, and salt until well mixed. Spread into one even layer on a baking tray lined with foil. Bake at 400 degrees for 20 minutes, stir the rice around on the tray, and bake for another 30 minutes. It's done when the top of the rice has browned and the clumps are crispy on the edges and soft inside. Once the rice has cooled slightly, transfer to a cutting board and chop larger clumps into bite-sized pieces. 

    2. While the rice bakes, make the orange chicken. Slice the chicken breast into bite-sized pieces and sautee in a skillet over high heat, with a Tbsp of olive oil. Remove to the side. To make the sauce, combine orange juice, soy sauce, brown sugar, and rice wine in a small bowl and set aside. Using the same skillet from the chicken, heat 1 Tbsp of olive oil. Stir together the green onion, ginger, garlic, 1 Tbsp of olive oil, and chili flakes and add to the hot skillet. Cook for about a minute until fragrant, and then add the orange juice mixture. 

    3. Let the sauce come to a simmer, over medium-heat, about 9 minutes. Do not let it come to a full boil. Stir together the corn starch and water, and add to the sauce. Stir gently for an additional 3 minutes, until the sauce begins to thicken. Lower heat and cook for 3 more minutes. Remove from heat and add the chicken, stirring until well-coated.

    4. To assemble the salad, fill a bowl with chopped spinach, diced cucumber, broccoli florets, and cashews. Top with a generous helping of orange chicken and crispy rice. Enjoy!

    Note: Leftover orange sauce can be refrigerated in an airtight container for up to a week. 


Cherry Blossom Bites

Cherry Blossom Bites

I live just outside Washington, DC (seriously, it’s a 5 minute drive/Metro ride) – so I have a front row seat to our Cherry Blossom Festival, in March/April, long before cherries hit our grocery stores at reasonable prices. And all the Festival does is make me wish that cherries were in season, because I love them more than just about any other fruit (except raspberries, because they’re the best). Finally, finally, it’s time to celebrate cherries being in season. These Cherry Blossom Bites are an excellent way to use the cherries that are abundant this time of year, especially if you’re like me, and you’ve been buying more than you can reasonably consume on your own.

Cherry Blossom Bites were inspired by a similar hors d’oeurve that was served at the cocktail hour for my wedding last October. They were simple puff pastry, with goat cheese and a sweetened cherry compote on top, and they were lovely. For this recipe, I’ve kept the puff pastry, but I’ve used cream cheese instead of goat cheese.  Cream cheese is less expensive, and more useful to have extra of. You don’t really notice a difference between the two when they’re packed into these little bites. I don’t know exactly what went into the cherries for the version at my wedding, but I used fresh cherries, softened and reduced with a little orange juice, and cloves. If you don’t take anything else away from this post, know that a pot of cherries, orange juice, and cloves heating on the stove smells like absolute happiness.

To add some sweetness and extra crunch, I created a streusel topping using chopped up bits of the leftover puff pastry, combined with sliced almonds and brown sugar. It really takes these bites to the point where they’re a perfect combination of sweet, salty, and tart. They’re a little chewy and plenty crispy, and the overall impact is what I imagine it would be like if you took a really good cheese board and captured all of its best parts in a single bite. I’d dare to say these are actually better than the ones from my wedding.

Figuring out how to bake these was something of an adventure, because I don’t usually put puff pastry into mini muffin pans. Puff pastry needs room to expand, so it doesn’t end up too chewy or over-cooked. After some trial and failure with a silicone mold, I found that the simplest method was also the best: I cut the puff pastry into 1 1/2 inch squares and just pressed them into the mini muffin pans. No cutting circles or trying to squish them in neatly, which is always a bonus in my book.

The rest of the process for making these is fairly quick – the cherries only need to cook for about 15 minutes, and the streusel can be prepared in the meantime. I made my own puff pastry, but you can speed up the process even more by buying it in pre-made sheets. These would be a perfect, unexpected treat to bring to summer parties and barbecues. They’d also make a great quick breakfast or snack that you can whip up ahead and then munch on throughout the week. They taste like dessert, but don’t have very much sugar added at all – it’s only in the topping – so they still fit into a healthy lifestyle. Or at least, that’s what I’m telling myself.


Cherry Blossom Bites

Ingredients

Puff Pastry

  • 1 1/4 cups flour
  • 3/4 tsp salt
  • 1/2 cup very cold water
  • 1/2 cup cold, unsalted butter (do not soften)

Cherry Blossom Bites

  • 28 fresh cherries, pitted and halved
  • 1/2 tsp ground cloves
  • 1/4 cup + 1 Tbsp water - divided use
  • 2 Tbsps orange juice
  • 1/2 Tbsp cornstarch
  • 2 1/2 Tbsps brown sugar
  • 2 Tbsps slivered almonds, roughly chopped
  • 1/4 cup chopped puff pastry bits

Instructions

  1. If you are making the puff pastry: Stir together flour and salt in a large bowl. Cut butter into small pieces and add to the bowl. Pour in water gradually, while stirring the mixture - add just enough water to get everything combined into a rough dough. You don't want the butter creamed into the flour, you want it to stay in chunks - this is what causes the dough to form those beautiful, flaky layers in the oven.

    2. Turn the mixture out onto a floured surface. Form it into a rectangle, and gently roll out until it's about a half inch thick. Fold the bottom third up into the middle, and fold the top third down on top of that. Turn it 90 degrees, add more flour to prevent sticking, and roll it out again. Repeat this process three more times, adding flour as needed. Wrap the dough in plastic wrap and refrigerate while you prepare the filling. You can also freeze it for about 10 minutes before using, if your filling is already made.

    Note: While making this dough, you need to work quickly, with very cold water and butter, to prevent the butter from melting into the dough. 

    3. Pit the cherries and cut them into halves or quarters - a mix of both is good. Place in a small sauce pan over medium heat with 1/4 cup water, orange juice and cloves. Stir occaisonally, until the cherries have gotten soft and released a lot of juice. Combine 1 Tbsp of water with the cornstarch, and add to the pot of cherries. Continue stirring until the cherry mixture has thickened, and then remove from heat.

    4. Soften cream cheese in the microwave in a small bowl, so that it's soft enough to be piped, but not melted. Transfer to a piping bag. 

    5. Roll the puff pastry out into a sheet, about 1/4 inch think. Cut 1 1/2 inch squares and place them into two un-greased mini muffin tins. Refrigerate the pans while you make the streusel topping - there should be a decent-sized section of puff pastry left over to use for this.

    5. Spread the brown sugar out on a cutting board, and add a 3 inch piece of the puff pastry. Coat it with brown sugar, and then start chopping it into tiny pieces. The brown sugar keeps it from sticking to itself, and becoming impossible to work with. Keep working until you have 1/4 cup of chopped puff pastry. Scoop this into a bowl with the excess brown sugar. Chop slivered almonds into small pieces and add to the mixture. Stir until well combined. 

    6. Assemble the tarts: Pipe about 1/2 tsp of cream cheese into the center of each square of puff pastry. Top with 1 tsp of the cherries, followed by 1/2 tsp of the streusel topping. Bake at 350 degrees for 15-20 minutes, or until the edges of the puff pastry turn a golden brown. 


Sunshine Curry Crispy Chicken Sandwiches

Sunshine Curry Crispy Chicken Sandwiches

Sandwiches are my favorite food. Hands down, no question – food enveloped in other food is the best way to eat anything. I’m including quesadillas and hot dogs in this category because I love them, but I promise I won’t fight you if you don’t believe they’re sandwiches. One thing I think we can all agree on is that a really good crispy chicken sandwich is one of the best things in life. When I’ve got flavorful breading with a nice crunch surrounding moist, perfectly cooked chicken, all enveloped in a hearty roll with delicious toppings, there is almost nothing I would rather eat.

Marinating chicken in a sour cream mixture is a great way to help ensure that the chicken stays tender through the cooking process. When I was working on my Sunshine Curry Dip recipe, it occurred to me that it would make a delicious chicken marinade, so I plopped a bunch into a Ziplock with a couple of raw chicken breasts, and let it sit overnight to get all delicious. I breaded the chicken and baked it in the oven, because I’m not always up for the process that is deep frying. Not having a deep fryer, I just do it on the stove, and it’s a bit of a mess – really only worth it when I’m making food for people besides myself and Bobby. So, baked crispy chicken sandwiches are where it’s at these days.

It goes without saying that baking something in the oven will never yield the same results as frying it. However, there are a lot of methods out there for baking chicken to get perfectly crispy breading that doesn’t get soggy or fall apart. For this recipe, I dried my chicken breasts with paper towel to remove a lot of the marinade, leaving just enough to help the breading stick. Then I dredged the chicken pieces in the breadcrumbs, set them on a cooling rack, and refrigerated the whole thing for about a half hour. Here’s the really important part: I took the cooling rack out of the refrigerator, plopped the whole thing on a tray lined with foil, and lightly spritzed each piece of chicken with olive oil spray. This method keeps the chicken from sitting directly on the tray, so the breading on the underside doesn’t get soft. Another bonus is that you barely need to use any oil: just a quick spray on each side (flip them gently) was enough for beautiful color and proper crispiness.

For the breading, I put curry powder along with salt, pepper, and paprika into some Italian breadcrumbs, to help the flavor from the marinade really shine through. I topped my sandwiches with avocado mashed with a little lime and cayenne, and a cabbage slaw, which is really just the Sunshine Curry Dip stirred in with shredded cabbage, to give the sandwich a little extra crunch and tang. (‘Crunch and Tang’ sounds like one of those weird animal duos, like a bear who is bffs with a monkey). The tart flavor of the cabbage slaw works beautifully with the mild avocado, and the combination of textures from the toppings and the crispy chicken really make this sandwich a winner.

This concept would be easy to double/triple for a large group. You could just set the chicken out on a platter and let everyone go nuts with the toppings. This idea works especially well for picky eaters. Apparently there are people in the world who don’t want avocado on a sandwich – you really meet all kinds these days. I served these sandwiches with potato chips, but you could just as easily throw a salad on the side, if you’re not trying to completely ruin your diet. Although I mean, the chicken is baked, and cabbage and avocado are involved, so this sandwich is basically a salad all by itself. I’ll leave it at that and let you contemplate if a salad on bread is still a salad. Although your head probably still hurts from trying to decide if a quesadilla is a sandwich.


Sunshine Curry Crispy Chicken Sandwiches

Servings 4 sandwiches

Ingredients

Sunshine Curry Dip (Marinade)

  • 1 1/2 cups sour cream
  • 6 Tbsps Greek yogurt
  • 1 1/2 tsps curry powder
  • 1 1/2 tsps Sriracha
  • 1/4 tsp turmeric
  • 2 tsps white balsamic vinegar
  • 1/2 Sunshine Spice Blend

Sunshine Curry Crispy Chicken Sandwiches

  • 2 chicken breasts
  • 1 cup Italian bread crumbs
  • 1 Tbsp curry powder
  • 1/2 Tbsp paprika
  • 1/4 tsp turmeric
  • 1 1/4 tsp salt
  • 1/2 tsp pepper
  • 2 avocados, mashed
  • 1 Tbsp lime juice
  • 1/2 tsp red pepper flakes
  • 2 cups shredded cabbage
  • 4 sandwich rolls

Instructions

  1. Mix together all of the ingredients for the Sunshine Curry Dip. Add about 1 cup to a gallon-size Ziplock bag. Slice each chicken breast into 3-4 large pieces, and add to the bag. Seal and refrigerate for at least 4 hours, overnight if possible. 

    2. Stir together bread crumbs, curry powder, paprika, turmeric, 1 tsp of salt, and the pepper in a shallow bowl. When you are ready to bread the chicken, remove pieces from the marinade and wipe most of the marinade off - leave just a little to help the breading stick. Dredge them in the breadcrumb mixture until well coated, and set them on a cooling rack. Place the cooling rack in the refrigerator for half an hour, to help the breading set further. 

    3. Remove the cooling rack from the refrigerator, and place on a baking sheet lined with foil. Lightly spray each piece of chicken with olive oil cooking spray, and bake at 400 degrees for 8 minutes. Remove the tray from the oven, gently flip the pieces of chicken, and give them another spray of olive oil. Bake in the oven for another 8 minutes. 

    4. While the chicken is baking, prepare the toppings. Mash together the avocado, 1/4 tsp salt, lime juice, and red pepper flakes, and set aside. Stir the shredded cabbage into 1/3 cup of the leftover Sunshine Curry Dip. 

    5. When the chicken is done, allow to cool slightly, and then build your sandwiches.  

Vanilla Butterfly Cupcakes

Vanilla Butterfly Cupcakes

Cupcakes have been officially “over” for a while now, but that hasn’t stopped me from eating plenty of them. Trendy desserts are very different from trendy clothes, because even after they stop being the “it” sweet treat, they’re still wonderful. Cupcakes will always be endlessly customize-able, and also the easiest way to transport and share cake. No one turns down a good cupcake, so they’re still worth thinking about – even if they’re not the treat du jour like mermaid toast and cookie cakes.

The most overlooked thing about cupcakes is undoubtedly the cake part itself. Everyone gets carried away with cute toppings and frosting techniques, and a lot of the time the cake is a little dry and the flavor is off. I like to bake as much stuff as I can from scratch, but for basic yellow and chocolate cake, box mixes are a great choice. They require much less work than scratch cakes, they yield consistently nice results, and they’re pretty inexpensive.

When I was about 7, I had a Disney cookbook with a cupcake recipe that I made over and over. I loved that book and that recipe, but the cupcakes were terrible. They were dry, dense, and always had pockets of baking soda that never quite got mixed in properly (this cupcake obsession happened way before my mom got a KitchenAid). I had no idea that the cupcakes were so bad, because I just wanted to eat as much sugar as I could get my hands on. Any cupcake can be improved by putting a tub of frosting on it, like I used to. That 7-year-old metabolism was a beautiful thing, and I miss it.

Fast forward 20 years or so, and I’ve learned that baking a good scratch cake requires specific methods of adding and mixing ingredients. The recipe I like for scratch yellow cake is Fluffy Homemade Vanilla Cake from The Spruce, and the only thing I’ve changed is to increase the vanilla extract. The process involves creaming the butter and sugar until they’re fluffy, adding eggs one at a time, and alternating adding milk and dry ingredients until the batter is smooth. It’s more work than opening a box of mix, adding three other ingredients, and letting the mixer go for a few minutes, but it’s worth it. It’s a great recipe if you’re in the market for a scratch vanilla cake, or if box mixes just aren’t your jam.

Now that we’ve covered the cake part, I can tell you about the decorations that make these cupcakes special. I actually dreamed them up for my boss’ daughter’s birthday, and I couldn’t be happier with how they turned out. She wanted butterflies on the cupcakes, and I didn’t really have time to run out and buy butterfly decorations. Instead, I found a simple butterfly image online and printed it out to use as a template. I used melted white chocolate to pipe the butterflies onto wax paper laid over the template. The best part? You can be absolutely terrible at piping and still have these come out nicely. Since you place them on the cupcakes piping-side-down, they look smooth and no one knows how much you struggled to stay in the lines. After they hardened, I broke them in half, and positioned the wings in the frosting at an angle, to make them look like butterflies perched on top.

I piped a simple buttercream frosting in the same rose shaped swirl I used for my Upside Down Lemon Raspberry Pavlovas, because I love the idea that the butterflies are sitting on sweet pink roses. The method I used for the butterflies can be used to make just about any decoration you can think of – I think the inspiration was from a Pinterest post about spiderweb cupcake toppers, done a similar way. These cupcakes are perfect for little kid birthdays, but they’re not cartoon-y at all, so they’d also make great desserts for a baby shower or an adult birthday. They’re an especially good option if complicated, cutesy decor isn’t your forte, and people will just love how adorable they are – and how great they taste!


Vanilla Butterfly Cupcakes

Cake recipe adapted from The Spruce "Fluffy Homemade Vanilla Cake"

Ingredients

Cupcakes

  • 2 2/3 cups flour 345g
  • 1/2 tsp baking soda
  • 1/2 tsp baking powder
  • 1 tsp salt
  • 1 cup unsalted butter
  • 1 3/4 cups sugar
  • 3 tsps vanilla extract
  • 4 large eggs
  • 1 cup milk

Frosting

  • 1/2 cup unsalted butter
  • 1 1/2 cups powdered sugar - divided use
  • 1/2 Tbsp milk
  • 1/4 tsp vanilla
  • 4 drops red food coloring
  • 2 dashes salt

Butterflies

  • white chocolate, melted

Instructions

  1. Sift together flour, baking soda, baking powder and salt. Set aside. 

    2. Cream butter in a mixer on low speed. Add sugar and vanilla, and beat on medium speed until fluffy, this will take about 10 minutes. 

    3. Add eggs, one at a time, making sure that each is fully incorporated before adding the next one. Mix for five more minutes at medium speed, until batter is light and airy. 

    4. With the mixer still running, add 1/4 of the dry ingredients. When it is fully incorporated, add 1/3 of the milk. Continue alternating dry ingredients and milk until everything has been added to the batter. Stop and scrape down the sides of the bowl as needed. 

    5. Pour batter into cupcake tins, lined with cupcake papers. Bake at 350 degrees for 15-20 minutes, until the tops are golden. 

    6. While the cupcakes bake, prepare the frosting. Cream together butter and 1 cup of the powdered sugar. Stir in vanilla, salt, and milk.

    7: Stir in remaining powdered sugar. When sugar is completely incorporated, add food coloring and stir until frosting is uniform.

    Optional, but highly recommended: Whip frosting in a mixer on high until very fluffy, about five minutes. Frosting keeps well in the refrigerator for several weeks.

    8. To make the butterflies, lay a sheet of wax paper over a printed template of butterfly shapes - see the blog post for a link to a good one! Melt white chocolate chips in a bowl in the microwave, stirring every 20 seconds. Transfer to a piping bag, and pipe the white chocolate over the templates. If you don't have a piping bag handy, you can also melt the white chocolate chips in a Ziplock bag, and cut a small hole in the corner to pipe through. Let butterflies harden completely before peeling them off the wax paper, and setting on the cupcakes. 


Vegan Tacos: Buffalo Cauliflower and Green Lentil

Vegan Tacos: Buffalo Cauliflower and Green Lentil

With Cinco de Mayo upon us, it only makes sense to post a taco recipe today. Actually, two taco recipes, because I’m bad at making food decisions. The correct answer to “Which taco recipe should we make?” will always be “All of them.” My friend Amanda, who possibly loves cooking more than I do, posted a pic of these tacos on her Insta recently, and I knew I had to get the recipes. Both are vegan, which isn’t typically in my taco wheelhouse, but we all know I jump at any opportunity to make vegetables taste better. Thank goodness for that, because these tacos are unbelievably delicious, and, you guessed it – healthy. One is green lentil and walnut based, the other has buffalo cauliflower “wings,” and they really do mimic the kind of textures you get with beef and chicken tacos. We dressed them up with guacamole, taco sauce, cilantro, shredded cabbage, lime, and fresh onion, and they tasted like all good tacos do: heaven.

In the past I’ve been skeptical of these so-called “buffalo cauliflower wings,” but then I made them, and tried them in a taco, and they’re great. They’re not quite a dupe for boneless chicken wings, but they’re way closer than I ever could’ve imagined. The recipe for the buffalo cauliflower taco is adapted from Gimme Delicious’ Baked Buffalo Cauliflower Wings. Baking instead of frying them makes them healthier and easier, although I suppose you could fry them if you wanted to. After baking, we coated them in Texas Pete Wing Sauce, although you could definitely try this with barbeque sauce, if you don’t love spicy food. The cauliflower itself gets quite soft, but the battered outsides get nice and crispy. This makes it feel very substantial in the tacos, and you can almost forget that you’re eating a pile of cauliflower.

The second taco recipe was my favorite of the two, because the flavor was every bit the kind of wonderful, taco meat flavor I wanted. It starts with cooked green lentils, blended with walnuts and spices, and quickly becomes a perfect taco filling that I never would have dreamed up on my own. The spices are a blend of chili powder, cumin, paprika, salt, and pepper, with a little tomato paste added. Since the lentils and the nuts are all fairly mild, it’s easy to give them a lot of bold taco flavor. I think they hold the flavors from the spices better than beef or chicken ever would, so you don’t need a load of extra sauce on top. You can use a mix of walnuts and cashews if that’s what you have on hand, and I’d guess a different kind of lentil would yield similar results, although I haven’t tested that theory. The recipe for this taco is adapted from Oh She Glows’ Ultimate Green Taco Wraps. She uses lettuce as wraps instead of tortillas, but I love carbs a little too much for that.

You can go crazy with the toppings, and add beans, corn, salsa – whatever floats your boat. We topped the buffalo cauliflower tacos with shredded cabbage, diced onion, cilantro, guacamole, and Panera’s Asian Sesame Dressing, which added a really nice hint of sweetness to the tacos. The green lentil tacos were topped with mild Ortega taco sauce, guacamole, diced onion and cilantro. We used Whole Foods guacamole, because I’m obsessed with it, and it’s honestly cheaper than making your own fresh guac. I’d go so far as to say that I like it more than Chipotle guac, which is really the best recommendation I can give anything.

I plan to repeat these tacos for dinner on loads of nights that don’t happen to fall on Cinco de Mayo. They’re very filling for being mostly veggies, and they’re quick to make. The buffalo cauliflower is probably the most labor-intensive part, and that really just involves chopping cauliflower, stirring together the batter and coating the cauliflower in it, before baking it in the oven. Either or both of these recipes are a perfect addition to any taco night. Meat eaters will love them, regardless of their meat-free status, because they’re packed with delicious flavor and great textures.

We made a whole day of creating this blog post, because tacos are just better with good drinks and friends, (and a vat of guacamole that doesn’t need to be photographed, so you can dive right in). While Amanda and I were making the tacos, Bobby was making sure we had a constant supply of margaritas. What a guy, am I right? I’m not saying margaritas are compulsory for a good taco night, but they’re definitely the cherry jalepeno on top, as far as I’m concerned.


Buffalo Cauliflower Bite Tacos

Adapted from Gimme Delicious' Baked Buffalo Cauliflower Wings

Ingredients

  • 1 head of cauliflower
  • 3/4 cup flour
  • 3/4 cup almond milk
  • 2 Tbsps garlic powder
  • 1 tsp paprika
  • 1 tsp cumin
  • 1 tsp salt
  • 1/2 tsp pepper
  • 1/2 cup wing sauce (I used Texas Pete Wing Sauce)
  • 6 inch corn tortillas
  • shredded cabbage
  • guacamole
  • cilantro, chopped
  • diced white onion
  • Asian Sesame Dressing from Panera, or dressing of your choice

Instructions

  1. Chop the cauliflower into bite size florets. Preheat oven to 450 degrees.

    2. In a large bowl, stir together almond milk, flour, and all of the seasonings. Add the cauliflower florets to the bowl and stir until well coated. Spray a baking sheet lined with foil liberally with non-stick cooking spray. Pour the cauliflower onto the sheet and spread into a single layer. Bake for 10 minutes, remove from the oven and rotate the cauliflower, and then bake for an additional 10 minutes. 

    3. Remove the cauliflower from the oven and drizzle the wing sauce evenly over top. Bake for another 20 minutes.

    4. While the cauliflower is cooking, prepare your choice of toppings for the tacos.

    5.Warm tortillas on the stove or in the microwave, and fill with buffalo cauliflower, and top with guacamole, onion, cilantro, cabbage, and dressing, or whatever suits you!


Green Lentil and Walnut Tacos

Recipe adapted from Oh She Glows' Ultimate Green Taco Wraps with Lentil-Walnut Taco Meat

Ingredients

  • 1 1/4 cups cooked green lentils 3/4 cup uncooked
  • 1 cup walnuts
  • 1 Tbsp olive oil
  • 3 Tbsp water (add more if it seems dry)
  • 1 Tbsp tomato paste
  • 1 tsp paprika
  • 1 tsp chili powder
  • 1 tsp cumin
  • 1 tsp salt
  • 1/2 tsp pepper
  • 6 inch corn tortillas
  • cilantro, chopped
  • guacamole
  • taco sauce (I used Ortega, mild)
  • white onion, diced
  • lime

Instructions

  1. Cook green lentils on the stove. Add them to a small pot with 1 1/2 cups water, bring to a boil, and then reduce to a simmer. Cook for 20-30 minutes until lentils are tender. Preheat the oven to 300 degrees and spread walnuts on a baking sheet lined with foil. Toast in the oven for about 10 minutes. Check them after the first 5 minutes, and then keep an eye on them so they don't burn.

    2. Blend lentils, nuts, olive oil, and all spices in a food processor or blender until well combined and a thick paste forms. 

    3. Warm the lentil "meat" up in a pan on medium heat for a few minutes, or just microwave. Add to tortillas with taco sauce, cilantro, onion, guacamole, and a squeeze of lime. 

Sweet Potato Summer Salad: Two Ways

Sweet Potato Summer Salad: Two Ways

I bought a new car a few days ago, because my old one was declared totaled after a fender bender. And on the day I bought my car, my laptop died. 2017 is perhaps not going to be my year after all. In the midst of misfortunes such as these, I turn to food to lift my spirits, because food rarely fails me. While I couldn’t be online blogging, I was able to test some new recipe ideas to dazzle you with. Today’s recipe is unusual in the best way, because it’s not a combination of flavors that you see a lot, but I’m so happy it’s in my life now.

I give you Sweet Potato Summer Salad. No longer will I stand for sweet potatoes being associated only with the holidays. Mixed with the right flavors, they’re perfect for spring and summer. This salad is a mix of roasted sweet potato, strawberries, apples, and spicy toasted pecans, tossed in an orange poppy seed dressing. I’ve adapted the Orange Poppy Seed Dressing recipe from Skinny Ms., reducing the honey to keep the whole dish from being too sweet. This dressing adds a light, zingy touch of citrus to the heartier sweet potatoes, and ties it together with the other fruits. The mix of crisp apple, soft, sweet strawberry, and rich sweet potato, with the crunch of the pecans and poppy seeds, makes this dish a textural dream. I highly recommend throwing it all in a bowl and serving it as is, but if you want to add a little something extra, I have a few ideas for you.

This salad works beautifully as a component in more traditional salads, served over a bed of greens and drizzled with a little more of the dressing. You could add meat or more nuts and seeds to make it more of a meal, but it definitely doesn’t need it. Alternatively, Sweet Potato Summer Salad also makes a fabulous dessert. I stirred little cubes of pound cake in with it, which added the perfect boost of sweetness and made the whole thing feel more decadent. You could take the dessert concept a step further and top yours with whipped cream or ice cream, with an extra drizzle of the dressing to balance the sweetness. Both versions offer a very interesting take on their respective food groups (if you count dessert as a food group, which I do). Will it matter if you omit the poppy seeds? Of course not, but in my opinion they add elegance to the salad and a striking contrast to the colorful fruit. You could also experiment with substituting chia seeds, if that’s what you have on hand.

This dish is complex and delicious, and you can still feel good about eating it. Even as a dessert it’s mostly a serving of fruit, and the dressing is packed with flavor, so you don’t need a lot of it. To be fair, I feel good about eating just about everything except coconut and bleu cheese, but it’s nice to have healthy options when summer is coming. Really fast. In less than a month. I feel like everyone I talk to lately is all “how is it May already?” Sweet Potato Summer Salad is the perfect dish to help usher in the new season, so we can all wonder less about where the year has gone, and wonder more about whether or not there’s enough left for a second helping!

5 from 1 vote
Print

Sweet Potato Summer Salad

Orange Poppy Seed Dressing recipe adapted from Skinny Ms.

Ingredients

Sweet Potato Summer Salad

  • 1 large sweet potato
  • 1/4 cup pecans
  • 1/2 Tbsp honey
  • 1 oz orange juice
  • 1/4 tsp cayenne
  • 1/2 granny smith apple, peeled
  • 8-10 large strawberries

Orange Poppy Seed Dressing

  • 1/4 cup orange juice
  • 1 Tbsp honey
  • 2 Tbsps olive oil
  • 1/2 Tbsp poppy seeds
  • 1/4 tsp salt
  • 1/4 tsp pepper
  • 1 tsp Dijon mustard

Instructions

  1. Preheat the oven to 400 degrees. Peel and cube the sweet potato, and place on a baking sheet lined with foil. Drizzle about a tsp of olive oil over top and stir the potatoes around until they're all coated. Sprinkle brown sugar and salt over top. Bake for 15 minutes, remove from the oven and stir the potatoes around on the tray, and then bake for an additional 15 minutes. 

    2. Roughly chop the pecans, and spread them on a baking sheet lined with foil. Place in the oven to toast for about 5 minutes - they can go in at the same time as the sweet potatoes. They may need an extra minute or so to get nice and toasty, but be careful not to burn them. Stir together 1/2 Tbsp of honey, 2 oz of orange juice, and the cayenne. Stir toasted pecans into this mixture, and then spread them out on the baking sheet to dry. After the sweet potatoes are done cooking, you can set the tray of pecans in the warm oven, with the door slightly ajar, to help them dry.

    3. Peel and cube the apple, and slice the strawberries into bite-sized chunks. Whisk together the dressing ingredients, until well combined. The poppy seeds will rise to the top, so you'll need to re-whisk it before pouring over the salad. 

    4. Add the potatoes, apple, strawberries, and pecans to a bowl, and toss with about half of the dressing. The other half of the dressing can be drizzled over greens topped with the sweet potato summer salad, or ice cream/pound cake, mixed with the salad. Both versions are delicious!


Sunshine Curry Dip

Sunshine Curry Dip

Chips and dip is my snack of choice when I need something to munch on while I watch TV. It’s impossible to binge watch The Great British Bake Off (or Baking Show – call it what you will) on Netflix without a snack, for obvious reasons. What I’m dipping my chips in changes all the time, depending on what I’m feeling. There are the obvious choices, like guacamole, salsa, queso, sour cream and onion dip – you get the idea. And then there are the dip options that are completely unique and invented by my dad for the sole purpose of being gobbled down with a new episode of your favorite show. I don’t know if he’ll appreciate that I’ve named his creation Sunshine Curry Dip, but I think that’s really the best way to describe it.

This recipe starts with a base of sour cream and Greek yogurt, although I imagine you could use all sour cream or all Greek yogurt, with similar results. It’s got a good amount of curry powder, sriracha, white balsamic vinegar, and a little turmeric. White balsamic vinegar is better for this recipe than a regular balsamic vinegar, because it’s milder, doesn’t overwhelm the other flavors, and doesn’t discolor the other ingredients. You could potentially sub white wine vinegar for the white balsamic, although I will admit I haven’t tested it.

The last ingredient, and also a key component of naming this recipe, is a dash of Spice & Tea Exchange’s Sunshine Spice Blend. There’s not really a substitute for this blend that I’m aware of. It adds an interesting combination of ginger and citrus notes that combine with the curry for a unique flavor twist. The result of all of this is a light, tangy, slightly spicy, curry-infused cream that you will never be able to stop eating. I had to physically remove myself from the bowl in the photos to keep from eating all of it as soon as I was done taking the pictures.

(Not sponsored – My bottle was from Ocean City and not Florida, like the ones I’ve linked to, but they’re the same product).

I take a lot of the photos for this blog in my parent’s kitchen, because my tiny apartment kitchen doesn’t really satisfy my cooking needs. Often I’ll take home some of the food I’ve made for a post for dinner/dessert. My parents wouldn’t let me take any of the remaining Sunshine Curry Dip home, because they wanted it all for themselves. Luckily for them, I know the recipe now.

This dip is a great choice if you just want something a little more unusual, or if you’ve eaten chips and guac for dinner too many days in a row and need a change. It can be made spicier or milder with small adjustments to the proportions of sriracha to yogurt, and it goes well with a variety of dipping implements. My parents like it with Jackson’s Honest Sweet Potato Chips; I prefer tortilla chips or celery. Whatever you’re dipping in it, I assure you that you’ll become just as hopelessly addicted as I am. This is a dip that you can take to all those summer parties coming up, and know that you won’t find another bowl of the same thing already on the table. Unless of course you and all your friends read here, in which case, hello, and thanks for stopping by. Let me know if you need the location for the support group of people who made this dip, ate it all, and are suffering from withdrawal.

Sunshine Curry Dip

Ingredients

  • 1 1/2 cups sour cream 323g
  • 6 Tbsps Greek yogurt 75g
  • 1 1/2 tsp sriracha
  • 1 1/2 tsp curry powder
  • 1/4 tsp turmeric
  • 2 tsps white balsamic vinegar
  • 1/2 tsp Sunshine Spice Blend

Instructions

  1. Combine all ingredients and stir until well mixed. Dip with your favorite chips or veggies!


Chocolate Peanut Butter Rice Krispie Treats: No Marshmallow, Extra Crispy!

Chocolate Peanut Butter Rice Krispie Treats: No Marshmallow, Extra Crispy!

This recipe was inspired by Mom on Timeout’s No Bake Snickers Crunch Bars, which essentially uses this version of a Rice Krispie treat as a base on which to put peanut buttery nougat and caramel. That sounds lovely and it tastes delicious – of course I tried it, how could I not? However, I found that the only part I was really interested in eating was the Rice Krispie part. I was that person who was just picking off the bottom and top layer and leaving the rest of the dessert on my plate. I know, I’m appalled with myself for wasting so much of a perfectly nice dessert. I set out to turn my favorite part into its own dessert, and with a few minor changes to the original recipe, I’ve achieved what I think is my favorite version of a Chocolate Peanut Butter Rice Krispie Treat.

These are unlike any Rice Krispie treats you’ve had. They’re the crispiest, crunchiest version out there, without being even a little hard or brittle. They’re also loaded with peanut butter and chocolate, so they taste exactly like one of those Little Debbie Nutty Bars. I’m pretty sure if you replaced the peanut butter with caramel, these would essentially be homemade Star Crunch (I may have had a Little Debbie problem growing up). The interesting thing about these treats is that they have absolutely no marshmallow, so they’re not chewy like you might expect. They’re held together with melted chocolate and peanut butter, and chilled briefly to make sure they hold their shape.

This recipe is wonderful because it calls for all of 5 ingredients, and takes 5 minutes to make. It’s made with semi-sweet chocolate, milk chocolate, peanut butter, peanut butter chips, and Rice Krispies. It really doesn’t get much simpler than that. Bobby, who has been known to give speeches about the virtues of Reese’s Cups, loved these, so they’re certain to satisfy any chocolate and peanut butter aficionado. You melt together the semi-sweet chocolate, peanut butter chips, and peanut butter, stir in the Rice Krispies and then press it into a pan. Top with a thin layer of melted milk chocolate, and drizzle with some melted peanut butter chips, and chill for 15 minutes. It’s the last-minute dessert you’ve always  dreamed of, and it’s a little more impressive than plain Rice Krispie treats.

The milk chocolate spread on top is essential to giving these the right amount of sweetness, and for holding them together properly. You can skip the peanut butter drizzle if it seems like more work that you don’t want to do, but I like it because otherwise people assume that this is an all-chocolate dessert, and then they take a bite and feel confused about their lives. I do that to myself enough, I don’t want it to happen to other people, too. The original recipe calls for butterscotch chips and Cocoa Krispies, so this concept is flexible to what you have on hand, and it’ll still end up delicious. These would be perfect to have kids help with, since this recipe is the opposite of complicated, and there’s a lot of stirring and spreading things into a pan involved. And since there’s no baking time, there won’t be any complaining about not being able to eat them immediately. Chilling them is a formality that helps them hold their shape, but we all know that I only put up with that since I needed to take pictures. If I’m just making these for family, we eat them in their just-pressed-into-the-pan state, gooey and falling apart slightly.

5 from 1 vote
Print

Chocolate Peanut Butter Rice Krispie Treats: No Marshmallows

Recipe adapted from Mom on Timeout's No Bake Crunchy Snickers Bars

Ingredients

  • 4 oz semi-sweet chocolate chips
  • 5 oz peanut butter chips - divided use
  • 1/2 cup peanut butter 128g
  • 4 cups Rice Krispies
  • 3 oz milk chocolate chips

Instructions

  1. Melt together semi-sweet chocolate chips, 4oz of peanut butter chips and peanut butter in the microwave, stirring after every 15 seconds. 

    2. Pour Rice Krispies into the melted chocolate peanut butter mixture and stir until well mixed.

    3. Pour mixture into an 8x8 pan lined with wax paper. Smooth with the back of a spoon into an even layer. 

    4. Melt the milk chocolate chips in the microwave, stirring after every 10 seconds. Spread in a thin, even layer over the top of the Rice Krispie treats. Drizzle with melted peanut butter chips. Refrigerate for 15-20 minutes. Remove from pan, and cut into squares. 


Asparagus Pancetta Gnocchi with Ricotta Sauce

Asparagus Pancetta Gnocchi with Ricotta Sauce

I was searching for asparagus inspiration, because it’s a major spring vegetable, and I almost sort of like it. I’m trying to transition that ambivalence to full-on like. This recipe sort of hides the asparagus, but it does still have it, so that’s sort of a step in the right direction, yes? I was originally looking at Smitten Kitchen’s Spring Asparagus Pancetta Hash – can you tell I’m a fangirl? I only mention her like every 5th blog post. I was all set to just make the recipe to see if I liked it, but then I started tumbling into the depths of Google and found Gnocchi with Asparagus and Pancetta from My Recipes. And then I started thinking about sauces, and things really spiraled out of control. My search for a light, but flavorful, asparagus-based recipe morphed into a pasta dish with a creamy sauce. I can’t tell you how often this happens to me. Pasta dishes with creamy sauce are very high on my list of the good things in life.

The creamy sauce for this dish isn’t a typical alfredo. It’s ricotta-based, with lots of fresh garlic and basil, and some dried tarragon. It’s about the lightest creamy sauce you can make that still uses whole-milk cheese. This keeps the dish from feeling too heavy for the bright spring days we’ve been having. If you let it thicken on the stove long enough, after adding in the cooked pancetta, asparagus, and gnocchi, you end up with a kind of cross between creamy pasta and a warm, delicious potato salad. The pillow-y gnocchi goes perfectly with the thick sauce, and the asparagus adds bursts of crunch in each bite.

I cooked the pancetta first, so I could toss the asparagus into the skillet afterwards, with all that delicious pancetta grease. I chopped the asparagus into 1-inch pieces, and let them cook for about 5 minutes. This let them get just barely soft on the outside, while picking up the lovely pancetta flavor. I tend to find asparagus a little bitter, but cooking it like this made me want to just eat it straight from the pan. The only thing I’d change about this recipe for next time would be doubling the asparagus, because it really did sort of disappear among the gnocchi.

This dish makes a fairly small amount, about two good-sized portions, so it would be a perfect date-night option. If you want to get all fancy and cook for someone you like, I’m pretty sure they’d want to see you again after this one. It’s easy to make, but it sounds and looks so much more impressive than it really is. This isn’t quite a one-pot recipe, but it’s close. You can fry the pancetta, then cook the asparagus, and then make the sauce right in the same pan. The only other thing to do is cook the gnocchi, but even that only takes about 5 minutes. If gnocchi isn’t your favorite, you could try this dish with regular pasta or maybe some tortellini, because you can never have too much cheese. You can also use bacon in place of the pancetta.

The week leading up to Easter was one of the busiest I’ve had in a long time, so I’ve been eating on the go a lot. It felt great to get back into the kitchen and come up with something new and delicious, that also didn’t take a million years to cook. I had my Asparagus Pancetta Gnocchi for dinner yesterday, and it was such a nice balance of comforting (after a very busy week), and light and fresh. I have a feeling I’ll be making this one again soon – with more asparagus next time!

Asparagus Pancetta Gnocchi with Ricotta Sauce

Adapted from Asparagus Pancetta Hash from Smitten Kitchen, and Gnocchi with Asparagus and Pancetta from My Recipes. 

Ingredients

  • gnocchi
  • 1/2 medium yellow onion, diced
  • 3 cloves garlic, minced
  • 1 cup ricotta cheese
  • 1/2 cup whole milk
  • 4 oz pancetta
  • 1/2 tsp dried tarragon
  • 1/8 tsp dill
  • 1/2 tsp salt
  • 1/2 tsp fresh ground black pepper
  • 8-10 fresh basil leaves, thinly sliced
  • 1/2 lb asparagus

Instructions

  1. Dice the pancetta and cook in a skillet over medium heat, stirring occasionally, until crispy. Remove to a plate lined with paper towel to soak up excess grease. Slice the asparagus into one-inch sections and add to the skillet, after removing the pancetta. Cook on medium heat for about 5 minutes, until the outside is slightly tender.

    2. While asparagus is cooking, chop onion and garlic. Remove cooked asparagus from the pan and add onion and garlic.  There should still be plenty of grease in the skillet from the pancetta, but you can add a Tbsp of olive oil if it seems too dry. Cook the onion and garlic until the onion softens. Start cooking the gnocchi according to the directions on the package (typically, add to a large pot of boiling water and let cook for 4-5 minutes, until all the gnocchi floats to the top).

    3. Add ricotta and milk to the onion and garlic. Stir gently until the ricotta softens and becomes smooth. Lower heat, and stir in gnocchi, pancetta, and asparagus. Add salt, pepper, basil, tarragon, and dill, and stir until well-mixed. Add more salt to taste. If you prefer a thinner sauce, it should be ready to serve at this point. For a thicker sauce, let cook on low for another minute or two before serving.