Perfect Flatbread

Perfect Flatbread

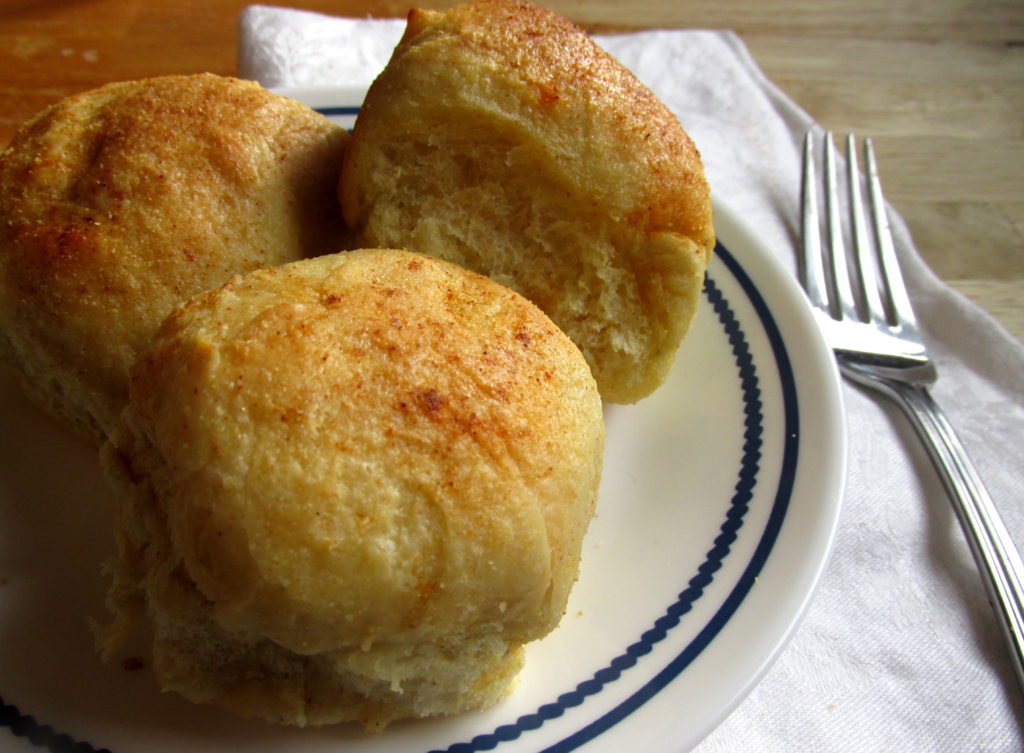
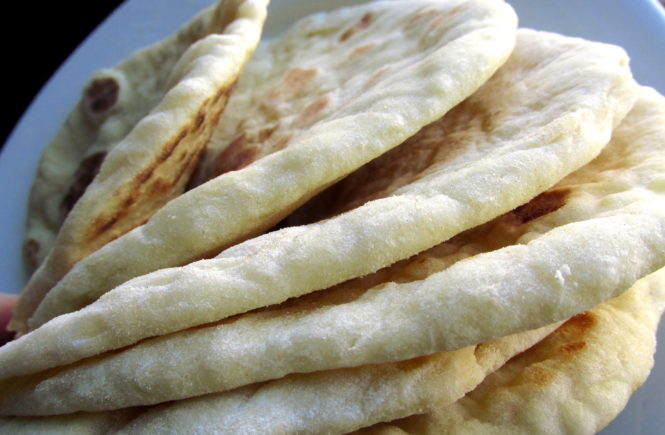
I began my hunt for a great flatbread recipe online, and didn’t have to try too many before I found a seriously amazing option. This recipe is directly from Mel’s Kitchen Cafe, and I wanted to make it and post it here to make sure this recipe gets the attention it deserves.  I incorporate it into a lot of my own dishes. This flatbread is light and soft, with the right amount of chewy, and most importantly, flavorful. I’ve tried a few flatbread recipes that got the texture right, but were bland and boring. This flatbread recipe is truly delicious by itself, or wrapped around just about anything you can think of.

Flatbread in grocery stores is criminally expensive. It’s one of those things that I never buy because I know I can make it on my own for a small percentage of grocery store prices. The best part? This flatbread recipe is way better than anything you buy in the store, and you can eat it at its absolute freshest, right out of the skillet. If there’s something better than warm, fresh bread, with a slight crunch on the outside edges, then I just haven’t found it yet. I suppose that goes for all bread, but flatbread doesn’t need to be sliced or buttered…just eaten!
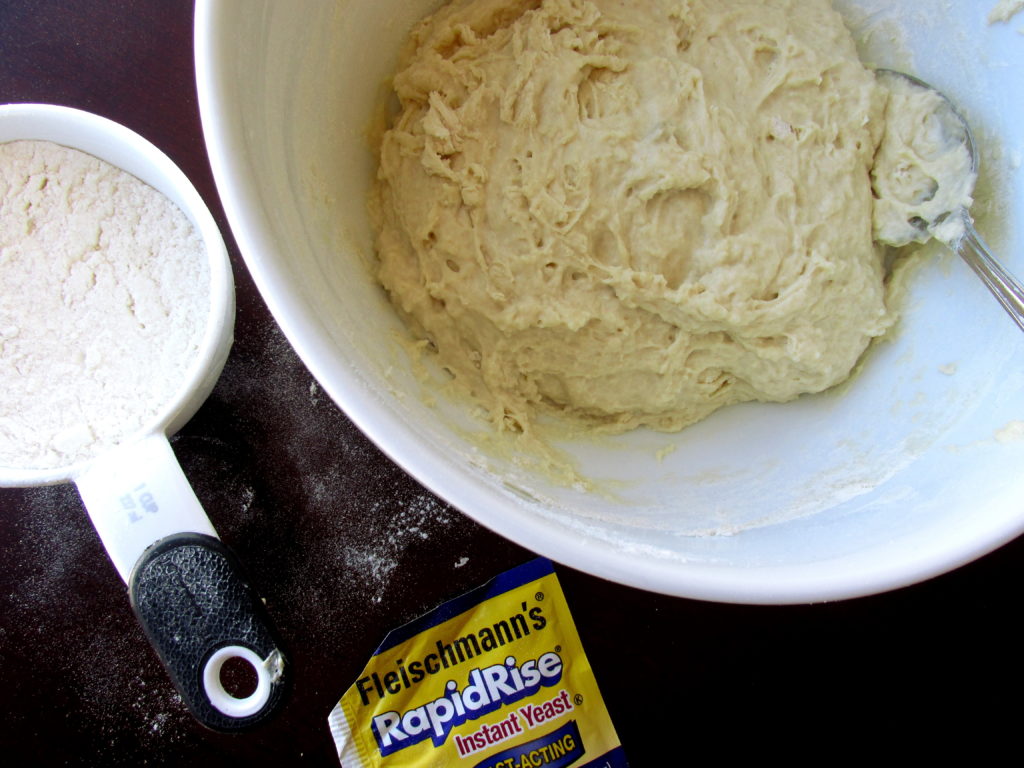
This flatbread is beyond easy to make. It’s one of those recipes that involves more waiting for the dough to rise than actual cooking, but don’t worry – you only have to wait about an hour total. That’s plenty of time to get the rest of dinner ready, so you can throw these in a pan and have them fresh and hot to go with whatever else you’re serving. They do need to be cooked individually, but each flatbread only takes about two minutes in the pan – if you have a large griddle you can absolutely do more at a time. I generally roll one out, get it in the skillet, and then roll the next one while the first is cooking.

The key to this recipe is the bread flour. You may be tempted to whip out some all-purpose flour because you don’t want to shell out the dough for a bag of bread flour that you’ll only use for this recipe, but bread flour will yield softer, chewier flatbread. After you experience the flatbread from this recipe, you’ll be so happy to have the extra bread flour around to make these again! The original on Mel’s Kitchen Cafe notes that you can use 2 3/4 cups of all-purpose flour plus 1/4 cup wheat gluten, definitely a good solution if you have wheat gluten on hand instead of bread flour.
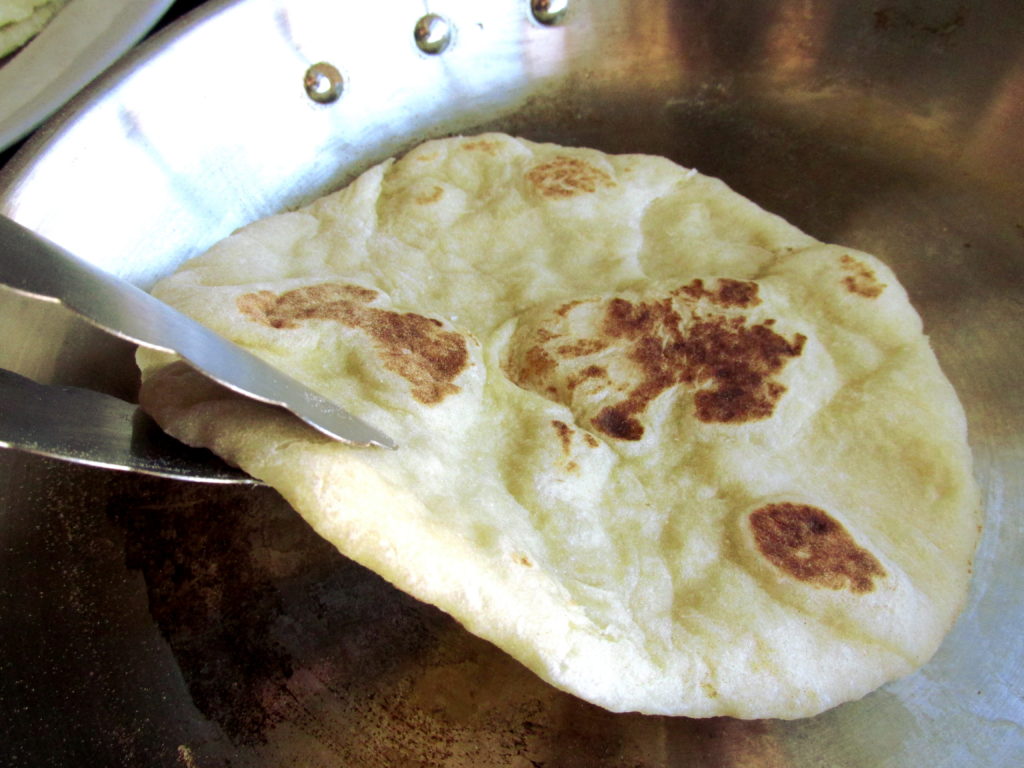
I have a single request if you decide to try out this recipe: please please eat at least a bite straight out of the skillet (don’t burn yourself). I cannot accurately describe exactly how gratifying and wonderful this is, when the flatbread is warm and fluffy, and smells delicious. I’m afraid it’s not something re-heating the flatbread can quite capture. It does freeze well if you want to make a lot at a time, and it’s completely delicious re-heated, just not exactly like when it’s fresh. But then again, how many things are better re-heated?

Perfect Flatbread

Recipe from Mel's Kitchen Cafe - Slight adaptations on cooking method from Homemade With An Upgrade.

Ingredients

  • 2 tsp rapid rise yeast
  • 1 tsp granulated sugar
  • 1 tsp salt
  • 1 Tbsp olive oil
  • 1/2 cup milk, heated until just warm, about 100 degrees
  • 2/3 cup water, heated until just warm, about 100 degrees
  • 3 cups bread flour

Instructions

  1. Stir together yeast, sugar, salt, oil, milk, water, and 1 cup bread flour.

    2. Stir in another 1 1/2 cups of the bread flour, until a shaggy dough forms. At this point, turn the dough out onto a clean surface. 

    3. Use the remaining 1/2 cup of flour to lightly flour the surface. Knead the dough, adding flour from the the surface you're kneading on, until it's elastic and smooth - usually I end up adding about 1/4 cup of flour through this process. 

    4. Place the ball of dough in a greased bowl, cover with plastic wrap or a clean dishcloth and set somewhere warm to rise until it doubles in size, about 45 minutes to 1 hour. 

    5. When dough has risen, separate it into 6-8 even balls and set on a tray to rest for 10-15 minutes. 

    6. After the dough has rested, heat a skillet or griddle until hot. You want to keep it on a medium heat level once it gets hot. 

    7. Roll out one of the dough balls on a floured surface to a circle roughly 1/8 inch thick, and transfer to the skillet. Let cook for around 2 minutes on one side, until golden, and spots of color develop. Flip with a pair of tongs and let cook for 1-2 minutes on the other side. Transfer to a plate/your mouth. While the flatbread is cooking, roll out another to go into the skillet - continue this process until dough is all gone. 

    Note: I like to turn my oven onto its lowest heat when I separate the flatbread dough into balls. Then, when I'm ready to start cooking, I turn off the heat on the oven, and place the plate for the finished flatbread inside, adding each to the plate as they come out of the skillet. This keeps them warm and fresh until I'm ready to serve!
Triple Chocolate Hearts

Triple Chocolate Hearts

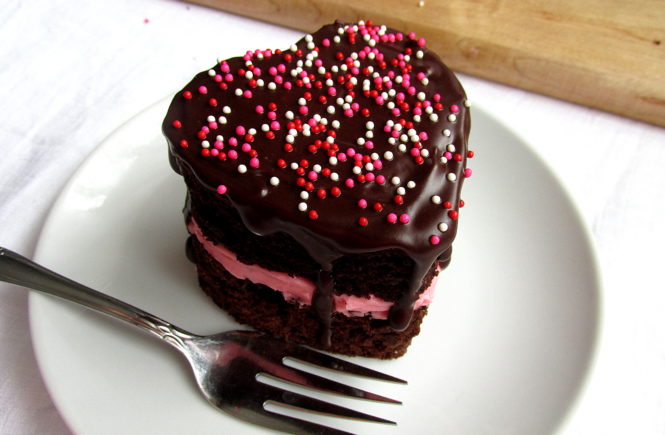
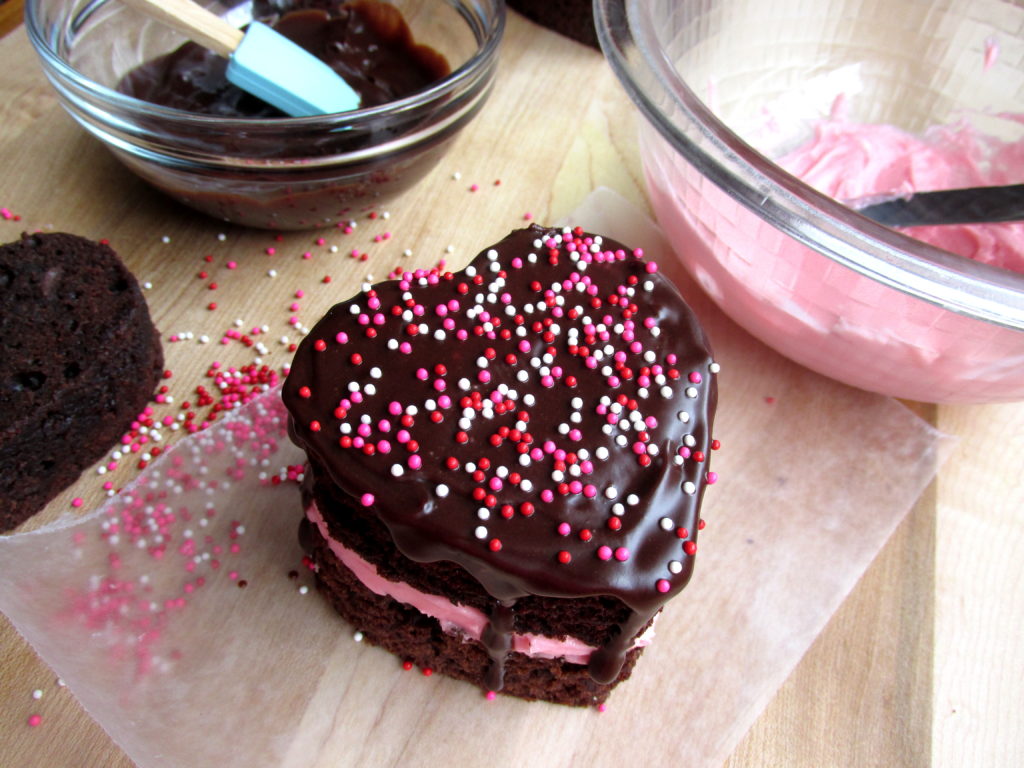
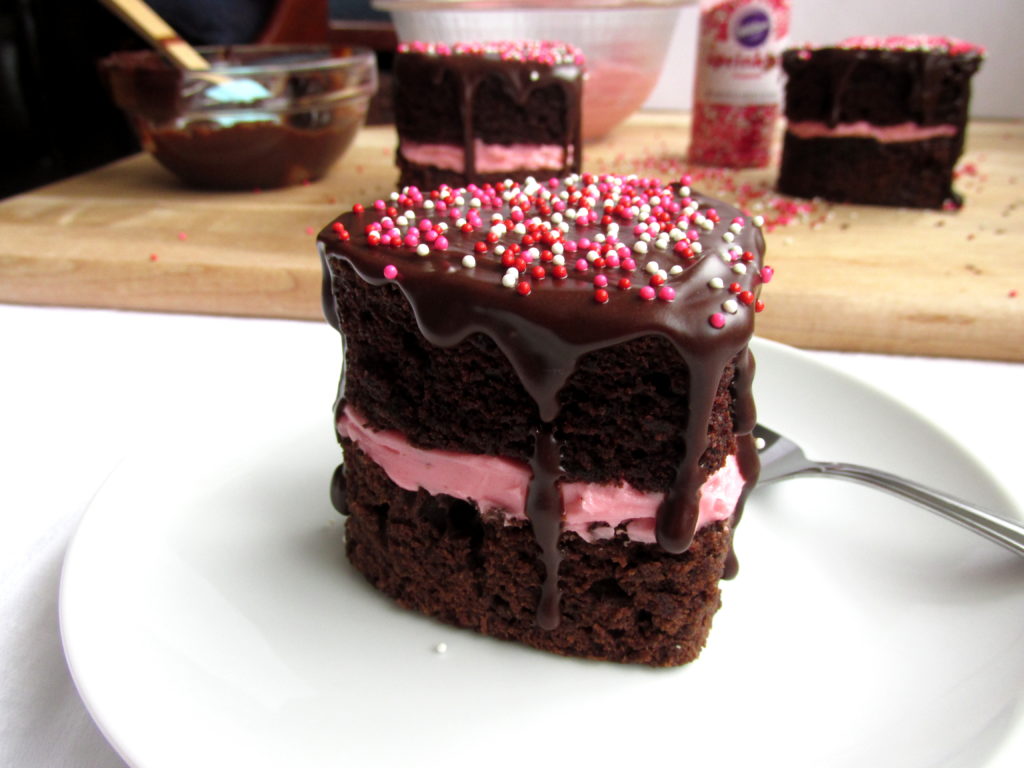
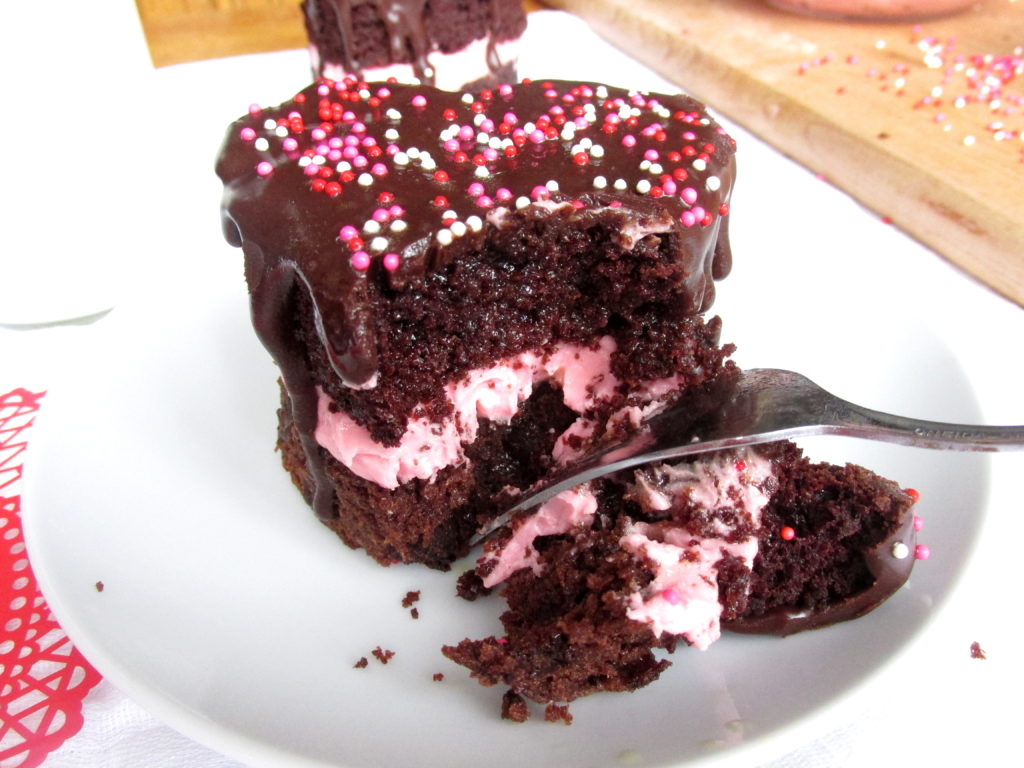
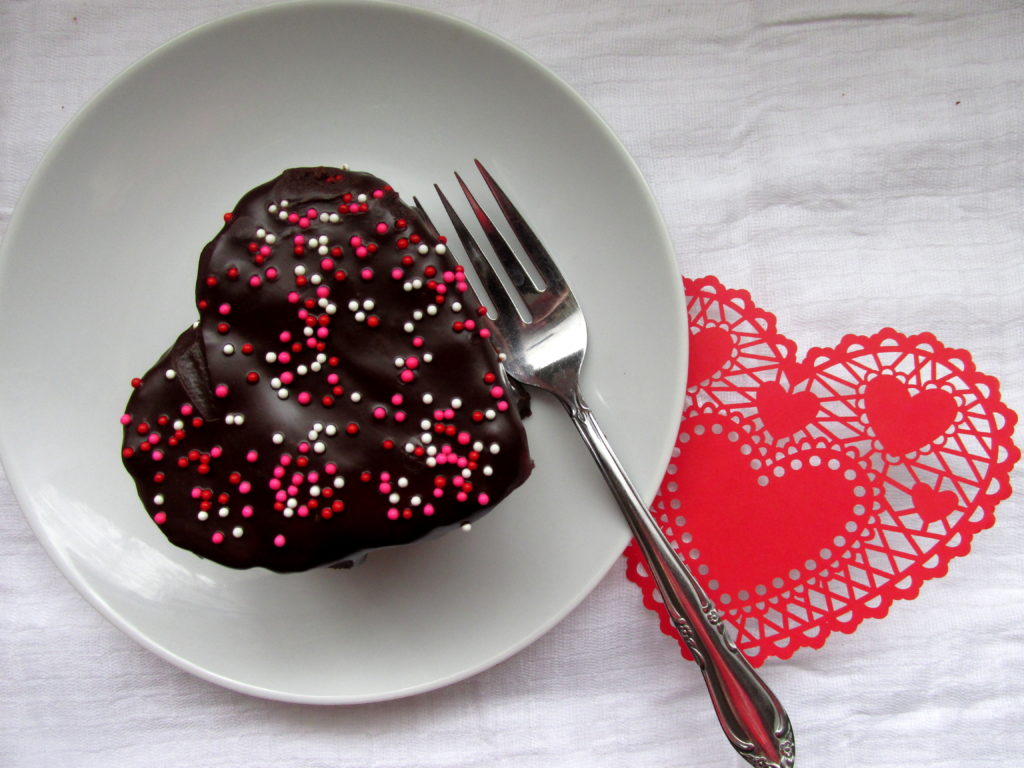
This recipe really counts as four recipes, because there are four homemade components that go into it. Triple Chocolate Hearts begin with a gooey brownie base. Next is a layer of smooth, pink, vanilla buttercream, followed by a layer of fluffy, moist, chocolate cake. The whole thing is topped with rich chocolate ganache, dripping down the sides of the cake. I wanted to create individual desserts of a similar size and cuteness as cupcakes, but in a more interesting form. I think these fit the bill perfectly.

Before you go running away because there are way too many parts to this recipe, let me make it easier. You can use a box brownie mix, a box cake mix, and a can of frosting if you so desire/don’t happen to have some extra time on your hands. Your treats will still be adorable and delicious, and you’ll only need to make a quick ganache from scratch. That said, baking is clearly my favorite hobby, so if I can find the time, I like to do it all from scratch. If you do have a little extra time, a quick way to improve canned frosting is to whip it with your mixer. This gives it a lot more volume, so you can put a nice thick – yet light and fluffy – layer between the brownie and the cake.

Triple Chocolate Hearts are extraordinarily rich, but I feel that Valentine’s Day calls for it. What is Valentine’s Day, if not an excuse to eat a lot of decadent chocolate-y desserts? Yeah, yeah it’s about love and all that, but the rest of the year can be about love if you make it, and wouldn’t that be a wonderful thing? Letting yourself indulge in desserts like this all year is definitely not going to work out as well. Love all year, eat extraordinary treats on Valentine’s Day.

These fit perfectly in little individual cupcake boxes, so you can package them with a pretty ribbon and hand them out to your favorite people. Be careful who you give them to, though – as soon as they take the first bite, I pretty much guarantee they’ll fall in love with you all over again.

You’ll be left with scraps of brownie and cake, and maybe extra frosting and ganache. I think it would be an absolute crime to waste all of this. Instead of just eating all the leftovers the very same day, I like to work them into other recipes. You can make mini triple chocolate parfaits, cake pops, or use the extra bits to top off yogurt or an acai bowl if that’s your thing. Of course, I’m not always the best at following my own re-purposing advice. I ate basically all of the scraps myself when I made these for co-workers last year. I was in the thick of planning my wedding; I promise I needed to eat the extras to keep from losing my mind. You can easily freeze the leftover cake and brownie pieces for self-medication purposes down the road, if you don’t want feel like turning them into something else.

You can change the concept here, and make adorable non-heart-shaped cakes with different sprinkles and white or chocolate frosting in the middle instead. These would make perfect birthday treats if you’re looking for something to make besides cupcakes. The only thing that won’t change is how delicious they are.

Every layer of Triple Chocolate Hearts has a different level of sweetness, so they aren’t overwhelmingly sugary. The varying textures of the layers make them much more interesting than a typical cake,  so you’ll keep coming back for another bite, and another. Just, do yourself a favor and have some milk on hand – anything this chocolatey requires milk.

Triple Chocolate Hearts

I use the standard Hershey's Collector's Chocolate Cake recipe for Triple Chocolate Hearts.  I didn't invent this one, but I wish I had!

The brownies and frosting are just typical recipes for brownies and buttercream - nothing super special or innovative (but extremely delicious).

The ganache is an original recipe. 

Ingredients

Hershey's Collector's Chocolate Cake

  • 3/4 cup butter
  • 1 3/4 cup sugar
  • 2 eggs
  • 1 tsp vanilla
  • 2 cups flour
  • 3/4 cups cocoa
  • 1 1/4 tsp baking soda
  • 1/2 tsp salt
  • 1 1/3 cup water

Brownies

  • 2 oz unsweetened chocolate (I used Baker's)
  • 1/2 cup butter
  • 1 cup sugar
  • 2 eggs
  • 1/2 tsp vanilla
  • 1/2 cup semi-sweet chocolate chips
  • 1/4 cup flour
  • 1/4 tsp salt

Fluffy Pink Buttercream

  • 1/2 cup unsalted butter
  • 1 1/2 cups powdered sugar - divided use
  • 1/4 tsp vanilla
  • 2 dashes salt
  • 1/2 Tbsp milk
  • 4 drops red food coloring

Chocolate Ganache

  • 4 Tbsp melted, unsalted butter 56.5g
  • 6 Tbsp cocoa 30g
  • 1/2 cup semi-sweet chocolate chips 85g
  • 1/4 cup heavy cream

Instructions

Hershey's Collector's Chocolate Cake

  1. Cream butter and sugar in large mixer bowl. Add eggs and vanilla; beat 1 minute at medium speed. 

    2. Combine flour, cocoa, baking soda, and salt; add alternately with water to creamed mixture (quickly, with the mixer running - takes about 3 minutes).

    3. Pour batter into two greased and floured 8-inch or 9-inch layer pans, or 13x9 pan. Bake at 350 degrees for 35 - 40 mins for 8-inch; 30 - 35 mins for 9-inch; 37 mins for 13x9. 

Brownies

  1. Melt together butter and unsweetened chocolate, stir until smooth. Add sugar, eggs, vanilla, and chocolate chips. 

    2. Stir in salt and flour. Pour batter into a greased and floured 8x8 pan. Bake at 325 degrees for 35-40 minutes. Do not over-bake. 

Fluffy Pink Buttercream

  1. Cream together butter and 1 cup of the powdered sugar. Stir in vanilla, salt, and milk.

    2: Stir in remaining powdered sugar. When sugar is completely incorporated, add food coloring and stir until frosting is uniform. 

    3: Optional, but highly recommended: Whip frosting in a mixer on high until very fluffy, about five minutes. 

    - Keeps well in the refrigerator for several weeks. 

Chocolate Ganache

  1. Combine melted butter and cocoa in a small bowl. 

    2. Pour chocolate chips into another bowl. Heat heavy cream for about 25 seconds in the microwave - you can also do this over the stove. You just want it hot enough to come barely to a boil. Pour cream over chocolate chips and let sit for one minute. Stir until chocolate has melted and the mixture is completely smooth. 

    3. Combine the two bowls of chocolatey essence into one bowl of nirvana.

Tripe Chocolate Hearts

  1. Make Cake (I did a 9x13) and Brownies. While these are baking, make frosting and ganache. When cake and brownies are cool, use a cookie cutter to cut heart shapes from each. Cut off the excess cake/brownie that sticks out over the top edge of the cookie cutter so that both sides of your heart shapes are even and flat. 

    2. Use the brownie hearts as the base. Frost with a generous layer of the pink buttercream. Top with a cake heart, bottom side-up, to give you a smoother surface for the ganache. 

    3. Spread a thick layer of ganache across the top of the cake, allowing some to drip down the sides. Decorate the hearts with sprinkles, and try not to eat all of them immediately!


Jambalaya Zoodles

Jambalaya Zoodles

I mentioned in my last post that one of my prime reasons for learning to cook was to be able to make vegetables taste wonderful. This recipe is the epitome of delicious vegetables, as far as I’m concerned. It’s a take on about a million versions of jambalaya, turned into an unbelievably flavorful plate of meat and vegetables. Healthy eating should never boil down to boring, flavorless dishes.

If you’re unfamiliar with cooking dishes like jambalaya, then this is a good place to start. There’s a lot of prep work involved, but no tricky techniques, and the actual cooking is quick and easy.

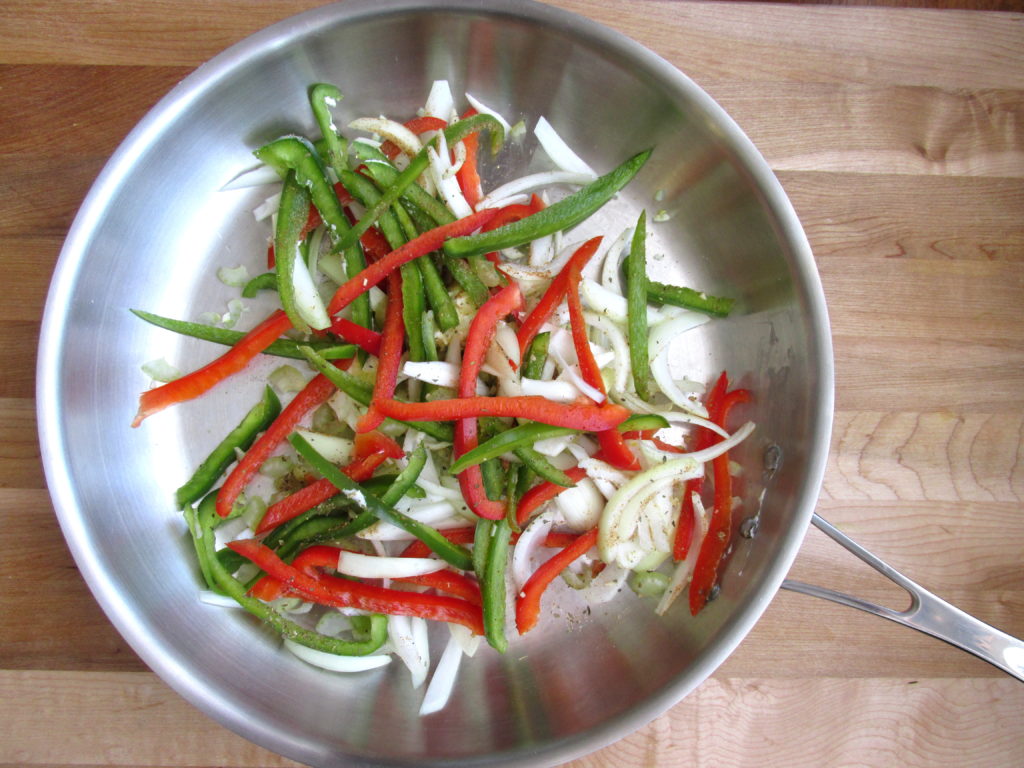
My Jambalaya Zoodles start as all good Cajun and Cajun-inspired cooking does: with the holy trinity: onion, bell peppers, and celery, along with some diced tomatoes and garlic. The vegetables are coated in a blend of spices and sauteed in butter. They’re taken off the heat while shrimp and andouille sausage are cooked with more seasoning. After that, everything is combined in the pan with chicken stock, and reduced until the meat and vegetables have soaked up all the flavor. The zucchini is added last, cooked in with everything else until barely tender, and then it’s time to serve!

The zucchini is a fabulous base for this combination of meat and sauce. I find that zoodle recipes are often either underwhelming in texture, or drenched in a cream sauce that leaves them feeling heavy in your stomach. These Jambalaya Zoodles have loads of interesting textures going on, between the crunch of the zucchini, the soft peppers and onions, and the hearty shrimp and sausage. This dish is a little spicy, but not so hot that you can’t truly appreciate the flavor. You can always reduce or increase the cayenne and pepper to adjust to your liking – just remember that a little cayenne goes a very long way. I’ve learned this the hard way!

If shrimp and andouille sausage aren’t your thing, you can use chicken instead and still end up with an amazing dinner. Beef or pork would probably be delicious as well, although I haven’t tried them in this recipe. It would be a wonderful meatless dish as well, perhaps with pasta mixed in with the zoodles, or mushrooms in place of the meat.

Since this isn’t a recipe for a true jambalaya, there’s no need to worry that what you end up with isn’t technically right. This recipe doesn’t pretend to be Cajun jambalaya like you’ll find in New Orleans. This is a take on the deep, spicy flavors of jambalaya, with a healthy twist. Once you taste this dish, you’ll never want to flavor anything else differently. And you’ll probably spend a few hours casually planning a dream trip to New Orleans to try some truly authentic jambalaya. In my head, I’m headed to Louisiana tomorrow. In real life, I’m making this for dinner tonight to dull the pain of an existence that doesn’t support snap-decision excursions to interesting places.

Jambalaya Zoodles

Servings 3 people

Ingredients

  • 1/2 green bell pepper
  • 1/2 red bell pepper
  • 1/2 yellow onion
  • 2 celery stalks
  • 1 16 oz can diced tomatoes
  • 2 cloves garlic
  • 2 Tbsps butter
  • 1/4 tsp cayenne
  • 1/2 tsp fresh ground black pepper
  • 1 1/2 tsp salt
  • 1/2 tsp paprika
  • 1/2 tsp dried oregano
  • 1/2 tsp thyme
  • 1/2 tsp dried basil
  • 1/4 tsp onion powder
  • 1 lb shrimp
  • 1 lb andouille sausage (about 5 links)
  • 2 Tbsp white wine
  • 1/2 tsp cornstarch
  • 1 1/2 cups chicken stock
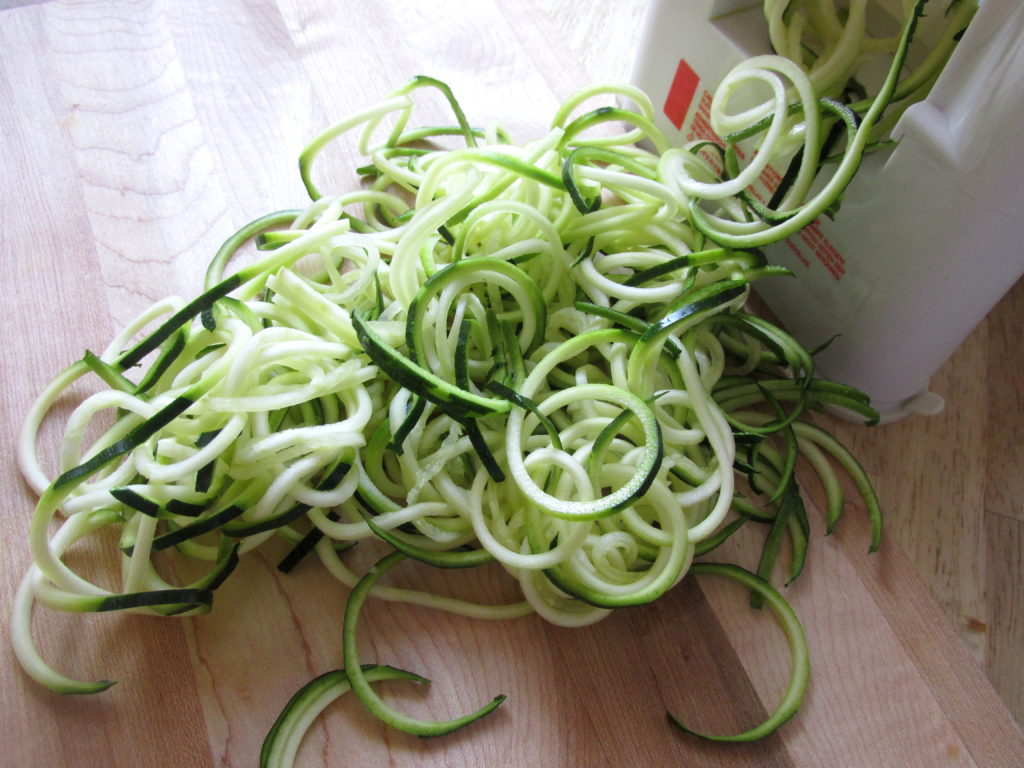
  • 3 medium zucchinis - about 9 cups of zoodles when spiralized

Instructions

  1. Note: This recipe requires a fairly sizeable skillet - I used a 12 inch skillet.  A wok would also do a great job.

    Step 1: Stir together cayenne, pepper, salt, paprika, onion powder, oregano, thyme, and basil. Spiralize three zucchinis. Roughly chop the spirals so you don't end up with very long zoodles.

    Step 2: Thinly slice peppers, onion, and celery. Mince garlic. Add peppers, onion, celery, garlic, tomatoes, and butter to a large skillet. Stir in half the blend of seasonings. Cook on high heat until vegetables are soft and starting to brown. 

    Step 3: Prick sausages all over with a fork and place in another skillet over medium heat. Pour in just enough water to come about a quarter of the way up the sides of the sausages. Cover and cook for 10 minutes. Uncover and cook until any remaining water in the skillet has evaporated and sausages are golden brown. Remove sausages from heat, cut into pieces, and set aside. 

    Step 4: When vegetables have started to brown, remove from skillet and set aside. Do not clean the skillet.  Add the shrimp to the same skillet and sprinkle the remaining spice blend over top. Cook shrimp on high heat just until they turn uniformly pink. 

    Step 5: Reduce heat to medium, and return sausage and cooked vegetables to the skillet with the shrimp. Pour about a cup of chicken stock into the skillet, and let cook, stirring occasionally. 

    Step 6: Stir together corn starch and wine. When chicken stock has reduced by half, pour corn starch and wine mixture into the skillet and stir. Continue cooking until the sauce begins to thicken. 

    Step 7: Pour remaining chicken stock into the skillet, let cook for three more minutes. Add zucchini to the skillet and cook just until it becomes tender. Remove from heat and serve! 


Black Bean Confetti Salad

Black Bean Confetti Salad

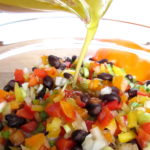
Black Bean Confetti Salad is possibly my favorite recipe of all time. The original is from Smitten Kitchen, and it honestly changed the way I thought about bell peppers. When I started learning to cook, a lot of the motivation was (and still is) to find delicious ways of preparing vegetables so I’d want to eat more of them. I used to be very bell-pepper-ambivalent. They were too sweet and too crunchy, which is generally not a combination I enjoy in my produce. Putting them in this recipe has really helped me re-think bell peppers. I’ve found that you can learn to like almost any food if you prepare it with flavors you already love.

I became obsessed with food way before I discovered this recipe, but making and eating this stuff over the years is largely responsible for me finally sitting down and creating the food blog I’ve always dreamed of. This isn’t my own recipe, but I’ve tweaked it, adding green onion, and honey and cayenne to the dressing. I think the changes really enhance this recipe. Playing with recipes like this is so satisfying, especially when my experiments work out.

I just desperately want everyone to know about this salad, because not only does it taste like a dream, it’s also extremely healthy. Black Bean Confetti Salad is a big bowl of fresh vegetables, fiber, protein, and healthy fats – what could be better for keeping your New Year’s resolution going?

It might seem like more of a salsa than a salad, and I absolutely invite you to enjoy it with chips (and a margarita), but it also makes a fabulous side dish. I served it with Cajun-seasoned tilapia and rice recently, and they went together beautifully – that sort of meal is also inexpensive, which I love. Proof you don’t need to spend a ton of money to eat well.

This recipe makes a fairly large amount, so you could halve it, although I don’t know why you would. I personally have to force myself not to eat the whole bowlful by itself as soon as I’ve finished making it. This is partially because it’s actually better the next day, when the flavors have had time to meld, and because I think eating an entire can of black beans in one sitting would destroy me.

I’ve made a number of changes to the original recipe, including the addition of scallions. This is definitely the kind of recipe where you can play around with the spices and ingredients to really make it fit your taste. The Smitten Kitchen original suggests adding cilantro if that’s something you really love.

Black Bean Confetti Salad

Adapted, with slight changes, from Smitten Kitchen's Black Bean Confetti Salad.

Servings 5 cups

Ingredients

  • 2 15oz cans black beans, drained and rinsed
  • 1 small white onion
  • 2-3 scallions
  • 1 red bell pepper
  • 1 yellow bell pepper
  • 1 orange bell pepper

Dressing

  • 3 Tbsp olive oil
  • 1 tsp cumin
  • 1/2 tsp honey
  • 3/4 tsp salt
  • 1/8 tsp cayenne
  • 1 large lime

Instructions

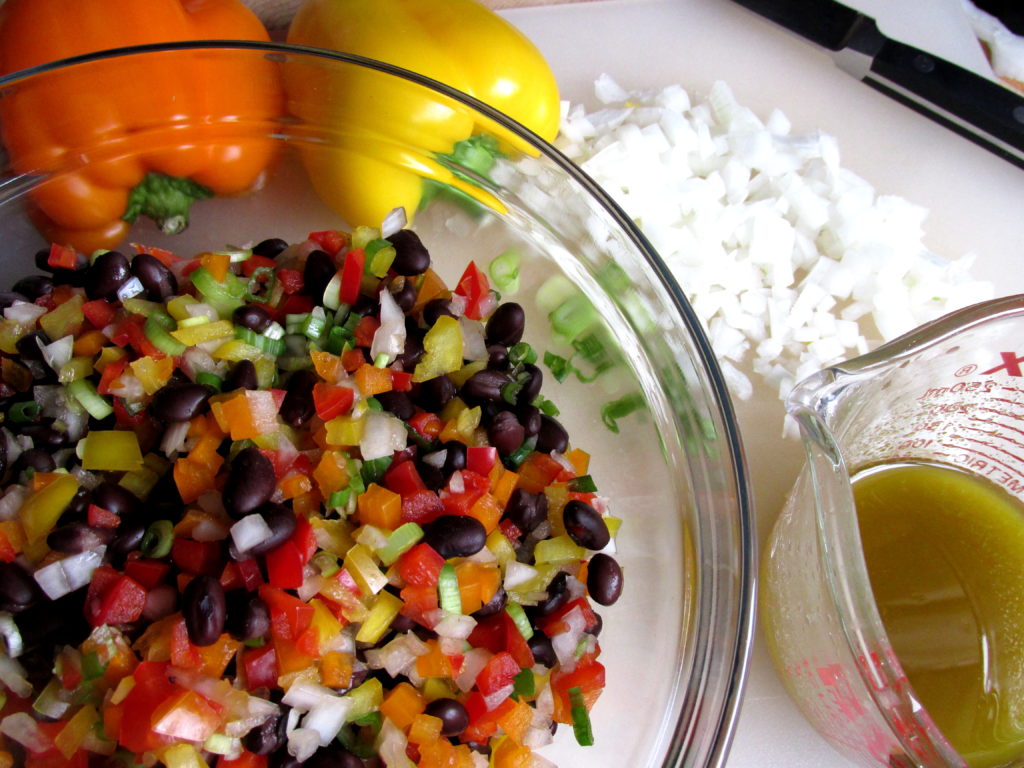
  1. Step 1: Dice onions, scallions, and bell peppers - small is better; you want the pieces to be about the same size as the beans.

    Step 2: Drain and rinse black beans. Stir together with onions, scallions and peppers.

    Step 3: Pour olive oil into a liquid measuring cup, and add salt, honey, cayenne, cumin. Add lime juice until the amount in the measuring cup reaches 1/3 cup. Whisk until the salt is completely dissolved. 

    Step 4: Pour over salad and stir. This salad can be stored and served the next day, and will stay good for up to five days in the refrigerator. It's actually better the next day because the flavors meld overnight!


Chocolate Chip Crater Cake

Chocolate Chip Crater Cake

I’m going to tell you a secret that I hold close to my heart. I don’t always tell people, because they often react in shock and horror, but I think it’s time to proclaim it to the world. Click away now if you’re easily distressed. Ready?

I don’t like coffee.

I know you’re staring at your screen right now, mouth agape, wondering how this could possibly have come to pass. Who doesn’t like coffee? Most people practically live on the stuff! I don’t have anything specific against it, I’ve just never enjoyed drinking it enough to make it a part of my life.

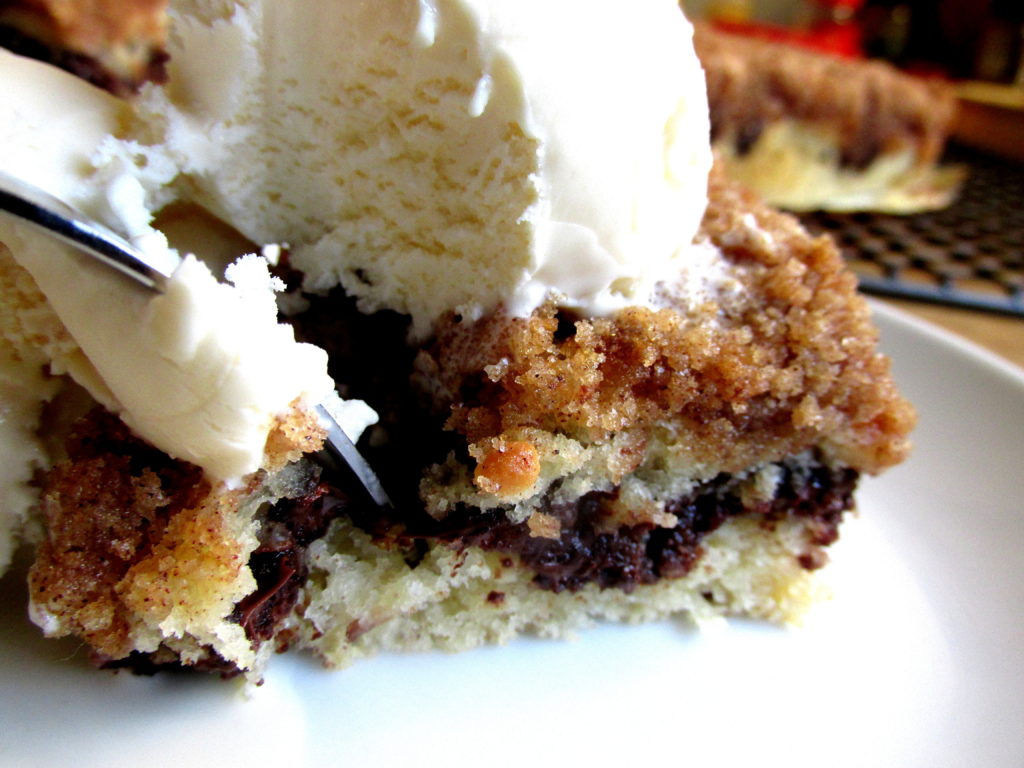
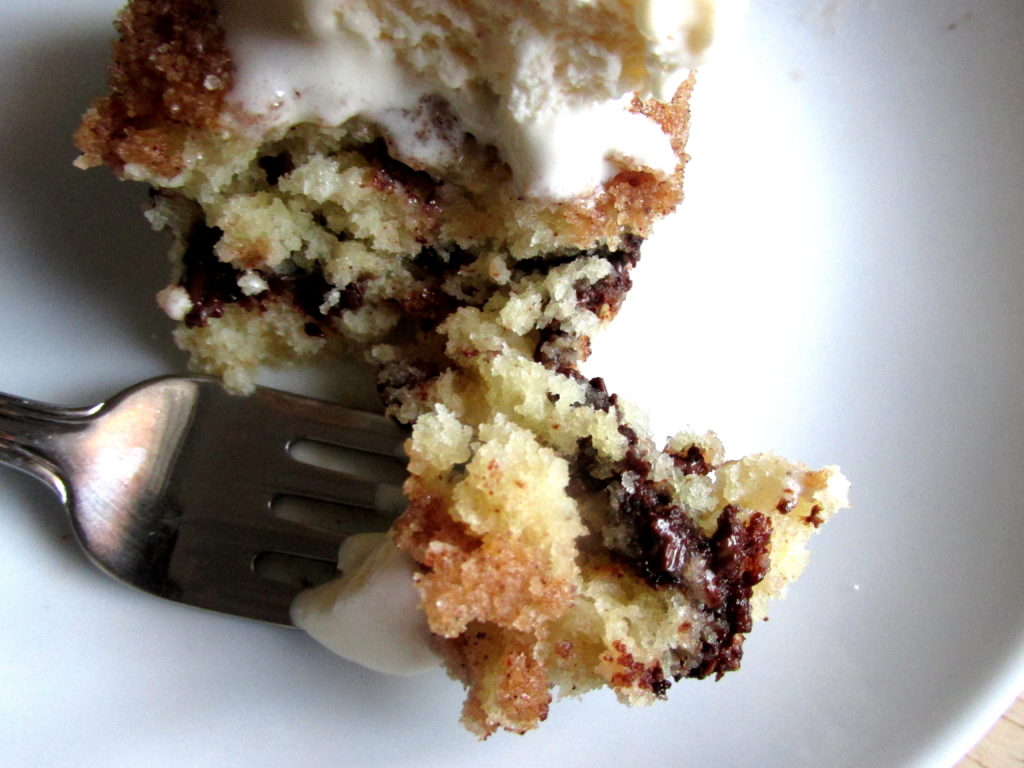
You know what I do like? Coffee cake – all versions of it. Chocolate Chip Crater Cake makes an absolutely delightful coffee cake. You can also choose to enjoy it sans coffee, perhaps with a scoop of vanilla ice cream, as I do. It’s versatile that way.

Chocolate Chip Crater Cake is a long-standing favorite from my childhood. My mom couldn’t tell me exactly where we got this recipe, although she suspects that it came from Betty Crocker. This isn’t exactly a new recipe, but I haven’t seen it around at all lately, so I figured it was time to start bringing it back.

This cake is a different creature from a lot of typical go-to desserts. It’s got a fluffy, cake-ybase, a layer of gooey, melted chocolate chips, another layer of cake, and a buttery, cinnamon crumble topping that ties the whole thing together. It’s baked in an 8×8 pan, so the recipe doesn’t make a huge amount. I tend to prefer that in dessert recipes I know I love. If I don’t bake too much of it, I won’t eat too much of it. Seems pretty rudimentary, but portion control has never quite been my strong suit. Especially when we’re talking about something this delicious.

Chocolate Chip Crater Cake is the dessert equivalent of those tiny restaurants that don’t look like much, but serve amazing food. It’s not the prettiest or the most intricate, but the balance of flavors and textures really makes up for what it lacks in appearance.

This recipe originally calls for Bisquick, which you are perfectly welcome to use – your results will be perfectly fine. I use a homemade version of Bisquick that I like to keep on hand – it keeps well for a long time in the refrigerator. I’ve included it below the recipe for the cake, in case you decide to make it from scratch as well. I know a lot of people like to know exactly what ingredients go into their food, and commercial mixes can make that more difficult.

Whether you enjoy it by itself, with ice cream, coffee, or coffee flavored ice cream, Chocolate Chip Crater Cake is a dessert you’ll want to make again and again. It’s simple yet rich, and about as comforting as a dessert can be. Try it hot out of the oven, and I promise you won’t even remember that it’s winter.

Chocolate Chip Crater Cake

Course Dessert
Prep Time 15 minutes
Cook Time 30 minutes
Total Time 45 minutes

Ingredients

Cake

  • 2 cups Bisquick 216g
  • 1/4 cup sugar
  • 2/3 cup milk
  • 1 egg
  • 1/4 tsp cinnamon
  • 1 tsp vanilla
  • 1 cup chocolate chips

Topping

  • 1/4 cup sugar
  • 1/4 cup packed brown sugar
  • 1/4 cup Bisquick
  • 2 Tbsp butter
  • 1 tsp cinnamon

Instructions

  1. Step 1: Stir together Bisquick, sugar, and cinnamon. Add egg, vanilla, and milk, and stir until well combined. It's alright if there are some lumps; these won't matter once it's baked. 

    Step 2: Pour half the batter into a greased 8x8 pan. Top with chocolate chips in an even layer. Pour remaining batter over the chocolate chips and spread to cover them.

    Step 3: Use a fork to stir together topping ingredients, and sprinkle evenly over batter. 

    Step 4: Bake at 350 degrees for 25-30 minutes until the topping is golden brown and crispy. Cool completely and cut into squares.


Homemade Bisquick

Prep Time 5 minutes
Total Time 5 minutes
Servings 3 cups

Ingredients

  • 2 cups flour 240g
  • 1 Tbsp baking powder
  • 1/2 tsp salt
  • 2 Tbsp buttermilk powder
  • 1/2 cup cold butter, unsalted

Instructions

  1. Step 1: Sift dry ingredients together in a large bowl. 

    Step 2: Cut in butter to the size of small peas. Refrigerate if not using right away - may also be stored in the freezer. 


Stuffed Corn Bubbles

Stuffed Corn Bubbles

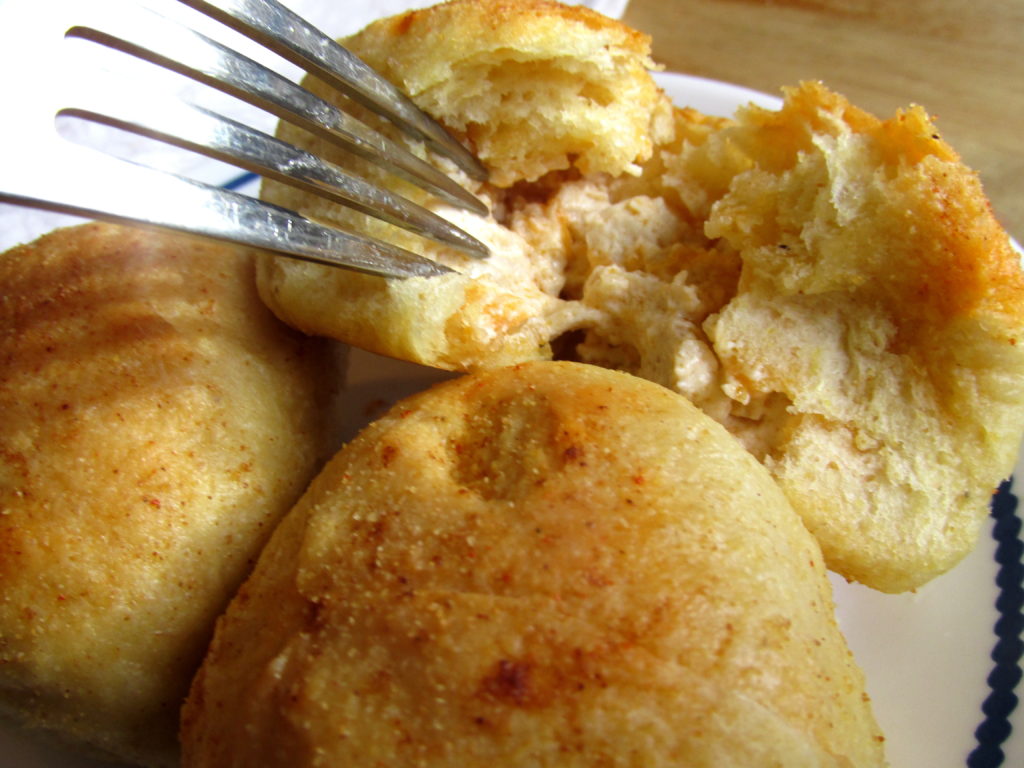
When you do a search for Super Bowl snacks, you’re inevitably greeted with photos of cheese plates arranged to look like football stadiums, and cute little cupcakes topped with green grass frosting and tiny field goal posts. There’s certainly nothing wrong with these if you have the time for them, but I can’t say I know anyone who does! When I’m planning Super Bowl snacks, I’m thinking easy, throw-in-the-oven food that doesn’t require days of prep work ahead of time. Stuffed Corn Bubbles have everything you could want in a party appetizer, or even an after-school snack for the kids. The active cooking time is only about thirty minutes, the recipe makes a ton, and they reheat well.  They have a slightly crisp outside, a fluffy yet doughy inside, and can be filled with anything you desire – in my case, buffalo chicken dip.

This is another recipe that I’ve had forever – the original came from Fleischmann’s Yeast, although I discovered it on Recipe Link. My version is quite different, as I’ve added a lot more flavor to the dough itself. Onion powder, garlic powder, cumin, chipotle powder, and chili powder flavor the dough, and combined with their outstanding texture, these go way beyond typical stuffed-dough recipes.

They’re named Corn Bubbles because the dough uses both flour and corn meal. This combination gives them the outstanding texture. They’re heartier than a regular dinner roll without being heavy, chewy without being tough. Filled with anything you can dream up, and brushed with melted butter, these are satisfying bites of pure comfort and happiness.

Stuffed Corn Bubbles seem like they take a long time to make, but that’s only because of the yeast in the dough. There’s about an hour total of resting time. If you’re not in a hurry, I think resting time for a dough is actually wonderful, because it means you’re multi-tasking without even trying.  Plus that whole developing flavor thing. Completely passive parts of cooking still count as getting something done, right? I did use rapid rise yeast for this recipe though, because no one wants to wait longer than a couple hours for these to be ready.

Filling these with buffalo chicken dip is an excellent choice, but I’d also recommend barbecue pulled pork, or some variation of a beefy queso dip, with plenty of beef to keep it from being too drippy. Just make sure to pinch the seams really well when you’re stuffing them, or the filling will ooze out the bottom, into your pan. The dough is wonderfully stretchy after kneading, so filling your corn bubbles is an easier process than it might sound. I use a kitchen scale to weigh the bubbles as I fill them, to make sure each corn bubble gets exactly 16g so they don’t get too full. This helps them all stay uniform, which means they’ll bake evenly.

If you give these a try, let me know what you filled them with! I’m always looking for new ideas for a recipe this versatile.

Need more ideas for Super Bowl snacks? Check out my Loaded Baked Potato Tots!


Stuffed Corn Bubbles

Course Appetizer
Prep Time 1 hour 30 minutes
Cook Time 20 minutes
Total Time 1 hour 50 minutes
Servings 32 bubbles

Ingredients

Corn Bubbles

  • 5 to 5 1/2 cups flour
  • 1 1/2 cups yellow cornmeal
  • 2 packages Fleischmann's Rapid Rise Yeast
  • 1/4 cup sugar
  • 4 tsps salt
  • 1/4 tsp chili powder
  • 1/4 tsp ground oregano
  • 1/4 tsp chipotle powder
  • 1 tsp onion powder
  • 1 tsp garlic powder
  • 1 tsp cumin
  • 1 3/4 cups milk
  • 1/2 cup water
  • 1/4 cup butter

Buffalo Chicken Dip

  • 12 oz cream cheese
  • 1/2 cup ranch dressing
  • 1/4 cup Frank's hot sauce
  • 3/4 cup shredded cheddar cheese
  • 1 lb cooked, shredded chicken

Instructions

  1. Set aside 1 cup flour. In large bowl, mix remaining flour, cornmeal, undissolved yeast, sugar, salt, and seasonings; set aside.

    2. Heat milk, water and butter until hot to touch (125 to 130 degrees F); stir into dry mixture. Stir in enough additional flour to make a soft dough.

    3. Knead the dough on a lightly floured surface until smooth and elastic, about 6 to 8 minutes. Cover (I just turn the bowl upside-down over the dough). Let rest 10 minutes.

    4. Divide dough into 32 equal pieces. With palms of hands, flatten to 3-inch circles. Place a tablespoon (about 16g) of your filling in the center of each circle. Pull up edges and pinch to enclose filling. Place balls in 2 greased 10x10-inch dishes. Cover; let rise in warm, draft-free place until doubled in size, about 40 minutes.

    5. Bake at 375 degrees F for 15 -20 minutes or until done. Remove from pans and cool on wire racks.


Loaded Baked Potato Tots

Loaded Baked Potato Tots

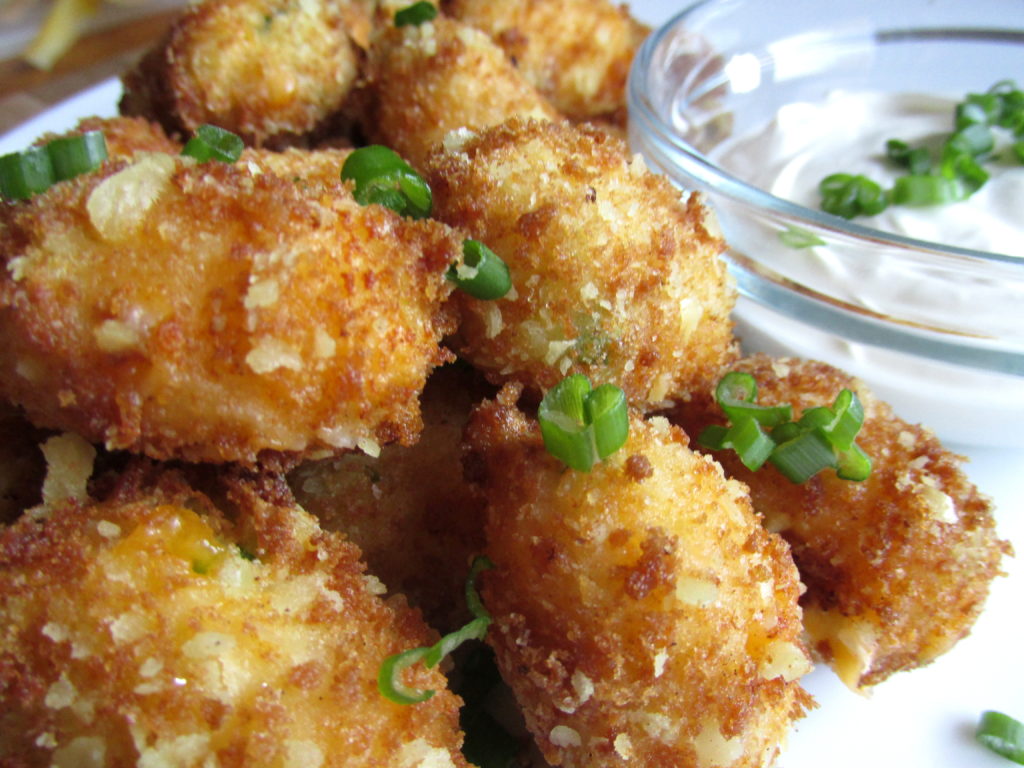
I was at The Cheesecake Factory with some family recently, and we were deciding on appetizers. We ended up ordering their loaded baked potato tots… and I ended up completely rethinking tater tots. I don’t typically order or cook tater tots, as I find the flavor and texture less appealing than that of french fries. Why even bother with tots when fries are so readily available? Those tots were a completely different experience. They were the complete opposite of the lumpy, bland tater tots I was expecting. Smooth and creamy on the inside and crunchy on the outside, with a delicious loaded baked potato flavor, I had to figure out how to make them myself.

I came home from dinner and immediately started researching loaded baked potato tot recipes. I found a lot of versions that were really just cheese-y tater tots, and some leftover-mashed-potato tots, but none of them looked right. Finally, my search led me to a Cheesecake Factory copycat recipe.

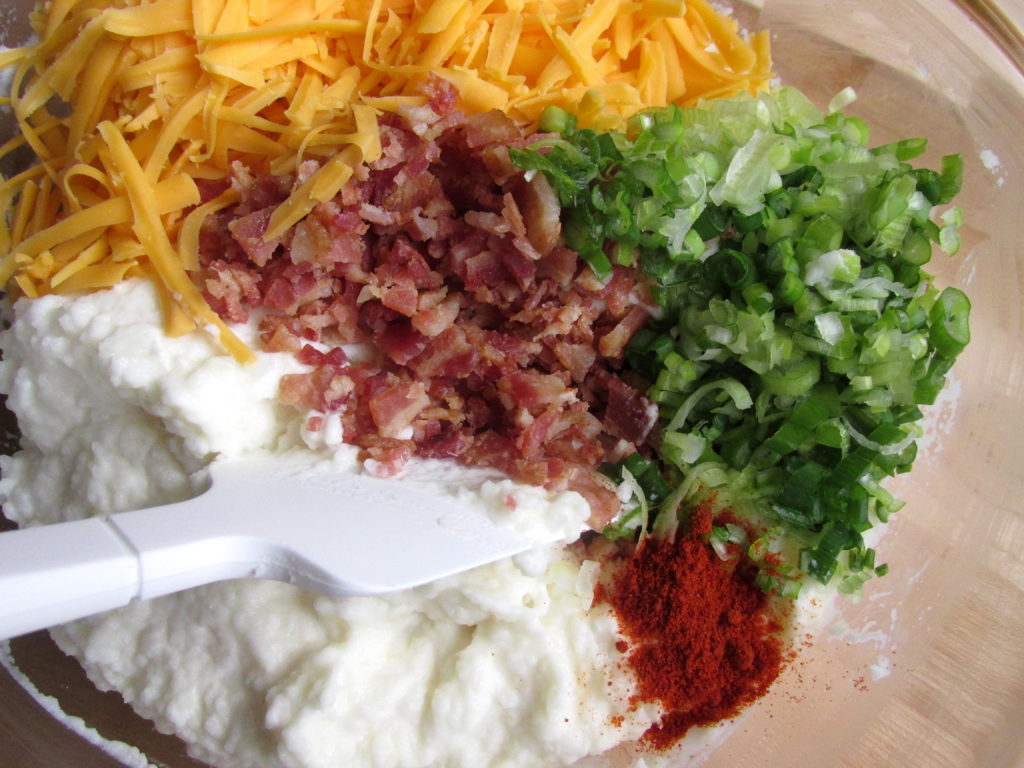
I tinkered with the ingredients and quantities a bit, adding smoked paprika, salt, and cream cheese to achieve the flavor I was looking for. I honestly think what I ended up with is better than the Cheesecake Factory version. They have all the cheese-y, bacon, scallion flavor of a loaded baked potato, with the texture of a perfect mashed potato, all encapsulated in a crispy little bite. All they need is a side of sour cream for dipping.

These tots can be customized to your taste, or to the ingredients you have on hand. You can omit the bacon, use onion powder in place of the scallions, or add a dash of cayenne powder or Tabasco to give them some heat. I can’t wait to play around with more flavor combinations for these babies.

I’m testing this weekend whether these loaded baked potato tots can be frozen and reheated in the oven, and will update this post soon with the answer! I’m hoping they’ll be that wonderful kind of appetizer that can be made ahead of time for parties, or just to have on hand. And speaking of parties, these are perfect Super Bowl Party food. Whether you’re a fan of the Falcons, the Patriots, or the commercials, you will be a fan of these for sure.

Loaded Baked Potato Tots

Servings 50 tots

Ingredients

Loaded Baked Potato Tots

  • 2 cups mashed potatoes 415g
  • 1 cup medium cheddar cheese
  • 1/4 cup sour cream 60g
  • 1/4 cup cream cheese 60g
  • 1/3 cup chopped green onions
  • 1/3 cup + 1 Tbsp chopped bacon crumbles
  • 1/4 cup milk (I used whole milk)
  • 1/4 tsp smoked paprika
  • 1/2 tsp salt
  • 2 eggs
  • 1 cup bread crumbs
  • vegetable oil for frying

Dipping Sauce

  • 1/2 cup sour cream
  • milk

Instructions

  1. Step 1: Make mashed potatoes: peel 6 russet potatoes. Slice into quarters and boil for 15-20 minutes. When potatoes are soft all the way through, pour into a colander to drain. Put potatoes through a ricer, or hand-mash them until smooth. Some small chunks are fine. 

    Step 2: Stir together mashed potatoes, sour cream, and cream cheese. Add milk, shredded cheddar, bacon, green onion, paprika, and salt and stir until well combined. 

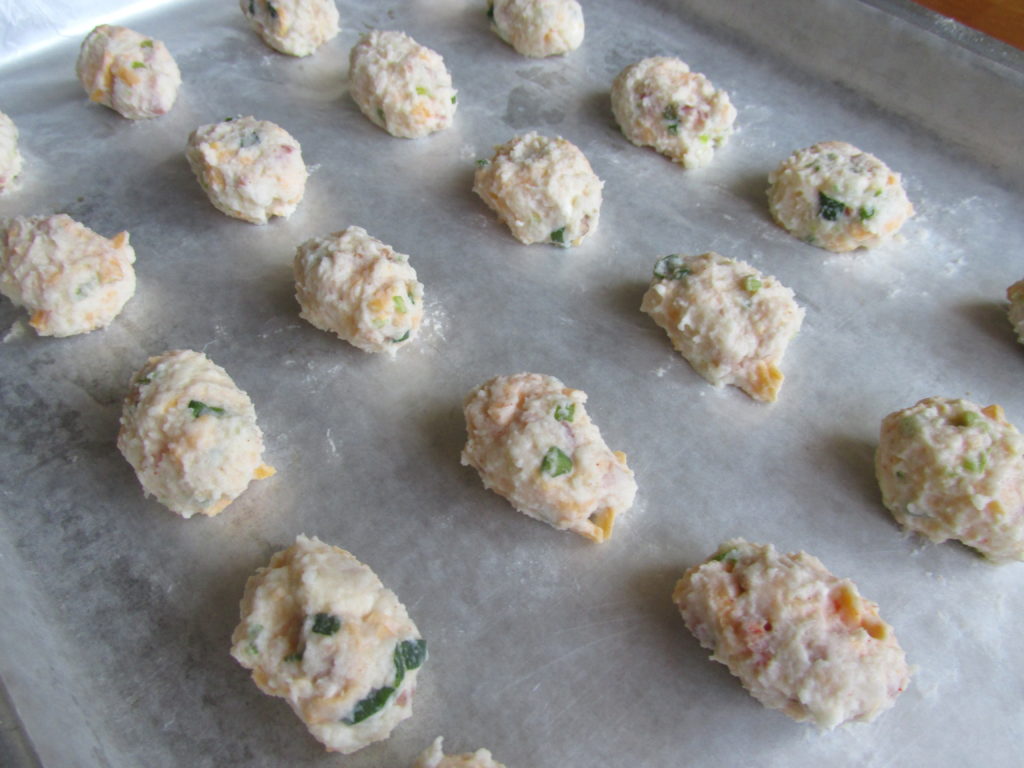
    Step 3: Line a baking sheet with waxed paper and lightly coat with non-stick cooking spray. With your hands, shape the potato mixture into small, tater-top shaped clumps, and set on the baking sheet. When the sheet is full, cover with plastic wrap and freeze for 20 minutes. If you find that the potato mixture is too soft for you to work with, cover and refrigerate for 30 minutes (up to a few hours). 

    Step 5: Remove formed tots from the freezer. Crack two eggs into a dish -  I just used cereal bowls - and beat until combined. Pour breadcrumbs into a second dish. Dip each tot in the egg, and then into the breadcrumbs until well-coated. 

    Step 4: Pour vegetable oil into a frying pan, about an inch and a half deep. Get it to 350 degrees and start adding your breaded tots, a few at a time. Be careful to keep an eye on the temperature, so that the oil doesn't get too hot - I used an instant-read thermometer to check mine. 

    Step 7: When the tots are getting golden brown, remove from oil and place onto a plate (lined with paper towel to soak up the excess oil). Be gentle when handling these, because the insides are very soft, and you will squish them if you're not careful.

    Step 8: In a small bowl, mix together the 2 Tbsps of milk and the 1/2 cup of sour cream. Dip your tots and enjoy! 


Easy Sunday Brunch: Mini Quiches

Easy Sunday Brunch: Mini Quiches

Breakfast food might be the best kind of food there is. I’m not a morning person though, so I prefer my breakfast food to be served for brunch. Or dinner if we’re being honest, but that’s much less trendy. “Easy Sunday Dinner: Mini Quiches” doesn’t have the same ring to it.

When I’m making brunch/breakfast for dinner, I typically get carried away and want some of everything. I want a full plate: pancakes, hash browns, and eggs and bacon. Cooking all of those at once without spending your whole morning in the kitchen is nearly impossible. Thus, I present to you my take on the Mini Quiche. It’s not the first of its kind, and possibly not the best there is, but it is the best I’ve come across. Warm, flaky pastry dough encases sharp cheddar cheese, eggs that get fluffy without being dry, and crispy bacon crumbles that can be subbed out for sausage, ham, or spinach and peppers.
Read More

Kung Pao Chicken: DIY Takeout

Kung Pao Chicken: DIY Takeout

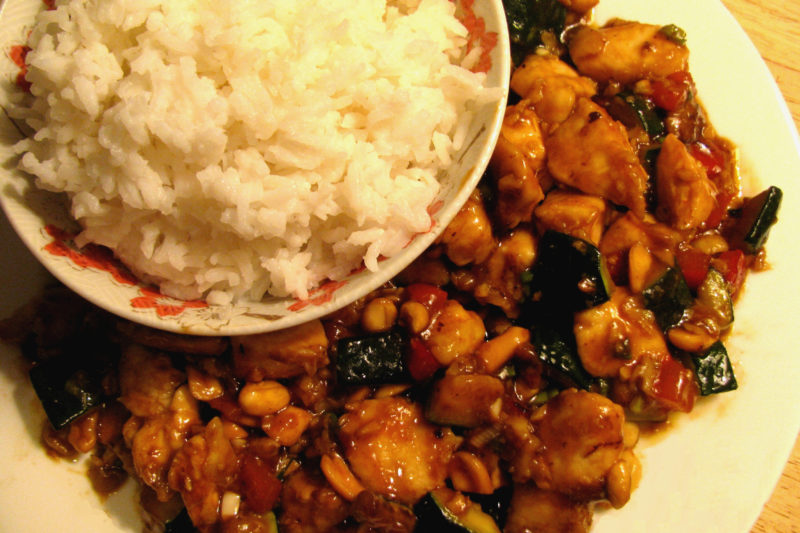
For a person who loves to cook, I certainly eat a lot of Chinese take-out. My go-to is almost always Kung Pao Chicken. I refuse to order from a restaurant that serves an inferior version of the stuff. My ideal Kung Pao Chicken has a generous amount of heat, a thick, slightly sweet and tangy sauce, more chicken than peanuts, and not too much vegetation. Sometimes you need lighter fare, like my Vegan Cashew Cream Spinach Dip, and sometimes you just need to focus on something a little heartier, like chicken and rice in a perfectly-flavored sauce.

When you look at the list of ingredients required to cook Chinese food at home, it can seem a little intimidating. You will almost definitely need to purchase some new sauce or oil in order to get your flavors the way you want them. I’ve found, however, that those new ingredients become an investment, as a lot of Chinese food isn’t nearly as difficult to prepare as you expect. Having the ingredients on hand will make future cooking experiments that much easier, and a lot of them are shelf-stable products that will keep for a long time.
Read More

Vegan Cashew Cream Spinach Dip

Vegan Cashew Cream Spinach Dip

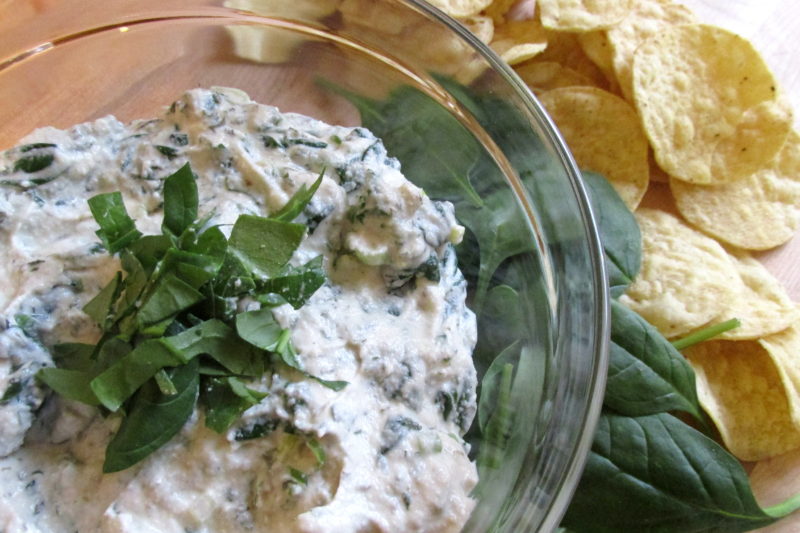
Reading the title of this post, I can only assume you’re thinking that while a vegan spinach dip will surely be healthier than a regular version, it can’t possibly be as delicious. It’s not an exact dup for the spinach dip you’re used to, but it’s pretty close. And it is beyond delicious, in a “maybe one more bite…just one more… and one more…” sort of way. The base is made of cashew cream, which is a wonderful surprise the first time you experience it – it’s a bit sweeter than your typical creamy dip bases, so it needs to be flavored differently, but the texture isn’t gritty like you might expect. As long as you give it enough time in your food processor, (or beloved NutriBullet), it gives you a perfect, smooth starting point for your spinach dip. Bonus: cashew cream is crazy easy to whip up, and doesn’t require any unusual ingredients – just cashews, water, lemon juice, and salt.

Read More